Products
Solutions
Resources
9977 N 90th Street, Suite 250 Scottsdale, AZ 85258 | 1-800-637-7496
© 2024 InEight, Inc. All Rights Reserved | Privacy Statement | Terms of Service | Cookie Policy | Do not sell/share my information

A rate table consists of personnel, equipment, material, and line item rates for premiums and allowances, as well as other rate exceptions. A rate table must be created and associated with a project prior to any billable work being LEM'd or invoiced for that project. A single rate table can be used by one or multiple projects and you can add a rate table to a specific project WBS item.
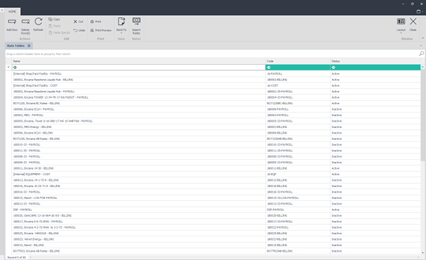
1. Go to Project Administration > Rate Tables.

2. The Rate Tables tab opens. You can select any rate table to modify, or you can create a new rate table by clicking the Add Row icon on the ribbon bar.
3. In the resulting new rate table tab, enter the name for the new rate table in the Name field. In the Code field enter the new code. This can be a numeric value or an abbreviation that the rate table goes by.
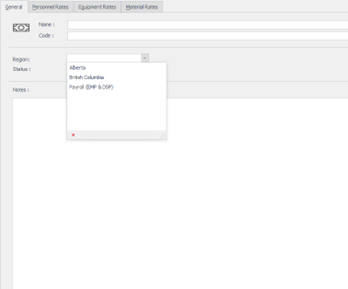
4. Select the appropriate region the rate table belongs to.
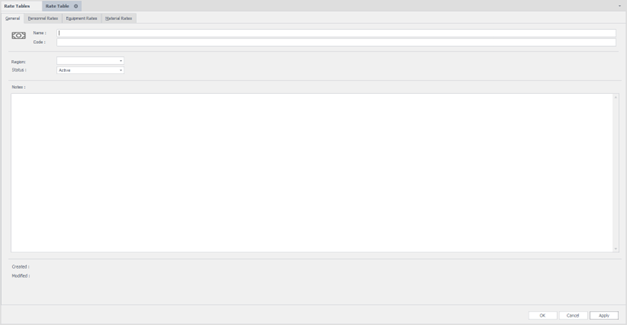
5. The Status field automatically defaults to Active. Enter any notes pertinent to the rate table in the Notes section and then click Apply to create the rate table
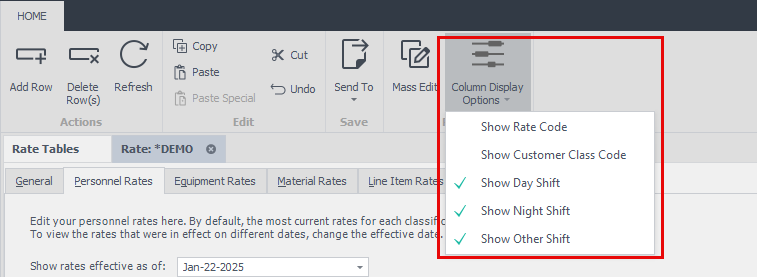
The Column Display Options button lets you show or hide columns by going to Rate Tables > Selecting a rates table, and then selecting or deselecting each shift column from the Column Display Options button from the ribbon menu. By default, at least one item needs to be selected. If all items are deselected, the drop-down will default to show day shift for Personnel, or Type 1 for Equipment.
The Company and Source columns give you flexibility when working with different companies, roles or resource types. These columns are listed in the personnel, equipment, material, and line items tabs of the rate table and allow you to set different rates based on what role is performing the work or where the resource comes from. For example, if rates differ between companies for the same role, where a subcontractor charges $30/ST hour, and an employee charges $25/ST hour for day shift, and $27/ST hour for night shift, you can use the Company and Source columns in the rate table to define those rates without having to create separate rate tables.
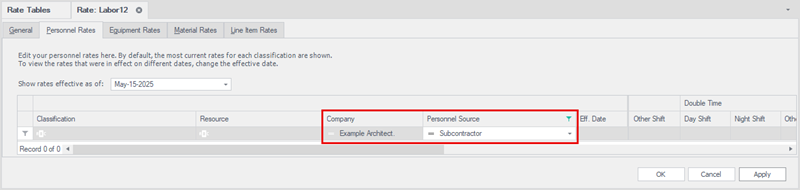
In the same new rate table tab as above, click the Personnel Rates tab to start entering personnel rate information.
By default, the most current rates for each classification (and optionally, named resource) are shown. To view the rates that were in effect on a different date, change the effective date in the Shown rates effective as of drop-down above the rates grid.
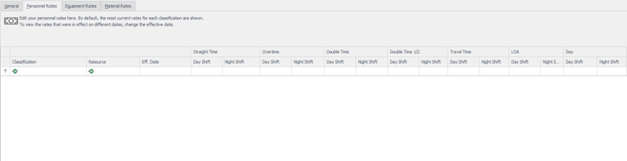
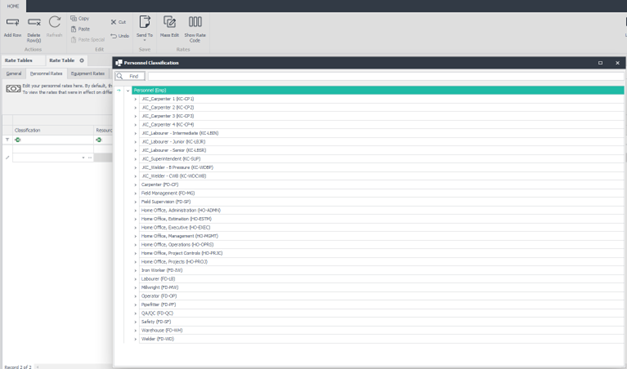
To add a new personnel rate record, click the Add Row icon located in the ribbon bar. If you wish to delete a record, select it by clicking it once, and then click the Delete Row(s) icon located in the ribbon bar. Click the drop-down list or the ellipses (three dots) icon under the Classification column and select the classification being assigned to the rate record.
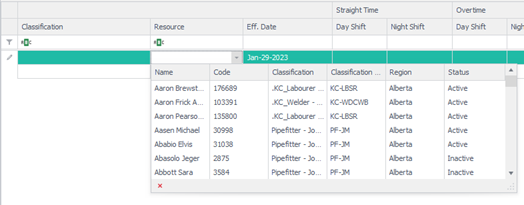
Optionally, Billings supports rates for individual resources by classification. For example, John Smith working as a skilled laborer can be billed out at rates different than the standard skilled laborer rates. If you choose to enter a rate for an individual in the classification selected, click the drop-down list under the Resource column, and then select the individual assigned to the rate record.
Select the Effective Date of the rate record (that is, when does this rate take effect) and enter in the rates to be used for the different earnings class by shift (i.e., Straight Time, Overtime, Double Time, Double Time and a Half, Travel Time, LOA, and Day). Repeat these steps to add another classification to this rate table.
To start entering equipment rate information for the rate table you have open, click on the Equipment Rates tab.
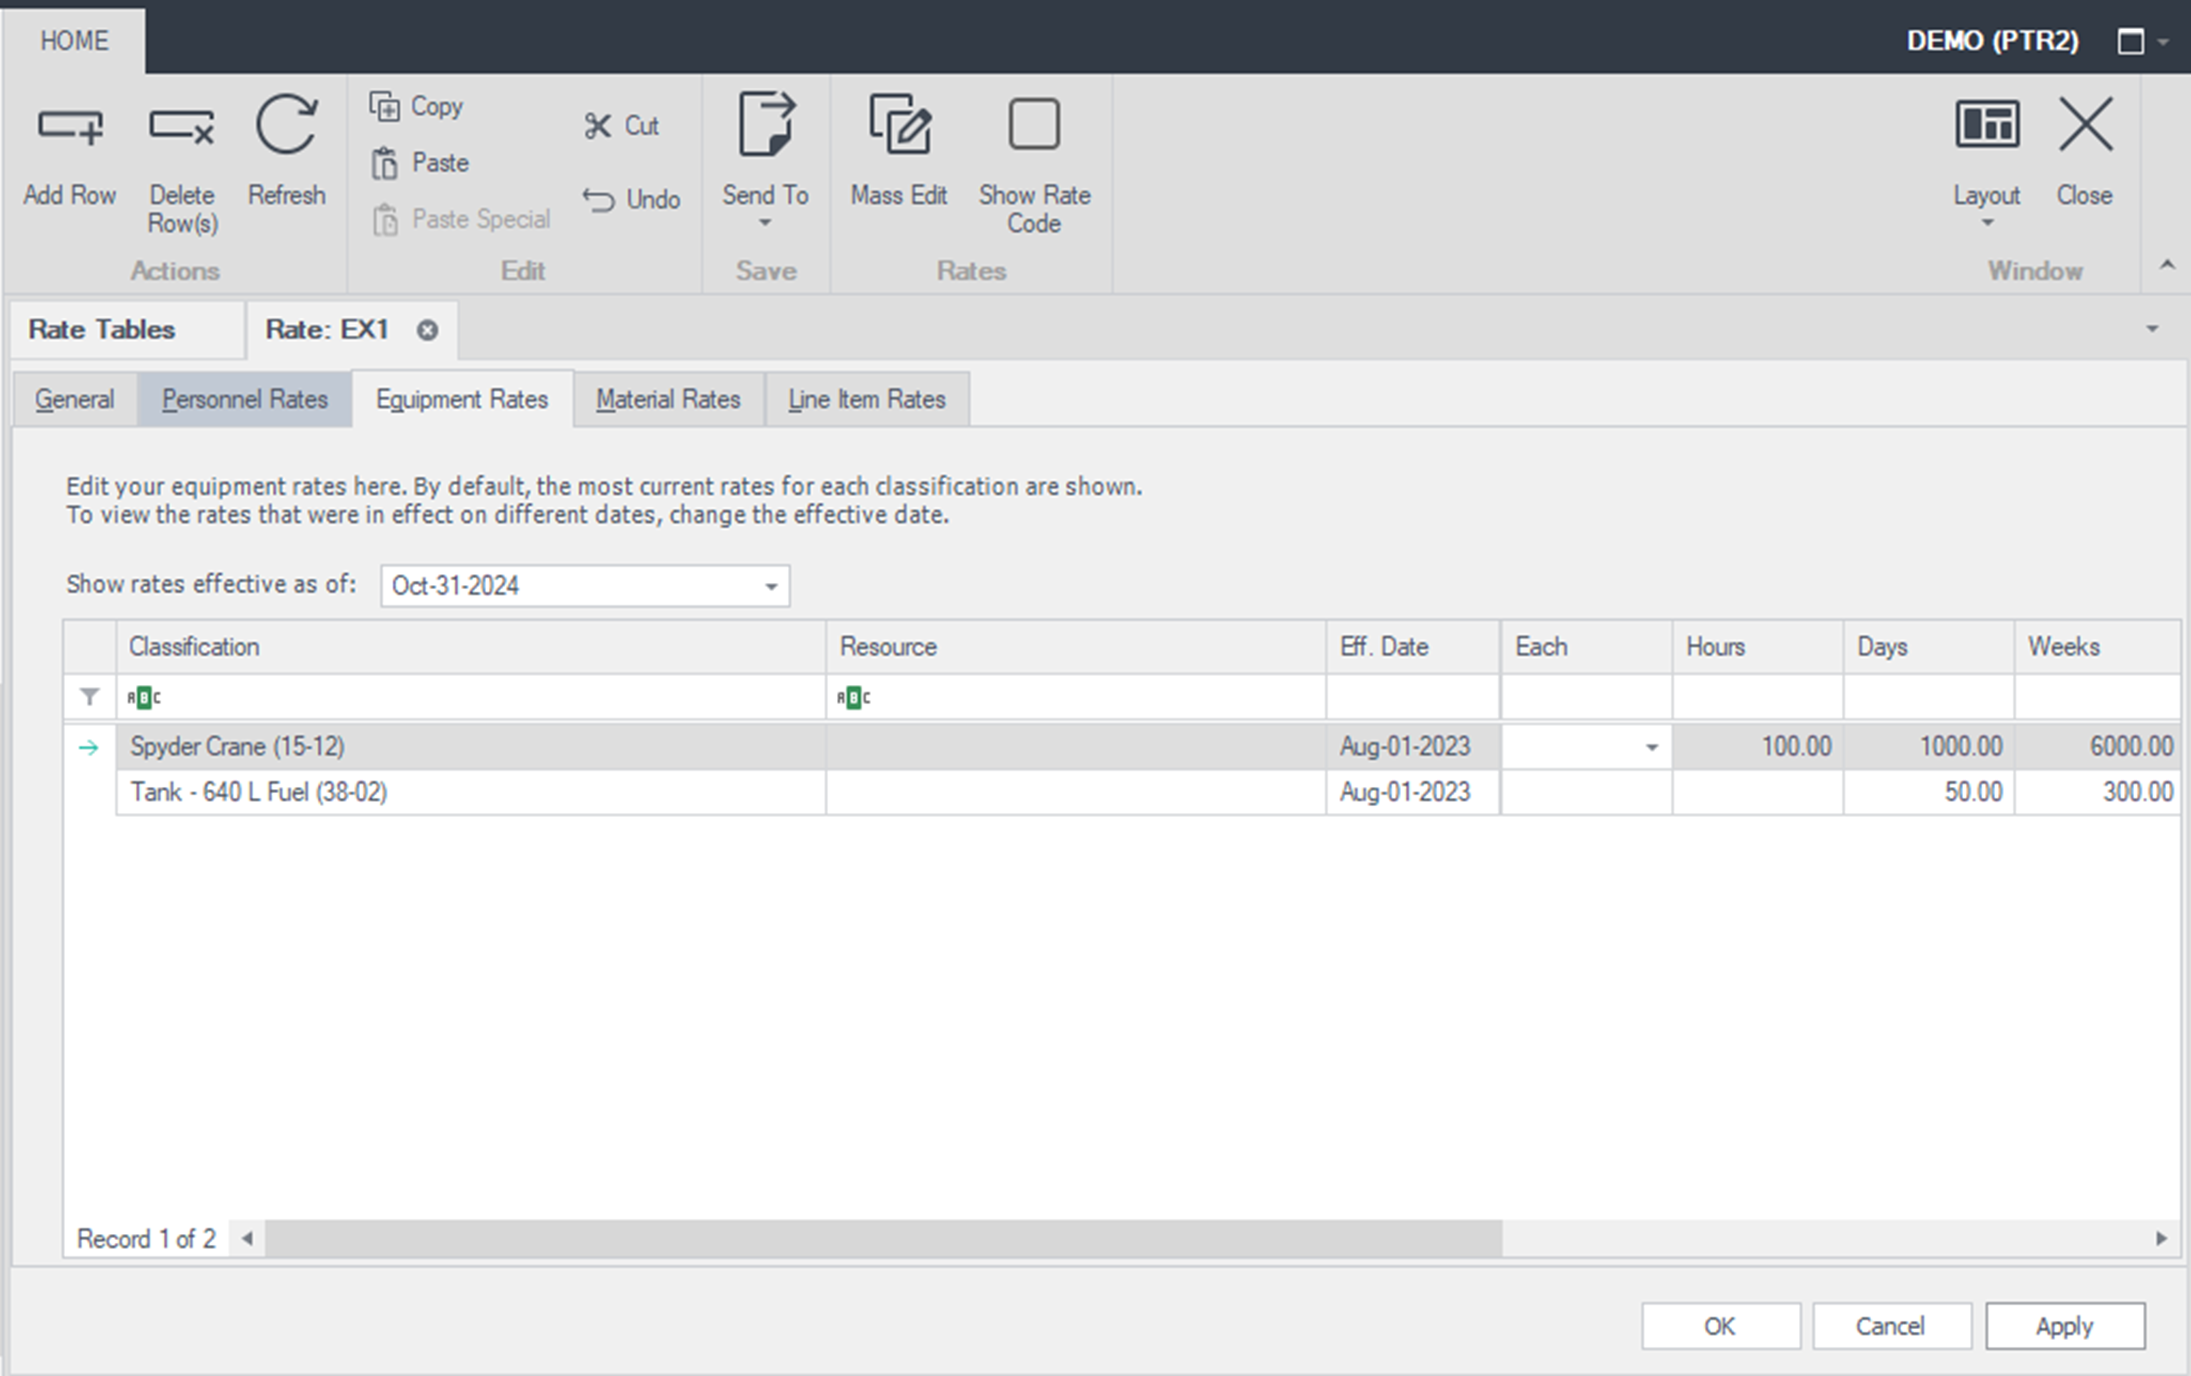
By default, the most current rates for each classification (and optionally, named resource) are shown. To view the rates that were in effect on a different date, change the effective date in the Shown rates effective as of drop-down above the rates grid.
To add a new equipment rate record, click the Add Row icon located in the ribbon bar. If you wish to delete a record, select it by clicking it once, and then click the Delete Row(s) icon located in the ribbon bar.
Click the drop-down list or the ellipses icon under the Classification column and select the classification being assigned to the rate record.
Optionally, Billings supports rates for individual resources by classification. For example, JD Backhoe operating as an excavator can be billed out at rates different than the standard backhoe rates. If you choose to enter a rate for an individual piece of equipment in the selected classification, click the drop-down list under the Resource column, and then select the individual piece of equipment assigned to the rate record.
Select the Effective Date of the rate record (that is, when does this rate take effect) and enter in the rates to be used for the different earnings class by shift (i.e., Hours, Days, Weeks, Months and a Standby and Each). Repeat these steps to add another classification to this rate table.
To start entering material rate information, click on the Material Rates tab under the Rate table tab you are in.
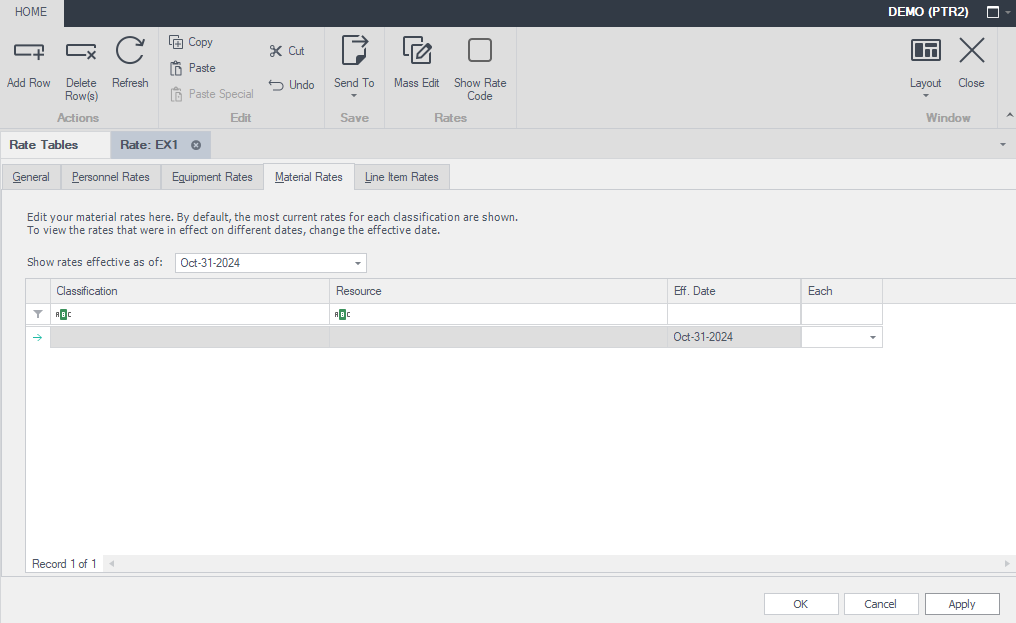
By default, the most current rates for each classification (and optionally, named resource) are shown. To view the rates that were in effect on a different date, change the effective date in the Shown rates effective as of drop-down above the rates grid.
To add a new Material rate record, click the Add Row icon located in the ribbon bar. If you wish to delete a record, elect it by clicking it once, and then click the Delete Row(s) icon located in the ribbon bar. Click the drop-down list or the ellipses icon under the Classification column and select the classification being assigned to the rate record.
Click the drop-down list or the ellipses icon under the Classification column and select the classification being assigned to the rate record.
Optionally, Billings supports rates for individual items by classification. If you choose to enter a rate for an individual material in the classification selected, click the drop-down list under the Resource column, and then select the individual material being assigned to the rate record.
Select the Effective Date of the rate record (that is, when does this rate take effect) and enter in the rates to be used for the earnings class (i.e., Each). Repeat these steps to add another classification to this rate table.
To start entering Line Item rate information, click on the Line Item Rates tab under the Rate table tab you are in. Continue adding the necessary resource type, classifications, and line item types for the project and the corresponding rates.
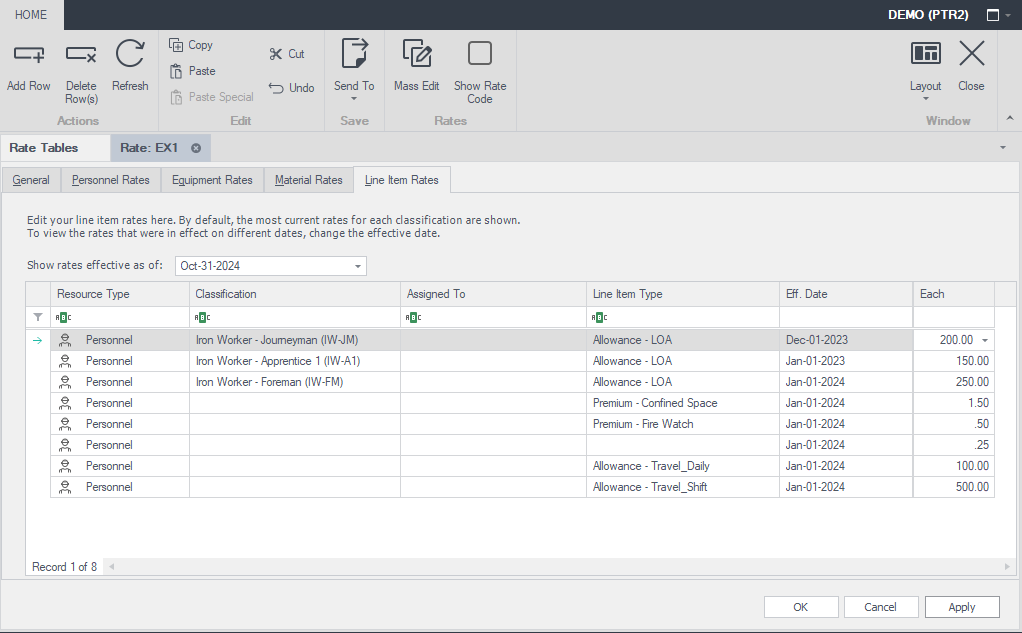
By default, the most current rates for each classification (and optionally, named resource) are shown. To view the rates that were in effect on a different date, change the effective date in the Shown rates effective as of drop-down above the rates grid.
Edit your line items rates here.
To add a new Line Item (e.g. Premium or Allowance) rate record, click the Add Row icon located in the ribbon bar. If you wish to delete a record, select it by clicking it once, and then click the Delete Row(s) icon located in the ribbon bar.
Select the Resource Type in the first column (i.e., Personnel, Equipment, or Material) to indicate which entity type the rate record will apply to.
Click the drop-down list or the ellipses icon under the Classification column and select the type being assigned to the rate record. The list here will be determined by the Resource Type specified for the row.
Optionally, Billings supports rates for individual resources by classification. If you choose to enter a rate for an individual resource in the classification selected, click the drop-down list under the Resource column, and then select the individual resource being assigned to the rate record.
Select the Line Item Type in the next column (note that this list will be determined by your system administrator during application configuration as it is configurable) to indicate which entity type the rate record will apply to. Select the Effective Date of the rate record (that is, when does this rate take effect) and enter in the rate to be used for the earnings class (i.e., Each). Repeat these steps to add another row to this rate table.
Additional Information
9977 N 90th Street, Suite 250 Scottsdale, AZ 85258 | 1-800-637-7496
© 2024 InEight, Inc. All Rights Reserved | Privacy Statement | Terms of Service | Cookie Policy | Do not sell/share my information