Products
Solutions
Resources
9977 N 90th Street, Suite 250 Scottsdale, AZ 85258 | 1-800-637-7496
© 2024 InEight, Inc. All Rights Reserved | Privacy Statement | Terms of Service | Cookie Policy | Do not sell/share my information

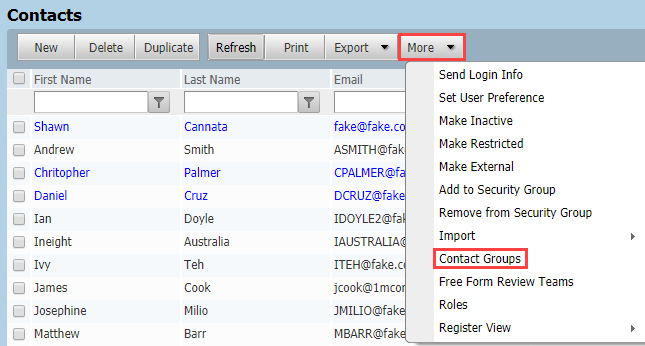
From Contacts, More, select Contact Groups.
Click New, enter the Group ID and Group Title.
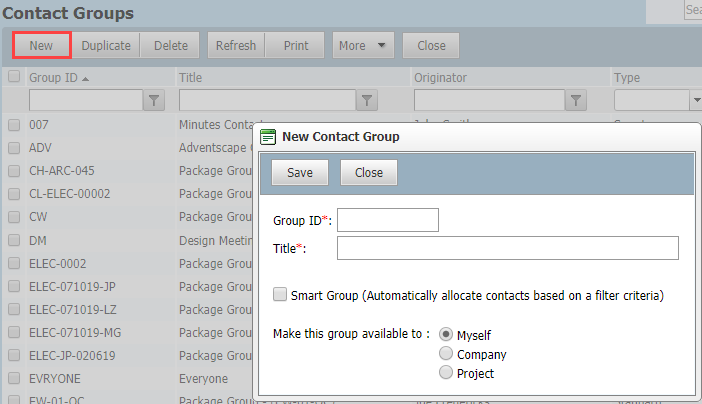
Tick the box labelled Make this group available to users from my Company or Project as required.
Click OK, your newly created Contact Group will be shown in the list.
To add contacts to this distribution group, click Add/Remove link.

For the Distribution option To/Cc, filter the company and contacts to add into either TO, CC or BCC boxes.

For the Distribution option None, add the members of the Contact Group to a single section.

Click OK.
The BCC option will only be available if Blind Copies has been activated on the Project.
Use More to: Add Contacts in bulk; Remove Contacts in bulk; or Replace Contact in bulk.
Contact groups tab – In the contact page, a new tab has been added to show the contact groups the user belongs to. This tab also lets you easily manage contact groups.
In Contacts > Contacts, when you select a contact ID, you can now see which groups the contact belongs to in the Contact groups tab.
You can also assign the contact to groups in the tab. Select groups on the left side of the tab, and then click the right arrow to assign the contact to the selected groups.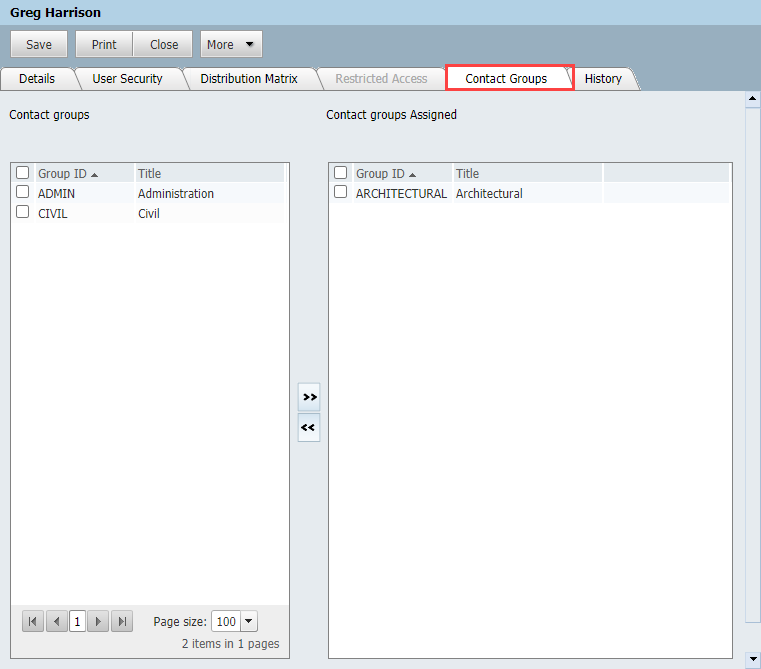
Additional Information
9977 N 90th Street, Suite 250 Scottsdale, AZ 85258 | 1-800-637-7496
© 2024 InEight, Inc. All Rights Reserved | Privacy Statement | Terms of Service | Cookie Policy | Do not sell/share my information