Products
Solutions
Resources
9977 N 90th Street, Suite 250 Scottsdale, AZ 85258 | 1-800-637-7496
© 2024 InEight, Inc. All Rights Reserved | Privacy Statement | Terms of Service | Cookie Policy | Do not sell/share my information

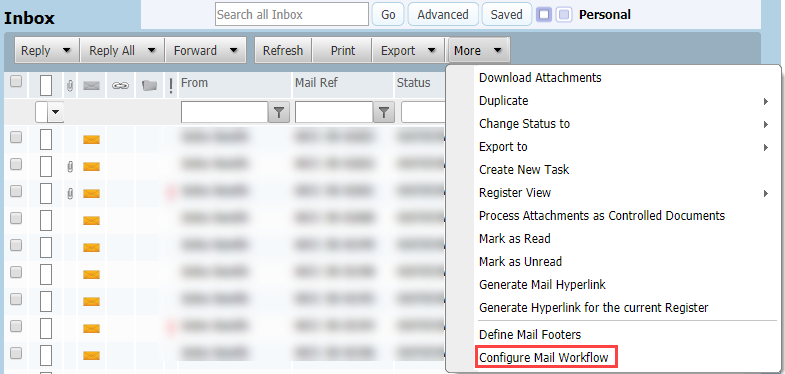
From within the Inbox or Sent Items registers, go to More, then Configure Mail Workflow.
Click New, enter a Mail Type ID and Mail Type Title.

Populate the following fields:
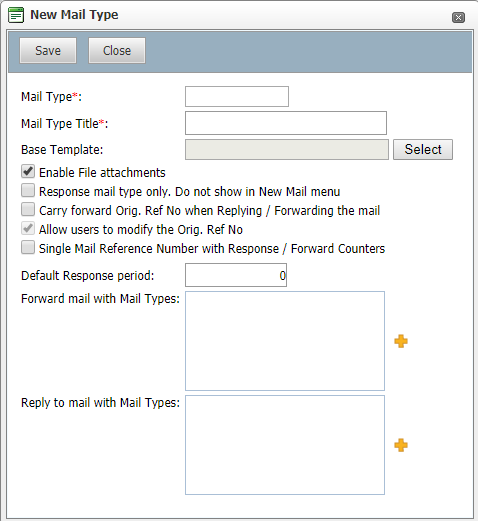
Base Template: select a template from the predefined library that shows the input and output screen of the mail type.
Enable File attachments: untick this option to prevent users attaching files to this mail type.
Response mail type only: if the mail type is only to be used when replying to other mails enable this option. If ticked this mail type will not be available via the New button, only when using Reply and Reply All.
Carry forward Orig. Ref No when Replying /Forwarding the mail: when replying to or forwarding mails of this type the mail reference from the mail being forwarded/replied to will be auto copied to the Originators Reference No. field of the new mail.
Allow users to modify the Orig. Ref No.: the Originators Reference No. field will be editable when creating a new mail using Reply or Forward.
Single Mail Reference Number with Response/ Forward Counters: will retain the original reference number but add a counter at the end for any mail that has been responded to or forwarded.
Default Response period: number of days after the current date the “respond by” date will auto populate. The calculation is based on working days as defined by the Project Calendar.
Forward mail with Mail Types: controls the type of mail that can be used to forward the current mail type with. Use the + button to select the required mail types.
Reply to mail with Mail Types: controls the type of mail that can be used when replying to the current mail type. Use the + button to select the required mail types.
Click Save, then Close.
Additional Information
9977 N 90th Street, Suite 250 Scottsdale, AZ 85258 | 1-800-637-7496
© 2024 InEight, Inc. All Rights Reserved | Privacy Statement | Terms of Service | Cookie Policy | Do not sell/share my information