Products
Solutions
Resources
9977 N 90th Street, Suite 250 Scottsdale, AZ 85258 | 1-800-637-7496
© 2024 InEight, Inc. All Rights Reserved | Privacy Statement | Terms of Service | Cookie Policy | Do not sell/share my information

Before activating a workflow Form for the first time the following preparation is required:
Status codes (if required) need to be configured.
Workflow steps defined.
Form participants (distribution list) assigned.
Status codes allocated.
Form Status Codes are used to help recipients quickly identify which step a Form is at and therefore what action is required. The library of available Status codes is defined by the Administrator via the Configuration Tables. The available status codes can be defined to be used generically on different form types or can be defined specifically for each form type.

Workflow Steps combine logically to Form a workflow that determines the process by which recipients perform actions relating to each section of the Form.
A Form must have a mandatory Start Step (that initiates the Form) and an End Step (that closes out the Form).
Each Step (including the Start Step) must have one or more sections allocated to it.
Each Step is also assigned a status. This will identify the status of the Form as it moves through the workflow.
At the completion of each Step (once the Complete Action button is clicked) a number of “Next Actions” are presented to the user. Each Next Action will drive which workflow step is executed next. For steps that are assigned to multiple recipients, it is the last recipient to complete the step that selects the Next Action. The Next Action can also be assigned a status. In this case it will override the Step Status.
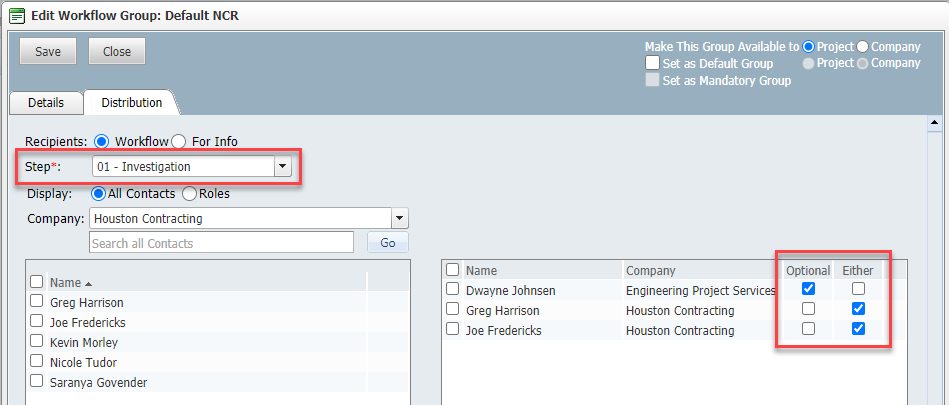
Each Step also requires one or more recipients who are given a completion date. All recipients must complete the Step by that date, unless they have been marked as “Optional” or there are two recipients who have both been marked as “Either”.
The Workflow for a Form can be setup from the Forms Type window.
From the Form Register click More > Configure Form Workflow
Click the Add/Edit link under the Workflow column for the appropriate Form type.
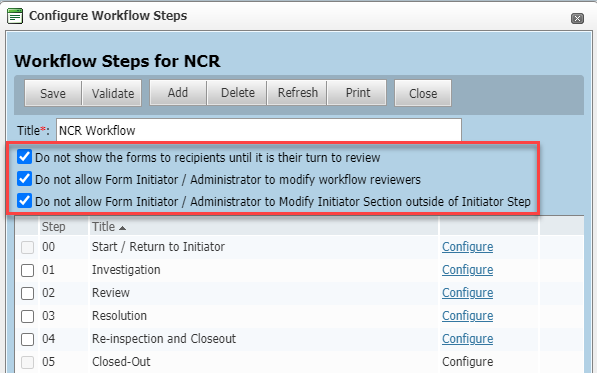
The following options can be set prior to configuring the workflow by checking the appropriate box:
Do not show the forms to recipients until it is their turn to review.
Do not allow Form Initiator / Administrator to modify workflow reviewers.
Do not allow Form Initiator / Administrator to modify Initiator Section outside of Initiator Step.
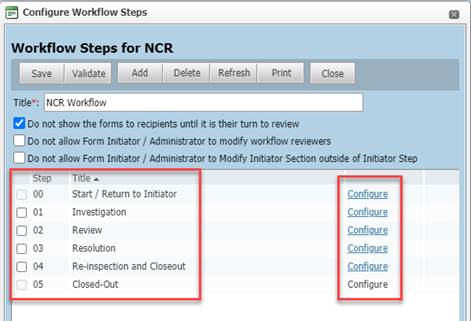
Click Configure for each Step and complete the following:
Add a Step title.
Select a Status.
Add Review duration.
Specify a Sequence for the Step.
It is possible to define the Next action to be the same step multiple times. But each time a different status must be assigned.
The Closed-Out status can be pre-configured via the Form workflow window.
Lock Form Initiator Section – This new setting lets project teams lock the initiator section down when not in the initiator step. This section of a form could previously be modified at any step of the workflow, which created a risk that information could be modified after it had been approved.
To create a default distribution list for Forms:
Within the Forms register, click on the More button and select Configure Form Workflow.
Click the Add/ Edit link next to the Form Type for Distribution.

Existing distribution groups are listed. Either Click on the distribution group title to edit an existing group or click Add/ Edit link under the Distribution column to create a distribution list for the Form type.
Specify a Title for the Distribution List.
Select recipients to be assigned as part of the workflow (For workflow-based form types) and those who are going to be accessing the form For Info. This must be done for each workflow step.
Hit Save each time user is assigned Or switching between Workflow and For Info.
Select recipient names from All Contacts or choose Role based contacts for each step.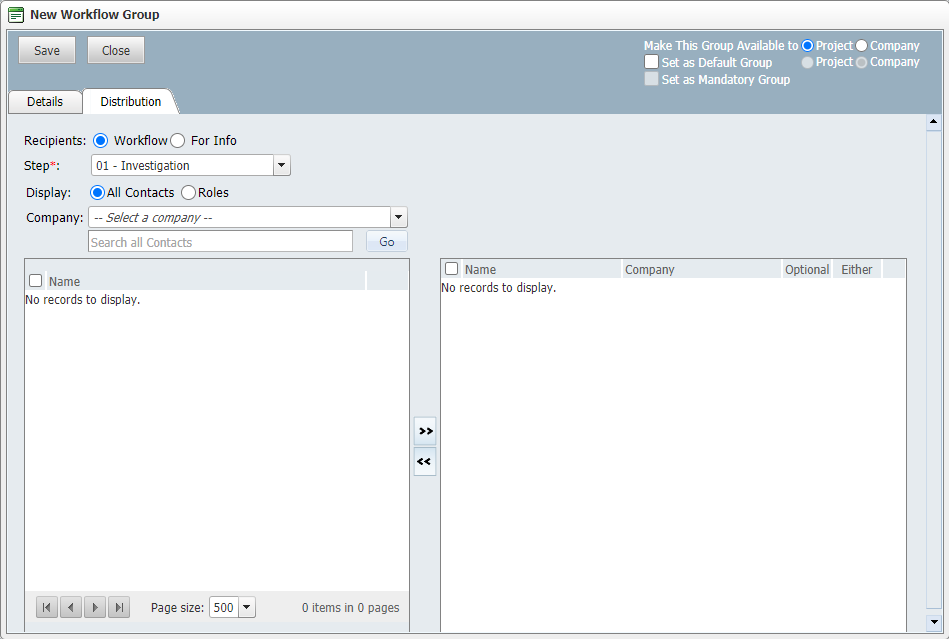
Add recipient(s) to the step using the arrows.
Click Save and Close once complete.
Select each step from the “Step*” drop down and repeat 6,7 and 8.
Responsible recipient(s) are allocated to one step at a time. Each workflow step remains active until at least one participant has been assigned.
It is possible to allocate a Default Contact Group (that can be altered by the Initiator and other parties on the Form), for the entire Project or for the Company Initiating the Form.
Default Groups can also be set to become Mandatory (which prevents any user in the group being removed for the given Form Type).
Inactive user message – When an inactive user is part of a Forms workflow, the system alerts you to remove or replace the inactive user from the workflow.
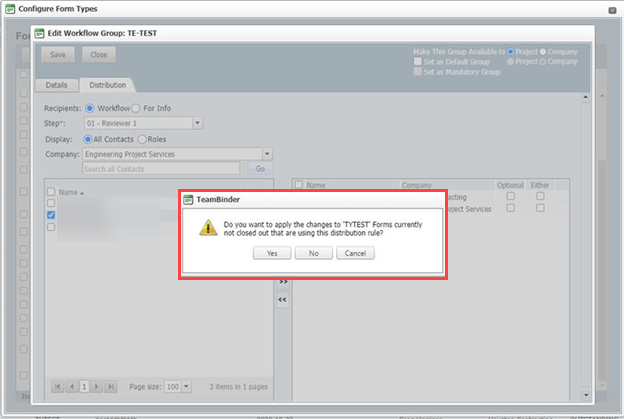
When workflow changes are made to an existing form that is in progress, you are shown a dialog box that asks if you want to apply the changes to the form.
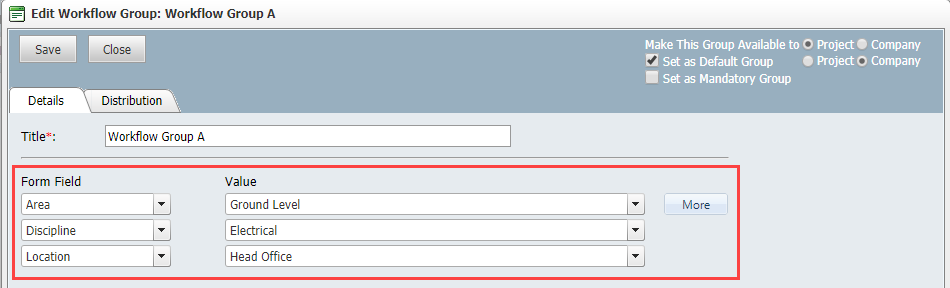
To define a review team based on a set of field values
Within the Forms register, click on the More button and select Configure Form Workflow.
Click the Add/ Edit link in the Status column next to the appropriate Form Type or click on the Form Type Title.

Use the + button to assign which Form Status values are to be available for use with the Form Type.

Note that the available Form Status values are defined by the Project Administrator.

Select the required statuses to include for use with the Form Type.
Additional Information
9977 N 90th Street, Suite 250 Scottsdale, AZ 85258 | 1-800-637-7496
© 2024 InEight, Inc. All Rights Reserved | Privacy Statement | Terms of Service | Cookie Policy | Do not sell/share my information