Products
Solutions
Resources
9977 N 90th Street, Suite 250 Scottsdale, AZ 85258 | 1-800-637-7496
© 2024 InEight, Inc. All Rights Reserved | Privacy Statement | Terms of Service | Cookie Policy | Do not sell/share my information

Central user management lets you add users to multiple projects at one time. Using central user management can help save time when there are multiple new projects starting at the same time.
You can enter each contact manually or you can import contacts from a Microsoft Excel spreadsheet. Using a spreadsheet lets you take advantage of features such as copy and paste and sorting to make entering and reviewing data easier.
Summary: Use central user management when you want to add new users at the same time to more than one project.
Considerations: Only projects that you have access to show on the central user management page. This step by step shows how to add users by importing from an Excel template. You can also manually add contacts on the same Add contacts page.
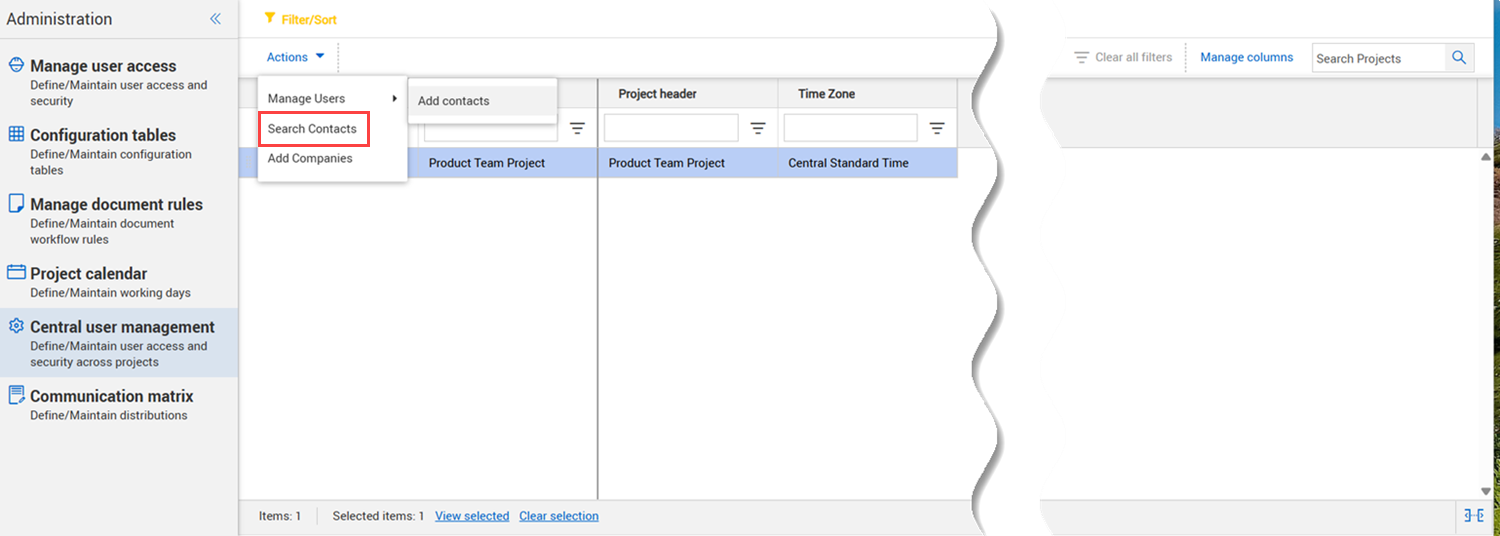
From your project, open the Admin section and then select Central user management. The Central user management page opens.
Select one or more projects that you want to add users to.
Expand the Actions menu, and then select Manage users > Add contacts. The Add contacts wizard opens.
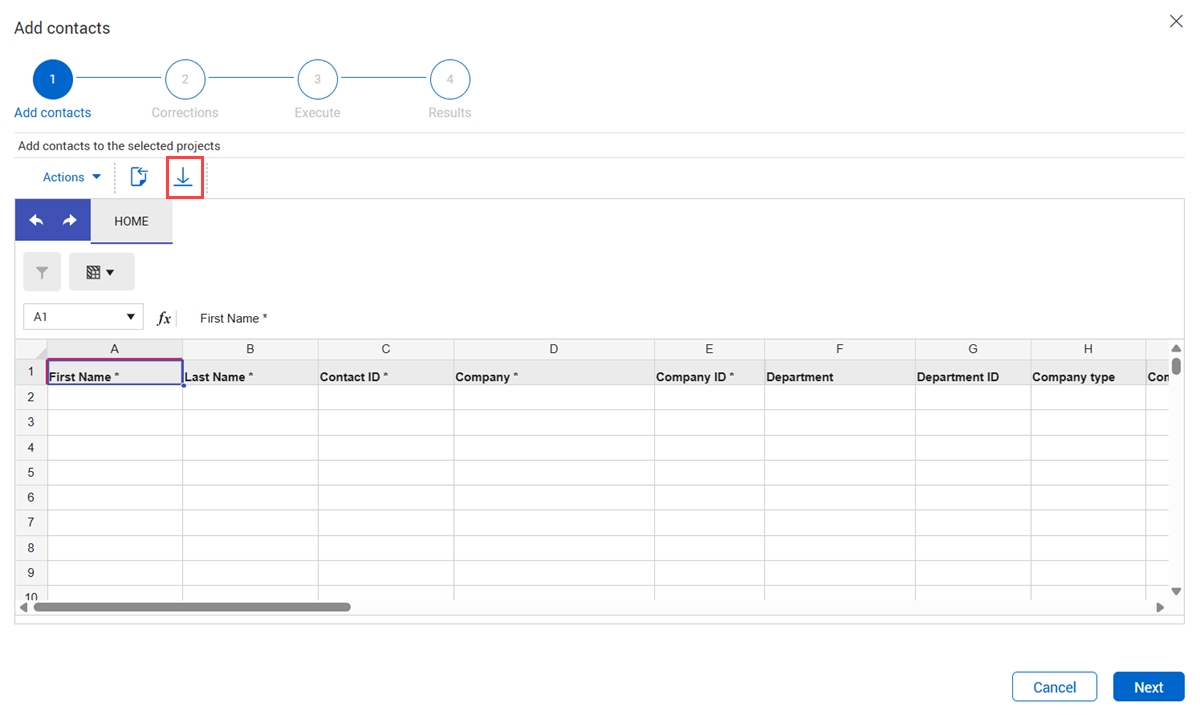
Click the Download Excel template icon. The tbAdrbook template is downloaded to your computer.
It is best practice to download a new template each time you import.
Open the template, enable editing, and then add the contact information.
Save the Excel file to your computer.
In the Add contacts wizard, click the Import icon. The Select Excel file dialog box opens.
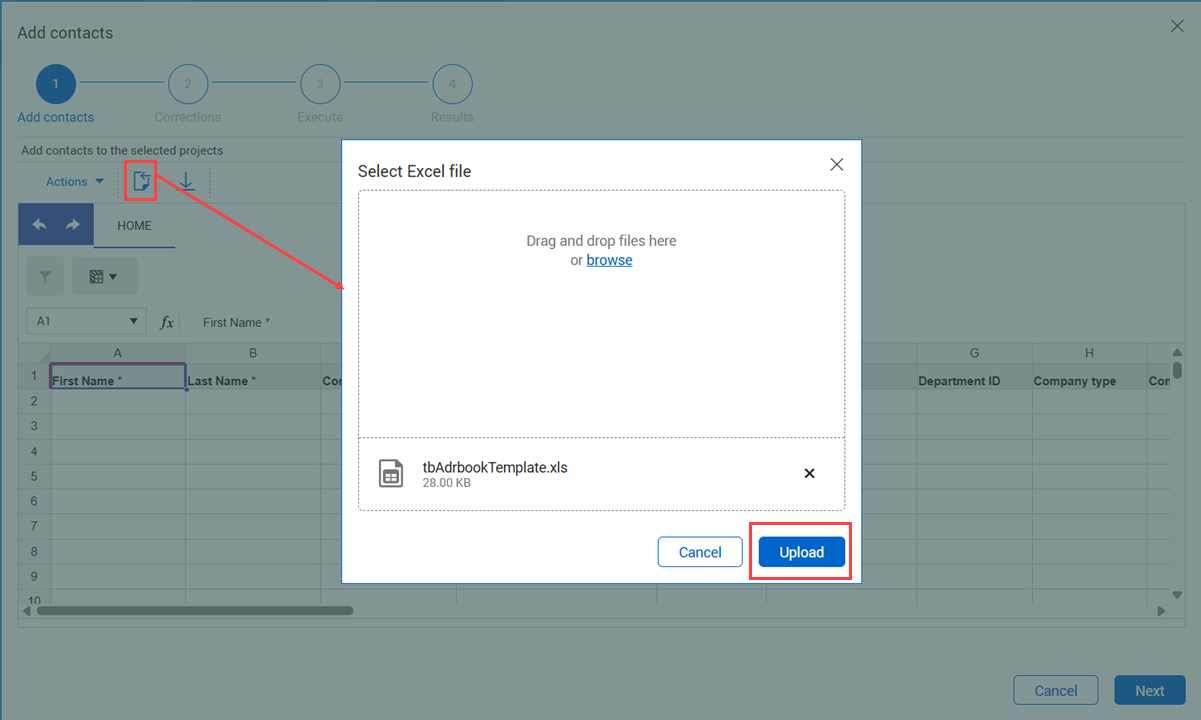
Drag and drop the Excel file into the dialog box, and then click Upload. The contacts are added to the page.
Optionally, add additional contacts manually.
Click the Next button. The Corrections page opens with a list of contacts that require corrective action. Scroll to the right to see the reason for the error. Optionally, you can click the Export icon to export the list to an Excel spreadsheet for easier scrolling.
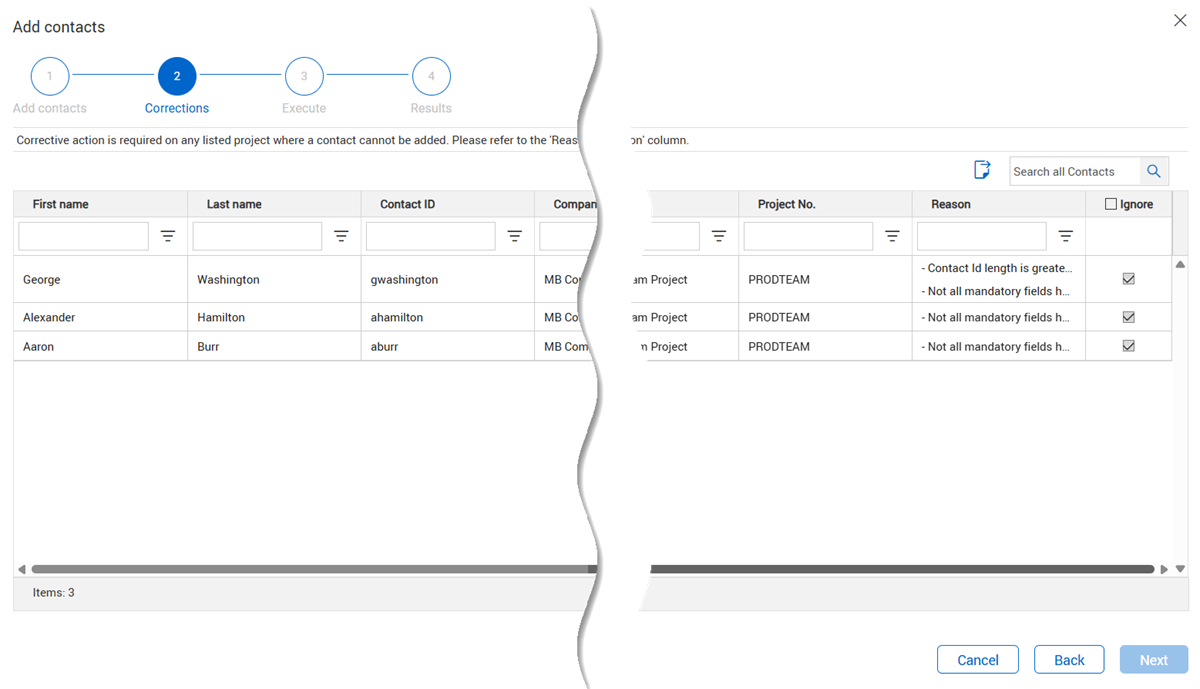
If you want to correct errors, click the Back button to return to the Add contacts page. You can then correct the errors, and then click Next to return to the corrections page. If you want to add the contact with the errors, you can deselect the Ignore check box.
Click the Next button. The Execute page opens with a list of all contacts that you want to add.
Click the Next button. The Add contacts dialog box open with a caution that the action will be completed as a background process.
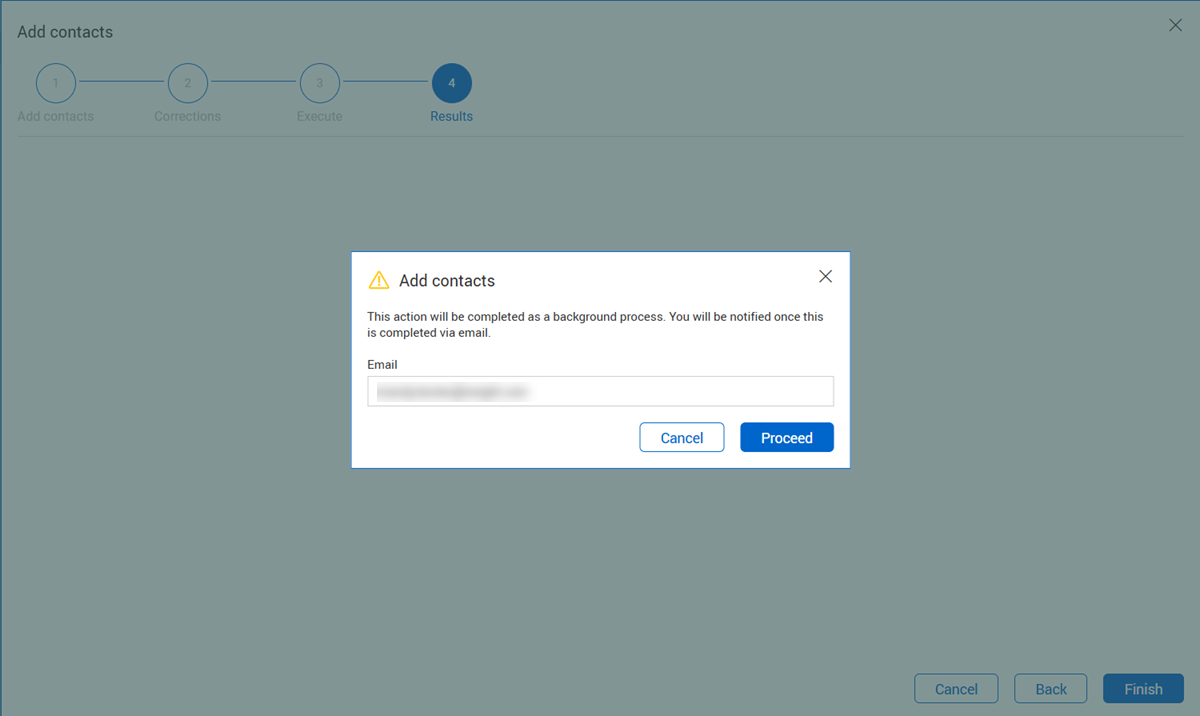
Verify the email address, and then click the Proceed button.
Additional Information
9977 N 90th Street, Suite 250 Scottsdale, AZ 85258 | 1-800-637-7496
© 2024 InEight, Inc. All Rights Reserved | Privacy Statement | Terms of Service | Cookie Policy | Do not sell/share my information