Create security groups
You can use central user management to create security groups for multiple projects at one time.
Create security groups in central user management
Summary: Create security groups in central user management when you have new groups that will be used in multiple projects.
Considerations: Only projects that you have access to show on the central user management page.
-
From your project, click the Settings icon, and then select Admin.
-
Select Central user management.
-
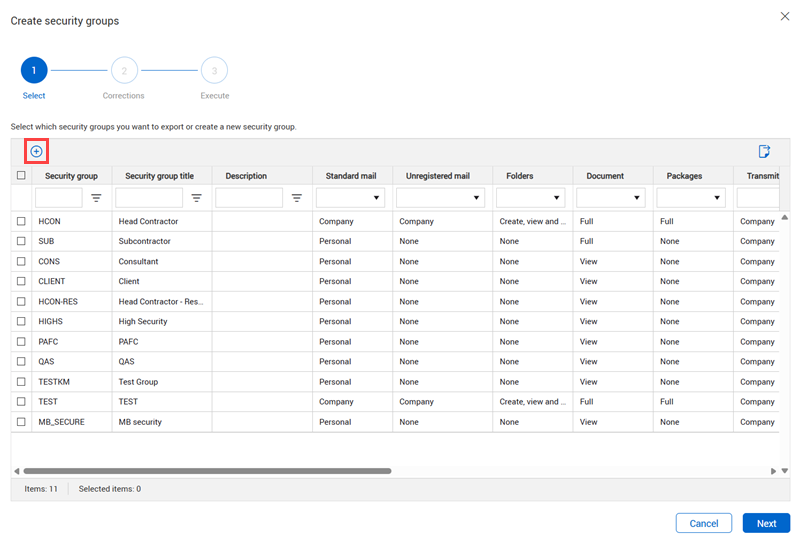
Select one or more projects from the list, and then select Actions > Create security groups. The Create security groups dialog box opens.
-
Click the Add icon. The Add new security group dialog box opens in the Administration > Manage user access section.
-
Add a security group as described in Creating a Security Group. The group is added to the selected projects.
Add an existing security group to other projects
Summary: You can add a security group that has already been created in one project to other projects in the organization, so you do not have to duplicate effort.
Considerations: Only projects that you have access to show on the central user management page.
-
From your project, click the Settings icon, and then select Admin.
-
Select Central user management.
-
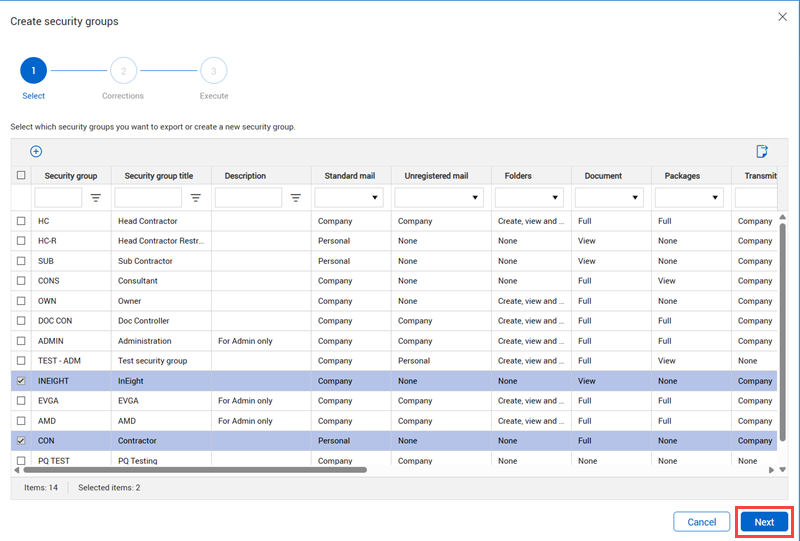
Select one or more projects from the list, and then select Actions > Create security groups. The Create security groups dialog box opens with a list of security groups in the current project.
-
Select one or more security groups to add to the projects selected in the previous step, and then click Next.
-
If there are any errors, such as the security group already existing, the Correction page shows. Correct any errors, and then click Next. If there are no errors, the Execute page shows.
-
On the Execute page, click Save. The security groups are added to the selected projects.
You can also use central user management to export security groups to a Microsoft Excel spreadsheet.
Export security groups
Summary: Export a summary of the security groups to Excel to review, filter, or report on information outside the application.
Considerations: Only projects that you have access to show on the central user management page.
-
From your project, click the Settings icon, and then select Admin.
-
Select Central user management.
-
Select one or more projects from the list, and then select Actions > Create security groups. The Create security groups dialog box opens.
-
Select one or more security groups, and then click the Export icon.
-
The Excel spreadsheet is downloaded to your device.