Products
Solutions
Resources
9977 N 90th Street, Suite 250 Scottsdale, AZ 85258 | 1-800-637-7496
© 2024 InEight, Inc. All Rights Reserved | Privacy Statement | Terms of Service | Cookie Policy | Do not sell/share my information

Before you use Bluebeam to check out or review documents, you must do the following:
Activate Bluebeam studio session in InEight Document
Link Bluebeam with Document
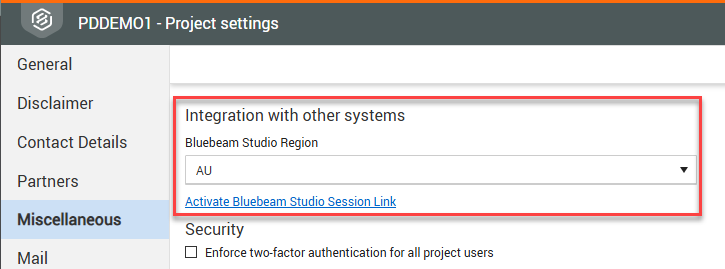
After your project delivery consultant has enabled the Bluebeam setting in the back end, the option Integration with other systems shows in the Project Settings > Miscellaneous section.
From the Integration with other systems section, select a region, and then click Activate Bluebeam Studio Session Link.
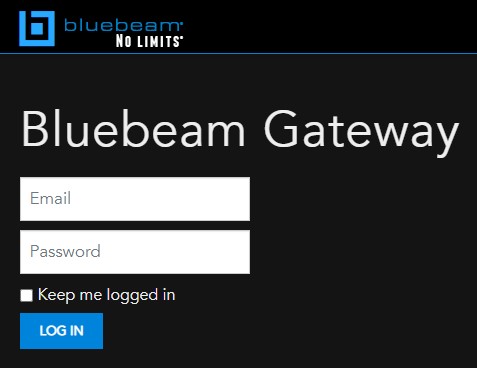
In the Bluebeam Gateway login dialog box, use the service account to sign in.
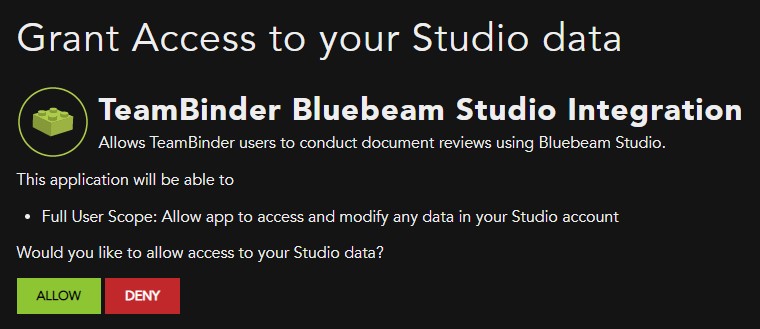
In the Grant Access to your Studio data dialog box, click Allow to grant integration access.
A Success message shows stating that your project been successfully linked to Bluebeam Studio Session.

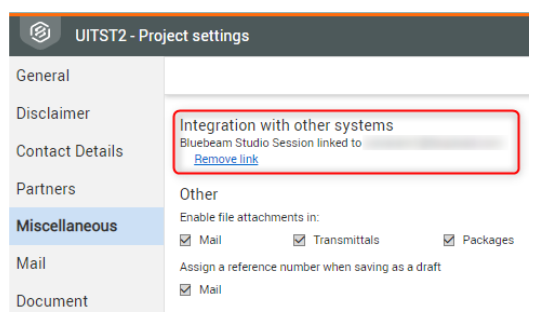
You can change the service account email address by clicking Remove link; however, make sure that there are no active Bluebeam sessions.
Bluebeam connects with Document using its SharePoint integration capabilities.
From the Bluebeam menu, click RevU, and then select Preferences.
Under the Interface section, click the File Access tab, and then click Add.

Enter the Document project address into the Site field using one of the formats below.
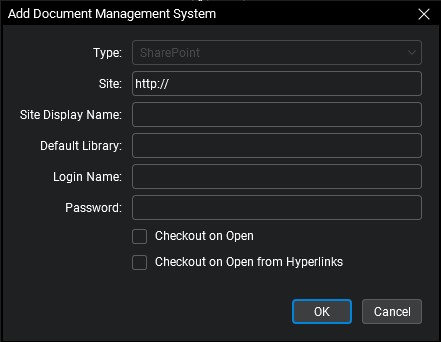
For non-SSO users:
https ://<SERVER>/TeamBinderBB/PROJNO<PROJECTNUMBER>
Replace <SERVER> with the server domain that the project is located on.
You can identify your server domain in the URL when you log into your project.
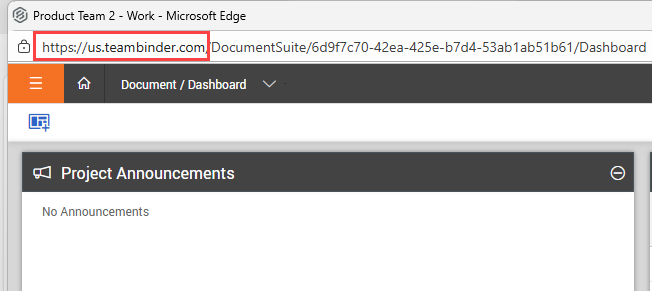
Replace <PROJECTNUMBER> with your project number.
For example: https://au1.doc.ineight.com/TeamBinderBB/PROJNOPDDEMO6
For Azure AD Single Sign-on (SSO) users:
<Reply URL>/PROJNO<PROJECTNUMBER>
Replace <Reply URL> with the appropriate URL address.
You can identify your Reply URL in Company Details > Single Sign-On Setup.
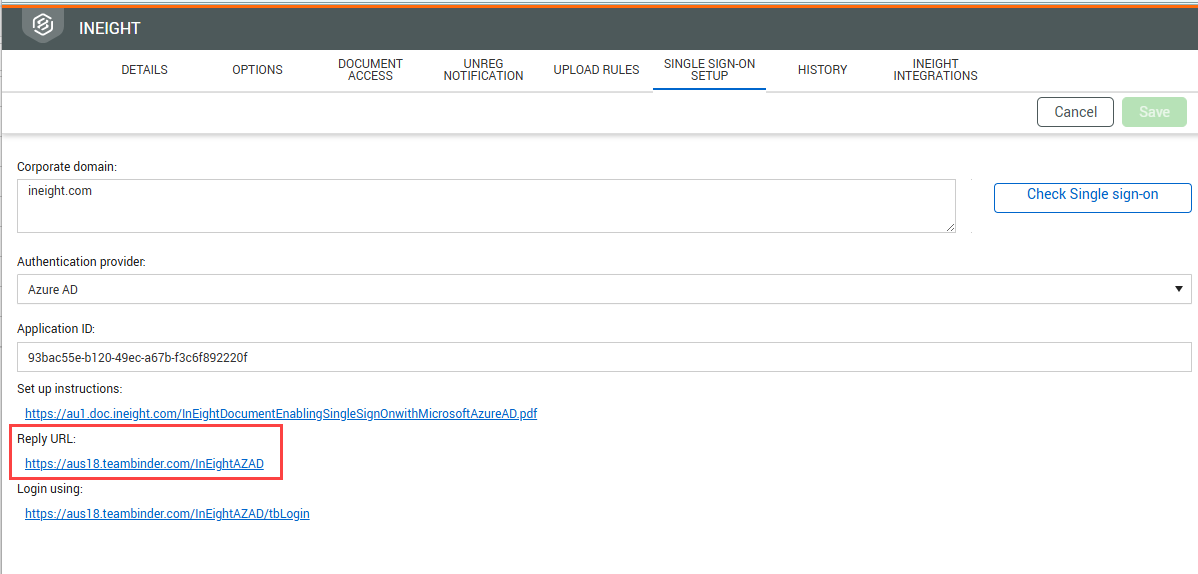
Replace <PROJECTNUMBER> with your project number.
For example: https://aus18.teambinder.com/InEightAZAD/PROJNOPDDEMO6
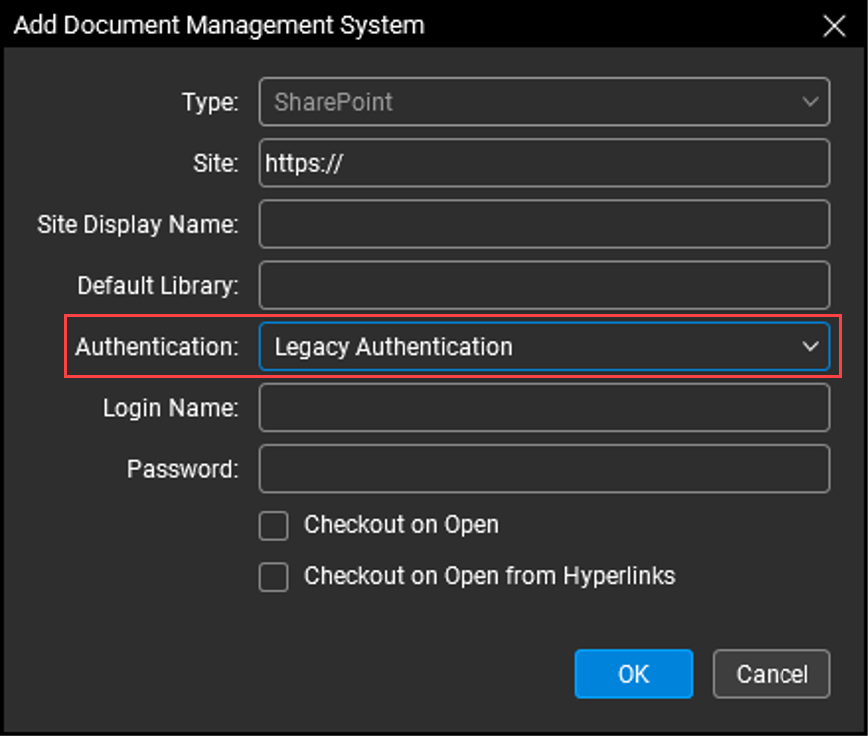
If you are using Bluebeam RevU version 20 or later, select Use Legacy Authentication from the Authentication drop-down menu.
Select the Checkout on Open checkbox (as shown above) to enter editing mode automatically once the document is opened in Bluebeam.
Documents must be checked out before new versions can be created within Bluebeam.
Click OK.
To further sort this document list by field (for example, Disciplines or Type), specify a direct path in the Site field. For example: https://au1.doc.ineight.com/TeamBinderBB/PROJNOPDDEMO6/Discipline/Type
You can open a document with Bluebeam RevU directly in your browser if you are using Microsoft Edge, which natively supports ClickOnce functionality.
Additional Information
9977 N 90th Street, Suite 250 Scottsdale, AZ 85258 | 1-800-637-7496
© 2024 InEight, Inc. All Rights Reserved | Privacy Statement | Terms of Service | Cookie Policy | Do not sell/share my information