Products
Solutions
Resources
9977 N 90th Street, Suite 250 Scottsdale, AZ 85258 | 1-800-637-7496
© 2024 InEight, Inc. All Rights Reserved | Privacy Statement | Terms of Service | Cookie Policy | Do not sell/share my information

After all reviewers have completed their reviews of a restrained document in a workflow, the review coordinator receives an email notification. The review coordinator uses the Document Release page to conduct their own review, select comments to include, and apply a review status, which either releases or rejects the document.
Summary: Review and release a document and close out reviewer comments.
Considerations: You must be a review coordinator or an administrator to release a document.
From the Module menu, go to Documents > Release.
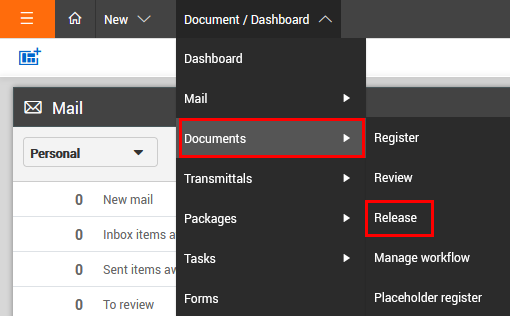
The Documents awaiting release page opens and shows all documents awaiting release by you as review coordinator.

Select a document from the list that you want to apply a review status. If there are many documents awaiting release, use the available search options to locate the required documents.
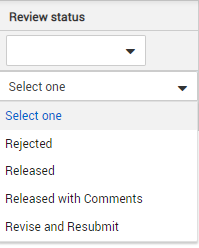
Allocate a Review Status Code as applicable to each document.
For a single document, select the document, and then select a status from the Review status drop-down list.
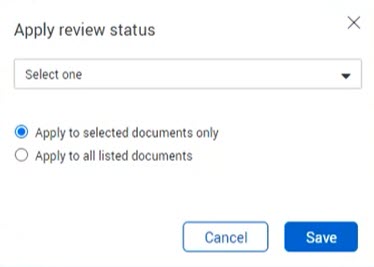
For multiple documents, select the documents, and then click Actions > Apply review status. The Apply review status dialog box opens, and then you can select the status. You can apply the status to the selected documents only or to all documents in the view.
Click Save to apply the status. You can also update the review status in bulk. See Nominate a review status in bulk for more information.
Your review options are the same as those of the reviewers in the Document Review wizard, which include the following:
Download
Redlines
Text comments
Attach external files to their comments.
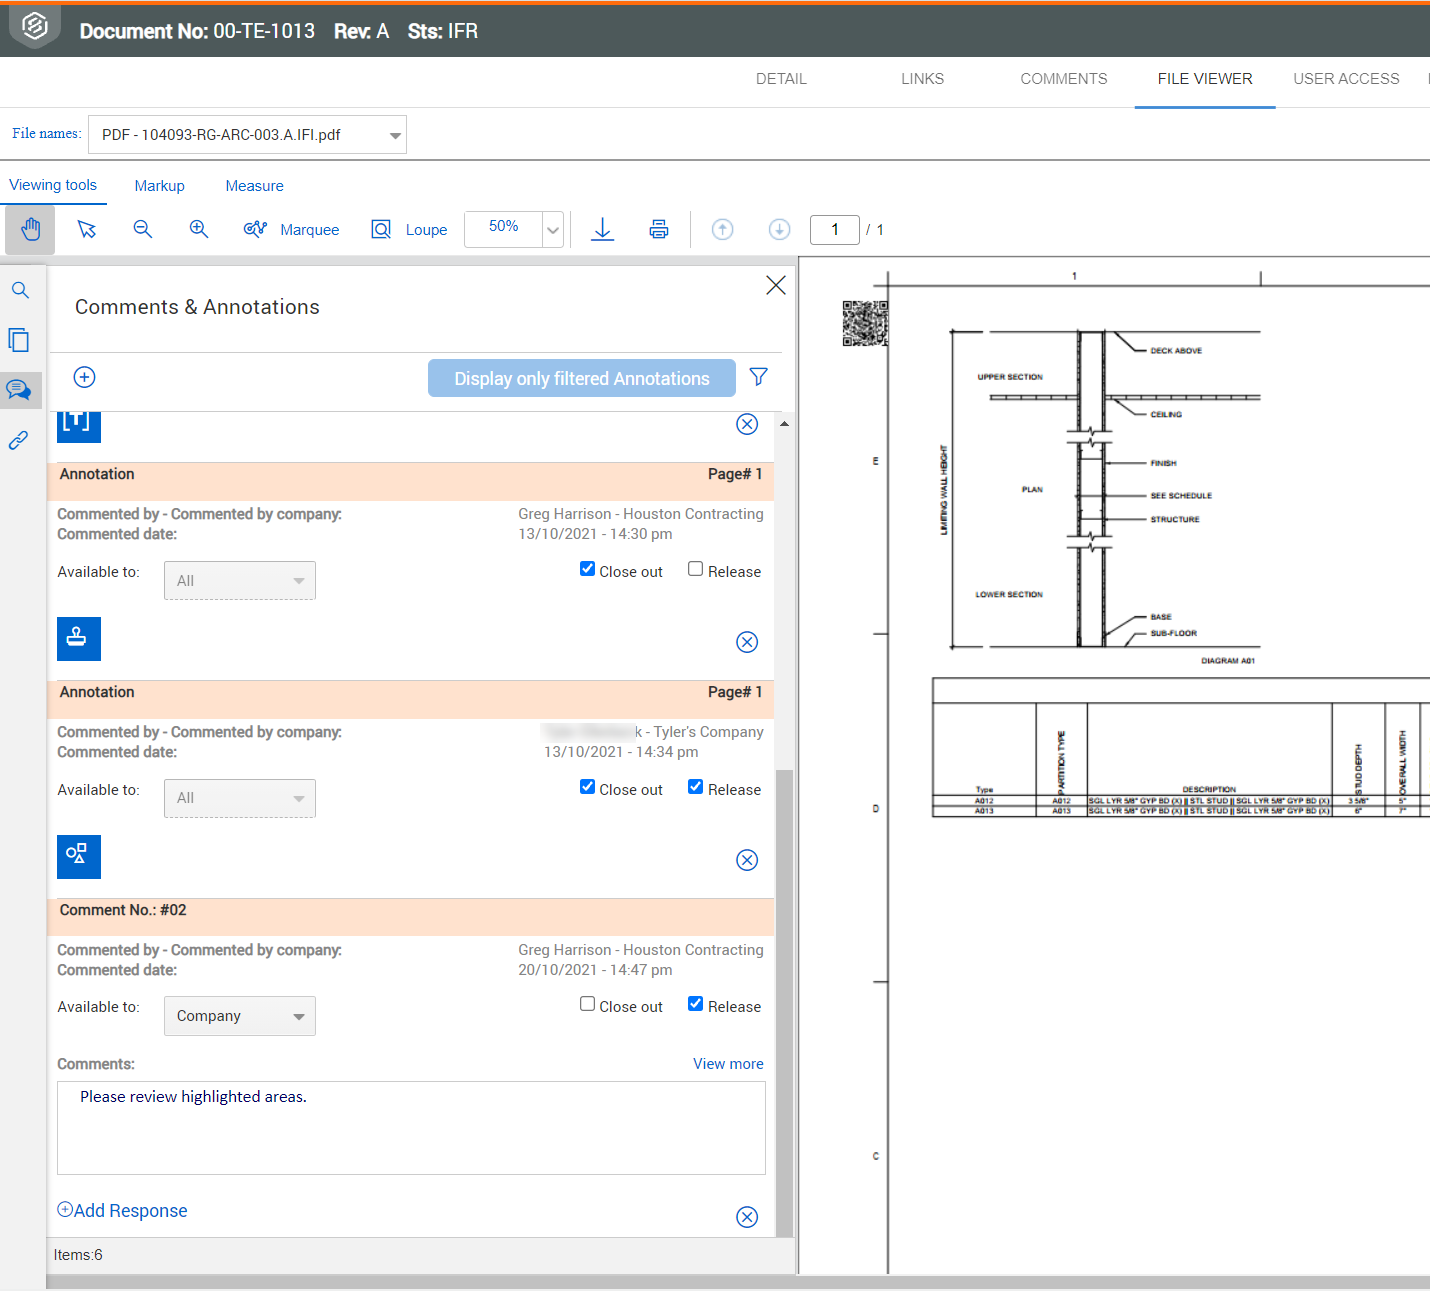
View reviewer comments and close them out as required:
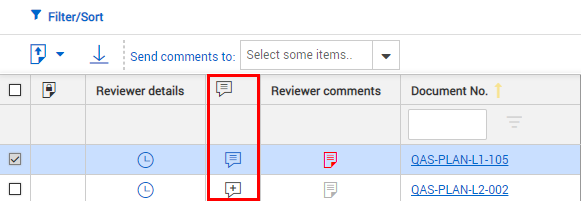
Click the Redline icon to open the File viewer to view markups and comments made against the file. Click the Comments tab to see a full list of comments.
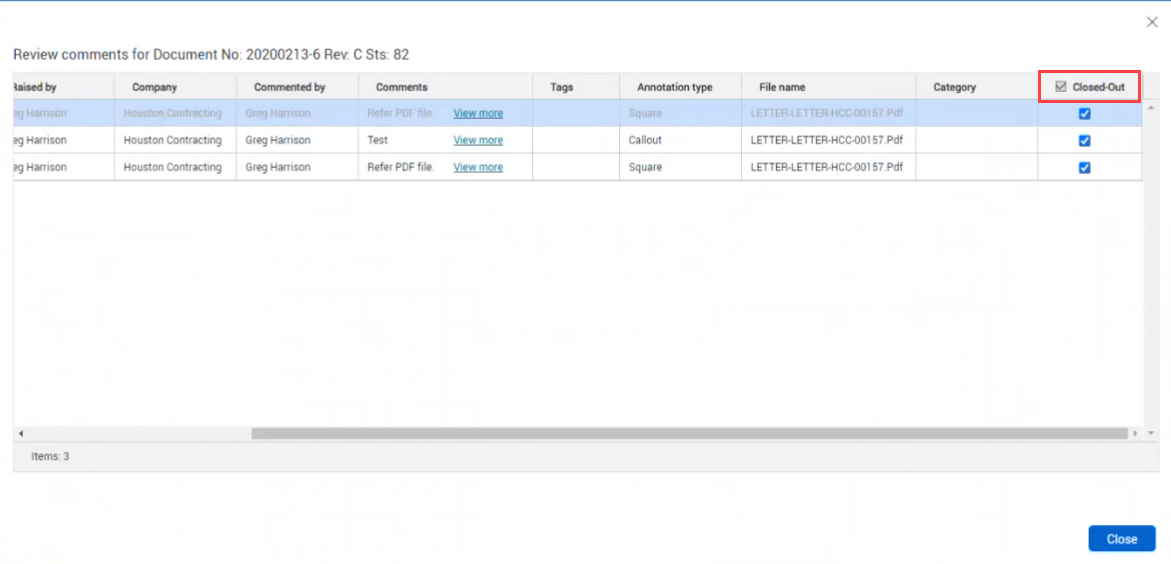
View reviewer comments and annotations. Select the Close out check box for each to close them out. Select the Release check box if you are ready to release the comment. The Review comments page is updated.
Alternatively, if you want to close out comments in bulk, you can click the Closed-Out check box in the Closed Out column header in the Review comments dialog box.
Select any comments and redline mark-ups made by reviewers to be included in the final comments for the document. These comments and redlines are distributed back to the originator, the review members, and document recipients if selected.
Click the Add Text icon in the Comments column and enter reviewer comments as the review coordinator.
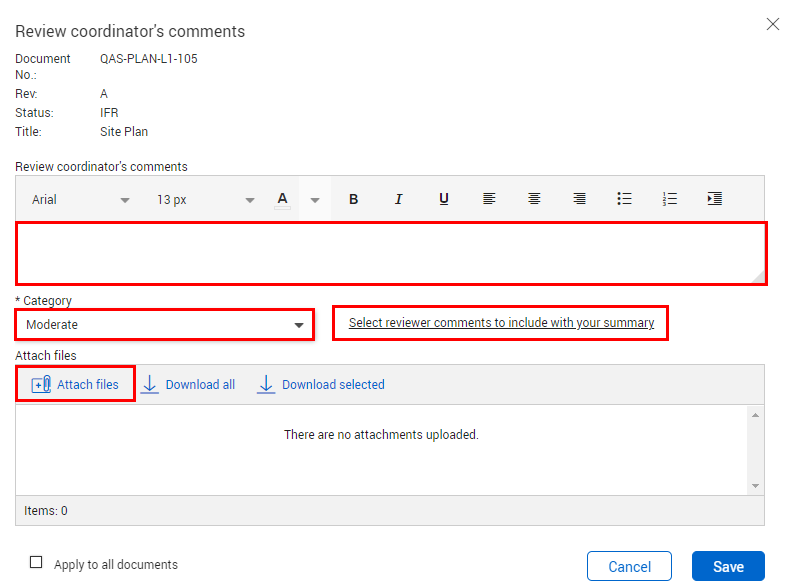
To include comments and redline mark-ups made by other reviewers, click the link Select Reviewer comments to include with your summary. Select the comments to include by selecting the check boxes against them. To view any attachments, click the Attachment icon and Download when prompted.

Click Close when completed to return to the Review Coordinators comments page.
Use the Attach files button to select one or more external files to include as part of your comments.
Select a Category if required.
Click OK to close the Review Coordinator’s comments page.
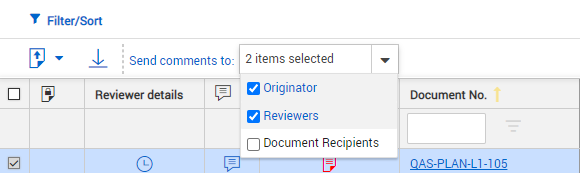
From the Release page, select who the review comments should be sent to: Originator, Reviewers or Document Recipients.
To release the documents where the above steps have been completed (ensure a release status has been set), click Release.

Reviewers and review coordinators can download the original file with all markups prior to consolidation after the document is released.
If the document is released: The document is distributed automatically using email notifications.
If the document is rejected: only the Originator, Review Team and Admins retain access to the document. Users from the originating company will not receive access even if they are part of the Distribution Rules / Discipline Matrix.
The Document Register is updated with the Review Status applied.
With the option enabled, at the Release screen the review coordinator can attach an additional View file to the document. To add an additional view file, click Add Files and select a view file to be added to the document.
Use the Review Details link to review a history of who reviewed the document and when.
Comments and/or Redline layers applied directly by the Review Coordinator and other reviewers selected by the Review Coordinator as part of the release process become public comments. These are visible after the document has been released via the Document Register. The other comments are private, and are not visible to users.
The review coordinator can change private comments to public after the document has been released. See "Change private comments to public".
InEight Document can be configured to automatically stamp an approval signature, date and status into an image of the document (normally a Tiff file) so that the approved document when printed always contains this information. (Contact InEight for information on QPRINT if this is of interest. Charges apply).
A reviewed and released document can be resubmitted for review without changing the Status or Revision. Go to More, then Resubmit for Review in the Document Register.
Summary: Update the review status of documents from the Release page after they have been reviewed.
Considerations: You must be a review coordinator to update the review status.
From the Document > Release page, select one or more documents.
Expand the Actions menu, and then select Apply review status. The apply review status dialog box opens.
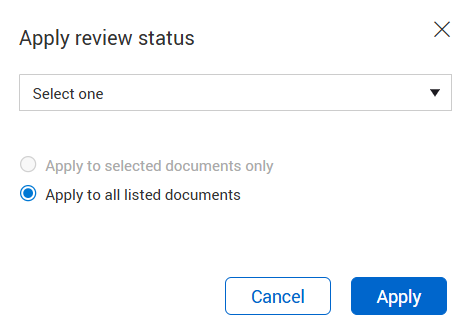
Select the status you want to apply.
Optionally, you can select whether to apply the review status to all listed documents.
Click Apply.
Summary: Nominate a review status from the Document > Review page when you want to quickly suggest a review status for multiple documents.
Considerations: Any reviewer can nominate a review status. The Allow reviewers to nominate a review status setting must be enabled for the reviewer to nominate a review status. A review coordinator can then apply the review status.
From the Document > Review page select one or more documents.
Expand the Actions menu, and then select Apply review status. The apply review status dialog box opens.
Select the status you want to apply.
Optionally, you can select whether to apply the review status to all listed documents.
Click Apply. The status shows in the Review Status column of your Review page and in the Reviewer Review Status column of the review coordinator's Release page.
Some projects require the ability to download or export each document that contains all review comments and markups made during the review workflow but prior to the consolidation of the markups and comments and subsequent release of the document.
This option is available in the PDF viewer only and is only supported with Adobe.
From the PDF viewer, expand the Actions menu, and then select Download pdf files with private and public markups.
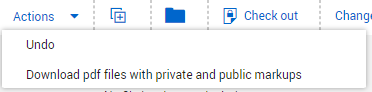
The PDF files are provided in a zip file.
Extract the zip file.
Open thePDF file.
If by mistake you chose not to publish a comment, you can now mark the private comments as public.
Only review coordinators and administrators can change private comments to public.
From the Comments tab, expand the Actions menu, and then click View private comments to see a list of all comments that have not been published.
Select the comments you want to make public, and then click Make comments public.

You can group entries in the Document release register by available register columns to help you quickly locate documents.
The grouping tool, which is shown as a gray bar above the column headings, lets you drag and drop a column heading to group by that column. For example, if you drag the Sts column to the bar, the documents are grouped by status. In the image below, the documents are grouped by status in ascending order. The documents with no status would come first, followed those with IFC status and then those with IFR status.
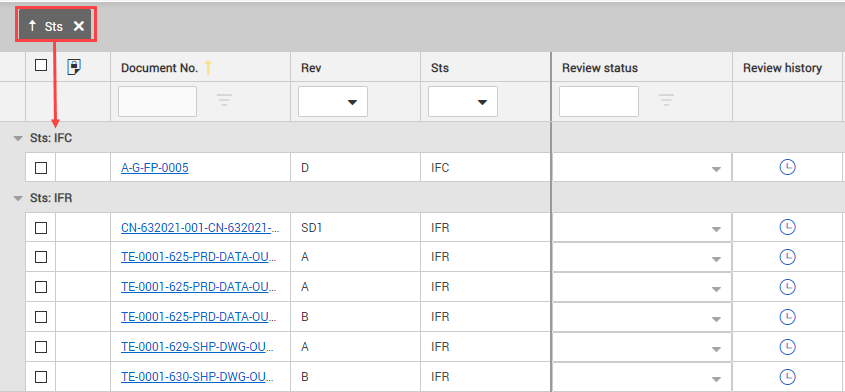
You can click the arrow next to the column name in the tool to change the order from ascending to descending. You can expand and collapse the groupings, so you can find the document you are looking for quickly.
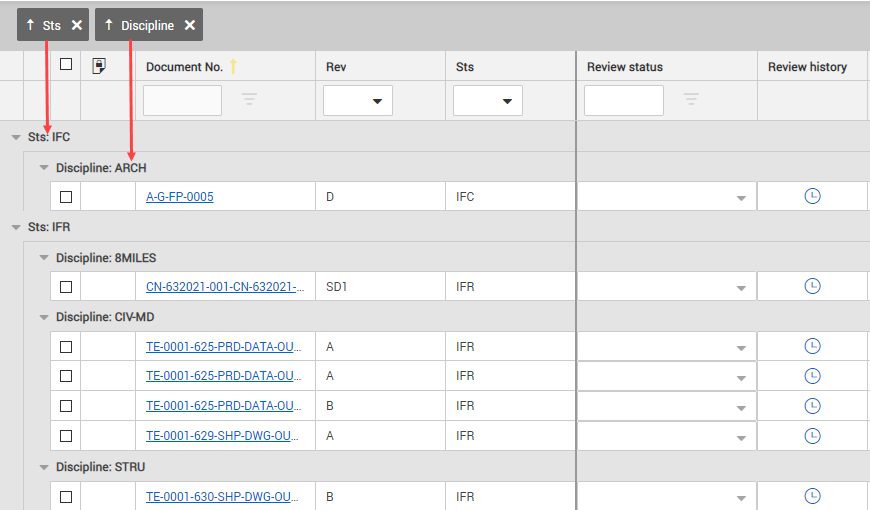
To use multiple groups, you can drag multiple column headings to the grouping tool. The documents are grouped in the order the headings are placed in the tool. For example, if you were to add the Discipline column to the scenario above, the documents would be grouped by status and then discipline within the status.
Additional Information
9977 N 90th Street, Suite 250 Scottsdale, AZ 85258 | 1-800-637-7496
© 2024 InEight, Inc. All Rights Reserved | Privacy Statement | Terms of Service | Cookie Policy | Do not sell/share my information