Products
Solutions
Resources
9977 N 90th Street, Suite 250 Scottsdale, AZ 85258 | 1-800-637-7496
© 2024 InEight, Inc. All Rights Reserved | Privacy Statement | Terms of Service | Cookie Policy | Do not sell/share my information

You can create and send new mail directly from the Mail Register.
Summary: Create new mail to communicate with other project participants.
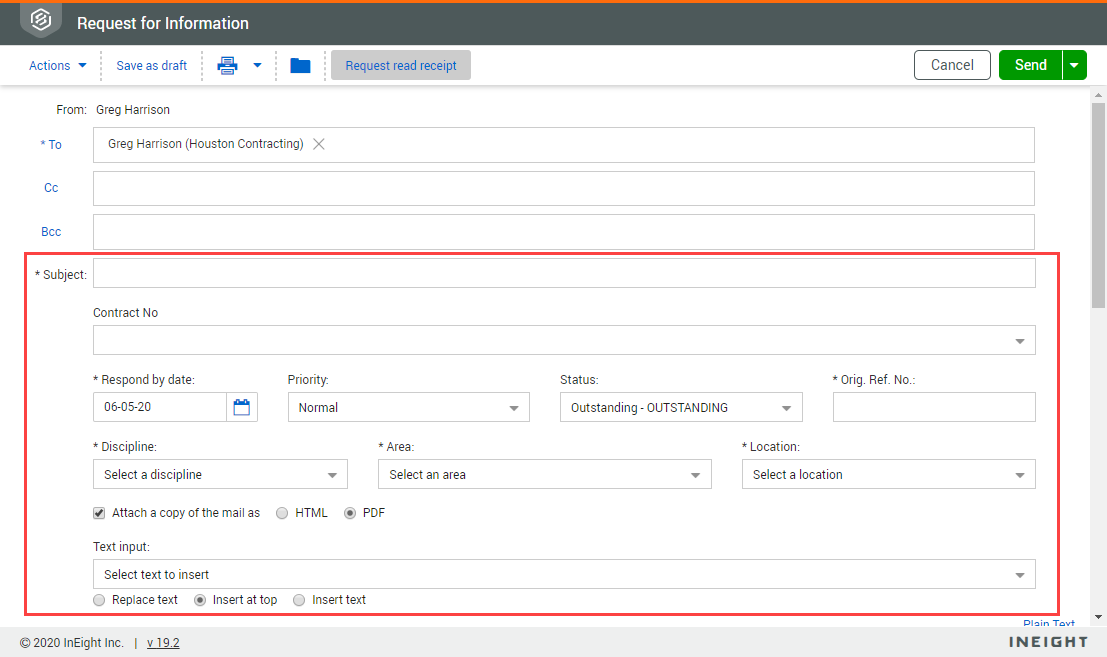
Click the Add icon, and then select the type of mail. The mail Details page opens.

Enter the recipients in the To field and optionally in the Cc and Bcc fields. If you want to select recipients from a company list, click the field label. The Select recipients dialog box opens.
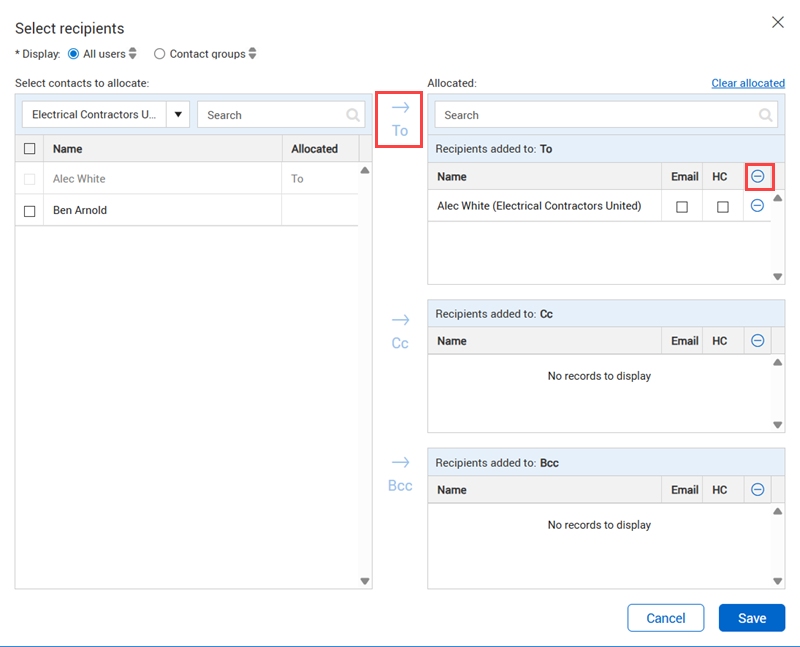
Select the company, and then select the names of the recipients. Use the arrow icons to move the recipients to the applicable Allocated section. If you want to remove a recipient, click the Remove icon next to their name. If you want to remove all recipients in a section, click the Remove icon at the top of the section.
Enter the mail details.
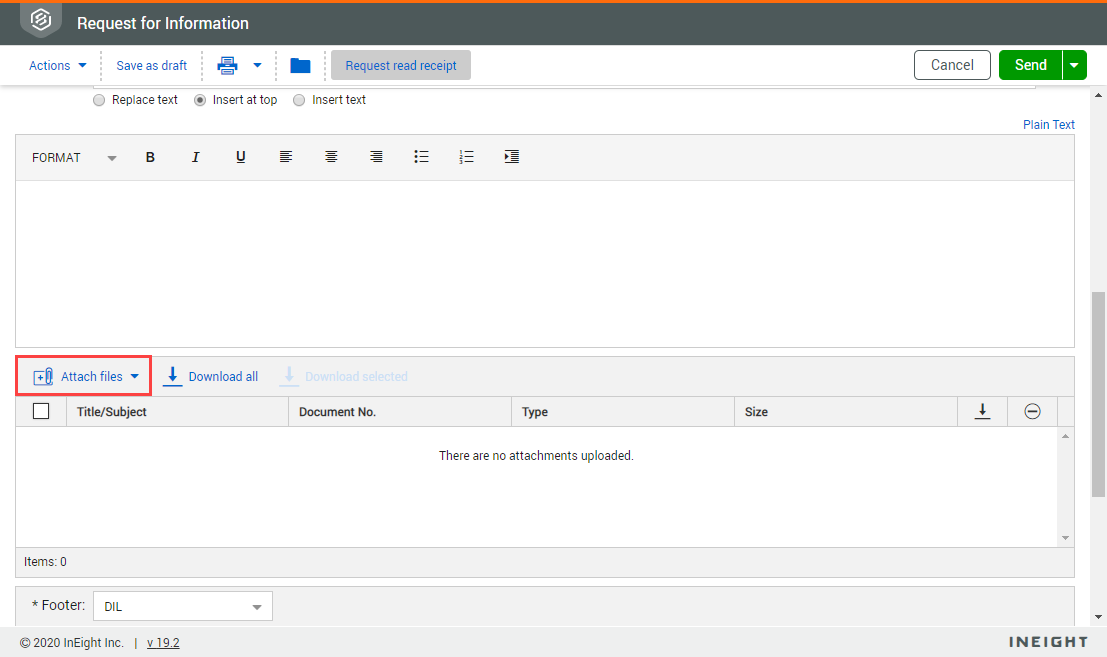
To use a custom footer, scroll down and select a custom footer from the drop-down menu.
To make internal notes about the mail, scroll down and enter information into the Action note and Response fields.
Attach a PDF or HTML copy of the mail by selecting the check box above the message field.
Enter a message in the message field.
Click Attach files to upload files.
If you are not ready to send the mail you can select Save as draft to save the mail as a draft. If the Assign a reference number when saving a draft project setting is selected, Document assigns a reference number. If the setting is unselected, draft mails are assigned a temporary reference number in the format DRAFT-COMPANYID-AUTOSEQUENCE. This number is replaced with the actual mail reference number when the mail is sent. You can click the arrow next to Save to choose from additional options, send and close out the mail or send it for review.
Click Send in the top right corner. The sent mail is shown in the Mail Sent items register. If the mail is large, and processing takes place in the background, a processing icon shows to the left of the item in the register. When processing is complete, a check mark icon shows. If the process was unsuccessful, an exclamation point shows.
What's next: Click the Print icon and select Print preview to preview the mail. Click the Folder icon to file the mail in a folder.
Additional Information
9977 N 90th Street, Suite 250 Scottsdale, AZ 85258 | 1-800-637-7496
© 2024 InEight, Inc. All Rights Reserved | Privacy Statement | Terms of Service | Cookie Policy | Do not sell/share my information