
Products
Solutions
Resources
9977 N 90th Street, Suite 250 Scottsdale, AZ 85258 | 1-800-637-7496
© 2024 InEight, Inc. All Rights Reserved | Privacy Statement | Terms of Service | Cookie Policy | Do not sell/share my information

This is a preview of the upcoming release. General release is available starting 28-MAY-2026.
*Updated 09-JUL-2026
Prevent schedule date changes for existing reviewers – You can now prevent changes to the schedule completion date for existing reviews when the workflow is updated with new reviewers. ![]() Read more
Read more
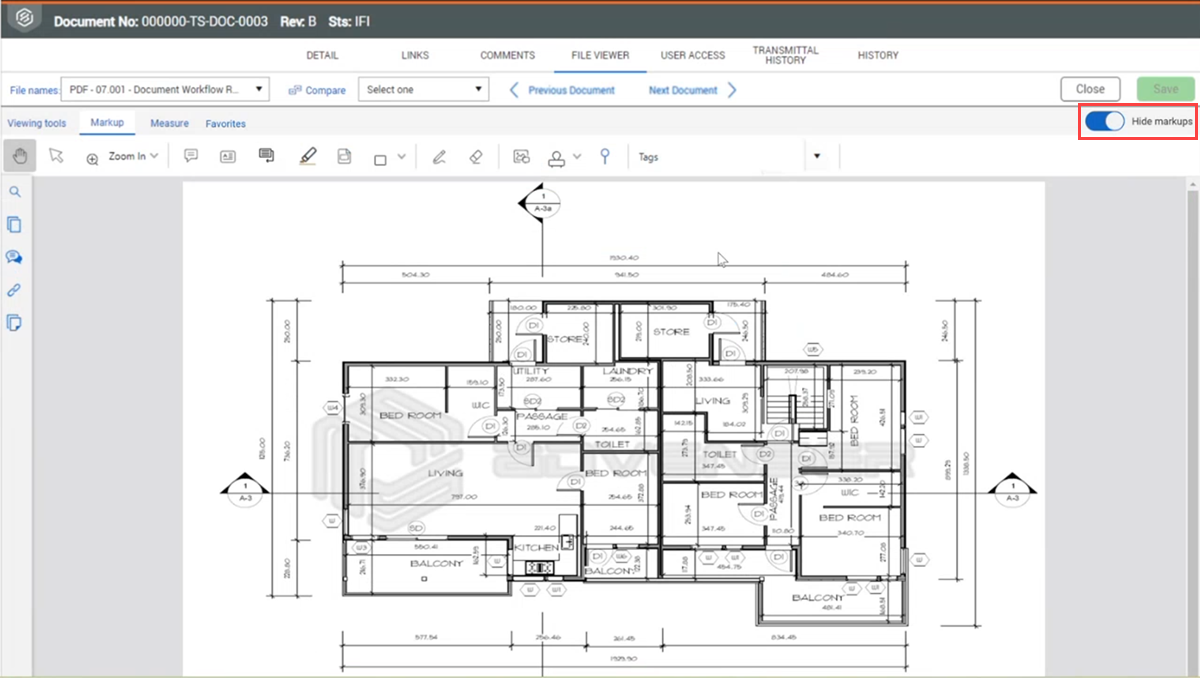
Hide annotations in the PDF viewer – You can now hide all annotations in the PDF viewer, so with a single click you can view a clean page without markups. ![]() Read more
Read more
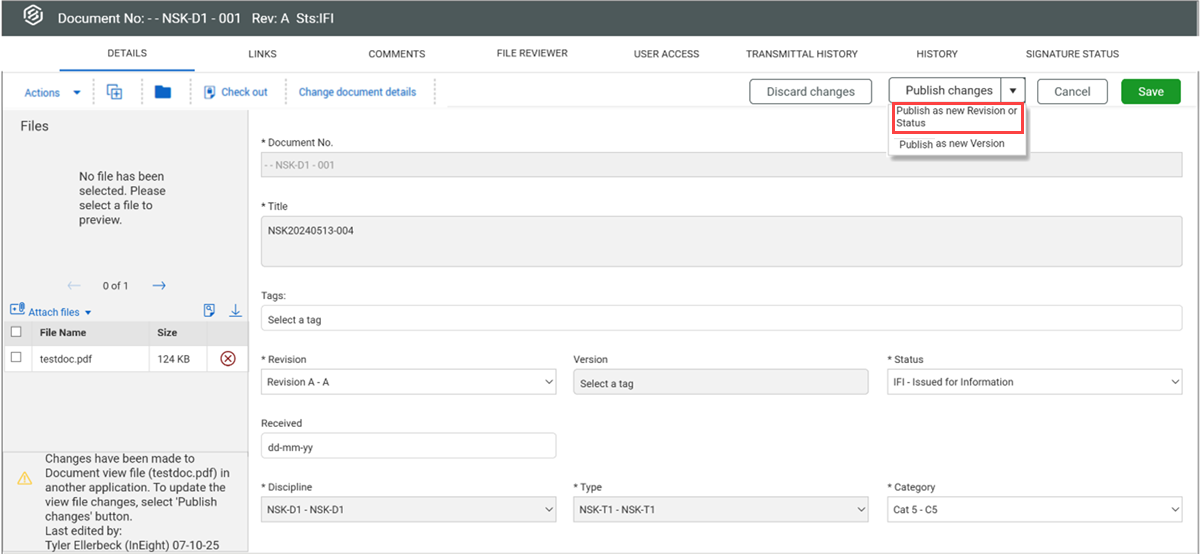
Publish Office Online document as a new status – When publishing a document from Office Online, you now have the option to publish the document as a new status, so you do not have to change the revision to publish document updates. ![]() Read more
Read more
*Set register pagination user preference at the project level – You can now set the user preference for the pagination option for registers at the project level for all users. ![]() Read more
Read more
Reset two-factor authentication – Administrators can now reset two-factor authentication, so they can assist users when there are authentication issues. Resetting two-factor authorization is not enabled by default. For more information, contact your InEight representative.
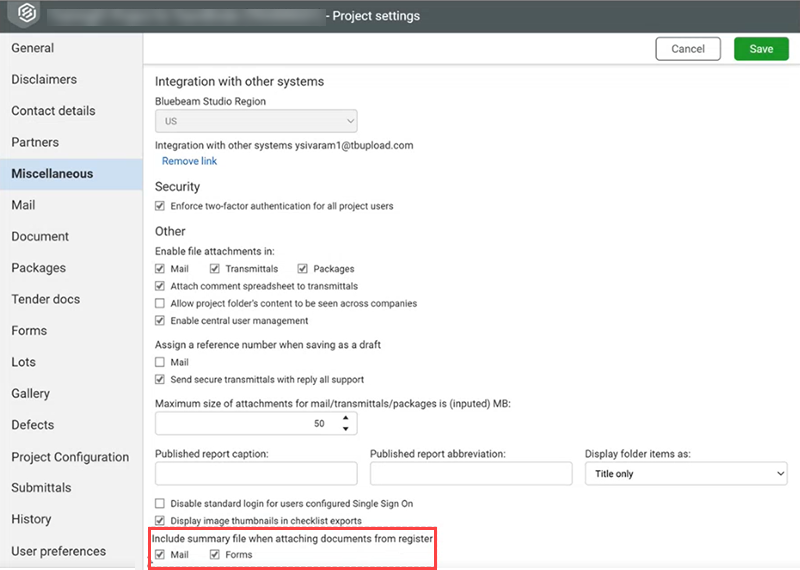
Exclude attachment summary file – You can now specify whether to include or exclude the summary file that is automatically generated for when you add an attachment to a form or mail. ![]() Read more
Read more
Submittal status in notifications – After a submittal has been issued to the issuing company, the submittal status now shows as Outstanding in the notification. Previously, the submittal status showed as Draft.
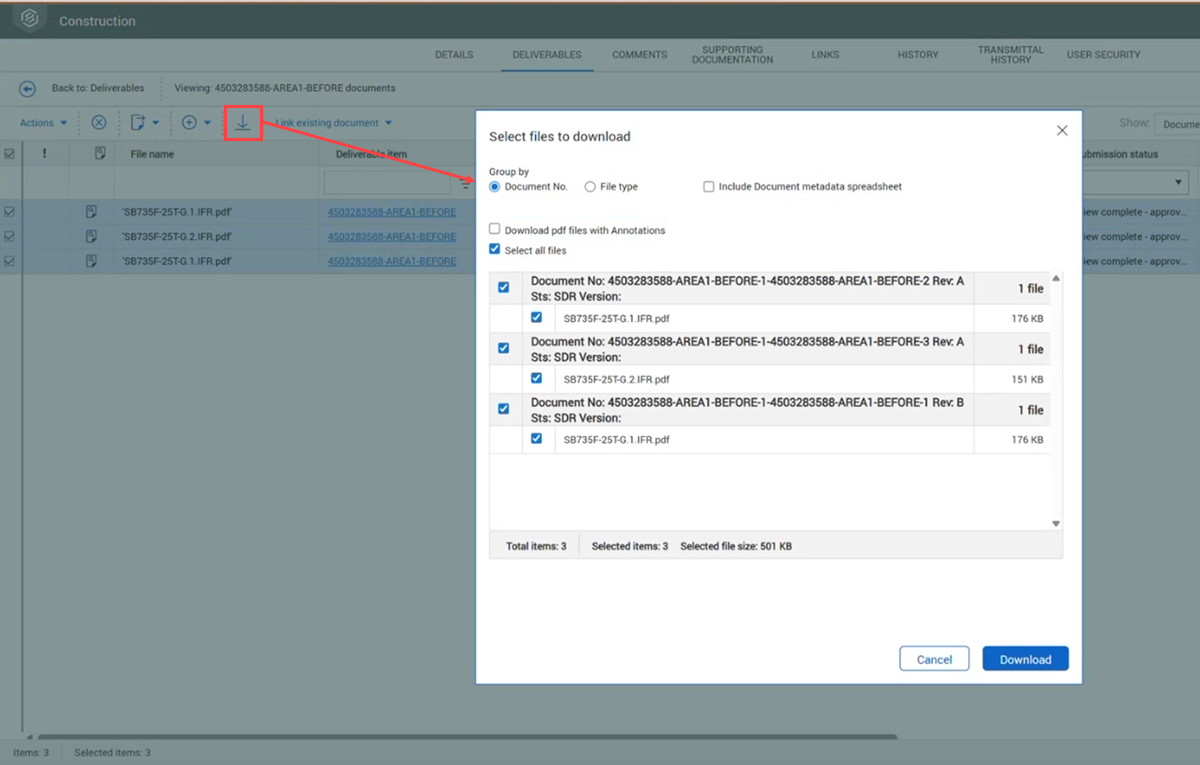
Bulk download from Documents page for managing company – The bulk download feature is now available to the managing company on their Documents page. Previously, you had to download each document individually. ![]() Read more
Read more
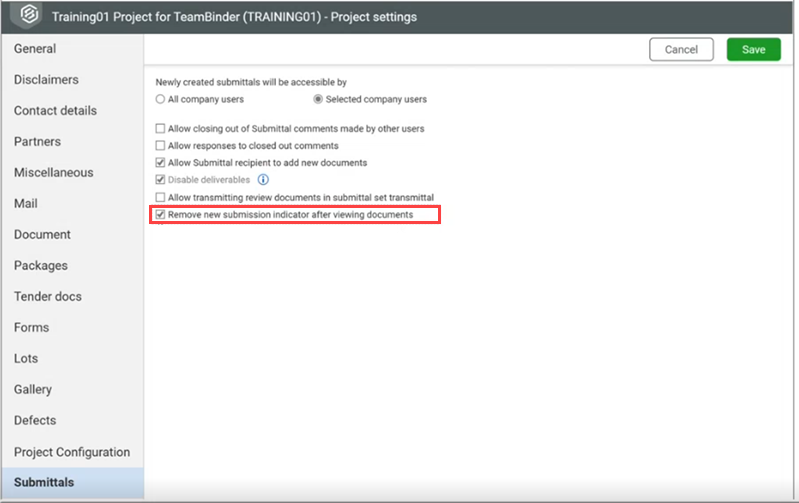
Manage new submissions manually – A new project setting lets you specify whether to have Document automatically remove the new submission indicator or to remove it manually. ![]() Read more
Read more
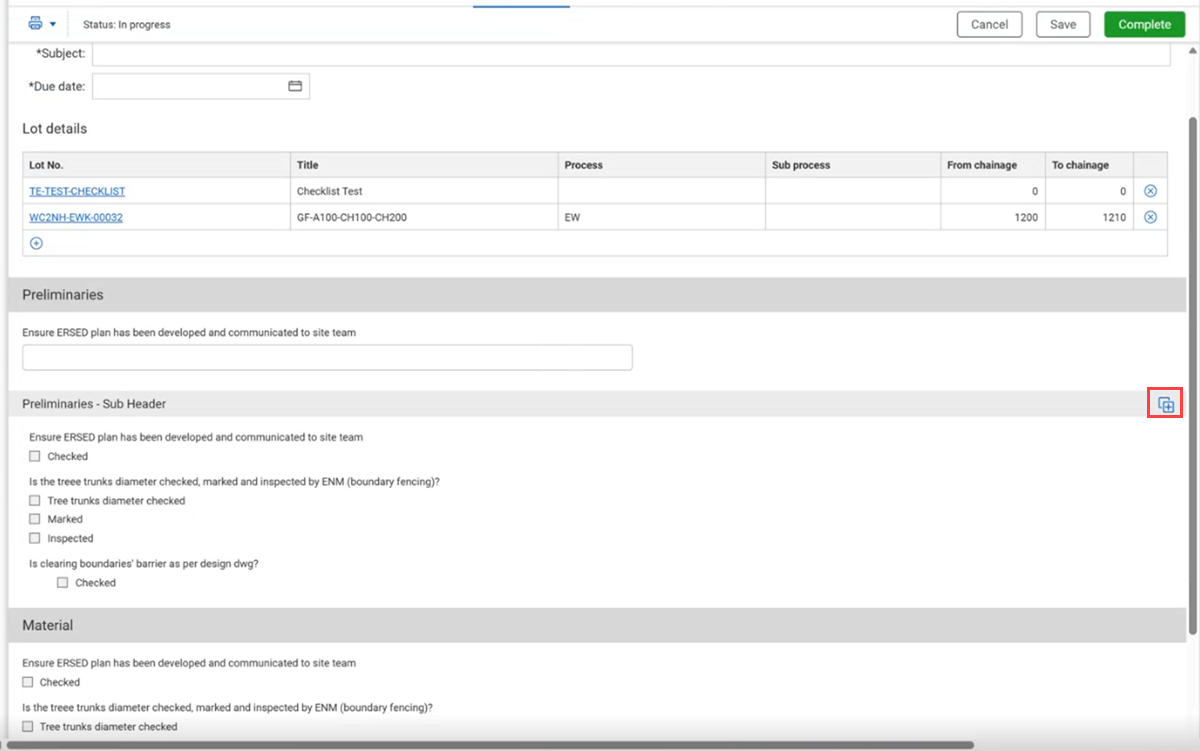
Add dynamic sections to a checklist – Checklist sections can now be configured to be duplicated so that multiple users can complete them. The Dynamic section type has been added to the Checklist builder, which lets checklist users duplicate a section. ![]() Read more
Read more
Form type history – The History tab has been added to the Configure Form Types dialog box, so you can track changes to workflows, distribution, and statuses for the form type.
Submittal section in the Form builder supported in all sections – You can now place the Submittal section in any part of a form when using the Form builder. Previously, you could only place the Submittal section in the Initiator section.
Send close-out notification for each form – You can now request that close-out notifications be sent at the point of closure instead of in the daily summary notification. For more information, contact your InEight project delivery team.
Rich text in the Form builder Label control – The Label control type in the Form builder now supports rich text.
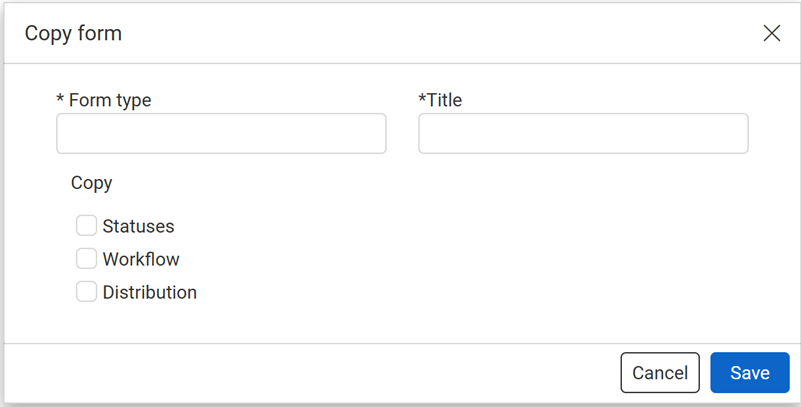
Duplicate form type – You can now duplicate a form type. The duplicate copies all the controls and formatting of the form type to be published in the Form builder. ![]() Read more
Read more
Bulk selection for send method – When you select mail recipients, you can now bulk select whether the recipients receive email and hard copies.
Document details link in Transmittals – When you access the download section of a transmittal, the Transmittal download dialog box now includes a link to the document’s Details page in the Document No. field.
Authentication data Session history report – The Session history report (02.020) now includes a column indicating whether users have two-factor authentication enabled, providing additional security visibility for stakeholders.
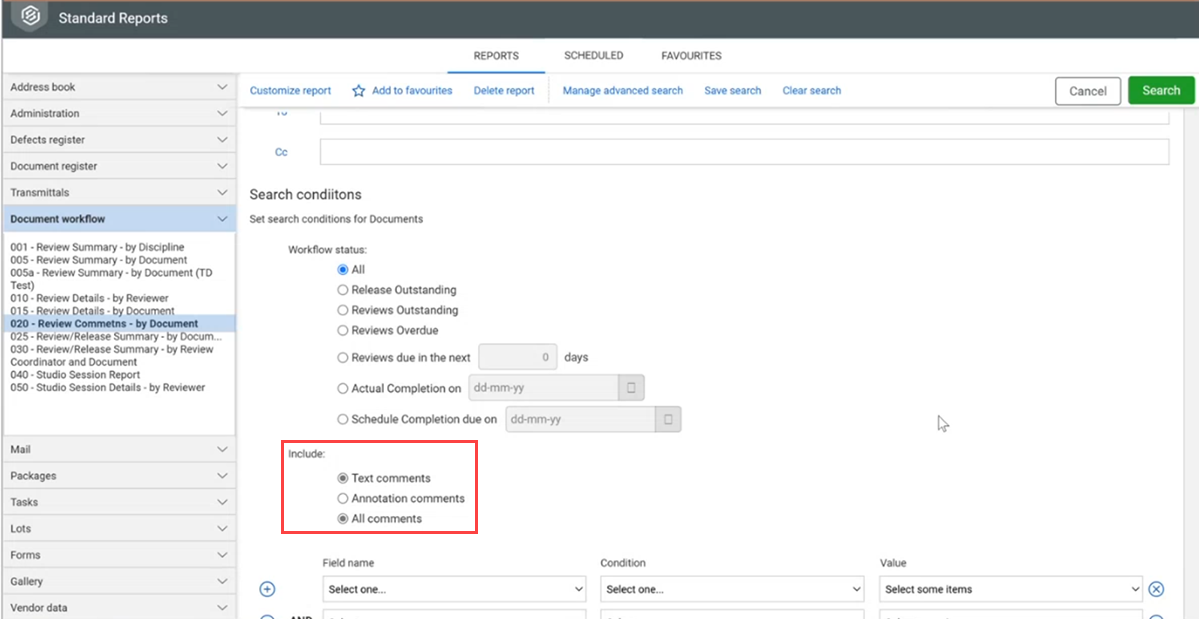
Review Comments report comment type filters – The Review Comments – by Document report (07.020) now has filters to include text comments, annotation comments, or both. Previously, only text comments were included. ![]() Read more
Read more
Multiselect fields in dynamic folders – Multiselect fields are now available when you set up a dynamic folder.
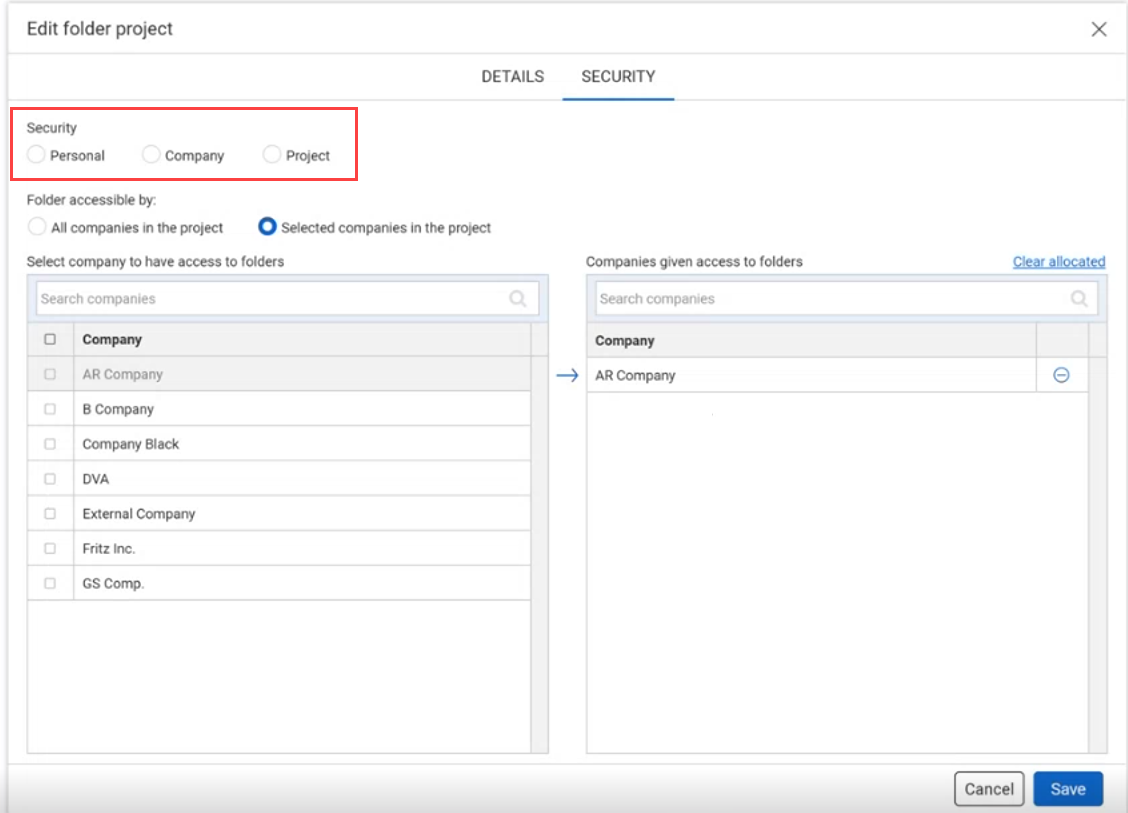
Assign folder access based on company – You can now specify which companies have access to a folder. Previously, you could only give folder access to your company and had to use the Project access, which gives access to all companies. ![]() Read more
Read more
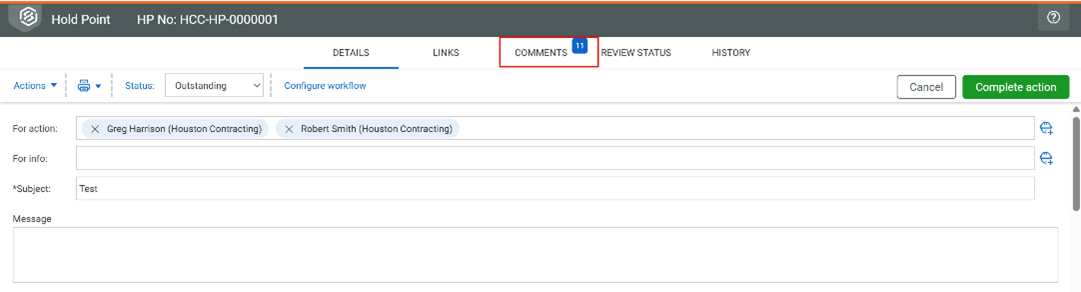
Details tab item count – When you are on a Details page, badges on the Documents, Attachments, and Comments tabs now show the item count. ![]() Read more
Read more
New Document calls – The Replace view file and Resubmit for review calls are now available in the APIs.
Additional Information
9977 N 90th Street, Suite 250 Scottsdale, AZ 85258 | 1-800-637-7496
© 2024 InEight, Inc. All Rights Reserved | Privacy Statement | Terms of Service | Cookie Policy | Do not sell/share my information