Products
Solutions
Resources
9977 N 90th Street, Suite 250 Scottsdale, AZ 85258 | 1-800-637-7496
© 2024 InEight, Inc. All Rights Reserved | Privacy Statement | Terms of Service | Cookie Policy | Do not sell/share my information


A project team is working on a design-build project for an industrial plant. The team is building out a high-level estimate and one of the team members is tasked with providing an initial schedule to go with the estimate, based on the requirements and specifications provided by the client.
This section covers how to create planning packages, WBS items and activities to build out a conceptual, high-level schedule.
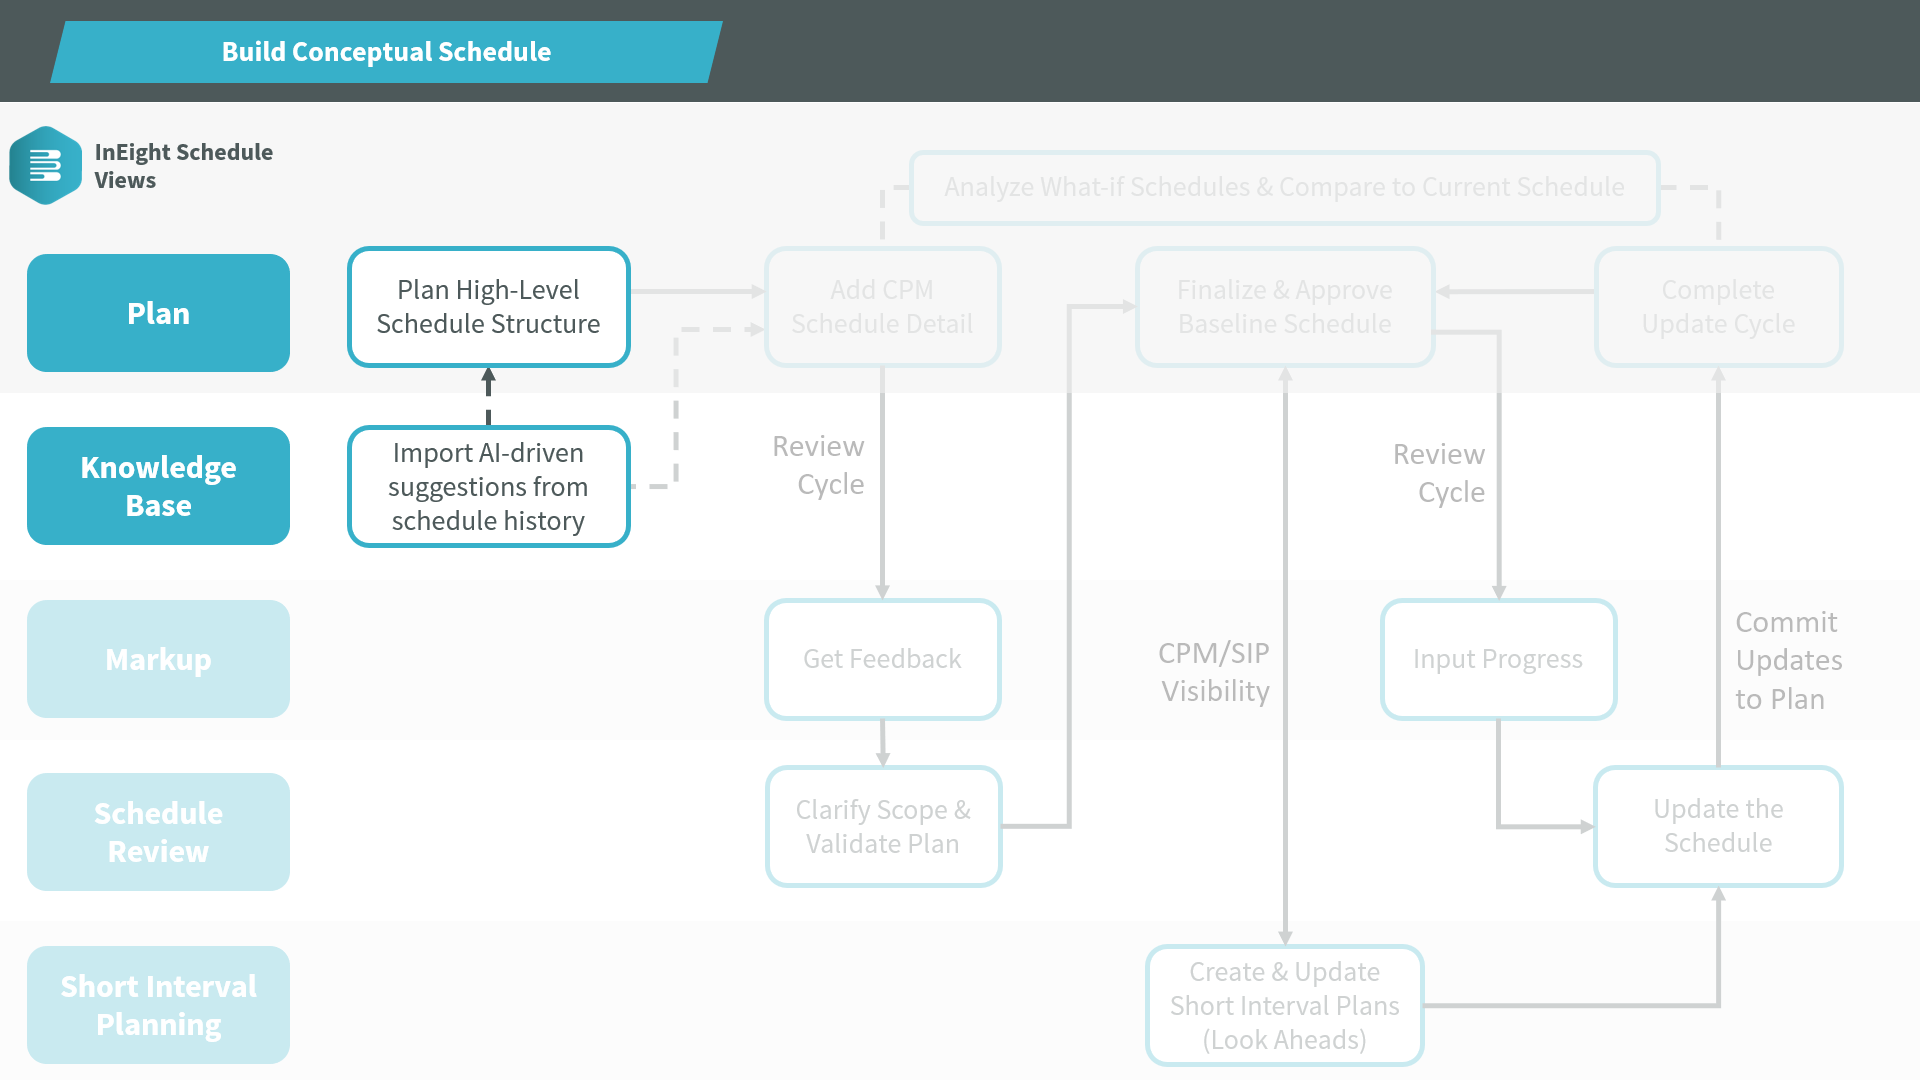
As a project planner, you can schedule at the highest level using planning packages. Planning packages are summary activities representing main areas of work for the project, so you can start visualizing the sequence and timeline of work at a high level.
Let’s look at an example.
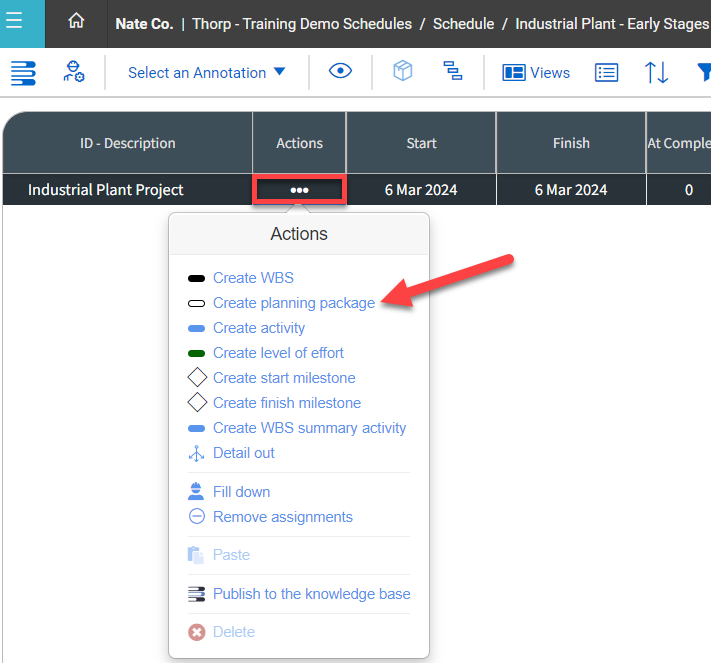
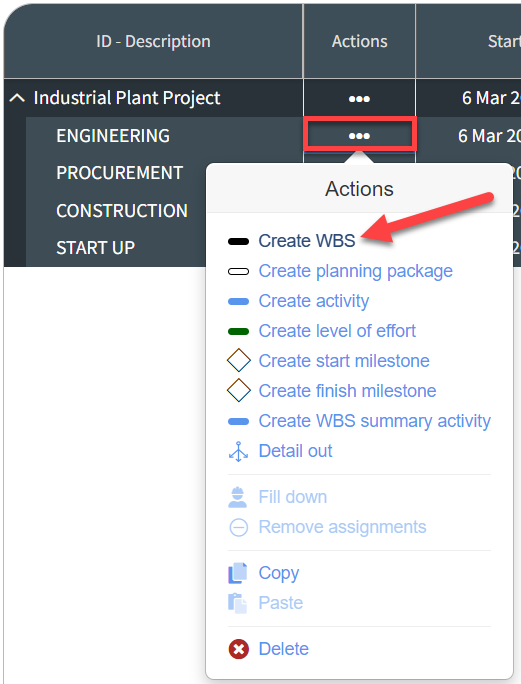
Within InEight Schedule Plan View for your project, you click on the Actions ellipses for the row you want the packages to go under (in this case Industrial Plant Project).
You then select Create planning package.
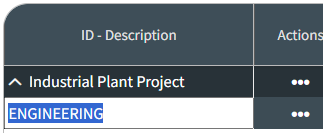
This adds a new planning package. You double click the ID - Description field to rename it to fit your needs (in this case “ENGINEERING”).
You add additional WBS items as needed to detail out the planning work.
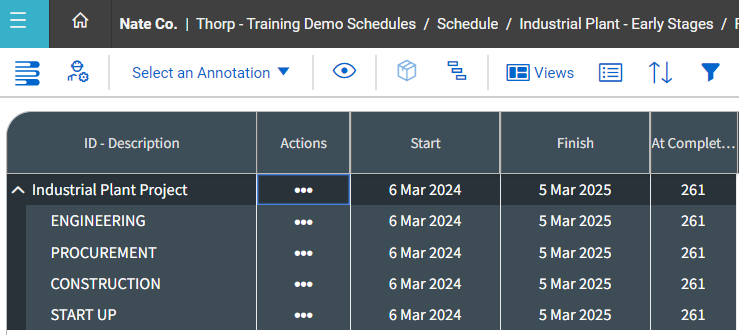
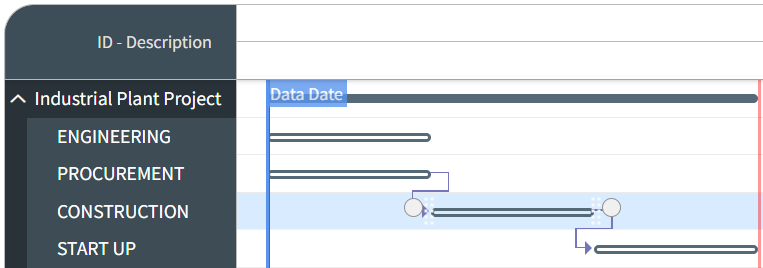
Each planning package is represented as a white bar with a grey outline on the Gantt chart.
You can:
Drag the bars to move packages around.
Click and drag to shorten or extend package durations.
Drag from the circles at the end of bars to apply logic between packages.
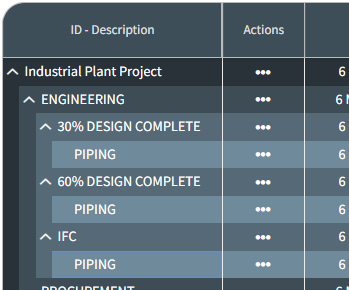
As the project progresses, you can add detail under your planning packages to further plan out your work. You will likely add subordinate-level items as WBS items and activities, so your plan naturally evolves into a more detailed WBS structure with activities for your project schedule.
Adding child WBS items or activities to a planning package will automatically convert the planning package to a WBS.
Follow the steps below to see an example of how this works.
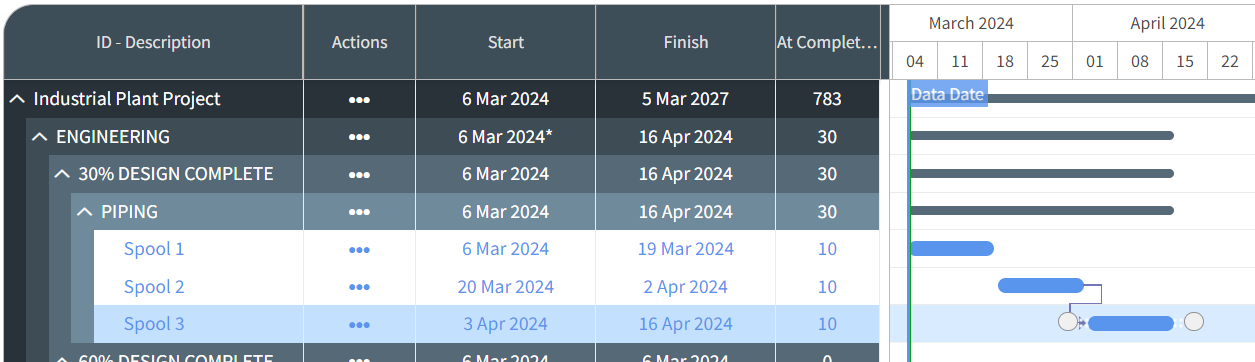
In this case, let’s assume you are planning out the design work for Piping under an ENGINEERING planning package.
You click on the Actions ellipses for ENGINEERING and select Create WBS.
This creates a subordinate (child) WBS item, which you rename by double-clicking in the ID – Description field.
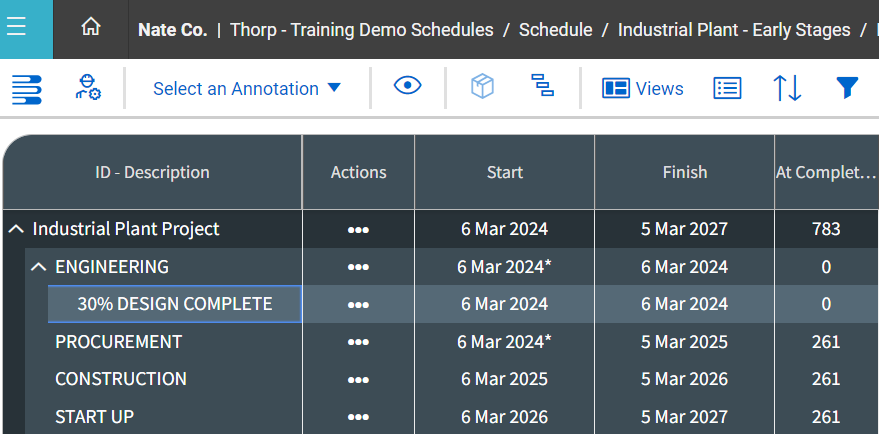
You add additional WBS items as needed to detail out the planning work.
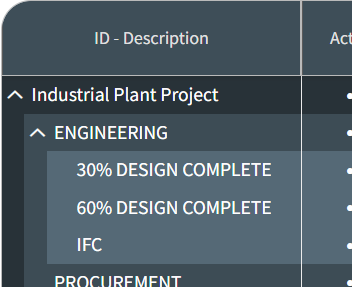
In this case, you are focusing on design work for Piping, so you add an additional “Piping” WBS item under each Engineering WBS item.
As you communicate with the Design team, you plan out their engineering activities. In this case, design work is commencing on a pipe rack consisting of 3 spools.
On the Actions ellipses for the 30% Design Complete > Piping WBS, you select Create activity.
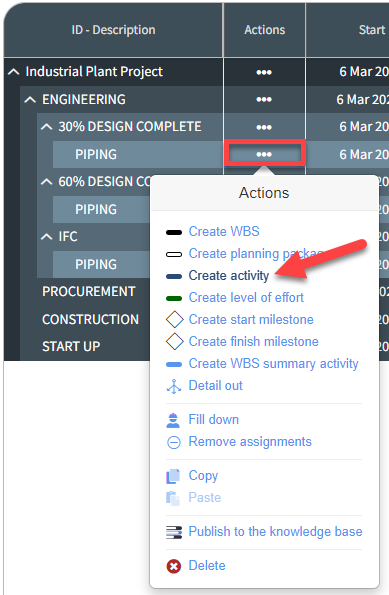
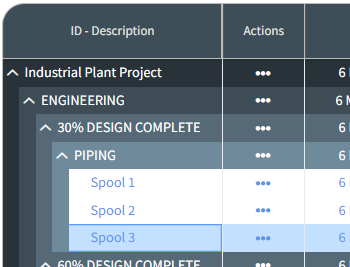
You add activities for the other two pipe spools.
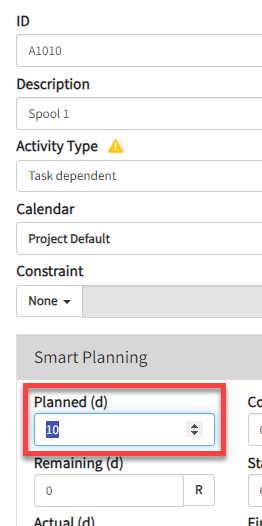
You add durations for each activity, either by dragging the activity bars or by inputting the duration on the Iris side panel.
You can also enter duration directly in the Planned Duration column.
Note that activities show up in the schedule as blue bars and your WBS items show up as solid grey bars.
You can apply logic to schedule out your activities as needed by dragging the end of one activity to another or by using the Logic section of the Iris panel.
Additional Information
9977 N 90th Street, Suite 250 Scottsdale, AZ 85258 | 1-800-637-7496
© 2024 InEight, Inc. All Rights Reserved | Privacy Statement | Terms of Service | Cookie Policy | Do not sell/share my information