Products
Solutions
Resources
9977 N 90th Street, Suite 250 Scottsdale, AZ 85258 | 1-800-637-7496
© 2024 InEight, Inc. All Rights Reserved | Privacy Statement | Terms of Service | Cookie Policy | Do not sell/share my information

This section covers how to apply progress updates from the field to the schedule.
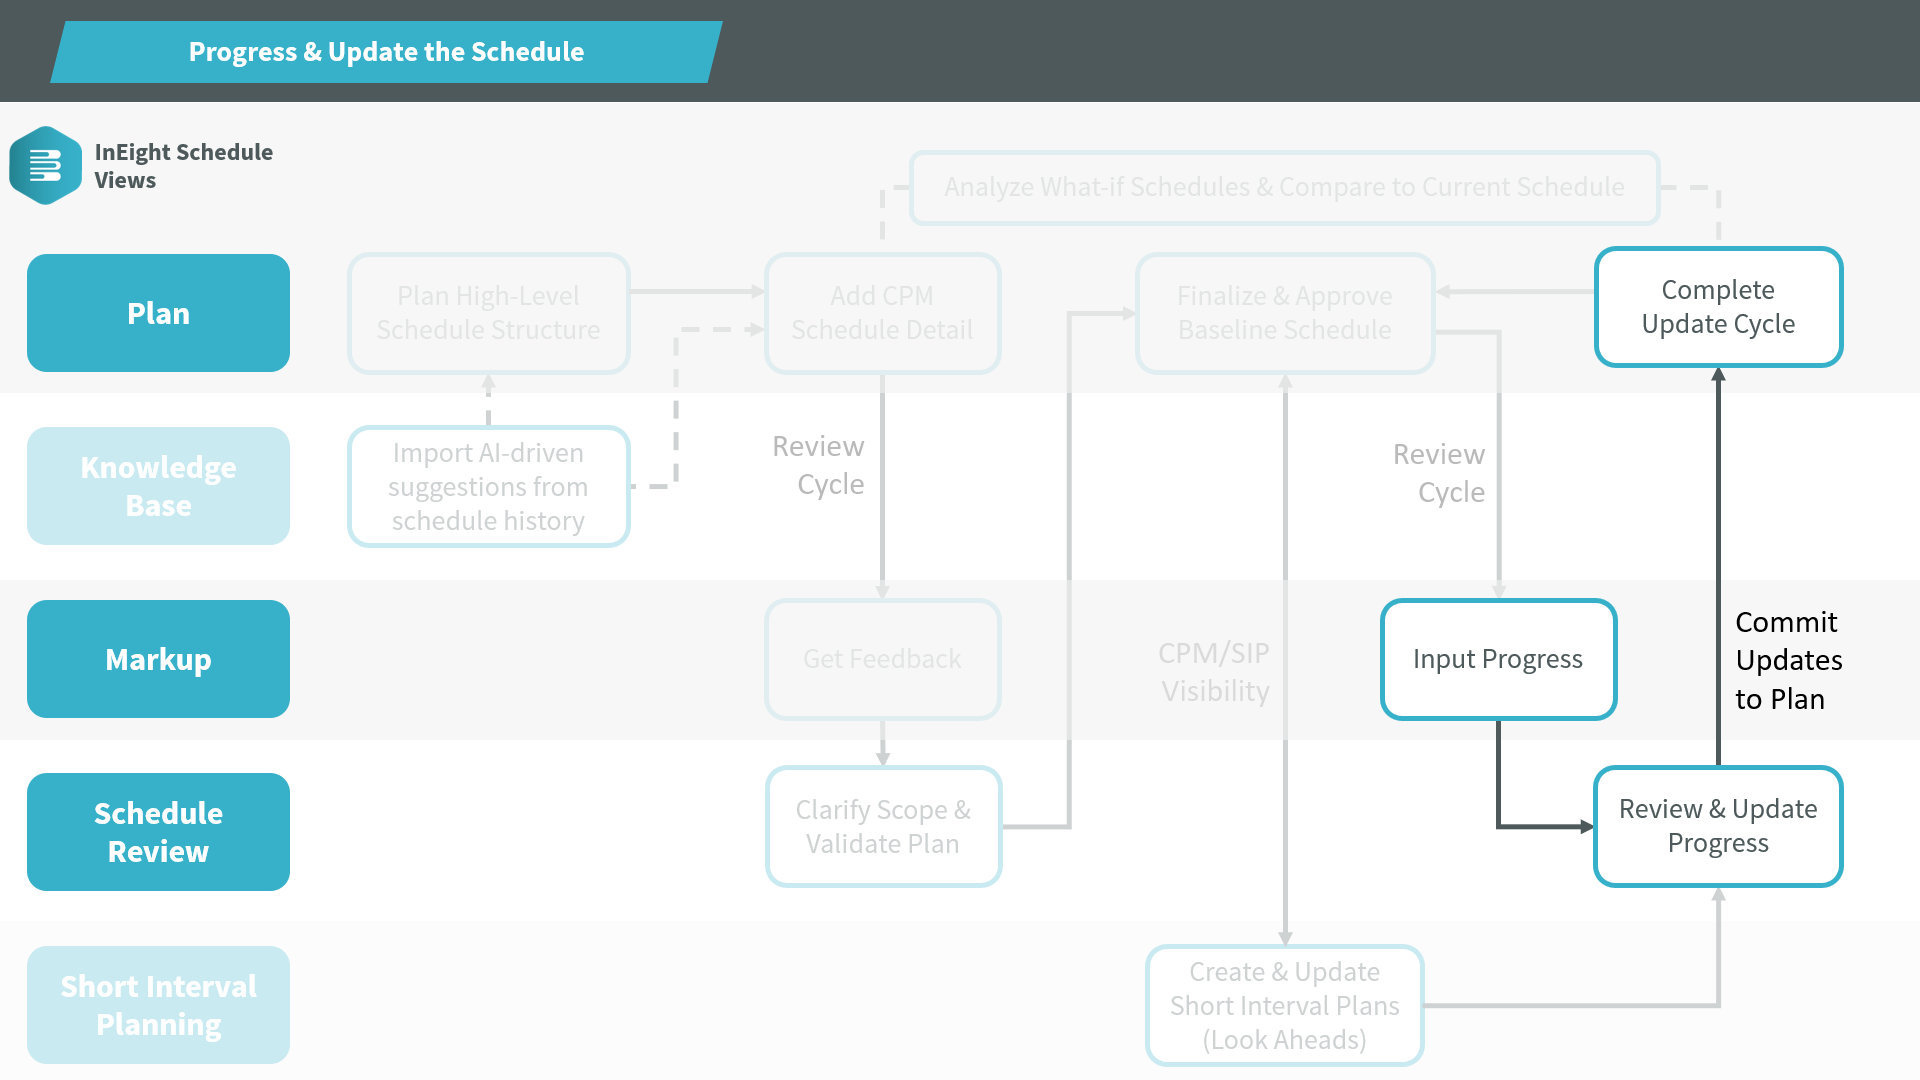

The scheduler has received back updated progress spreadsheets from his field personnel. He updates the activities in InEight Schedule accordingly.
As the scheduler, you may exchange information with the field through spreadsheets, documents, or other forms of communication at each update cycle.
Follow the steps below to see an example of how these updates can be added to InEight Schedule.
Construction work on the industrial plant is in progress, and you received updates from superintendents via Excel spreadsheets as part of the first update cycle.
To input the updates, you first open the Plan view in your project.

You begin with updates to the Piping work. You select the activity Install Spool 1 and open Smart Planning in the Iris panel.
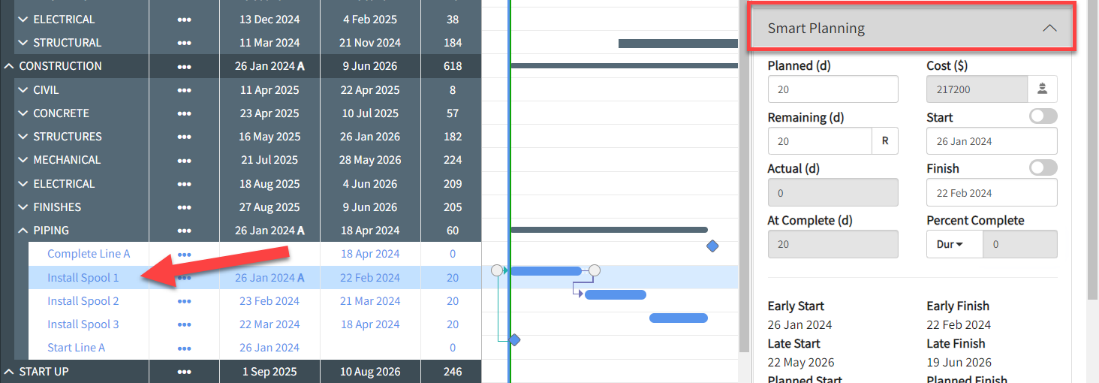
Within the spreadsheet, Spool 1 shows 20% complete. You click the Start toggle and confirm the start date. You then input 20 in the Percent Complete field.
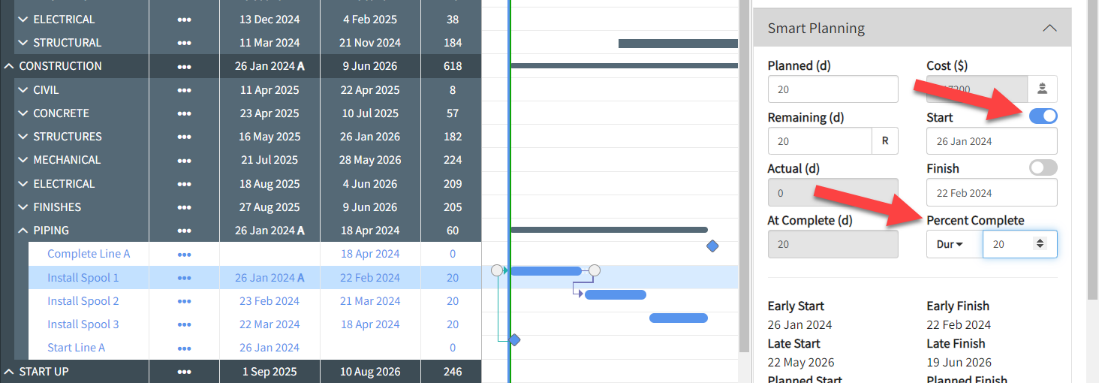
The update has now been added to the schedule activity.
Under Resource Assignments, you can view the Remaining and Actual values for the associated resources.

Access the following link for more information on progressing the schedule:

After launching the review cycle, the scheduler received submitted progress updates from his field employees in the Markup view. The scheduler reviews the updates and applies them to the schedule.
See the steps below for an example of applying updates to the schedule from an update/review cycle.
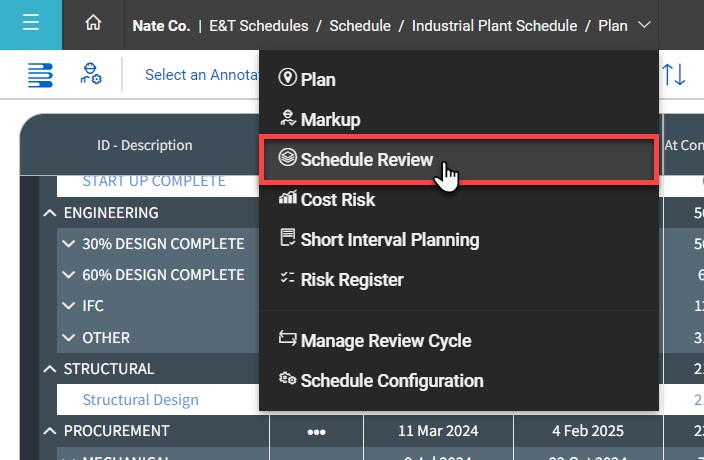
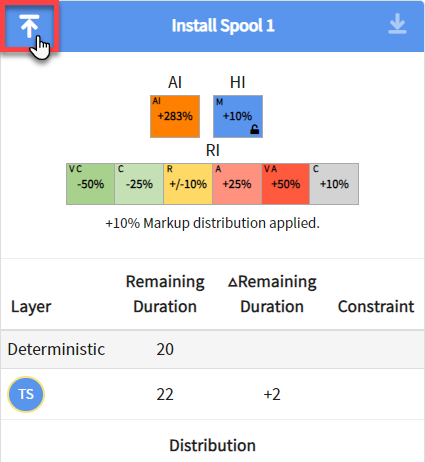
As the scheduler, you receive notifications that the field planners have completed their markups for the latest update/review cycle. You open the Schedule Review view to see their updates.
You click on the first activity under Piping to see its updates.
From the Iris panel, you click the Apply Progress icon.
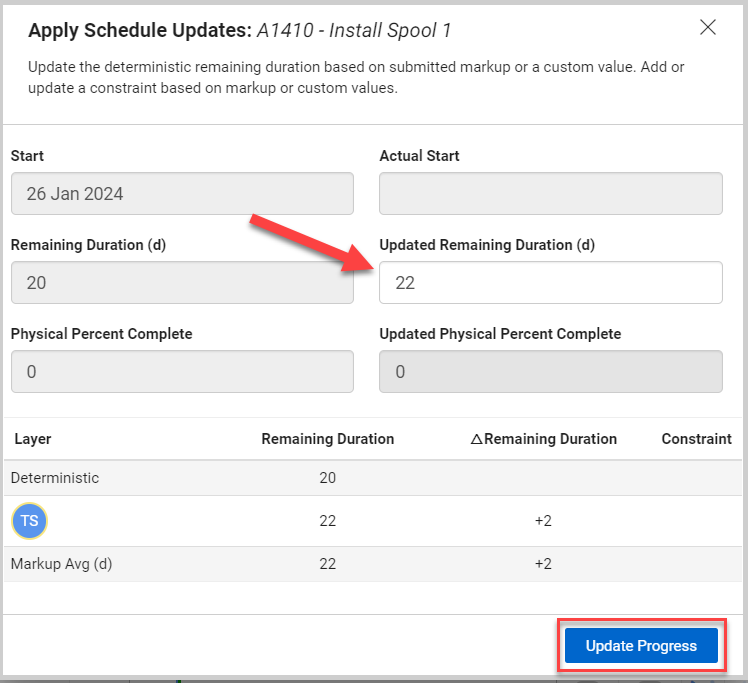
In the Apply Schedule Updates pop-up window, you see that the superintendent has updated the Remaining Duration to 22 days.
You click Update Progress to apply the update.
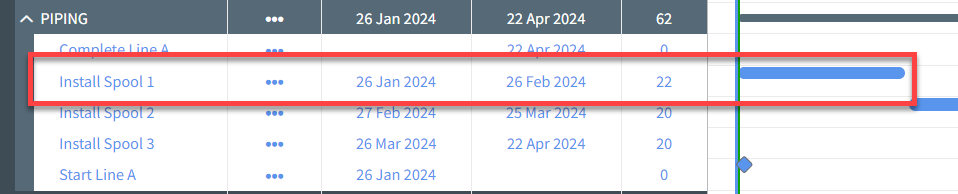
From the Plan view, you can see that the update has been applied to the schedule.
You continue applying updates for each activity in the update/review cycle.
Access the following links to learn more:
Additional Information
9977 N 90th Street, Suite 250 Scottsdale, AZ 85258 | 1-800-637-7496
© 2024 InEight, Inc. All Rights Reserved | Privacy Statement | Terms of Service | Cookie Policy | Do not sell/share my information