Products
Solutions
Resources
9977 N 90th Street, Suite 250 Scottsdale, AZ 85258 | 1-800-637-7496
© 2024 InEight, Inc. All Rights Reserved | Privacy Statement | Terms of Service | Cookie Policy | Do not sell/share my information

Calendars define statutory holidays that apply during a project's life cycle. These holidays directly affect time bumping calculations, especially weekly straight-time thresholds if the stat weekly thresholds are defined. Stat holidays can reduce the number of straight-time (ST) hours allowed in a week. For example, Standard weekly ST threshold being 40 hours compared to a stat holiday week with only 32 hours.
The calendar you assign determines when these reduced thresholds apply.
A default Canada calendar is available which gives you access to the following:
Use it as-is for Canadian projects
Copy and modify it for locations with different statutory holiday dates
Create entirely new calendars for other countries
When creating or editing a calendar, you must define the following fields:
Code - A unique identifier for the calendar.
Description - A clear explanation to describe the calendar.
Country - The country the calendar applies to.
Holiday Rows - The list of statutory holidays.
Holiday Dates - The specific dates those holidays occur.
Go to Data Library > Classifications > Calendars
In the menu, select Add Row.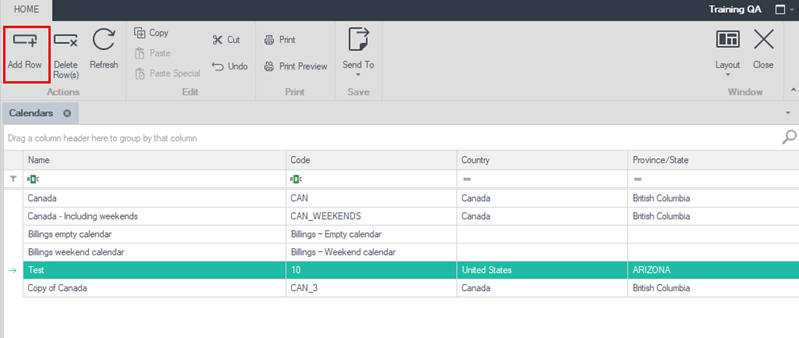
Complete the fields for the calendar. Enter a name, code, country, state and status.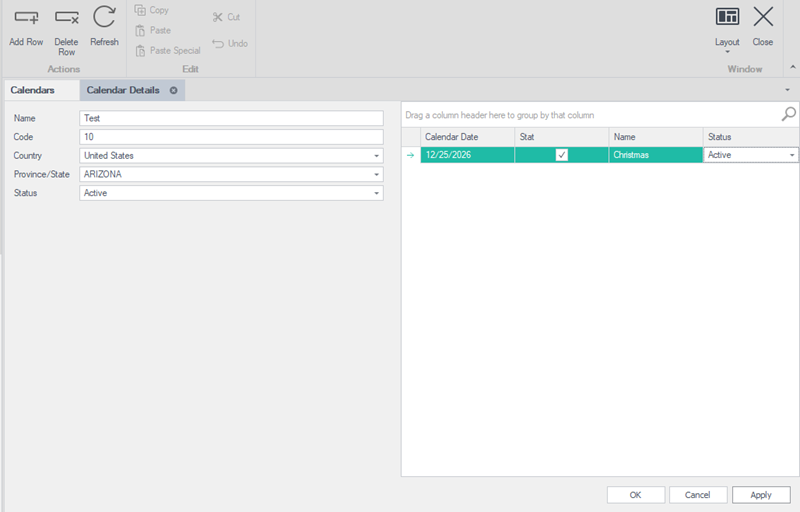
To add a holiday, select Add Row.
Enter the date and holiday name
Select Add Row as needed to add more holidays.
Click Apply to save your changes or click OK to save your changes and close the dialog box.
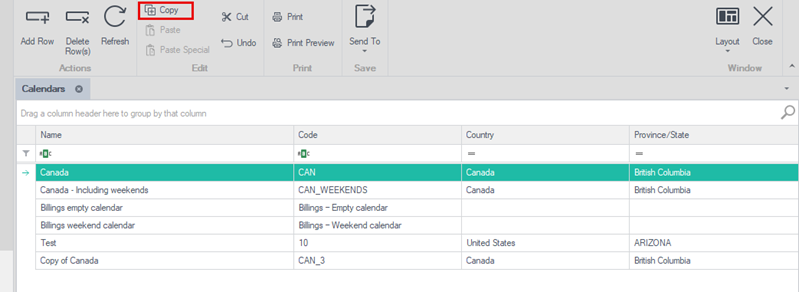
Instead of creating a new calendar, you can copy an existing calendar that is similar and make changes to it.
From the main calendar screen, select the calendar you want to copy.
Select the Copy option from the menu options.
A copy of the calendar is shown in the list. Double-click in the row for the calendar to open it and make changes.
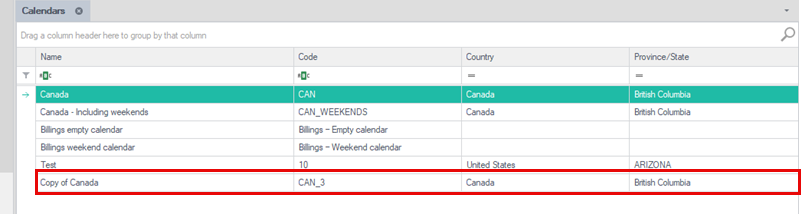
Click Apply to save your changes or click OK to save your changes and close the dialog box.
Additional Information
9977 N 90th Street, Suite 250 Scottsdale, AZ 85258 | 1-800-637-7496
© 2024 InEight, Inc. All Rights Reserved | Privacy Statement | Terms of Service | Cookie Policy | Do not sell/share my information