Products
Solutions
Resources
9977 N 90th Street, Suite 250 Scottsdale, AZ 85258 | 1-800-637-7496
© 2024 InEight, Inc. All Rights Reserved | Privacy Statement | Terms of Service | Cookie Policy | Do not sell/share my information

Time bumping lets you automatically redistribute hours into straight time (ST), overtime (OT), double time (DT) and Double Time and a half (DTH), based on rules you configure. You configure the rules in the Billings Data Library and then enable and apply them at the project level.
All time bumping rules are managed in the Billings Data Library menu. Configurations are at the organizational level which makes them available to be reused across multiple sites.
You can add new configurations, copy and paste existing configurations, and set configurations as inactive.
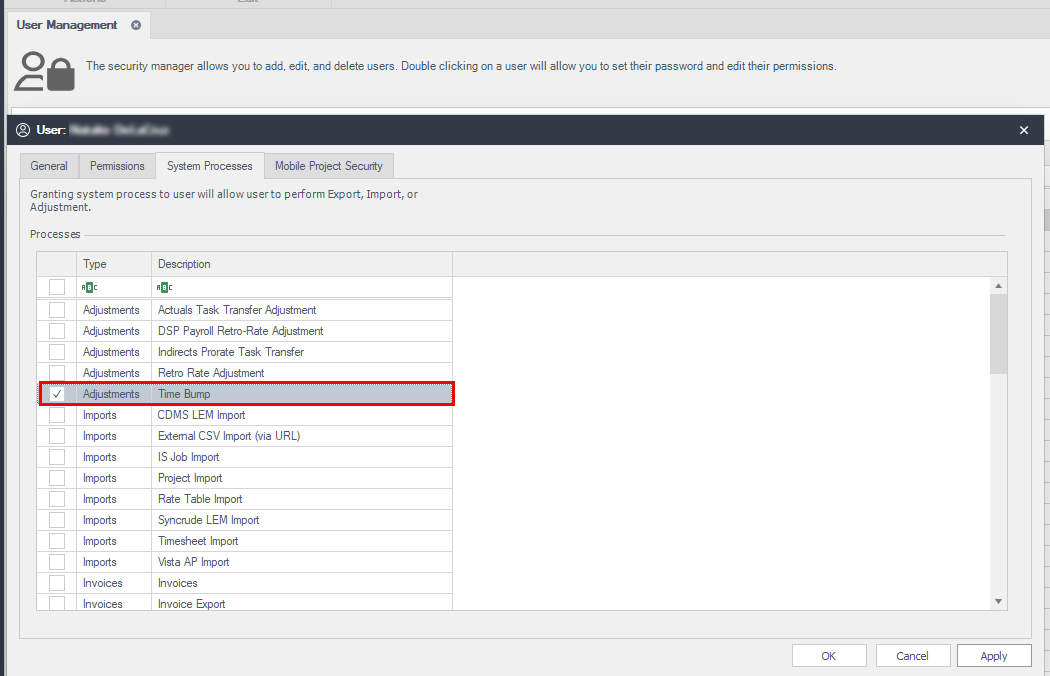
To access the Time Bump process, users must have applicable permissions. Go to Suite Administration > User Management. Double-click a user to open their permissions . Select the System Processes tab and then enable the adjustment type Time Bump. When enabled, you can access Time Bump from Processes > Adjustments > Time Bump. If you do not see the update, go to Help > Refresh Menu to refresh your view.
Each configuration includes the following:
| Title | Action / Description |
|---|---|
| Name and Description |
Provide a name and code for the configuration so you can easily identify and reuse it. |
| Calendar |
Select a calendar that determines how holidays are handled. You can use the default Canada calendar or create custom calendars for different countries or provinces. |
| Daily Maximums |
You can define how many hours are allotted for each category per day:
|
| Weekly Straight-Time Threshold | Defines how many straight-time hours are allowed per week when no stat holiday exists. 40 hours for example. |
| Weekly Straight-Time threshold (Stat week) | If a statutory holiday exists during the week, you can lower the weekly straight-time limit from 40 to 32 hours for example. |
| Optional Weekly OT/DT Thresholds | You can set weekly limits for overtime and double time. Although these are rarely used, these options are available if your business rules require them. |
Time bumping is not automatic; it must be enabled on the site associated with the project. The site is automatically created and assigned to the project, when the project is created in InEight Platform .
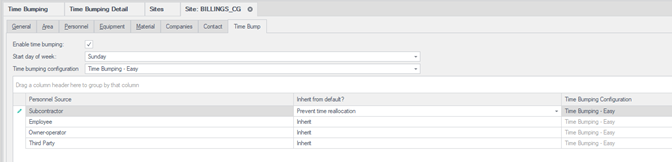
On the site’s Time Bumping tab, you can do the following:
Enable time bumping for the project
Set the week start date
Select the default time bumping configuration
Personnel types come from your organization-wide configurations in Suite Administration. They are part of each resource profile and determine which time bumping rule applies to that person.
When you enable time bumping at the site level, you can set exceptions by personnel type. For each personnel type, you can either exclude them from time bumping or assign a different configuration than the project default. For example, if someone is tagged as an employee in their resource profile, their hours follow the configuration assigned to the employee personnel type.
If salaried employees should not be bumped, you can set the employee personnel type for salaried employees to no time bumping.
Go to Project administration > Sites.
Chose the Site and select the Time Bump tab.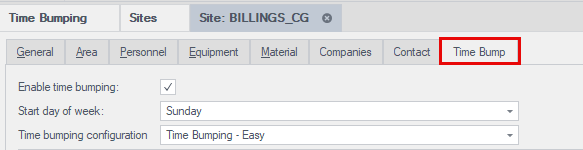
Select the Enable time bumping option
Select the start day of the week
Select the time bumping configuration from the drop-down
Click Ok or Apply
Time bumping is not automatic. You must request it after making sure timesheet hours already exist in Billings for the target week.
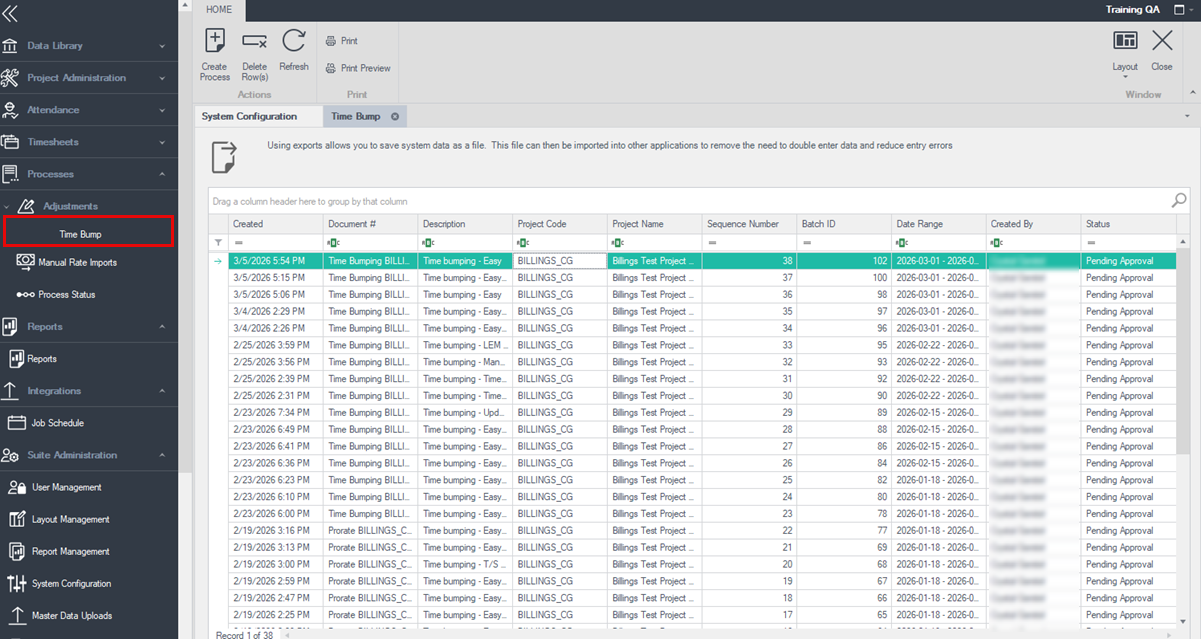
Go to Process>Adjustments > Time bump.
Select the Create Process option.
Select the project.
Select the start date (This determines the Sunday-Saturday week range).
Add a description.
Select Submit.
After the request is submitted, the system applies the configured rules to all timesheets for that week.
If changes to timesheets have occurred after the process was originally generated, a new process can be generated to correct timesheets and can be ran as many times as required to update hours as changes are made.
After the time bump runs, you can open the process results to see which timesheets are adjusted by double-clicking the specific process to view the details.

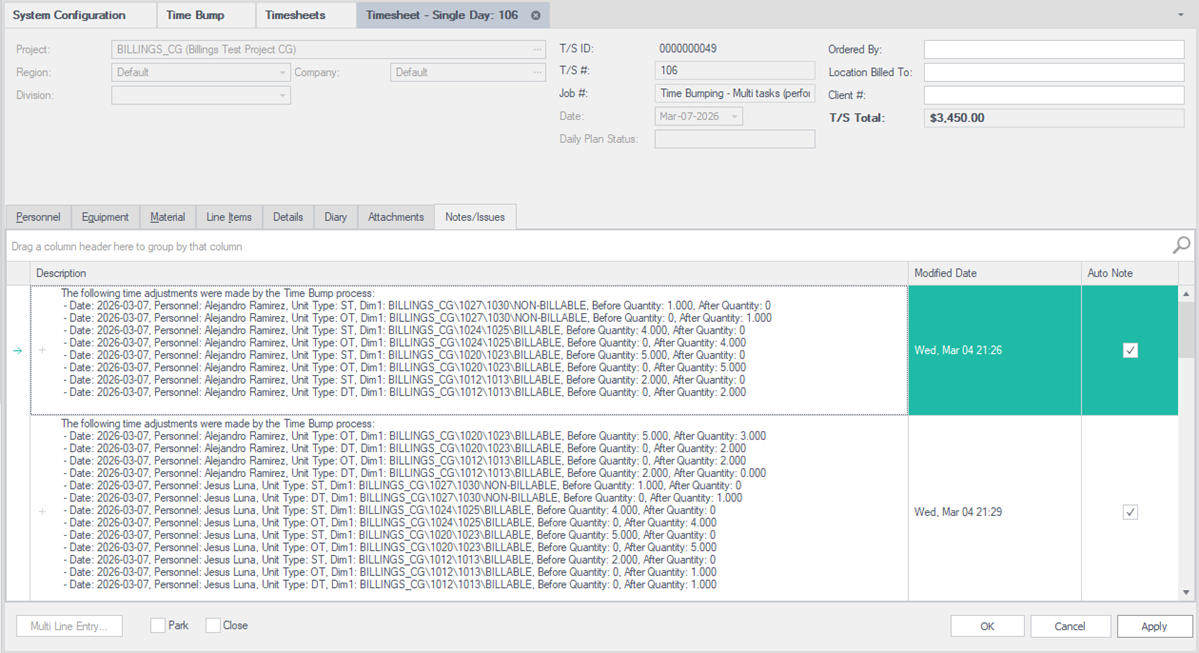
To see more details about the adjustments, open the timesheet, and go to the Notes/Issues tab. Review the adjustments linked to each process that is generated.
Additional Information
9977 N 90th Street, Suite 250 Scottsdale, AZ 85258 | 1-800-637-7496
© 2024 InEight, Inc. All Rights Reserved | Privacy Statement | Terms of Service | Cookie Policy | Do not sell/share my information