Products
Solutions
Resources
9977 N 90th Street, Suite 250 Scottsdale, AZ 85258 | 1-800-637-7496
© 2024 InEight, Inc. All Rights Reserved | Privacy Statement | Terms of Service | Cookie Policy | Do not sell/share my information

Billings will receive all operational resources associated to personnel from the Master Data Library within Platform.
1. To create an additional resource, that will be used for purposes of customer billing only, go to Data Library > Resources > Personnel.
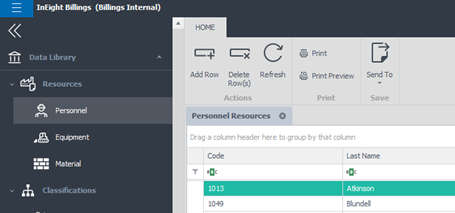
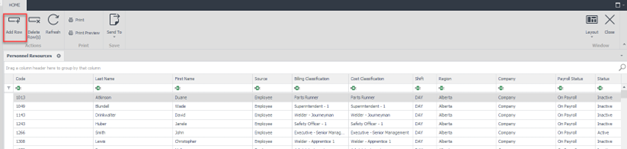
2. The Personnel Resources tab appears. Click the Add Row icon on the ribbon bar.
3. The Personnel window opens. Enter the employee’s last and first name in the appropriate fields.
4. Assign a personnel code in the Code field.
The Code must be unique within the database. As a best practice use your organization’s internal code for the individual.
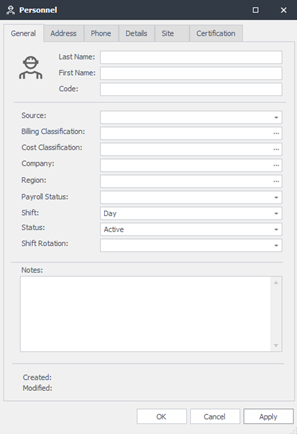
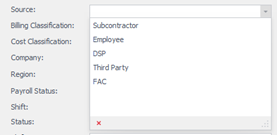
5. Click the drop-down arrow on the field labeled Source. This field lets you label the resource as a subcontractor, employee, third party or any other description previously set up by the system administrator.
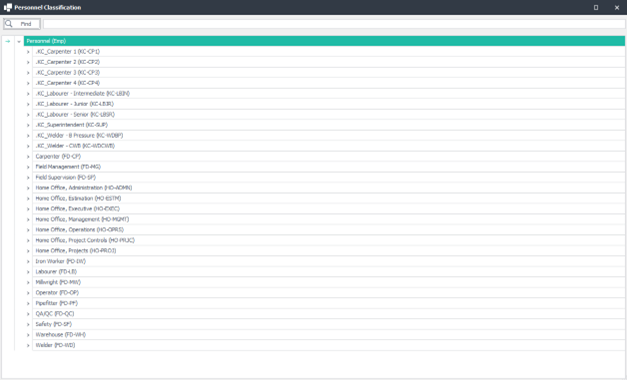
6. Click the ellipsis (three dots) icon in the Billing Classification field. A Classification dialog box appears. Select the Employee’s classification by double clicking on it.
You can use the Search feature at the top of the pop-up to search for the classification using either the name or the code.
7. The Cost Classification field will replicate the classification chosen in the Billing Classification field. However, this can be changed if required by clicking on the ellipses icon in the Cost Classification field and updating accordingly.
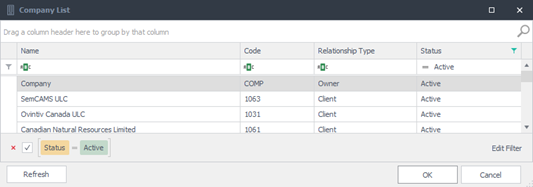
8. Click the ellipses icon in the Company field. This field lets users assign a worker to the company for which they work for.
As an example, if the employee works directly for ABC Company, select ABC Company as the company name. If the employee is a subcontractor working for Al’s Contracting Services, select Al’s Contracting Services as the company the worker works for.
9. Scroll through the list or use the Search field and type in the name of the company the worker is working for. Double click to select the appropriate company.
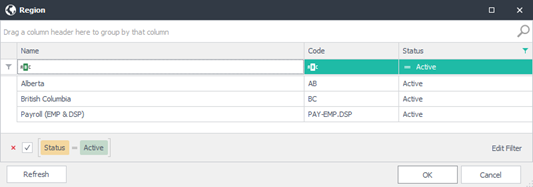
10. Click the ellipses icon on the Region field. A Region window appears. Scroll through the list or type in the region name in the Search field. This associates the worker with a default region.
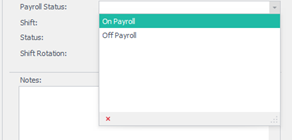
11. Click the drop-down arrow of the Payroll Status field and select if the person is On Payroll or Off Payroll. The value selected here is used to determine if this person’s hours should be sent to the payroll system.
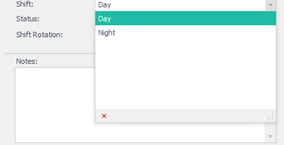
12. Click the drop-down box on the Shift field. A selection of Day, Night, or Other shift appears. Select the default shift type the employee typically works.
You can always indicate the actual shift worked when time is captured for this worker on a time sheet. This often happens when a worker is temporarily working a different shift from what their master personnel record is set to.
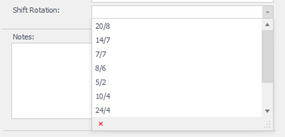
13. Shift Rotation is not required but can be added if there is a need to include this information on Billing reports. Click the drop-down box on the Shift Rotation field. A selection from the Options window appears. Select the default Shift Rotation the employee typically works. Shift Rotations are defined in the Options menu under Drop-Down List Setup > Shift Rotation Type.
14. Click the Details tab. This section is used to capture custom field values. Populate any custom fields per your organization requirements.
Additional Information
9977 N 90th Street, Suite 250 Scottsdale, AZ 85258 | 1-800-637-7496
© 2024 InEight, Inc. All Rights Reserved | Privacy Statement | Terms of Service | Cookie Policy | Do not sell/share my information