Products
Solutions
Resources
9977 N 90th Street, Suite 250 Scottsdale, AZ 85258 | 1-800-637-7496
© 2024 InEight, Inc. All Rights Reserved | Privacy Statement | Terms of Service | Cookie Policy | Do not sell/share my information

As you manage your issues and PCOs, you can convert them to client change orders (CCOs) when they reach any of the following criteria:
You are finalizing the negotiating process with the client
You have an agreement in place
You have something up for signature or already signed
You already know the final value of your change order

A CCO can be generated from an existing PCO or directly from an issue. The CCO will carry over all pertinent data from the PCO/issue and populate fields within the CCO. Just like the relationship between issue and PCO, the link between issue/PCO to the CCO is one-way, upstream. Data carried over from the issue/PCO into the CCO can be modified without any changes occurring to the former; however, changes to the issue/PCO can be pushed upstream to the CCO.
Create a CCO when the change is finalized and ready to send to the owner.
When converting to a change order, an issue is limited to 250 unique cost items or 100 unique pay items. If a message shows indicating that you must remove cost items or pay items, it is best practice to create a new issue. Creating a new issue lets you create another change order with the removed cost items and pay items.
From the PCO tab, select the PCOs you want to associate to a CCO, and then click the Associate to Client change order icon..
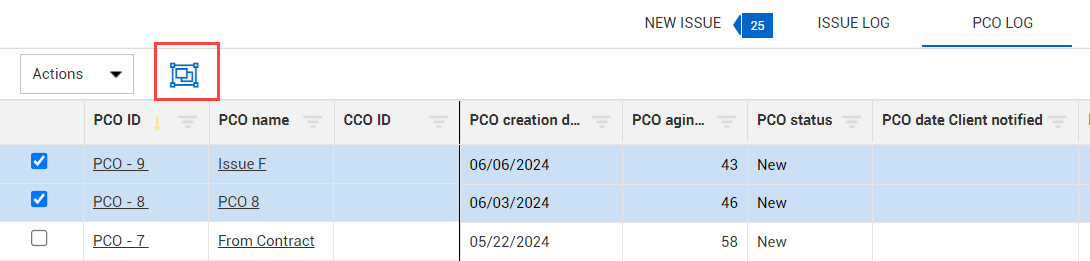
The Associate to Client change order dialog box opens.
Indicate whether the PCO is to be associated to a new CCO or an existing CCO, and then enter the CCO ID and CCO name. You can also enter an alternate CCO ID and a description of the change.
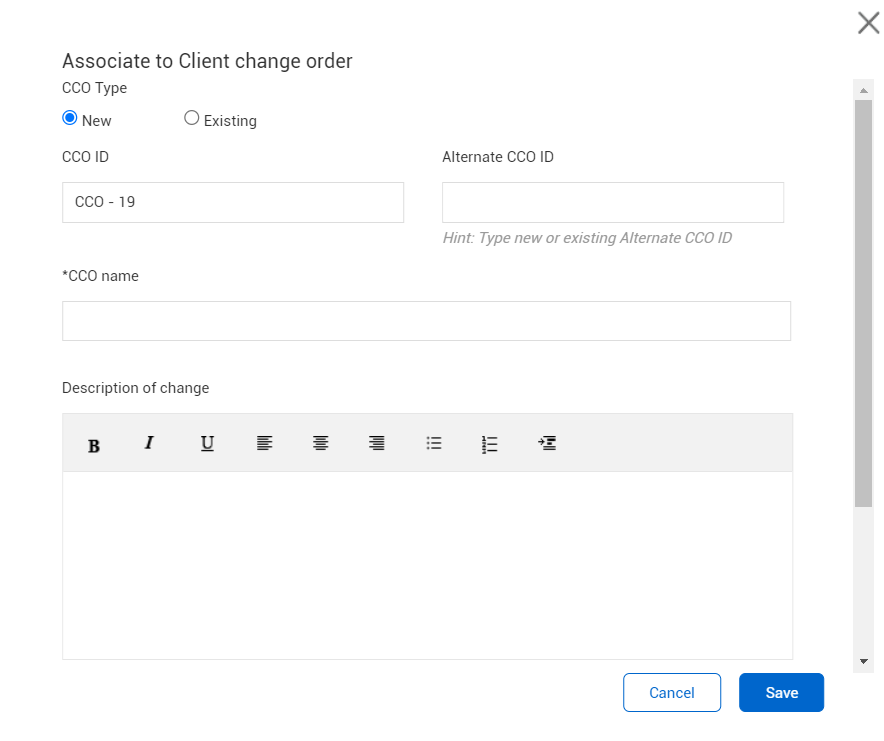
Click Save. The CCO Details page opens.
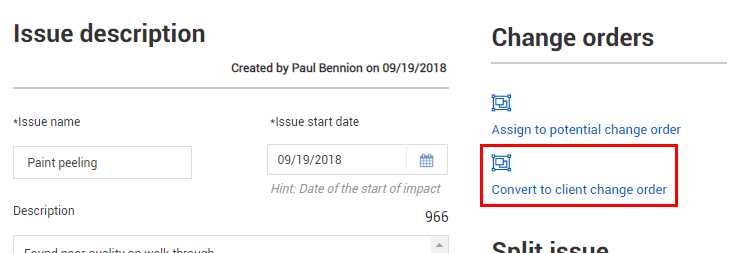
Another option for converting to a CCO is on the Details tab of an issue record. Click the Assign to potential change order link to assign the issue to a PCO.
The header at the top of your CCO record contains the same functionality as the issue/PCO header, allowing you to update the following:
CCO status
Pricing status
Proposal status
Below the header on the CCO record, there are tabs for capturing the CCO’s details, costs, and supporting documentation.

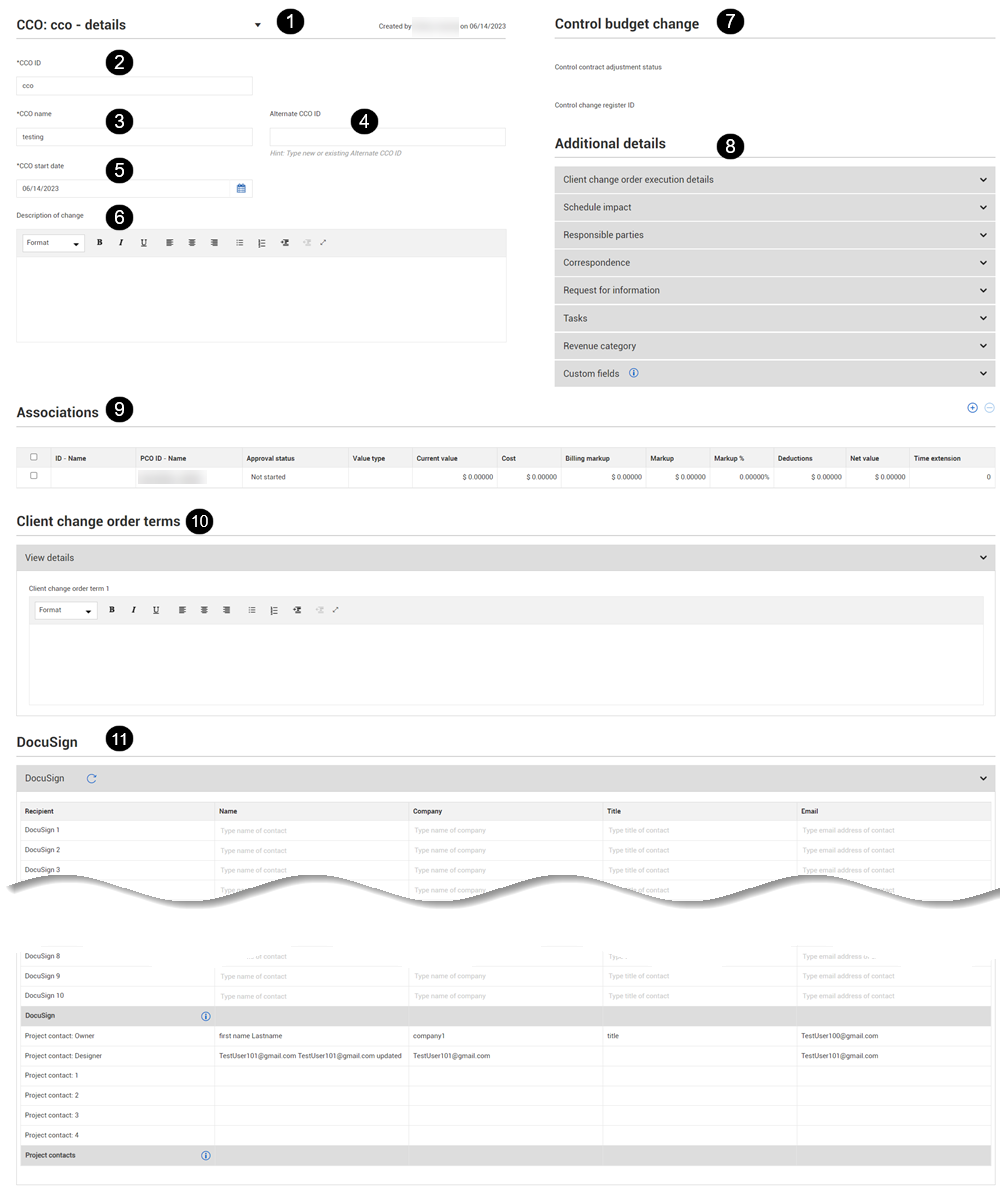
The CCO Details tab contains the identifying information you entered on the Convert to client change order window, along with several other fields to capture the change order amount, approved extension information, and type of signing agreement.
|
Title |
Description |
|
|---|---|---|
| 1 | CCO navigation | Lets you navigate to other CCOs without having to go back to the CCO log. Click the arrow to see a list of CCOs, and then select one. The selected CCO opens in the same window. |
|
2 |
CCO ID |
Free text entry for describing the CCO, carried over from filling out the Convert to client change order window. |
| 3 | CCO name | Free text entry for the name of the CCO. |
| 4 | Alternate CCO ID | Free text entry can be used as a subset to your CCO ID. |
|
5 |
CCO start date | The date that work on the CCO started. You can use a start date that is different from the created date when the day work on a CCO was started is different from when the CCO was created. The CCO aging days open column on the CCO log uses the start date instead of the created date to give a more accurate count. |
| 6 |
Description of change |
Free text entry for describing the PCO, carried over from filling out the Convert to client change order window. You can use the Expand icon to expand the text box for easy text entry and viewing. You can then collapse the text box when you are finished. |
|
7 |
Control budget change | Information about the contract adjustment status and the change register ID from InEight Control. |
|
8 |
Additional Details |
Sections for Client change order execution details, Schedule impact, Responsible parties, Correspondence, Request for information, Tasks, Revenue category, and Custom fields. |
| 9 |
Associations |
|
| 10 | Client change order terms | Terms specific to the CCO. You can add up to two terms. You can use the Expand icon to expand the term text boxes for easy text entry and viewing. You can then collapse the text boxes when you are finished. |
| 11 | eSign | Lists of eSign recipients and project contacts that default as signees for an eSignature via a provider, such as DocuSign. When custom labels are used for contacts in InEight Platform project details, Change uses the labels set at the suite administration level. The labels are also used in the Send for signature dialog box. |
The eSign section lets you view or add recipients to be used as default eSign signees. This section has subsections for eSign and Project contacts. All signees must be added to at least one section.
Names in the eSign section are populated from the project eSign setup tab (Project settings > Change > Configurations > eSign setup). You can also manually enter the names of the signees.
Names in the Project contacts section are populated with contact information from project contacts added in Project details. This section is for reference only. If you want to add or change recipients, you must edit the Project contacts section of the Project details.
The Additional details section has expandable subsections for the following features:
Client change order execution details
Schedule impact
Responsible parties
Correspondence
Request for information
Tasks
Revenue category
Project values
Custom fields
The Client change order execution section contains fields that are used when the CCO is executed.
The Signing agreement field describes how the CCO was executed (bilaterally, unilaterally, or unassigned). The Current value is carried over from the Pricing tab and is read only. The executed change order amount typically matches the Agreed Change Order Amount, but could differ due to changes by the client. This value is shown in the CCO log.
The remaining fields are read-only and are automatically filled when the CCO is executed.
The Schedule impact section includes the Approved time extension and the Time extension. The Approved time extension is the number of days granted by the client per CCO. You can also select Deferred to defer the extension or N/A when the time extension is not applicable. The time extension fields show the time extension requested. When there is only one PCO associated to the CCO, the PCO delay days populate this field. When there is more than one PCO associated, the field is blank. You can add forecasted days in the Forecast field.
Use the Correspondence section to track the following:
CCO Date client notified - An information icon in the Date column shows the specific supporting document that must be attached to populate the date. You can add the document on the Supporting documents page. After a document is added, a link is shown in the File/Link column.
CCO Date price to client - An information icon in the Date column shows the specific supporting document that must be attached to populate the date. You can add the document on the Supporting documents page. After a document is added, a link is shown in the File/Link column.
Executed change order - An information icon in the Date column shows the specific supporting document that must be attached to populate the date. You can add the document on the Supporting documents page. After a document is added, a link is shown in the File/Link column.
The Request for information fields are assigned by a supporting document of type RFI. The heading for the Request for Information section includes a counter so you can quickly see the number of associated RFIs the CCO has.
The Tasks section shows all tasks assigned in InEight Compliance for the CCO. For each task, the section shows the task name with a link to the task, the name of the person assigned to the task, the due date, and the current state. Overdue tasks show in red in both the Due date and State columns. Pending tasks show in yellow in the State column. Completed tasks show in green in the State column.
The Project Values section shows the project values configured for the project. For each project value, you can select a value from the drop-down list. Each field has a Settings icon that takes you to the Available project values page of the project. You can add project values or change the status of existing project values with the applicable permission.
Custom fields include CCO custom lists 1 and 2 and CCO custom fields 1-4.
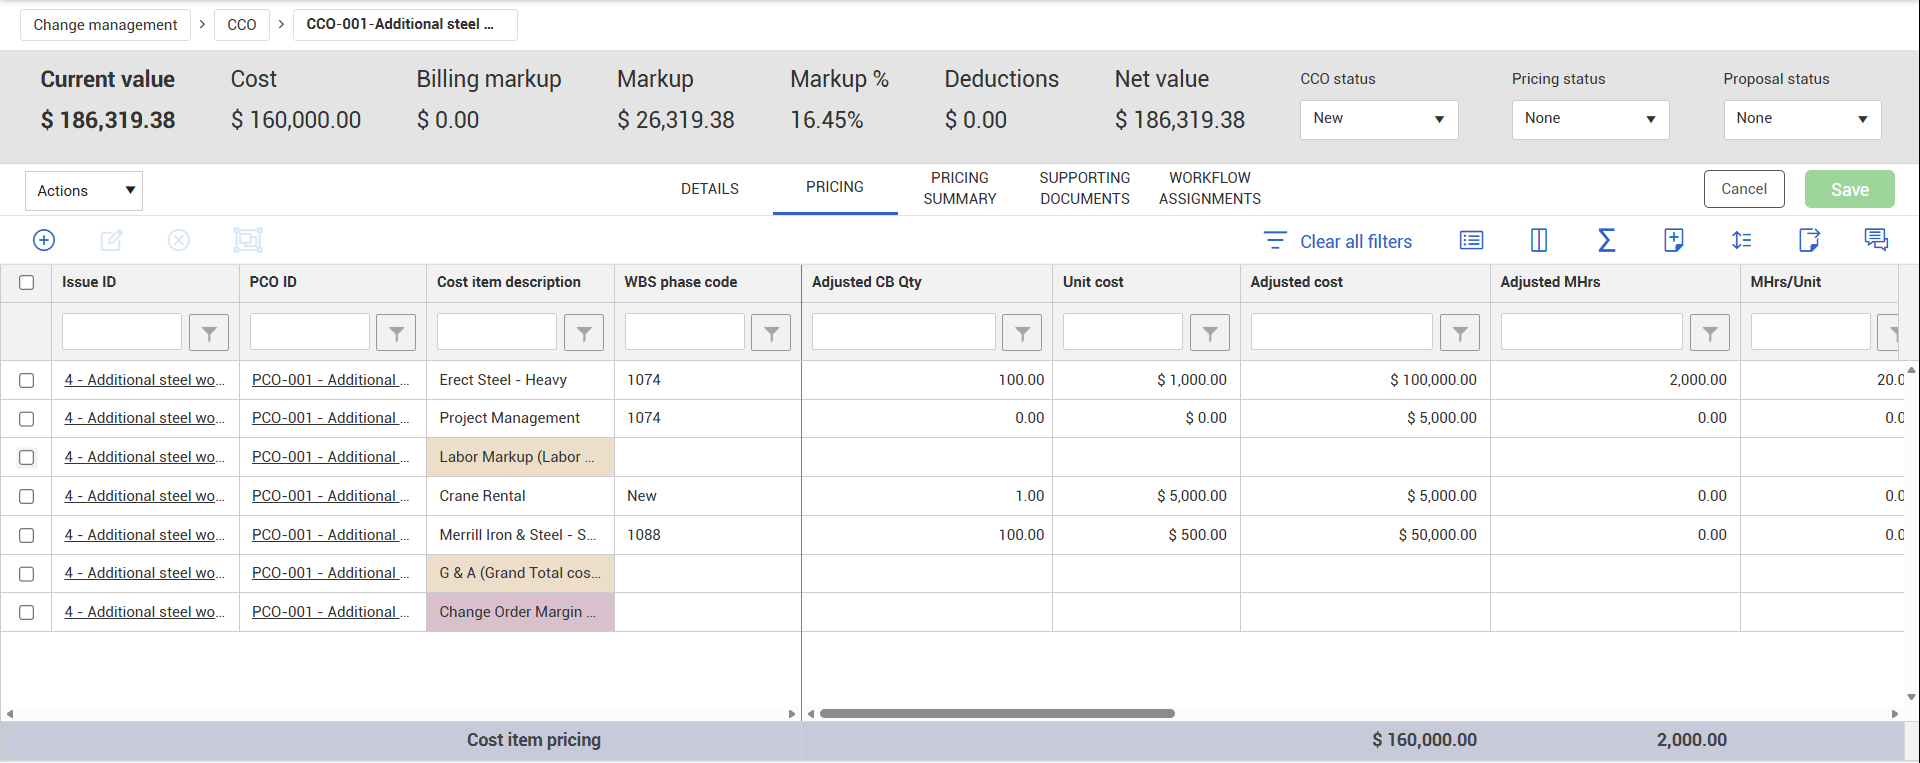
On the CCO Pricing tabs, you can work out the final pricing for your change order, ending up with a current value for the CCO derived from cost items and any assigned markups. You have the same pricing functionality on the CCO Pricing tabs as you have on the PCO Pricing tabs.
The Pricing tab shows the pricing established at the PCO and issue levels. It includes cost item pricing, including any unassigned pricing items and markups. You cannot edit the inherited values on this tab. You can only add an unassigned pricing item, if needed. To make detailed pricing updates, return to the associated issue.
The Pricing Summary tab shows subtotals organized by cost pricing section . You can make lump sum adjustments to the CCO total.
The Pricing summary has the same rules of precedence for ROM, Estimate, Proposal and Agreed values.
On the Pricing Summary tab, the Grand total is the sum of the Direct cost, Vendor, and Indirect cost subtotals.
Changes made on the Pricing Summary tab do not update associated issues or PCOs. See Pricing Configuration for more information about updating values across levels.
In the Value type column, you can quickly view or change the value type (that is, ROM, Estimate, Agreed, or Proposed) for the cost item. You can also add or update the value type on the Details page of the Edit cost item slide-out panel.
Values set on the Pricing page or in the Edit slide-out panel show in the pricing summary in the Estimate column. The value type on the Issue log is not affected by the value type in cost item pricing or on the Pricing summary page.
On the Pricing page, you can only edit the Value types for cost items that were added at the current level. For example, if you are on the Pricing page at the CCO level, you can only update the Value types for cost items added at the CCO level.
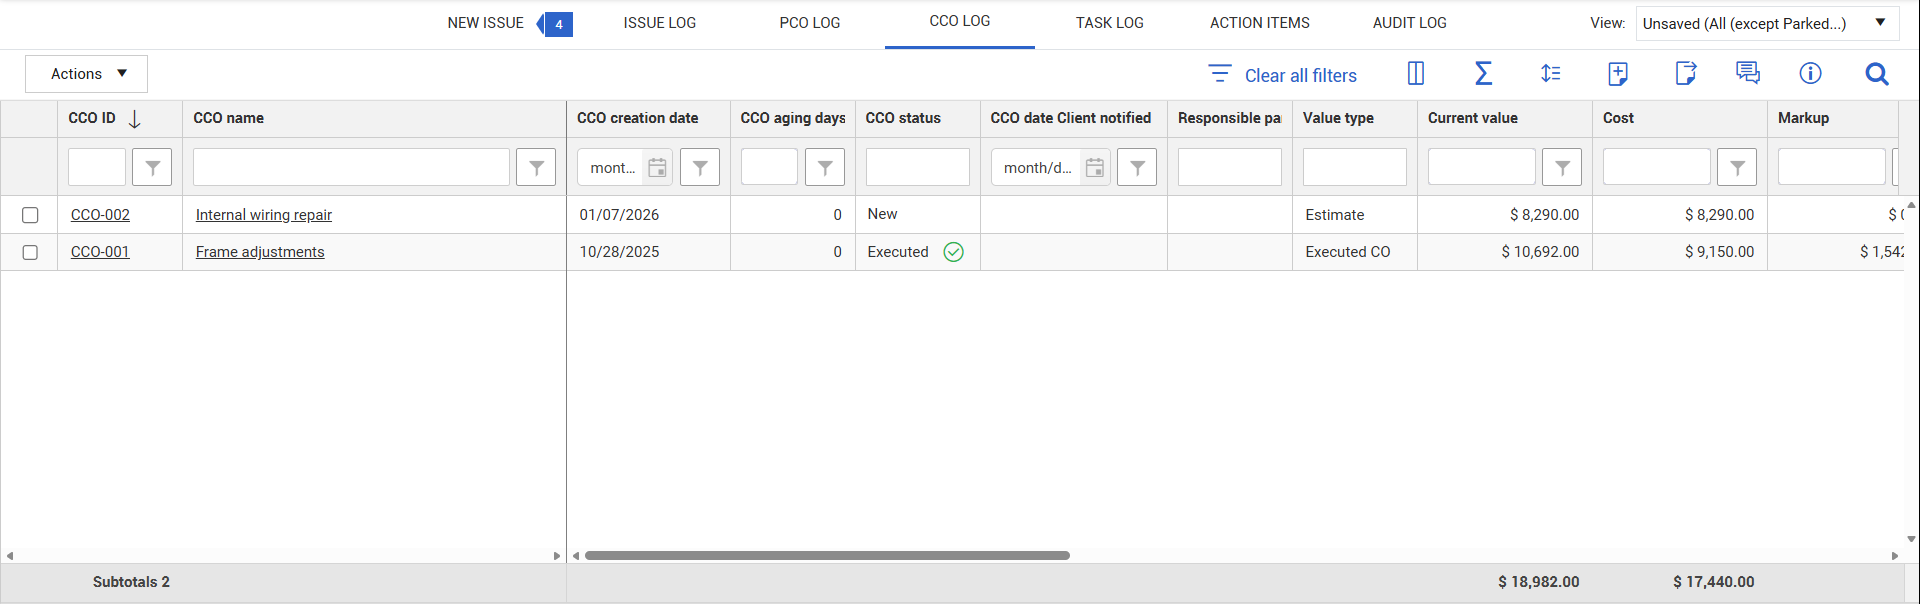
The CCO Log tab is a display of all CCOs, regardless of status. Most fields will contain data from the CCO Details header and Pricing. However, there are some editable fields on within the CCO Log.
Executed CCOs have a green checkmark next to them and are no longer editable
Dropped CCOs have a yellow caution sign next to them and are locked
Note that there is no delete button. Once a CCO is created, it cannot be deleted
The CCO Log provides subtotals at the bottom of the register for total number of CCOs and total current value of the CCOs (based on those CCOs that have locked pricing – ROM, Estimate, Agreed)
You can also export your table, show details, and search for data within the table.
When you export your table, the table exports the data exactly as it shows within the table; thus, if any filters are on that data will not export. To export your table, click the Export icon from the toolbar.

You can generate a change document from the CCO log. Select a CCO, go to the Actions menu, and then select Generate Change document. See "Change writer" for information about generating change documents.
Additional Information
9977 N 90th Street, Suite 250 Scottsdale, AZ 85258 | 1-800-637-7496
© 2024 InEight, Inc. All Rights Reserved | Privacy Statement | Terms of Service | Cookie Policy | Do not sell/share my information