Products
Solutions
Resources
9977 N 90th Street, Suite 250 Scottsdale, AZ 85258 | 1-800-637-7496
© 2024 InEight, Inc. All Rights Reserved | Privacy Statement | Terms of Service | Cookie Policy | Do not sell/share my information

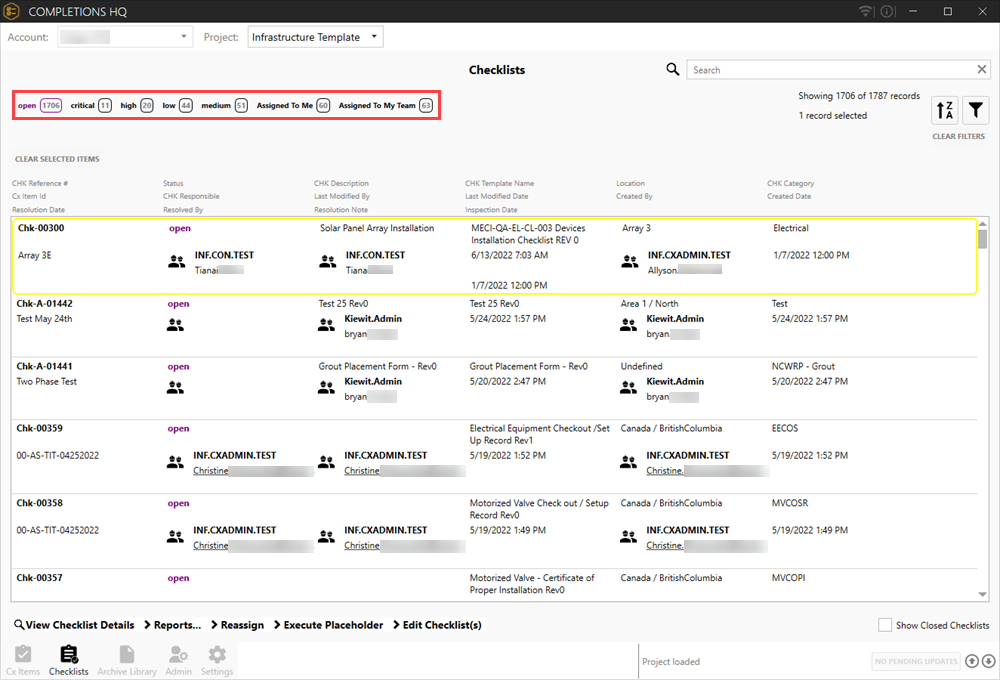
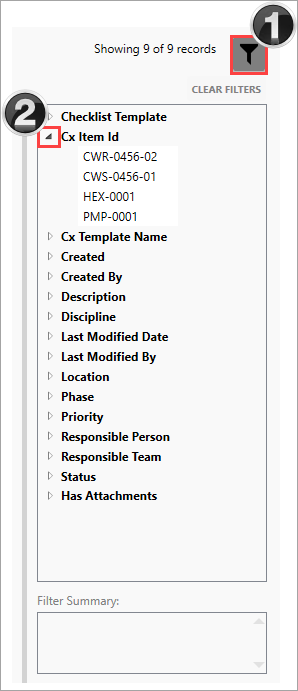
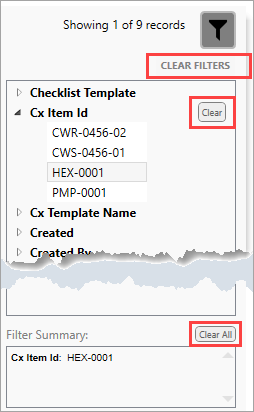
On the main Checklists page, you are able to quickly jump to the desired checklist in two ways:

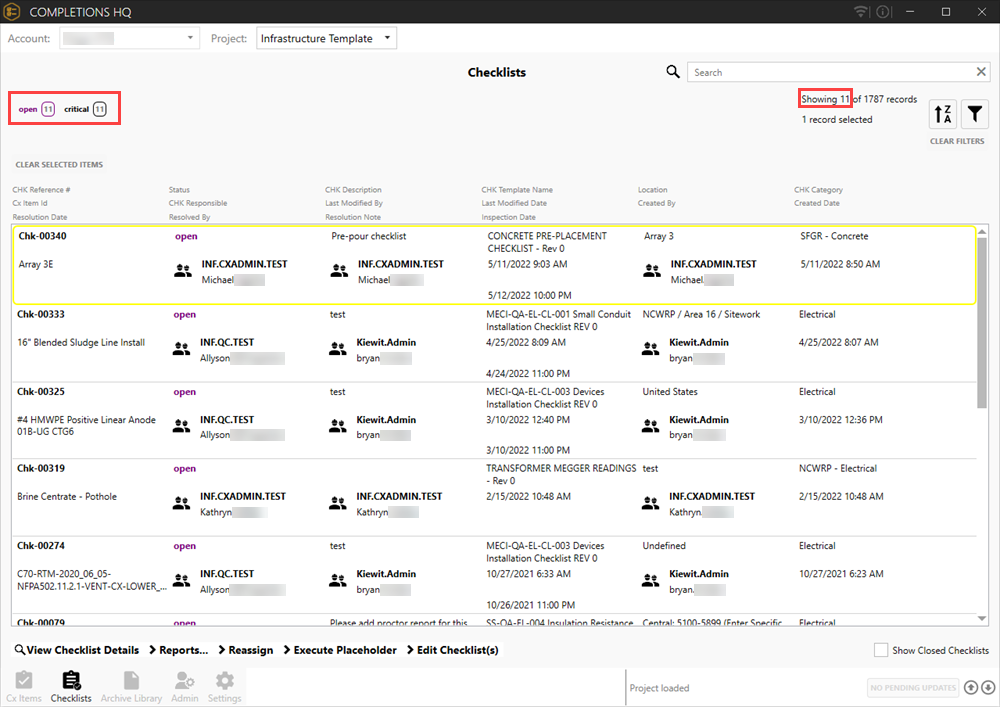
The second way to quickly jump to a checklist from within the Checklists page is to click on any of the open / critical / high / low / medium / Assigned To Me / Assigned To My Team or otherwise defined buttons. Using this functionality might be important if you are seeking:
Notice once you click on any one of those buttons, the checklist records page is narrowed, in this case to eleven critical items.
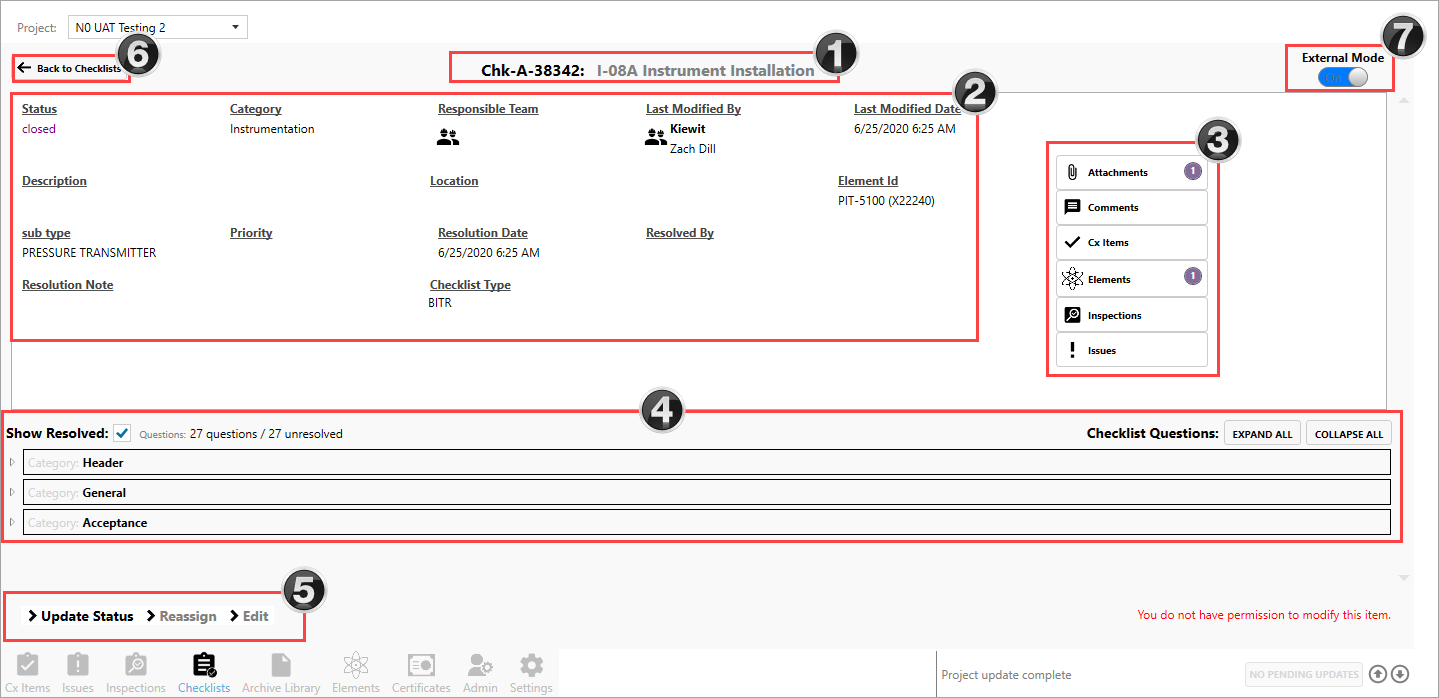
Within a checklist, there are many options. Some functions are about editing the checklist, while others are about navigating to and from the checklist. In the table below, each aspect is described.
| Item | Description |
|---|---|
| 1 | Name of the Checklist by ID and Checklist Template name. |
| 2 | Data from the checklist regarding the checklist including Status, Category, Responsible Team, Description, Location and Priority, Element Id, Sub type, Priority and Creation, Modification & Resolution information. |
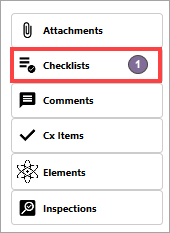
| 3 | Depending on project configurations and/or your role, each button creates links or new records with links where you can add new Attachments, Comments, Cx Items, Elements, and/or Issues. |
| 4 | A cascading drop-down, by category, of questions with room for question-specific responses. |
| 5 | While project/role/workflow specific, additional pop-ups appear when each of the buttons is clicked. Updating a Status is the first option, Reassigning the Checklist Template option is the second and Editing the primary checklist field is the third option. |
| 6 | This button returns you back to the previous window. |
| 7 | When On, the External Mode expects to receive a scan of the checklist PDF with a QR code using the ADMIN module, taking the scan to complete the checklist. |
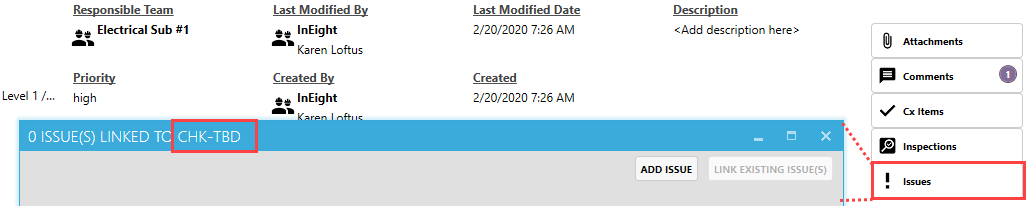
The below Checklist Issue image shows an extension of TBD under the Id field. This is because the Issue has not yet been published. Once published to the server, the TBD's will turn into a numerical reference point for the Id.

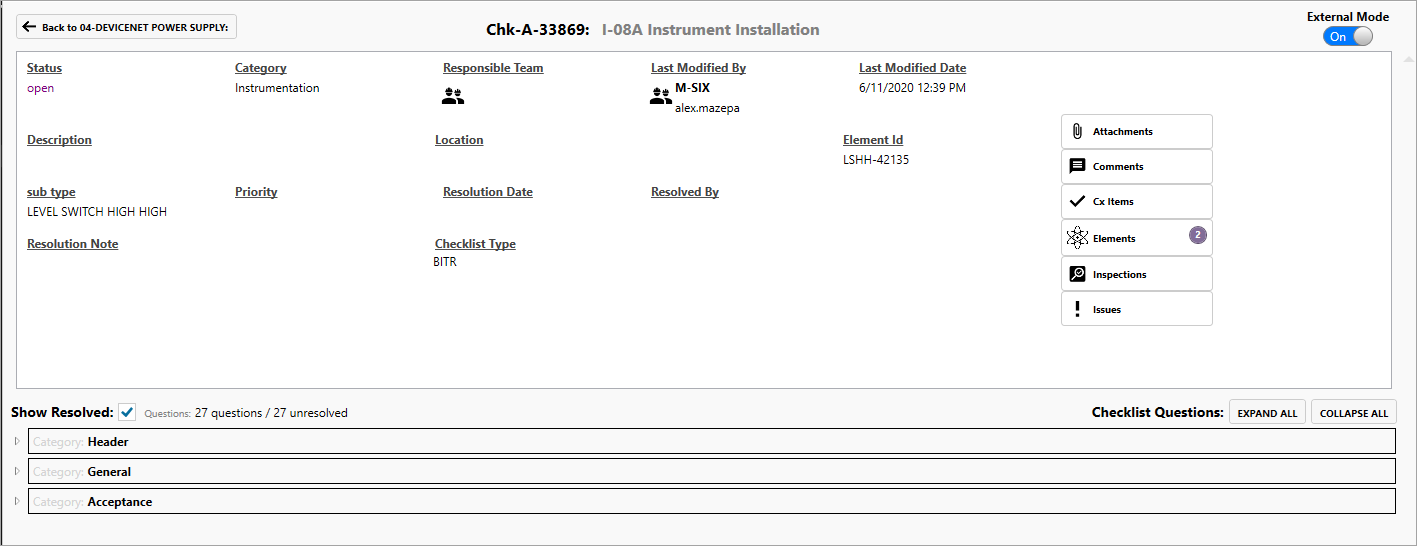
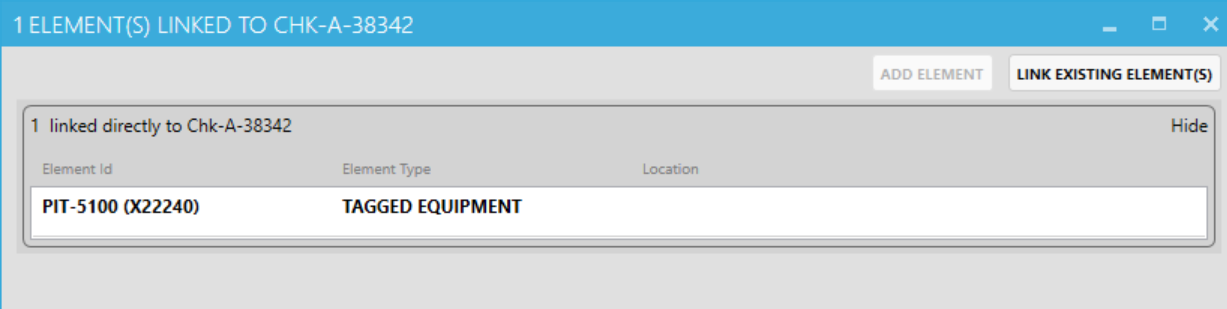
Within a checklist, users are able to link data such as issues, attachments, and comments based on user permissions.
Using the first Equipment Inspection checklist item, simply checking the YES button makes the green check box appear.
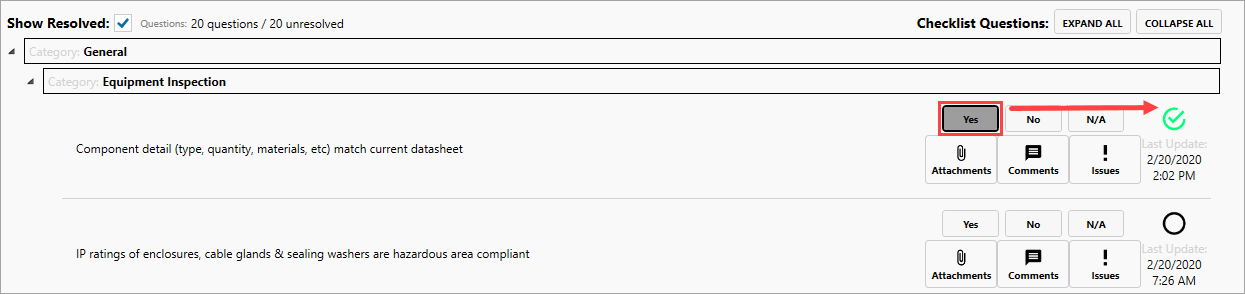
Alternatively, selecting a NO response turns the item into a red X, and a new pop-up appears asking if you'd like to create a new issue.
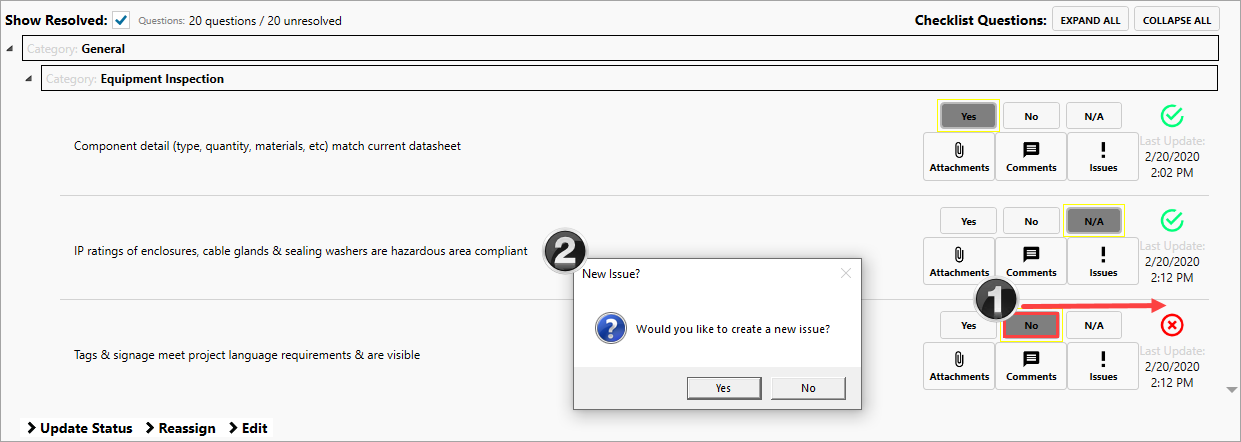
If you create an issue from a question (with prompt or by a manual link using issues buttons) the question's issue description will get the question auto populated for convenience.
To learn more about elements, see the Elements lesson.
To learn more about attachments, see the Attachments lesson.

Comments are tied to a specific checklist item, in this case "Component Detail."

If the Link Existing CX item(s) button is selected, a new pop-up window appears showing all of the Cx Items, that in our case, can be tied to the ID CHK-TBD: E-001A-Motor Control Center.
To learn more about Cx items, see the Cx Items lesson.

As a configurable item, your project may not have Cx Items, or you may not have the permission to link to it.
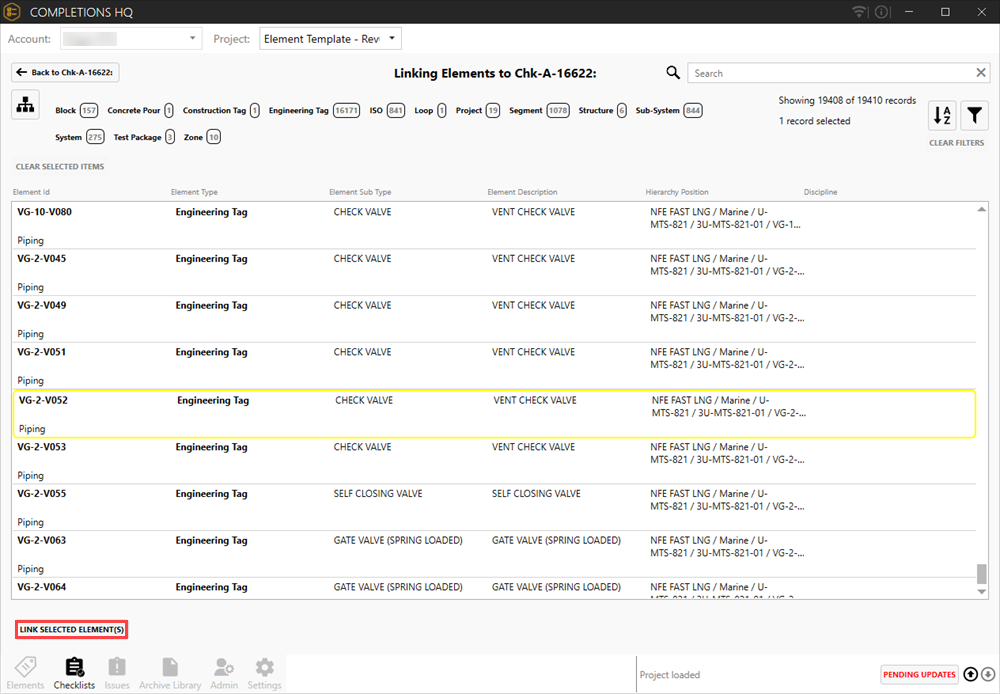
The following step by step outlines the process of linking an element to a checklist.

To learn more about inspections, see the Inspections lesson.

To learn more about issues, see the Issues lesson.

Additional Information
9977 N 90th Street, Suite 250 Scottsdale, AZ 85258 | 1-800-637-7496
© 2024 InEight, Inc. All Rights Reserved | Privacy Statement | Terms of Service | Cookie Policy | Do not sell/share my information