Products
Solutions
Resources
9977 N 90th Street, Suite 250 Scottsdale, AZ 85258 | 1-800-637-7496
© 2024 InEight, Inc. All Rights Reserved | Privacy Statement | Terms of Service | Cookie Policy | Do not sell/share my information

You can access Checklists by selecting the Checklists icon at the bottom of the screen.

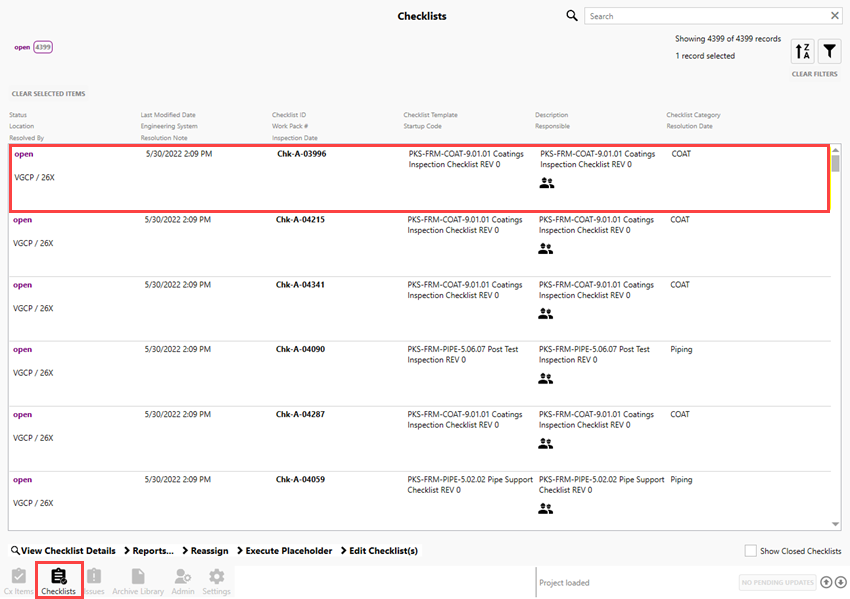
Clicking on the checklist once, places a yellow box around the checklist. Clicking on the checklist a second time opens it.
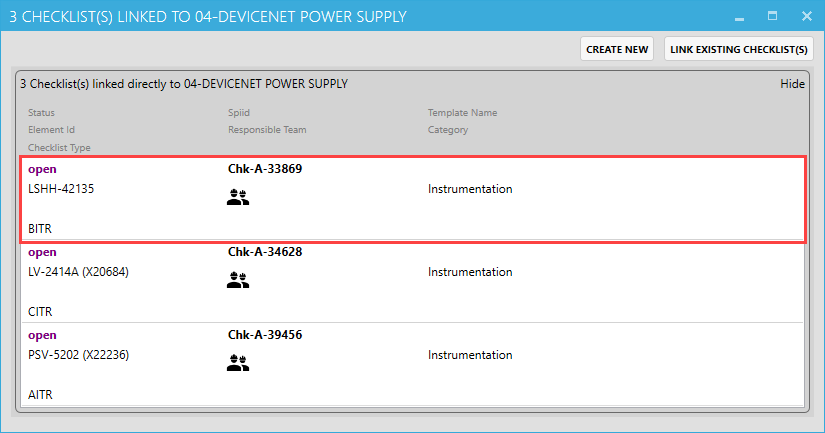
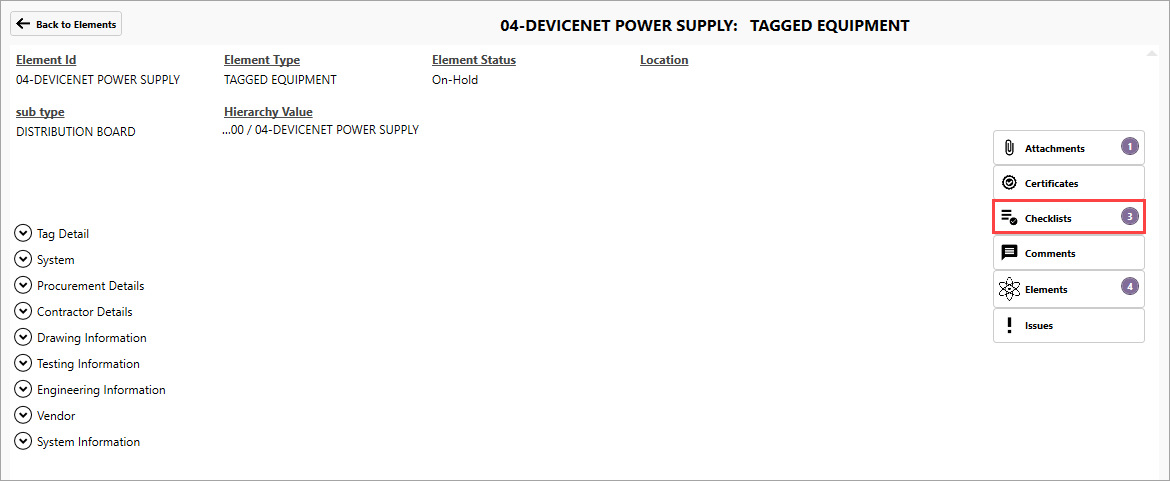
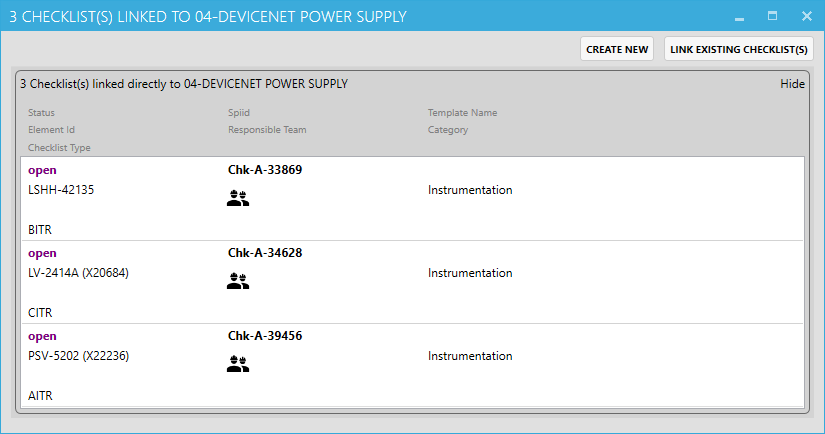
Where available, you can also open a checklist from within a specific Cx Item, Issue, Inspection or Element. Though the Checklists button is available to select, it doesn't mean that each item has an existing checklist created, as shown in this Inspection.
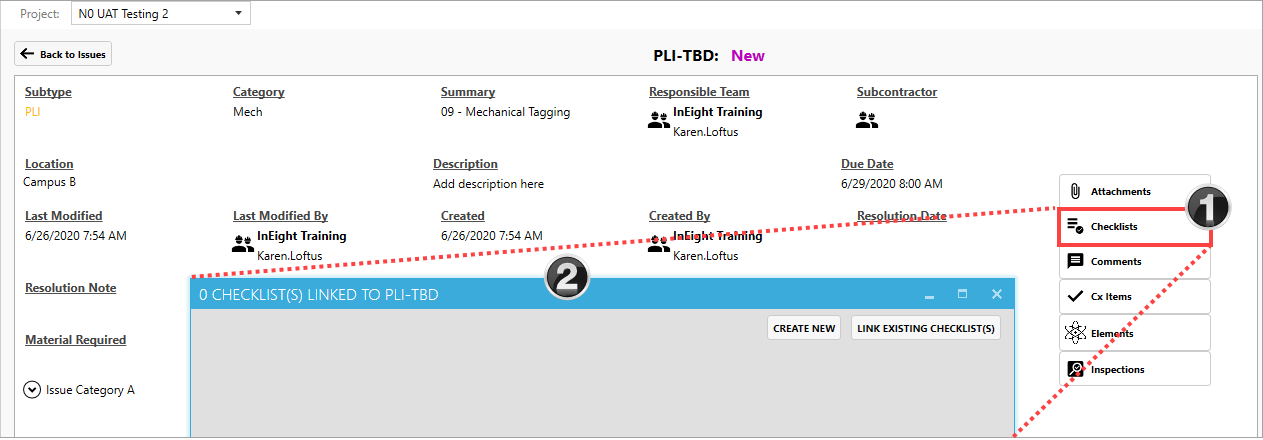
If there were a checklist to address, there would be a number to the right of the Checklists button.
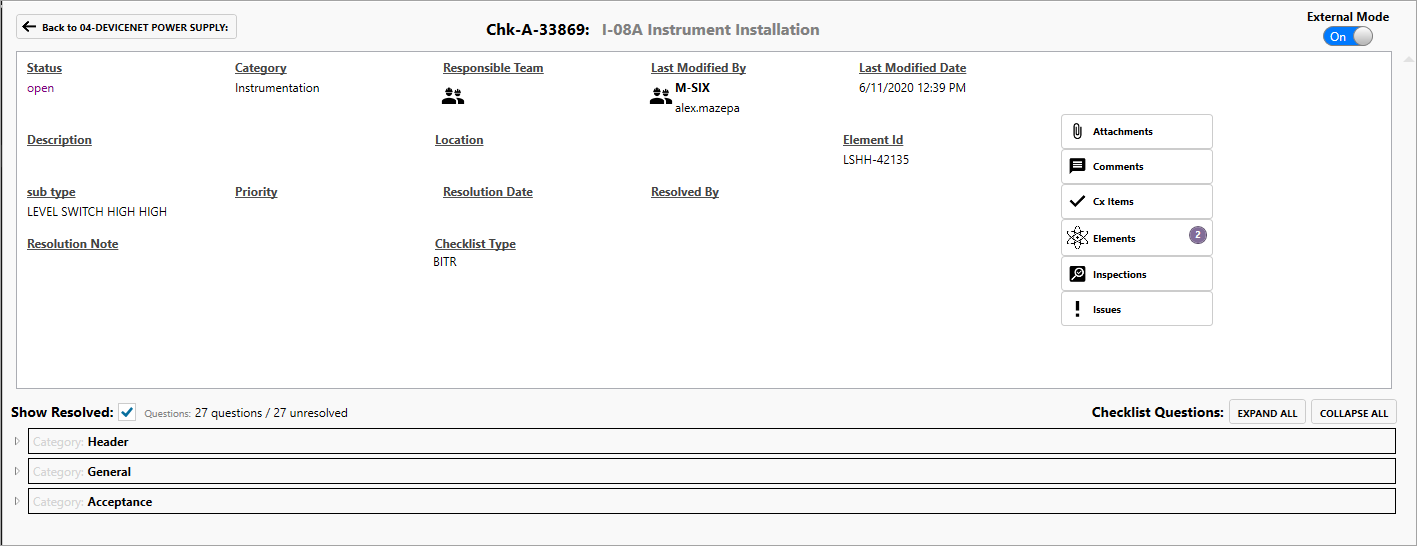
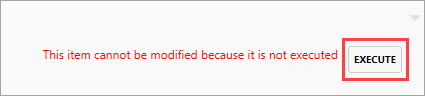
Assuming you have the authority to do so, click the Execute button, ensuring the most current Checklist is applied to the Element.
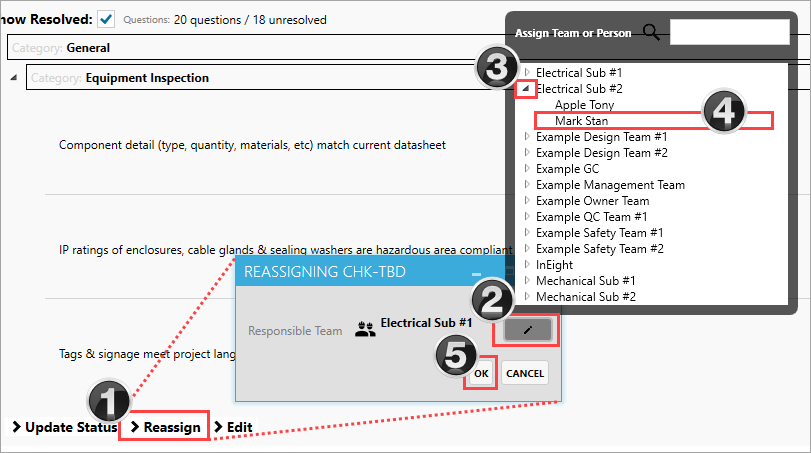
Reassigning a checklist may be important when:
For those checklists you create, and where you have authority to do so, you will have the ability to edit and close the checklist.
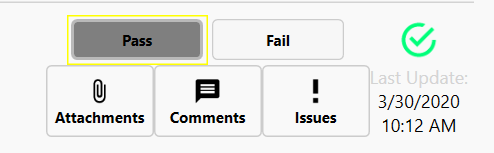
While an entire Checklist must ultimately be completed, you may only have the need or time to answer a portion of the questions in one sitting.
After each series of questions have been answered, click the Pending Changes button. This ensures your responses are locked in and cannot be overwritten by another user.
Once all questions have been answered in the checklist, click Update Status.
Add a comment to the Resolution Note field and click OK.
If all questions have not been resolved, a pop-up appears indicating the checklist cannot be closed, because either there are questions still unanswered, or haven't been saved.
Depending on the type of permissions you have, you might not have the correct permissions to modify an existing checklist. If this is the case, when you open an existing checklist, a warning appears. Then, the Update Status > Reassign > Edit link is disabled, as shown below.

You can close the checklist by clicking the Back to Checklists button.
Additional Information
9977 N 90th Street, Suite 250 Scottsdale, AZ 85258 | 1-800-637-7496
© 2024 InEight, Inc. All Rights Reserved | Privacy Statement | Terms of Service | Cookie Policy | Do not sell/share my information