Products
Solutions
Resources
9977 N 90th Street, Suite 250 Scottsdale, AZ 85258 | 1-800-637-7496
© 2024 InEight, Inc. All Rights Reserved | Privacy Statement | Terms of Service | Cookie Policy | Do not sell/share my information

The InEight Completions product is highly customizable per your specific project requirements. Tab order and its functionality may differ than what is shown.
Cx, or commissioning, is the last process that's required before reaching owner acceptance. That means as a permitted user, you will perform commissioning activities, steps and sign-offs along the way. Each step, or phase, is customizable per project to fit whatever workflow is required.
Along with the overall design of the project, your Project Administrator will assign roles to give to different Teams or individual Users which may limit your functionality based on the examples shown in these lessons.
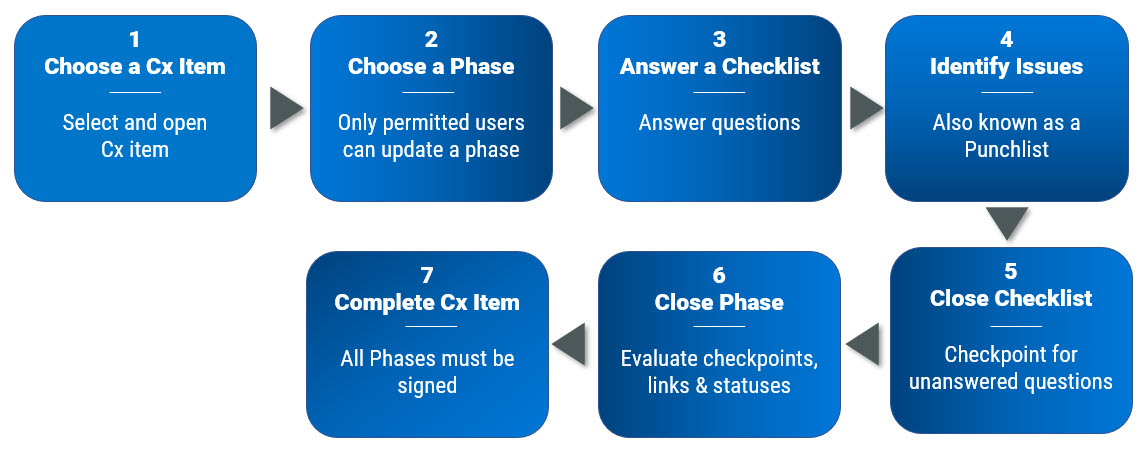
Examples of Cx Items might include such things as loops, circuits, tags, system, and sub-systems.
From within a project, clicking on the Cx Items module brings up a list of the Cx Item Id's.
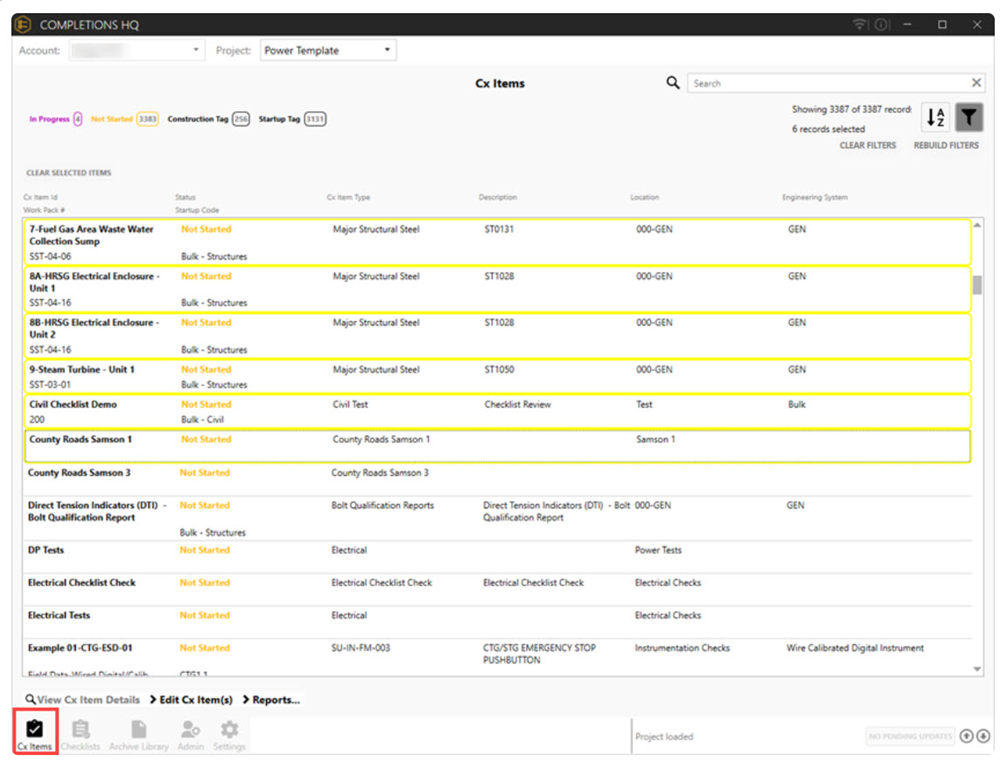
The rebuild filter action reloads all available filter options and automatically removes any option that no longer applies based on your current selections. To maintain accurate results, it is recommended that you rebuild filters regularly when you use them to clear out items that might have been previously disabled. If selection types have been disabled, they will continue to show in the filter results unless you adjust the filter accordingly. For more information, see Navigate element hierarchy.
Clicking on any line item, brings up that Cx Item Id.
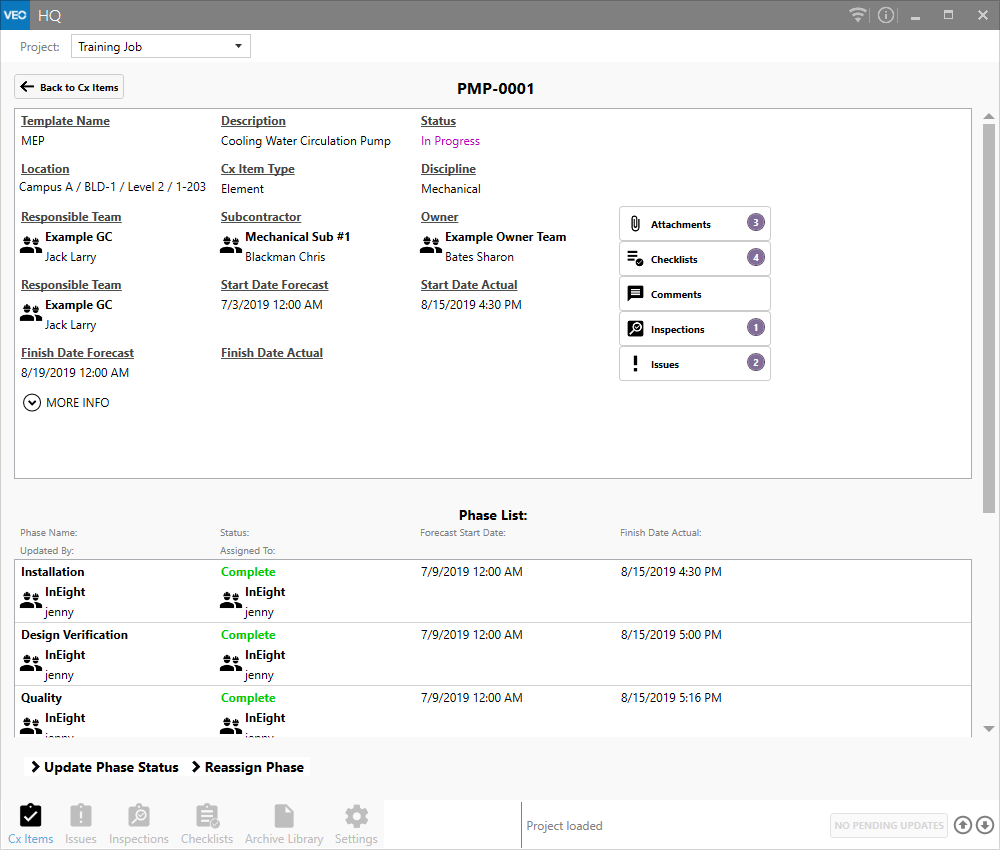
From within the selected Cx Item Id, the screen is divided in two halves.
The top portion includes all the metadata for the project, along with buttons to access Attachments, Checklists, Comments, Inspections and Issues. Clicking on any of these buttons take you to links specific to that project.
If you have to change the metadata for a project, contact your Project Administrator.
As shown above, when a Cx Item is first created, the phases, and their sequence, also get created by your Project Administrator.
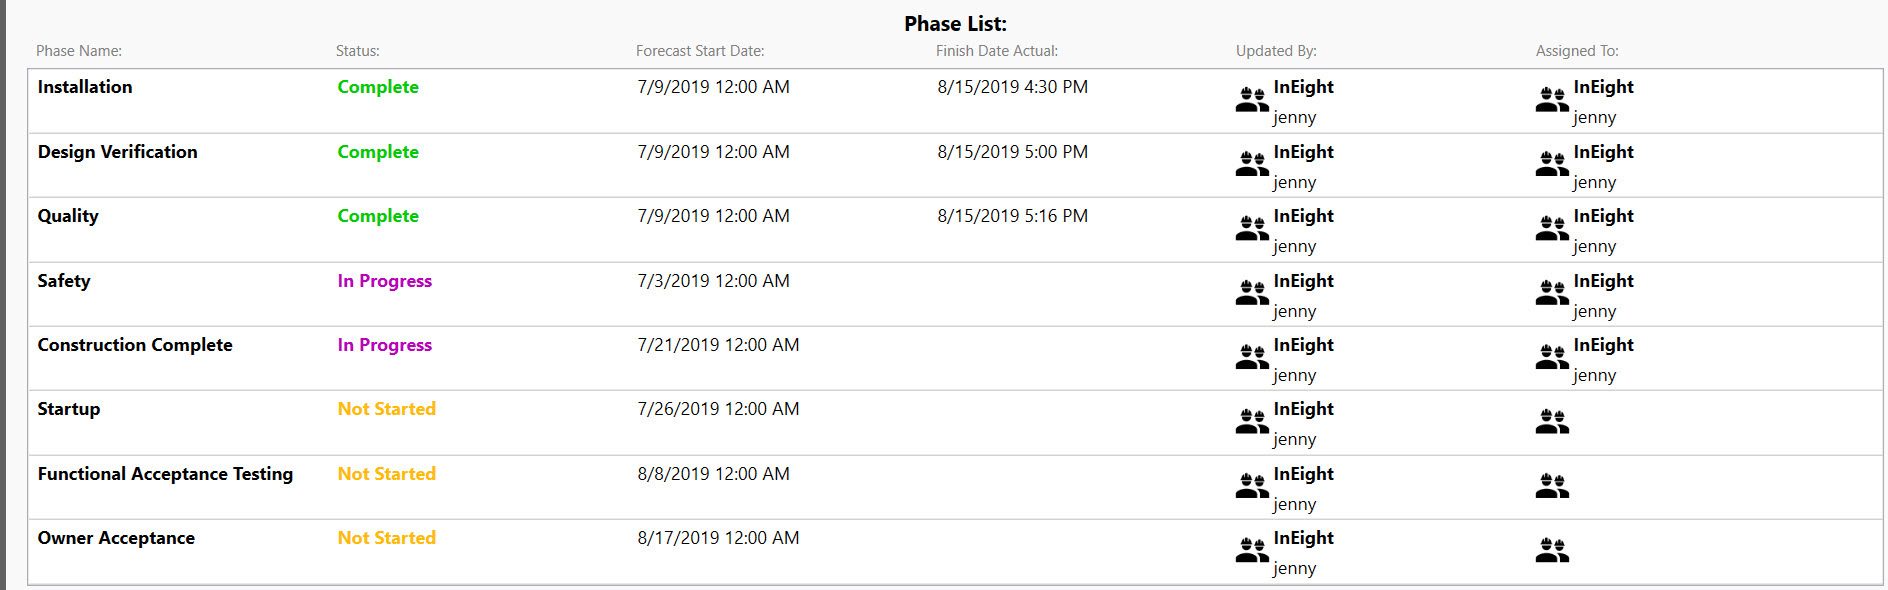
Working through each phase and completing the required components are crucial to overall owner acceptance. As shown in the sample below, within an single Cx Item, the Phases, and their respective Status is shown.
If interested in learning more about Reports, accessed by the > Reports tab, check out the Reports lesson.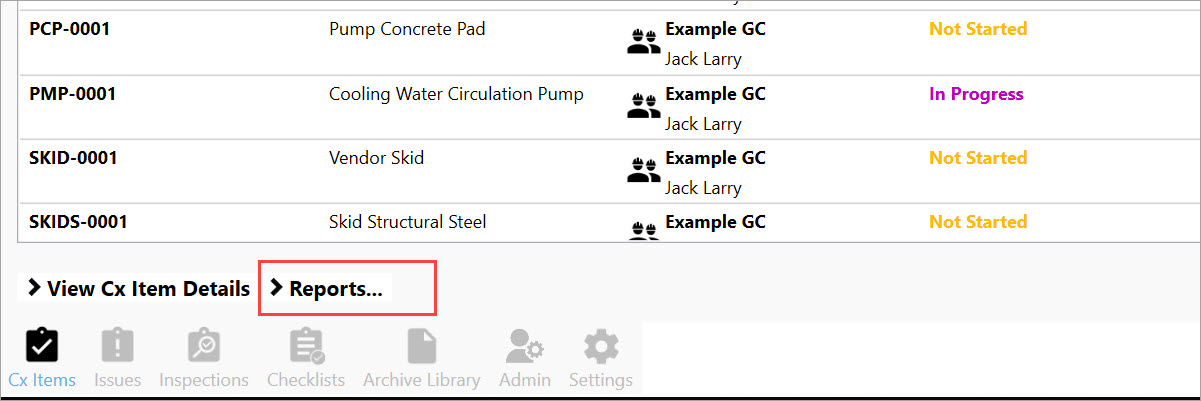
Making an update to a Phase begins by selecting a Cx Item.
With a Cx Item selected, a Phase is a discernible set of steps that need to be completed before the Commissioned Item gains Owner Acceptance. Phases are shown in sequence within a Phase List, and are color coded by the phrases Complete, In Progress and Not Started.
Within any phase the option may exist to add Attachments, Checklists, Comments or Issues.
With the data of a specific Cx Item from the Upload File at the top of the page, the lower portion of the page identifies the Phase List. Columns include:
Phase Name and who updated it last
Status & to whom it's been assigned
Forecast Start Date
Finish Date Actual
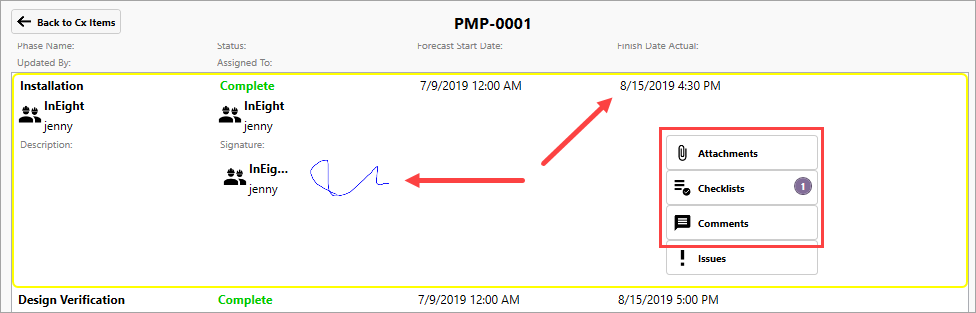
You can review data from Complete, In Progress or No Started phases.
Complete phase tiles mimic the look of In Progress and Not Started tiles, with the exception of
An electronic signature
A Finish Date Actual
Attachments, Checklists and Comments may also be present
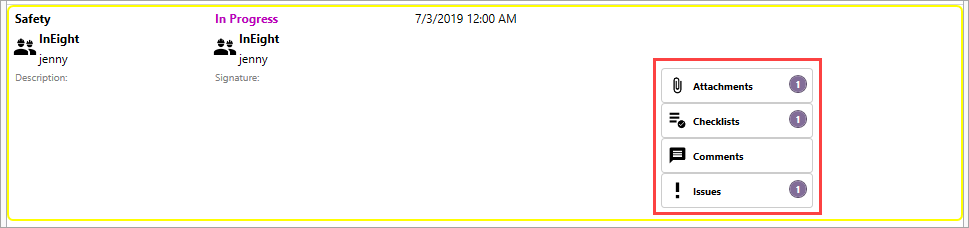
In Progress phases may certainly contain Attachments, Checklists, Comments and/or Issues as shown below:
Phases that have Not Started may include Attachments, Checklists, Comments, or Issues.

To learn more about attachments, see the Attachments lesson.

To learn more about checklists, see the Checklists lesson.

Comments are tied to a specific Cx Item, in this case "CP-001."

To learn more about inspections, see the Inspections lesson.

To learn more about issues, see the Issues lesson.

With a Cx Item selected, and then a Phase selected, click the Update Phase Status link.
Three options are available:
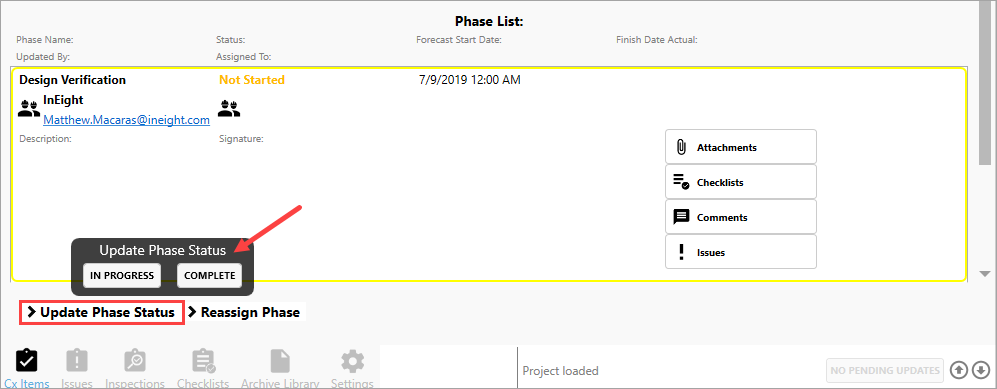
If the In Progress button is selected:
If you've made an error, and didn't want to update the status, click In Progress, then Cancel in the subsequent pop-up window.
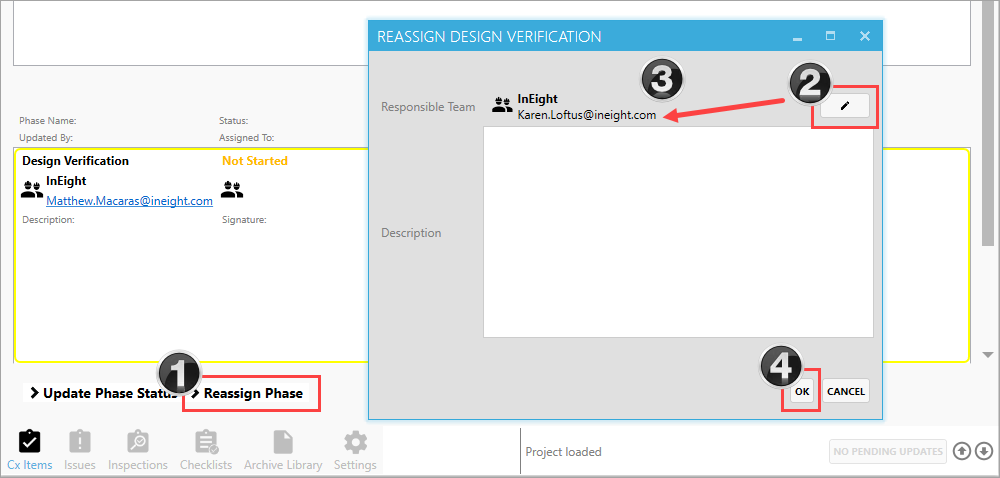
While an individual will have ownership of a Phase, any phase can be re-assigned if you have the permission-level to do so.
If you are ready to close out a phase, and all checklists are complete:
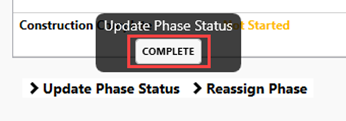
The complete Phase will show the status of Complete, along with a Finish Date Actual, and with the signature of the person.
Additional Information
9977 N 90th Street, Suite 250 Scottsdale, AZ 85258 | 1-800-637-7496
© 2024 InEight, Inc. All Rights Reserved | Privacy Statement | Terms of Service | Cookie Policy | Do not sell/share my information