Products
Solutions
Resources
9977 N 90th Street, Suite 250 Scottsdale, AZ 85258 | 1-800-637-7496
© 2024 InEight, Inc. All Rights Reserved | Privacy Statement | Terms of Service | Cookie Policy | Do not sell/share my information

User Account Management settings let you manage users, user groups, and access to projects. You can navigate to User Account Management through the quick link in the slide-out panel.
You must be an account administrator to manage user accounts.
The User Account Management has two tabs:
Users & Groups – Manage users and user groups.
Project Permissions - Assign users and user groups to projects.
The Users & Groups tab has two panels. The Users panel lets you manage users, and the Groups panel lets you manage groups. You can use the buttons in the center of the page to add and remove selected users to and from groups.
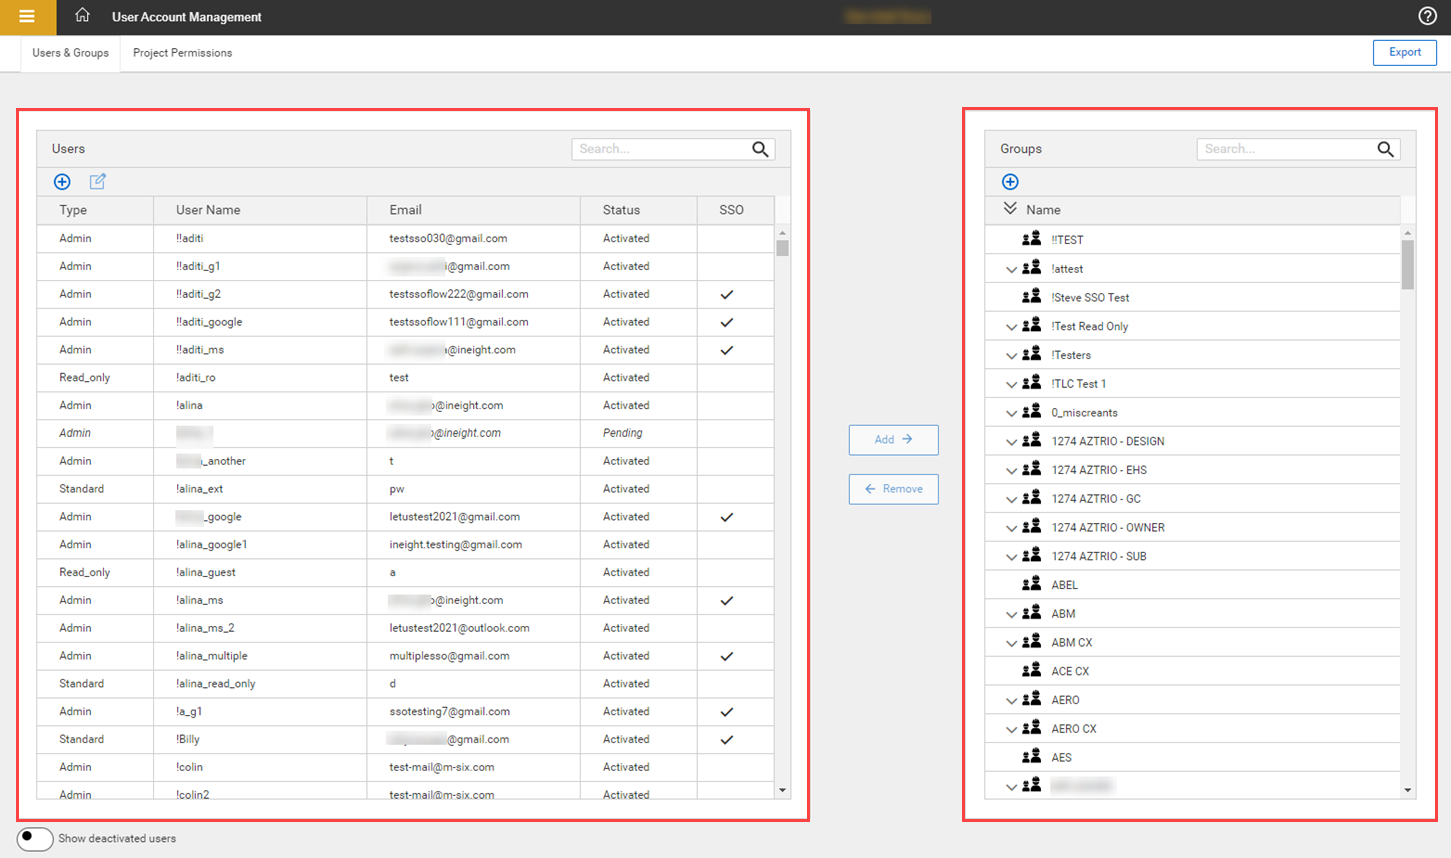
You can select the following user types:
| User type | Description |
|---|---|
| Admin | Create and manage users and duplicate projects. |
| Standard |
Limited access and functionality in a project. |
| Read-Only |
Unable to make changes to a project even if you have other roles that would otherwise allow it. |
See User Access Overview for additional information.
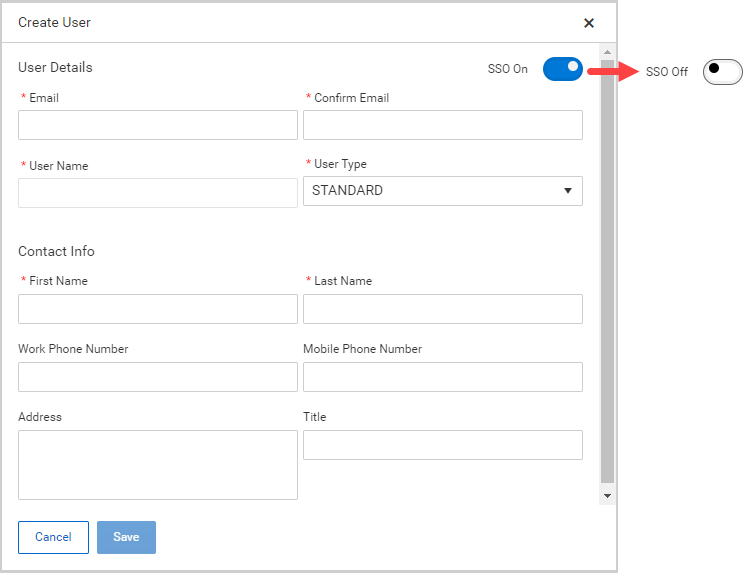
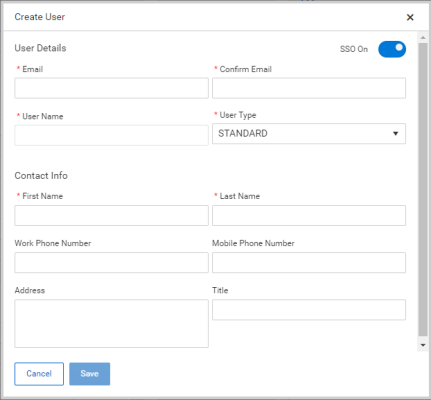
When creating a new user, the SSO On toggle lets you choose between creating a single sign-on (SSO) user, or a user that logs in using their user name and password. The default setting is On. This cannot be changed in edit mode.
The following Step-by-Step walks you through adding a new user.
Click the Add user icon in the Users panel.
The Create User dialog box opens.
Fill in the required fields indicated by an asterisk, and then click Save.
The SSO toggle lets you choose between creating an SSO user, or as a user that signs in with a user name and password. To add a user that signs in with a user name and password, switch the SSO On toggle to Off.
Select a user from the Users panel.
Click the Edit user icon at the top of the Users panel.
You can also right-click a user, and then select Edit User in the drop-down menu.
Make the updates in the dialog box, and then click Save.
The user name cannot be edited, and the SSO toggle cannot be changed in edit mode.
To activate a user, right-click the user, and then select Activate User in the drop-down menu.
To see a list of deactivated users that you want to activate, enable the Show deactivated Users toggle at the bottom of the Users and Groups panel.
To deactivate a user, right-click the user, and then select Deactivate User in the drop-down menu. A deactivated user can no longer access their account.
To reset a user's password, right-click the user, and then select Reset Password in the drop-down menu. The user receives an email with instructions and a link to reset their password.
To set a temporary password for a user, right-click the user, and then select Set Temp Password in the drop-down menu. A temporary password lets you manually set a new password for the user.
To delete a pending user right-click the user, and then select Delete User in the drop-down menu.
You can only delete pending users for non-SSO users.
To resend an activation email to a pending user, right-click the user, and then select Resend Account Activation Email in the drop-down menu.
Groups are made up of multiple users. You can assign multiple users to projects using groups.
To add a new group, click the Add group icon at the top of the Groups panel. In the dialog box enter a group name, and then click Save.
To delete a group by right clicking a group, and then selecting Delete Group in the drop-down menu.
A group must unassigned to be deleted.
To change a group's name, right click a group, and then select Rename Group in the drop-down menu.
The new group name is shown in all historical data about the group.
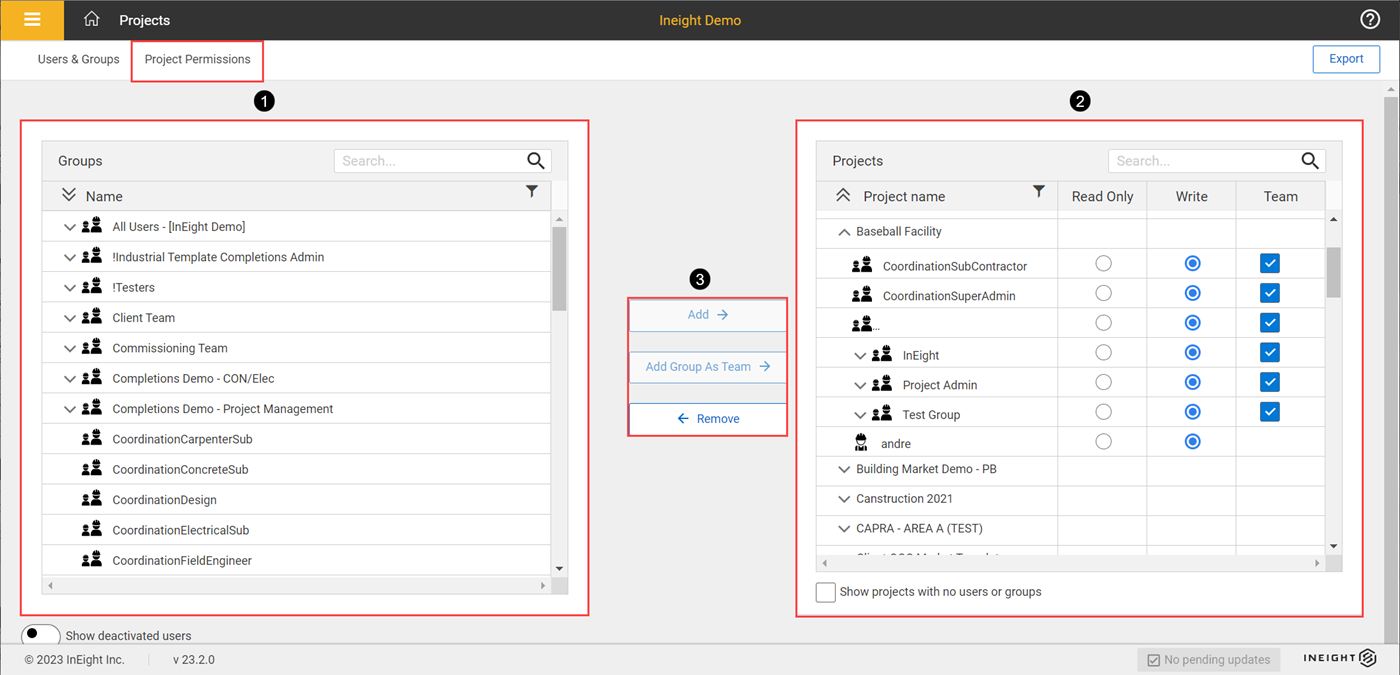
The Project Permissions tab has two panels. You can add and remove selected users and Groups As Teams using the center buttons.
| Item | Description | |
|---|---|---|
| 1 | Groups panel | Shows groups and their users. |
| 2 | Projects panel | Shows projects and the users and groups assigned to each project. You can manage user and group access to a project |
| 3 | Add, Remove, and Add Groups As Team | You can use the buttons in the center of the page to add and remove selected users and Groups As Teams to and from projects. |
Every user must be on a team but can only belong to a single team per project. Failure to assign a user to a team for a given project will result in a misconfiguration error.
Best practice is to add Groups As Teams to projects instead of adding individual users.
Users and Groups As Teams have the following access types:
Read Only – Unable to make changes to a project even if they have roles that would otherwise allow it.
Write - The default access given to a user or group.
If you used the Add button, you can then simply click the checkbox in the Team column.
You can export a Microsoft Excel file with user information and to which projects users are assigned to. Export files are useful for audits.
To export, click Export in the top right of the page to download the file.
Additional Information
9977 N 90th Street, Suite 250 Scottsdale, AZ 85258 | 1-800-637-7496
© 2024 InEight, Inc. All Rights Reserved | Privacy Statement | Terms of Service | Cookie Policy | Do not sell/share my information