Products
Solutions
Resources
9977 N 90th Street, Suite 250 Scottsdale, AZ 85258 | 1-800-637-7496
© 2024 InEight, Inc. All Rights Reserved | Privacy Statement | Terms of Service | Cookie Policy | Do not sell/share my information

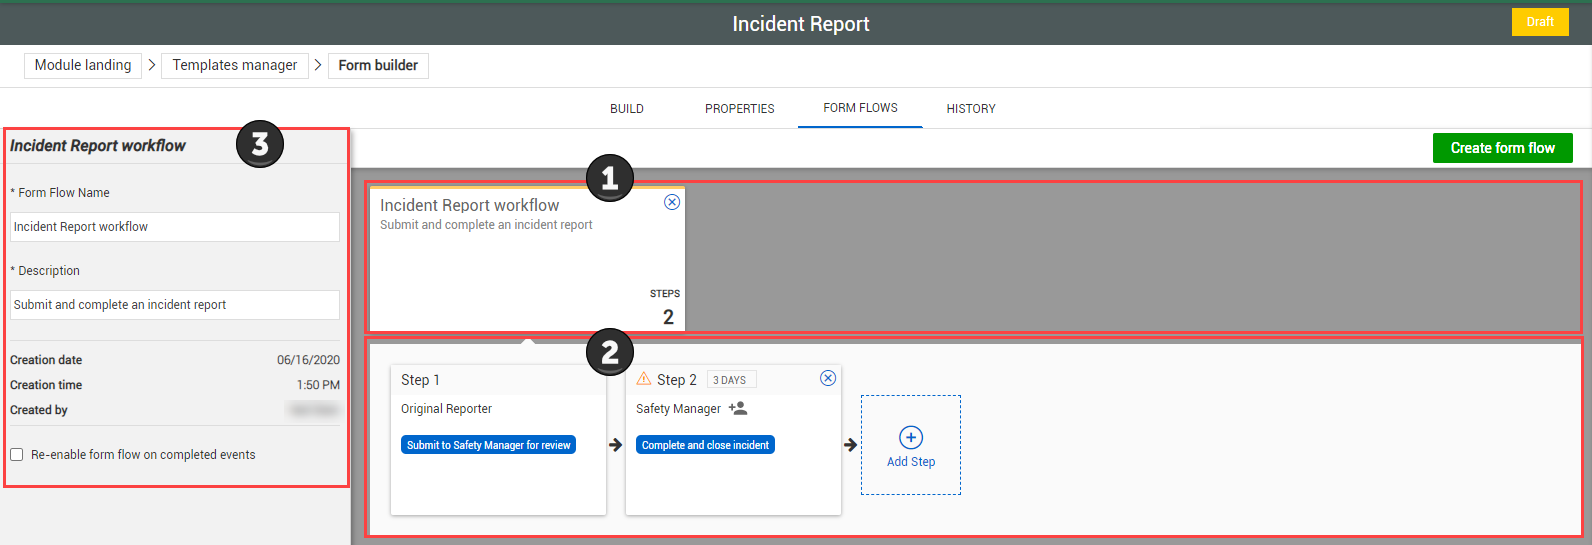
The Form Flows tab of the Form builder lets you manage all the form flows associated with a form template. A form flow adds workflow functionality to your form so that responsible parties can be actively engaged in an event’s process life cycle. Including a form flow can be helpful if your business process needs to be handed off from the reporter to another individual or department. Each step of a form flow has an associated form flow button in the template that you, as a responsible party, can click to complete your part.
Multiple form flows can also be added to a form to suit your specific business processes. For example, when filling out a form, you might need manager approval to proceed sometimes, but not every time. In this case, you could have one form flow for when manager approval is required, and another form flow when it is not required. Each form flow’s steps are independent of each other but contained in the same form.
The Form Flows tab is separated into the following areas:
To create a form flow, you must use both the Build and Form Flows tabs to associate form flow questions with a form flow and its steps.
To efficiently plan and create a form flow, you can build your form with all of its form flow questions before moving to the Form Flows tab to associate those questions with steps.
There are two ways to start creating a form flow:
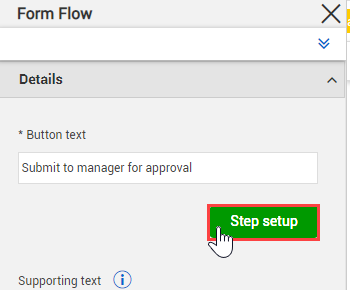
From the Build tab, in the Form Flow Button’s side panel under Details, click Step setup, and then click Next if you see a dialog box that says no form flows exist
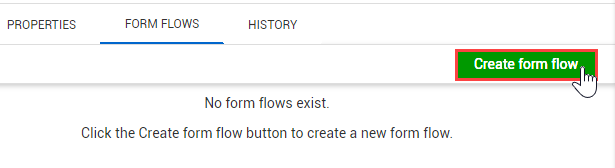
From the Form Flows tab, click Create form flow
The following step by step walks you through the process assuming that you start from the Build tab.
In the Step 1 panel on the left side of the page, in the Details section, select which form flow button to use for this step and who is responsible.
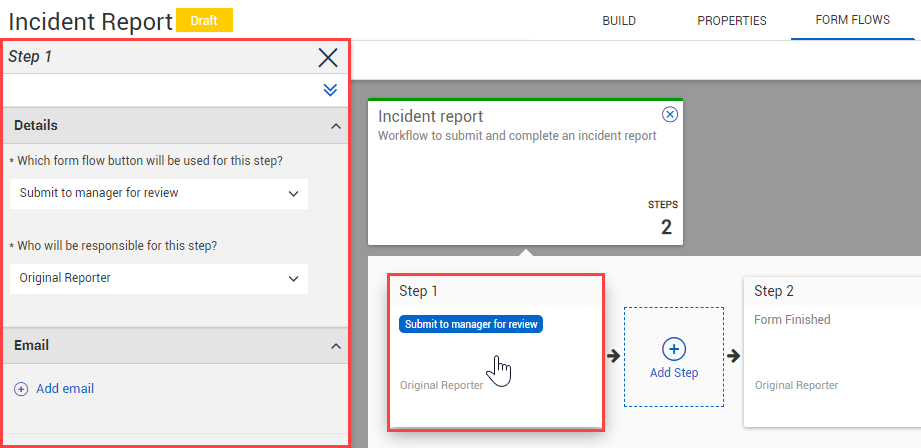
Optionally, if you want to send an email notification to the responsible party for this step, click Add email in the Email section and complete the dialog box.
The email notification indicates the start of the step after clicking its form flow button, not the step’s completion.
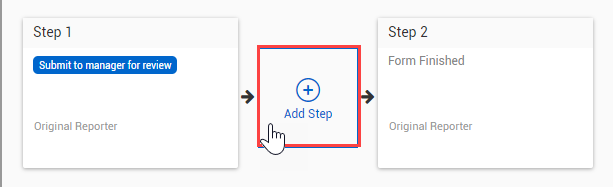
You can add a new step to a form flow through the Add Step button in the Form Flows tab or the Step setup button of a form flow question in the Build tab. The Add Step wizard contains several pages of options. After you have added a step, you can edit any of this information by selecting the step card and editing the fields in the left side panel.
There are two ways to start setting up an additional form flow step:
From the Build tab, in the Form Flow button’s side panel under Details, click Step setup
From the Form Flows tab, click Add Step
The following step by step walks you through the process assuming you start from the Build tab and have at least one form flow and form flow question.
On the Step details page of the Add Step wizard, select the form flow button to use for this step.
If you started the Add Step wizard from the Build tab, this option is already filled with the form flow button you selected.
Select who is responsible for this step.
You can let the user choose an individual from the selected role if, for example, one individual with that role is off work and cannot complete the step.
On the Email page, select whether you want to add an email that notifies responsible recipients each time this step is reached, and then enter the contents of the email.
The email notification indicates the start of the step after clicking its form flow button, not the step’s completion.
You can personalize the email by pressing the @ key and selecting responses to questions in the form to insert.
Optionally, select Make this step reversible to let users go back to a previous step. Select which step to go back to, whether to cc recipients to the email, and whether to require a comment when reversing.
If you make a step reversible, you must go back to the Build tab after the step setup to edit the text of the new button, which is named Reversal form flow button by default.
The reverse form flow button can have leading logic applied to it independently from the button that advances to the next step.
On the Step access page, set view or edit access by role for each form question or section when the event is in this step. Access rules are shown as a table with the ability to view and edit as columns and questions and sections as rows. When you select a cell, a slide-out panel shows options for all roles, a select role, or no roles.
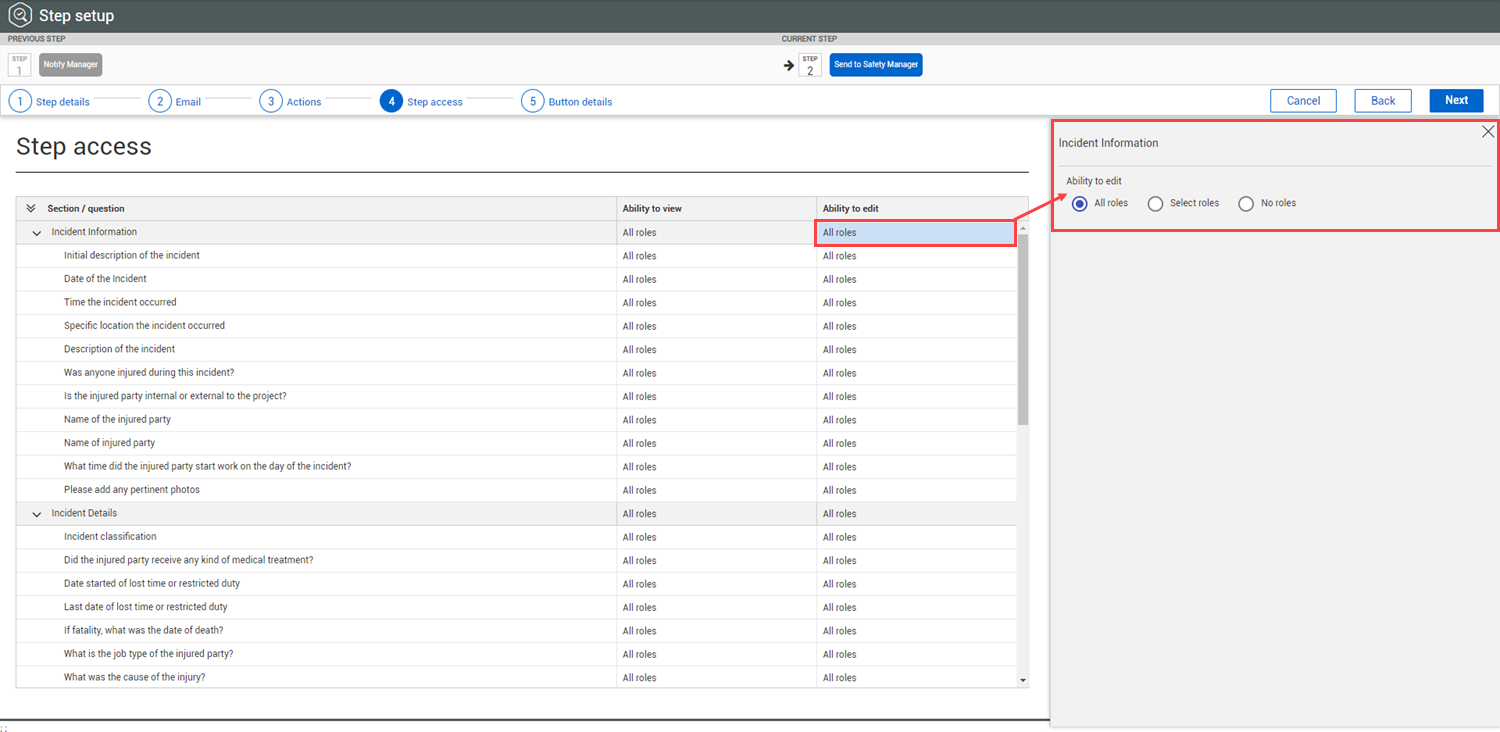
The view and edit permissions you set on this page are applied to the form only when in this specific step of the form flow. Step access does not override question access given in the template. If you cannot view a question using the access given in the template, you cannot view it when step access is applied.
On the Button details page, select what form flow button is used to advance to the next step.
You can also select None.
You can let users re-enable a form flow of a completed event by selecting a form flow, and then selecting the Re-enable form flow on completed events check box in the side panel.
When a user re-enables a form flow, they can move it back to the step of their choice. All step data is saved from previously completing the form flow unless the user changes an answer in a way that leads to different questions based on logic. Only the selected form flow is re-enabled, not all form flows associated with the template. If a re-enabled form flow leads to another form flow that is not re-enabled, the user cannot see the other form flow.
Users must have permission to edit completed events to re-enable a form flow.
Additional Information
9977 N 90th Street, Suite 250 Scottsdale, AZ 85258 | 1-800-637-7496
© 2024 InEight, Inc. All Rights Reserved | Privacy Statement | Terms of Service | Cookie Policy | Do not sell/share my information