Products
Solutions
Resources
9977 N 90th Street, Suite 250 Scottsdale, AZ 85258 | 1-800-637-7496
© 2024 InEight, Inc. All Rights Reserved | Privacy Statement | Terms of Service | Cookie Policy | Do not sell/share my information

The Role assignment dialog box lets you create roles by resource type, and assign teams and users to roles. You can create roles for any resource type added to your project. When you add a claiming scheme to a scope item, a default role is automatically added for the associated resource type and claiming scheme if a role does not already exist.
The Role assignment dialog box shows the Current and future assignments tab by default when opened. On this tab, you can add roles and assign teams and users. There is also a User assignment history tab, which shows a record of all user assignment changes made.
The Current and future assignments tab shows counts of current assignments to scope items and steps.
After a role is created, you can assign it to a scope item in the Resources section of the Add and Edit scope items slide-out panels and in the Resource Assignments sheet of the Microsoft Excel import template. When you assign a role to a scope item, the Planned team and Assigned user fields are automatically populated with assignments from the Role assignment dialog box and become read-only.
To see role assignments, you must have the permission View role assignment. To perform actions on role assignments, you must have the permissions Edit role assignment, Add role assignment, and Delete role assignment.
When you assign a role to a scope item, the role, planned team, and assigned user are inherited by the claiming steps. You can still update the role on individual steps if the step has not been claimed.
You can delete a role only if it is not assigned to a scope item.
When you update a planned team or assigned user on a role, those fields are updated on all incomplete scope items and steps with that role assigned. Any completed roles with the role assigned keep the previous planned team and assigned user.
There is no limit on the number of roles that can be created for a resource type.
For each existing role, you can add a future user by clicking the Add future user icon next to the role name. This allows another user to be assigned on a role on a future start date. The start date defaults to today’s date, and can be updated to a future date. On the start date, the current user is replaced by the future user and each incomplete step is updated with the future user.
After a future user is added to a role, the end date of the current user on the role defaults to the day before the future user's start date.
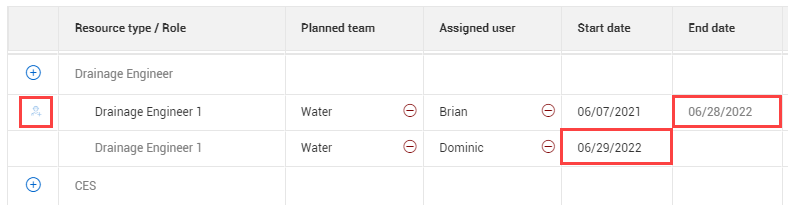
Each role can have only one future user at a time.
To assign a role, planned team, and user to a resource type:
From the Scope items page, click Actions, and then select Role assignment from the drop-down menu. The Role assignment dialog box opens to the Current and future assignments tab.
Click the Add role icon next to a resource type. A new row is created below with a default name.
To change the name, click on the role name, edit the name, and then press Enter.

Click in the Planned team field for the new role, and then select a team from the drop-down list. Any team added to project settings is available to be selected.
For more information about assigning a resource type to a scope item, see Scope item resources.
Additional Information
9977 N 90th Street, Suite 250 Scottsdale, AZ 85258 | 1-800-637-7496
© 2024 InEight, Inc. All Rights Reserved | Privacy Statement | Terms of Service | Cookie Policy | Do not sell/share my information