Markup tab
Tools on the Markup tab let you add text and other annotations to the PDF. When the Automatically save document markups setting (Settings > Project settings> Document > Comment) is enabled, your markups are saved automatically. If the setting is disabled, you must save any markups you make before closing the file. Save prompts show when you close windows, such as the Details page, or when you close the viewer tab to ensure that you save all markups.
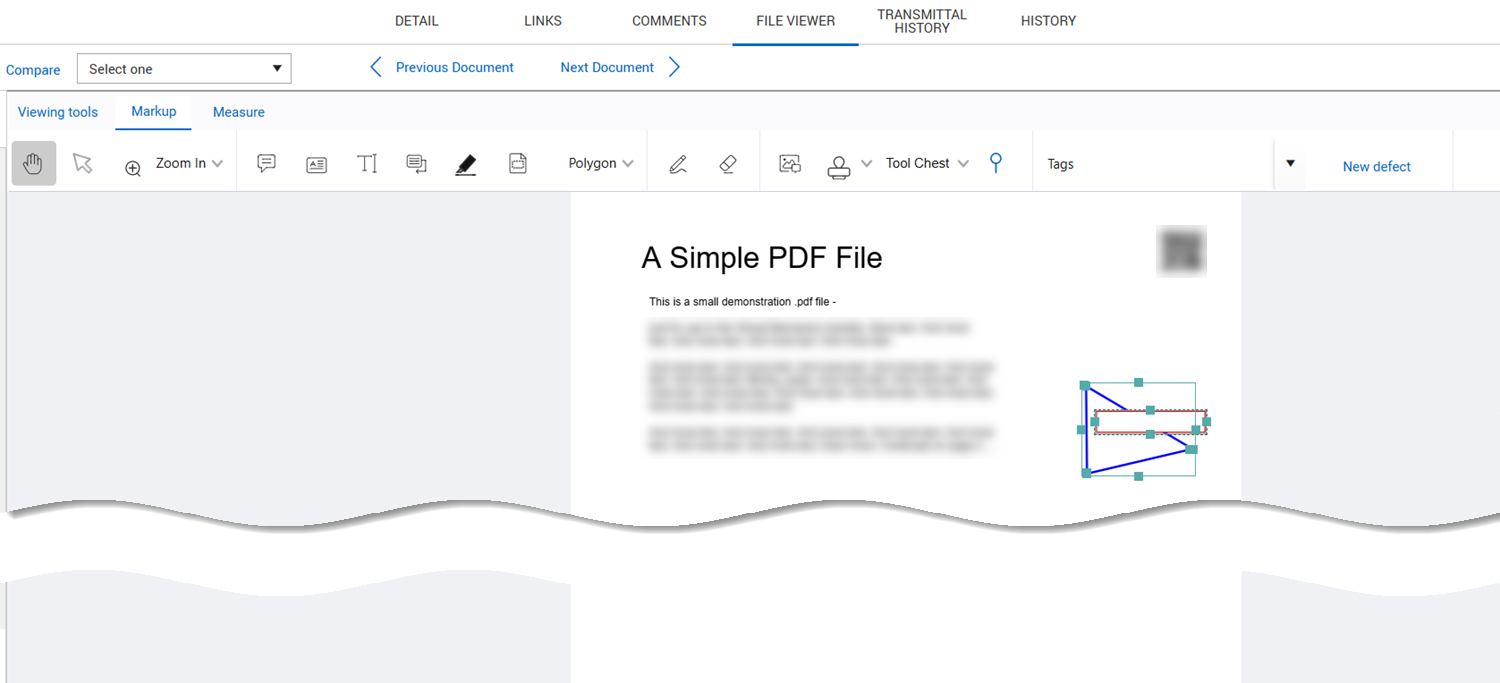
| Item number |
Name |
Use |
| 1 |
Pan hand |
Click and drag to move around a large drawing. You can use the pan hand to click an annotation to open a formatting slide-out panel. You can then click the Apply button to apply the formats and close the panel. |
| 2 |
Select text and annotations |
Select existing text or annotations to add links, manage links, or delete items. |
| 3 |
Zoom tools |
Zoom in or out of the PDF page. |
| 4 |
Note |
Add a note to the PDF page. |
| 5 |
Text box |
Add a text box on the PDF page. Text added to a text box is shown in the Comments field of the annotation in the Comments & Annotations pane. It is also shown as a comment in the document's Comments register. |
| 6 |
Typewriter |
Add text without a text box around it. The text shows in the Comments & Annotations panel as comments. |
| 7 |
Callout |
Add a text box with an arrow, so you can add text and point to an area of the document with a single tool. You can right-click the callout to access the callout properties, where you can adjust the appearance and font of the text box. |
| 8 |
Highlight |
Highlight text on the PDF page. |
| 9 |
Area highlight |
Draw a highlight box. |
| 10 |
Shape |
Draw a shape, such as a square, circle, or line. |
| 11 |
Pencil |
Draw a pencil line. |
| 12 |
Eraser |
Erase a pencil line. |
| 13 |
Image |
Insert a saved image. |
| 14 |
Stamp |
Add a stamp, such as one that shows approval or rejection. |
| 15 |
Tool chest |
Insert or manage custom annotations. |
| 16 |
Pin |
Place a marker (pin) to an area of the PDF page. |
| 17 |
Edit my company users' markups |
Lets you edit the markups from other users in your company. This tool shows only when the security setting Admin > Manage user access > Security > Document > Edit Other Users Markup is enabled for your security group. |
| 18 |
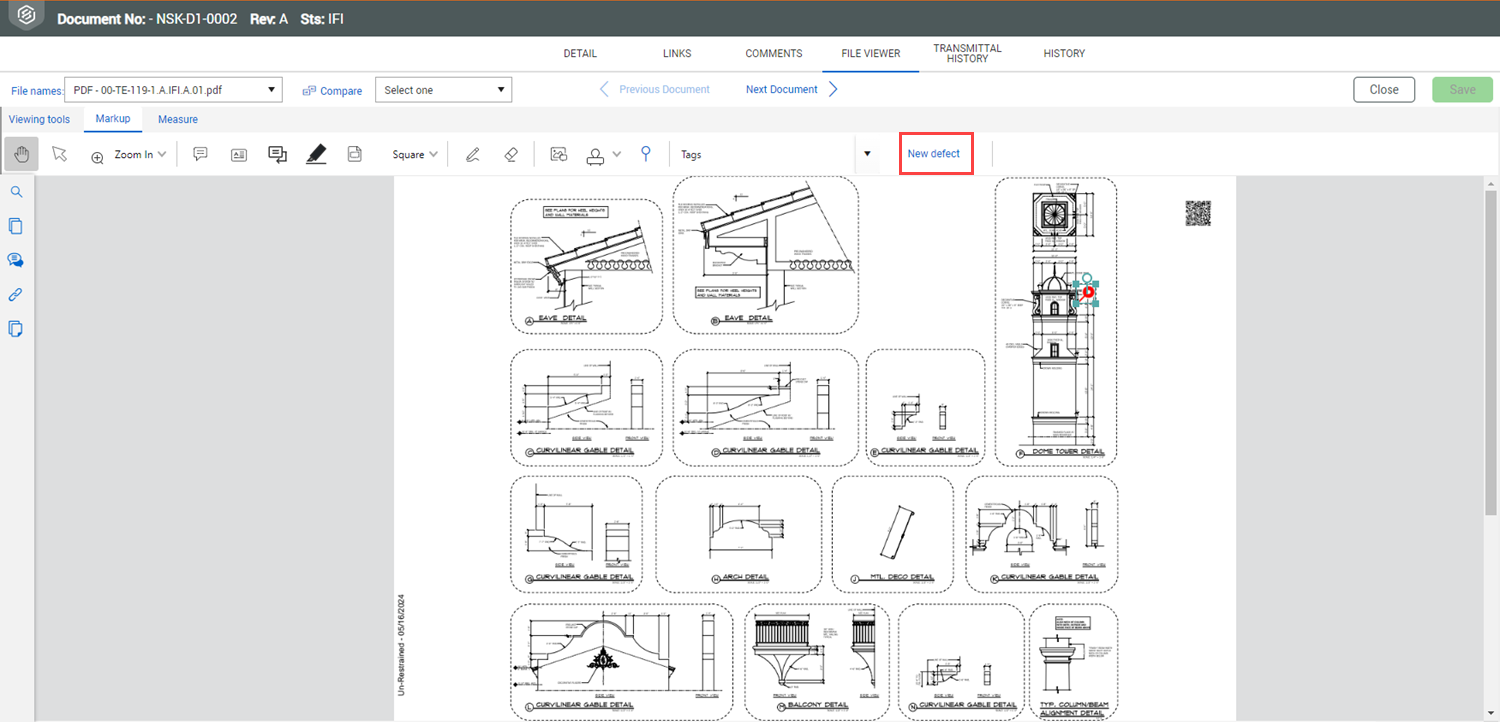
New defect |
Pin a defect to the drawing. |
You can use the Ctrl+C and Ctrl+V keyboard shortcuts to copy and paste a markup. Copy and paste is supported in the same file or across files.
Text added to any markup, including notes and shapes, shows in the Comments tab. You can click the Add response icon for the comment in the Comments tab to respond to the annotation comment.
Format markups
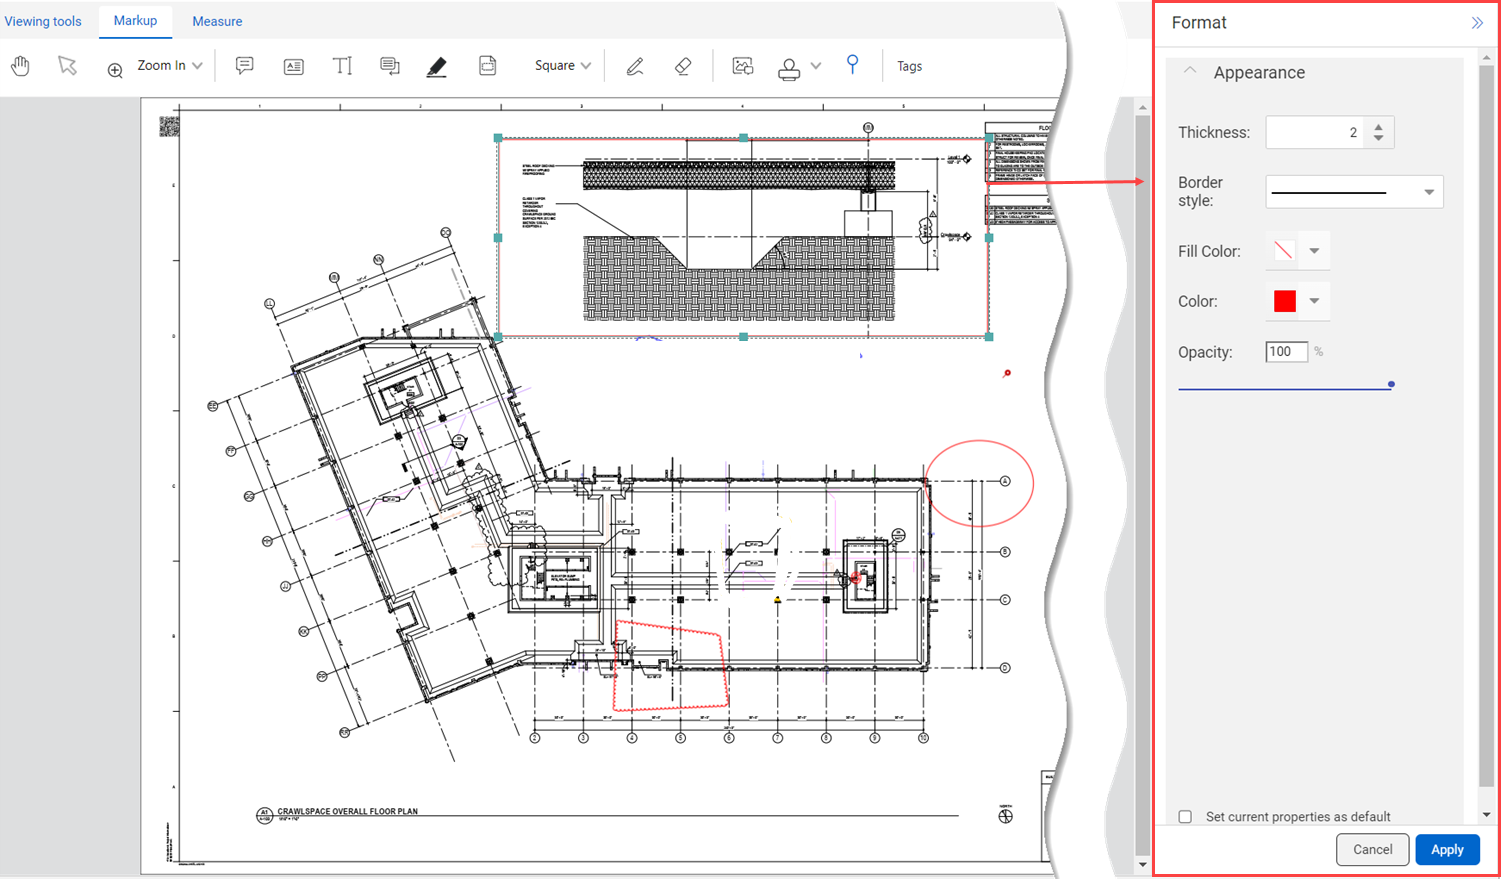
When you add a note, highlight, or shape, the Format slide-out panel opens, so you can change the color and opacity. You can then click the Apply button to apply the formats and close the panel.
For other markups, you can use the pan hand to click the markup to open the Format slide-out panel, where you can change the appearance.
If you want to set the properties as the default, select the Set Current properties as default check box. You can then click the Apply button to apply the formats and close the panel. The default applies to all your projects.
Color choice
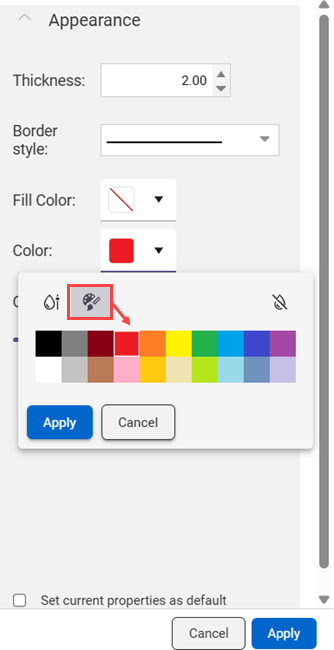
To change the color of your markup, click the Color drop-down menu in the Format pane. A gradient view of the available colors shows in the dialog box. You can choose a color from the gradient, or you can click the Palette view icon to switch to standard color options. Click the Gradient view icon to return to the gradient view.
Click the Apply button in the Color dialog box to save your selection.
Custom tool chest
You can use the tool chest to create a library of custom stamps and annotations at the personal, company, or project level. You can group markups and properties to create custom annotations or import custom stamps.
If the annotation supports dynamic data, such as a note, text box, or callout, you can configure automatic attributes. For example, you could define properties for a note that include the commenter's name and the date.
If you have requested a new stamp via a customization, it is automatically added to the tool chest.
Save custom properties for the tool chest
Summary: Save frequently used markup properties as a single entity and store it in the tool chest, so you do not have to apply each properly individually.
-
In the viewer, use the markup and formatting tools to add a markup with multiple properties, such as shape, colors, and border thickness.
-
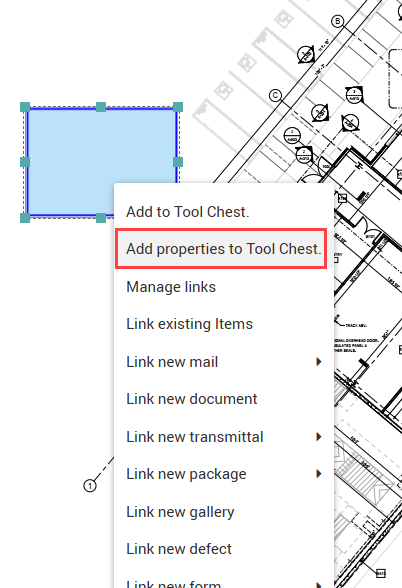
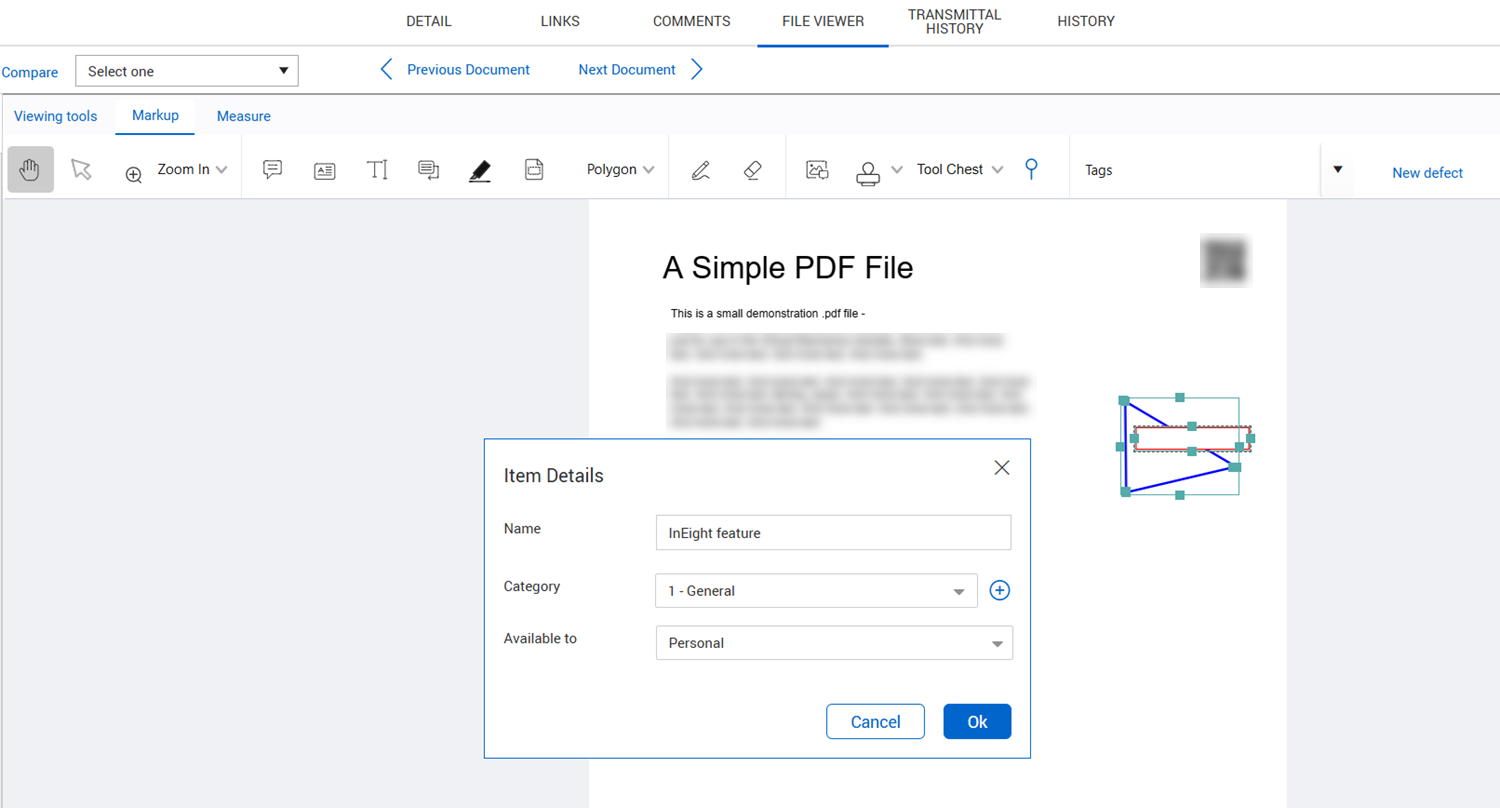
Right-click on the annotation, and then select Add properties to Tool Chest. The Item details dialog box opens.
-
Enter the name of the property and the availability (Personal, Company, or Project) of the item, and then click Ok. The item is saved to the tool chest.
Create a custom annotation for the tool chest
Summary: Create a custom annotation and add it to the tool chest when you frequently group multiple markups together, and you want to save them as a single annotation for future use. You can also use the tool chest when you want to save the formatting for a single annotation, such as a font or color, so you do not have to apply formatting each time you use the annotation.
Considerations: You can create custom annotations while using the viewer.
-
In the viewer, use the markup tools to add multiple shapes to a document, and then select them.
-
Right-click the grouped annotation, and then select Add to Tool Chest. The Item Details dialog box opens.
Additional fields show in the dialog box when the annotation supports text and dynamic data, such as a note, text box, or callout. See Add dynamic data to a tool chest annotation, for more information about adding dynamic data and supporting text.
-
Enter the name of the annotation, the category, and the availability (Personal, Company, or Project) of the item, and then click Ok. The item is saved to the tool chest.
What's next: You can open the tool chest and select your annotation instead of recreating it. If you saved the tool with Company or Project availability, the annotation is available in other users' tool chests.
Add dynamic data to a tool chest annotation
Summary: Add dynamic data, such as user names, dates, or document information to annotations.
Considerations: These steps are applicable to annotations that support text, including notes, text boxes, typewriter, and callouts.
-
Follow steps 1 and 2 in the procedure Create a custom annotation for the tool chest to open the Item details dialog box.
-
Enter the name of the annotation, the category, and the availability (Personal, Company, or Project) of the item.
-
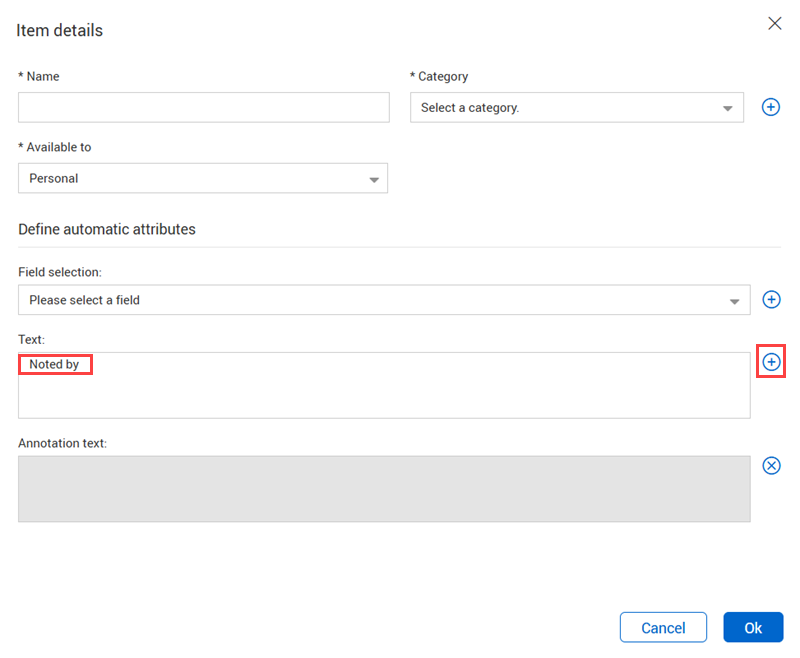
In the Define automatic attributes section, enter the text (including spaces) or field selection for the first part of the annotation in the applicable field, and then click the Add icon for the field. For example, if you want the dynamic attributes to show Noted by [user name] on date [YYYY-MMDD], you would first enter Noted by and a space in the Text field.
The text or field shows in the Annotation text box after you click the Add icon.
-
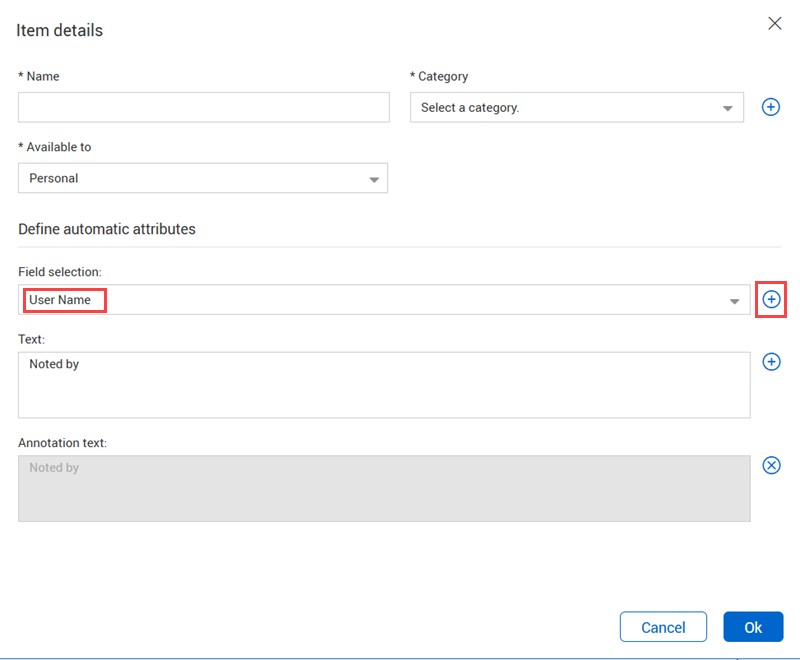
Repeat step 3 for each part of the annotation. Using the example for this procedure, you would next select the User Name field and then click the Add icon for the Field selection.
If you make an error, you can click the Delete icon to clear all the annotation text.
-
After all annotation text is entered, click Ok.
Use a custom property, annotation, or stamp
Summary: Mark up a document with a custom property, annotation, or stamp.
Considerations: The property, annotation, or stamp must have already been added to the Tool Chest. While a custom annotation is added to the page as a unit, you must select each part if you want to move it or apply options from the context menu.
-
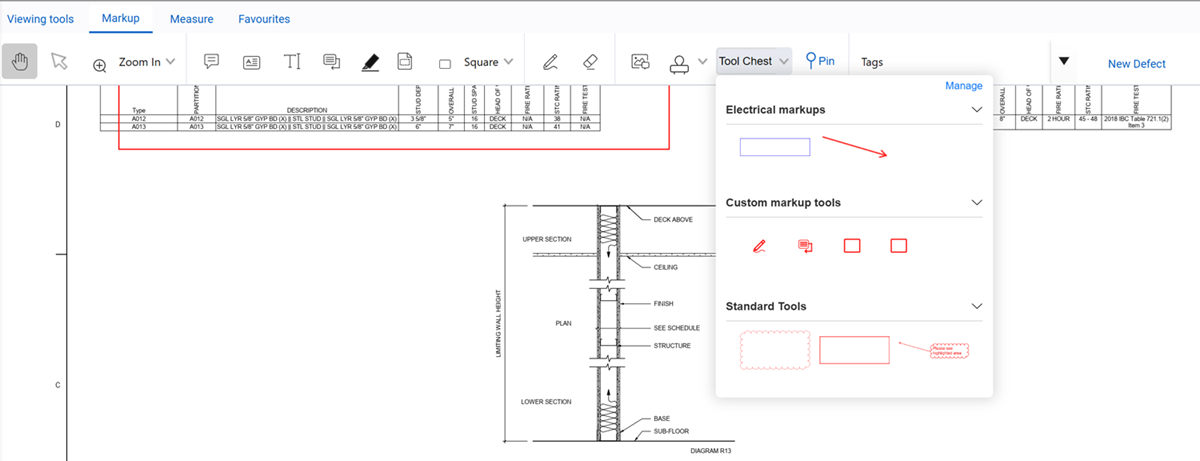
In the PDF viewer, expand the Tool Chest drop down list, and then select the property, annotation, or stamp you want to use. You can collapse or expand the categories as needed to help you locate the applicable tool.
-
Select an area on the page to add the tool chest markup. The markup is added to the page.
To manage tool chest items, expand the Tool Chest drop-down list, and then select Manage. You can then right-click a tool chest item, and then select to delete it or edit the item details.
Linking and pinning annotations
Document tools let you link supporting items or pin defects to an annotation.
Link an existing item to an annotation
You can link an existing item, such as mail, a document, or a form, to support an annotation on the PDF. For example, if you annotated a drawing with a note, you can add items to support that note.
The item to link must already exist in Document. See Link a new item to an annotation for information about creating a new item and linking it. If you want to add links to the document in general, you can use the Links tab.
-
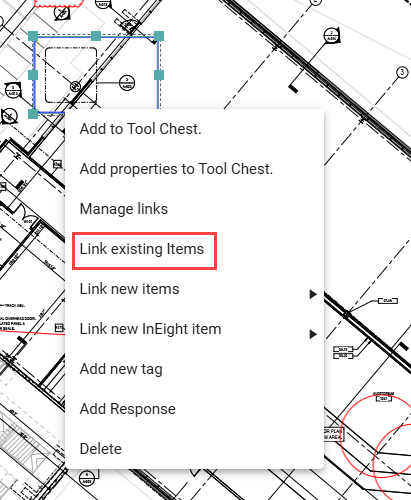
Click the Select tool, and then click an annotation. A menu of linking options is shown.
-
Select Link existing items from the menu. A search dialog box opens.
-
Select the search criteria type, and then enter the search criteria.
-
Click Search.
-
Select one or more items from the search results, and then use the move right arrow to move the items to the Selected work items to link section of the page.
-
Repeat steps 3–5 until you have the links you want. Click Save.
-
Click Save in the PDF viewer.
The items are linked to the text. You can see them when you use the Links tool.
Link a new item to an annotation
You can create a new item, such as mail, a document, or a form, and then link it to annotation on the PDF in a single procedure. For example, if you annotated a drawing with a note, you can create items to support that note.
You can create and link an item to an annotation from any of the tabs of the PDF viewer. If you want to add links to the document in general, you can use the Links tab.
-
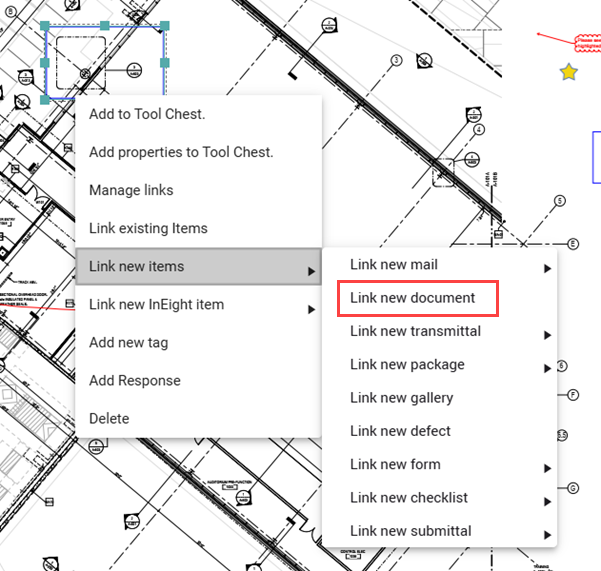
Click the Select tool, and then click an annotation. A menu of linking options is shown.
-
Expand the Link new items option, and then select the type of item you want to link (for example, Link new document).
- Create the new item and then save it.
- Click Save on the PDF viewer.
The items are linked to the text. You can see them when you use the Links tool.
Pin a defect to a drawing
Summary: Pin a defect to a drawing to show where the defect is located. Using a drawing that is already in the register instead of adding a drawing to the inspection lists prevents duplicate drawings.
Considerations: The drawing must be a PDF.
Quick steps:
-
From a PDF drawing, go to the Markup tab, and then click New defect.
-
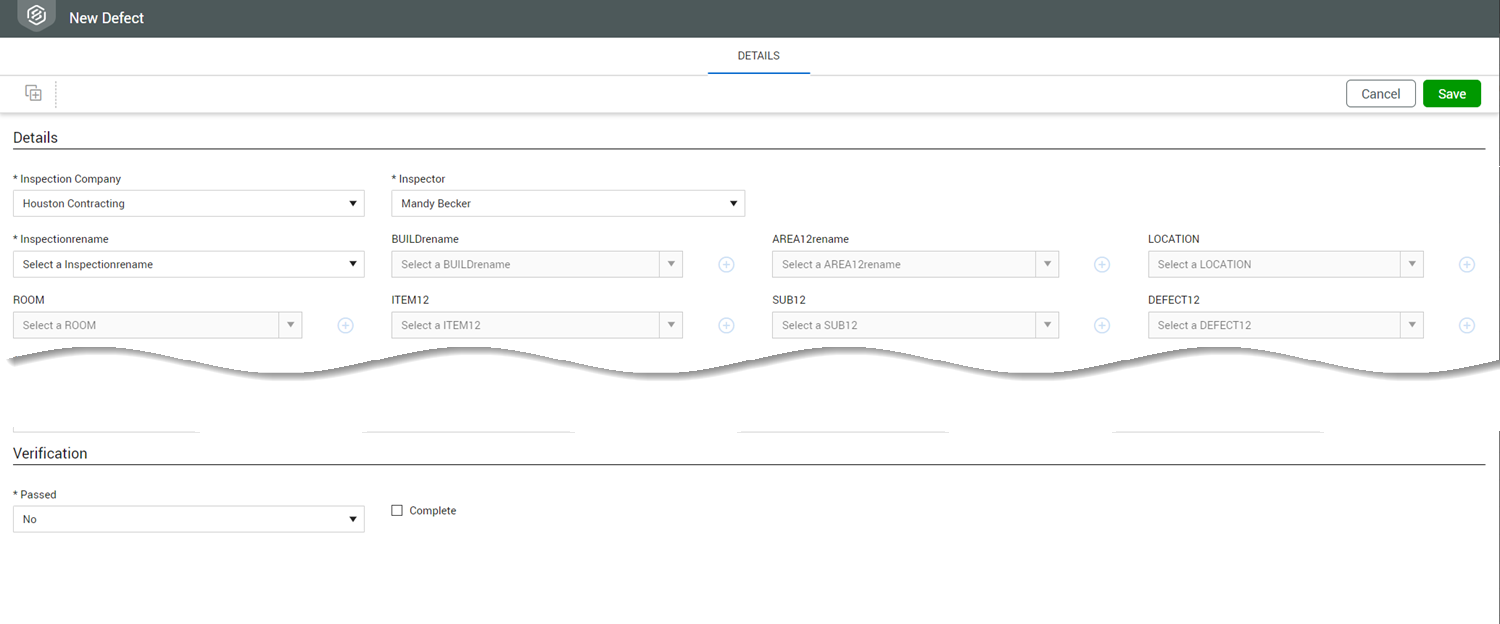
Click the area on the page to place the defect link. The New Defect Details page opens.
-
Enter the details of the defect, and then click Save. The defect is added, and additional defects tabs become available. The drawing, including the pin, shows in the Drawings tab. For information about New Defect Detail page, see Log defects on the web application.
What's next: You can add information on the additional tabs as needed.
Preview linked items
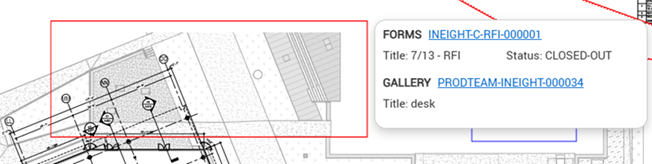
When you hover over an annotation in the viewer, you can see where and how the annotation is impacted by linked items. The hover text shows a preview of linked items, which includes the type of item linked and a hyperlink to the item.
Automatic document linking
When you upload a PDF with searchable text (OCR), Document searches for the text for document numbers that correspond to documents in the register. When it finds the matching text, it creates a hyperlink to the document. You can click the document number link to go directly to the corresponding document.