Products
Solutions
Resources
9977 N 90th Street, Suite 250 Scottsdale, AZ 85258 | 1-800-637-7496
© 2024 InEight, Inc. All Rights Reserved | Privacy Statement | Terms of Service | Cookie Policy | Do not sell/share my information

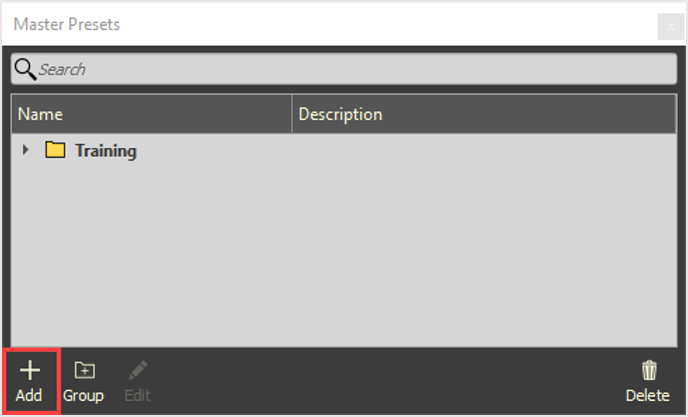
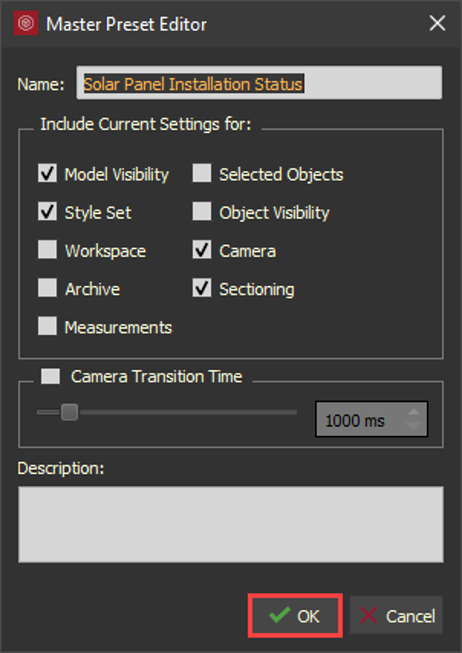
Select Add to create a new preset.
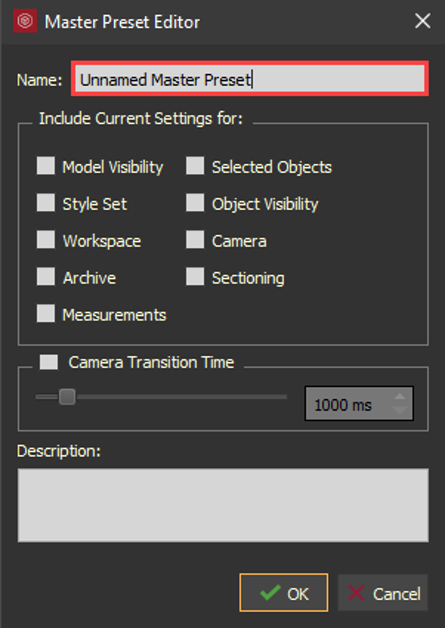
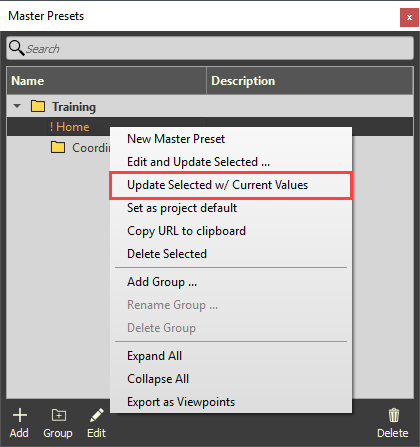
It is good practice to create one or more HOME master presets.
Mouse over settings for tool tips.
When finished, select OK.
The description text does not wrap, so it is best practice to keep the description short.
This is a rare notification that you could encounter when you are trying to Hide Unselected while you are also selecting the Object Visibility option when creating the Master Preset.
You can also get that dialog box if you published one entire model from Navisworks.
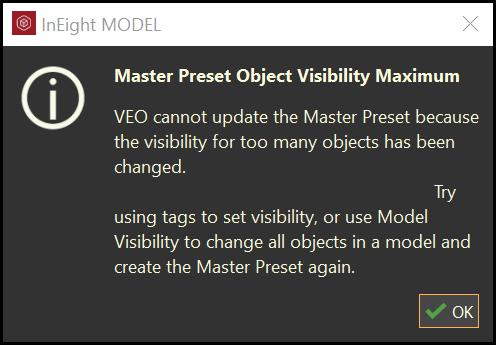
It is recommended that you publish discipline specific models or area specific models. Then select objects, RMC, and select Hide Models from Unselected. Then RMC and select Hide Unselected. After that, create the Master Preset with Object Visibility option.

Additional Information
9977 N 90th Street, Suite 250 Scottsdale, AZ 85258 | 1-800-637-7496
© 2024 InEight, Inc. All Rights Reserved | Privacy Statement | Terms of Service | Cookie Policy | Do not sell/share my information