Products
Solutions
Resources
9977 N 90th Street, Suite 250 Scottsdale, AZ 85258 | 1-800-637-7496
© 2024 InEight, Inc. All Rights Reserved | Privacy Statement | Terms of Service | Cookie Policy | Do not sell/share my information

Coordination issues are groupings of geometric clashes, viewpoints, documents, and markups that can be assigned to a user or a user group. You can create coordination issues without a geometric clash. All issues created can be exported.
When creating and managing issues, one best practice is to have the Clash Manager’s Results panel and Issue Manager panel open side-by-side. After you run a clash rule or rule group, your focus will be on their results in the Clash Manager’s Results tab and the Issue Manager.
To open the Clash or Issue Manager, go to Logic > Clash Manager or Issue Manager.
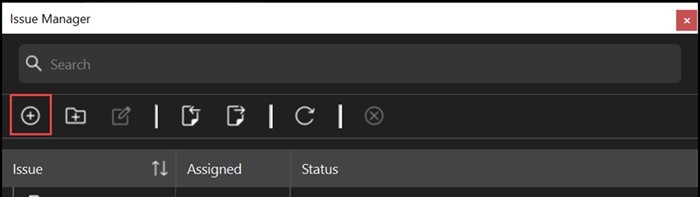
In Issue Manager, to add a new folder, click the Add folder icon, and then name the folder.
To add sub-folders, select a folder, and then click Add folder icon.
Select a folder, and then click the Add issue icon. A new issue is created, and the Details panel opens to fill in the issue details.
Open the Clash Manager and the Issue Manager’s panels side-by-side.
In Clash Manager, run a rule or rule group.
In Issue Manger, select or create a folder to push the clash results into.
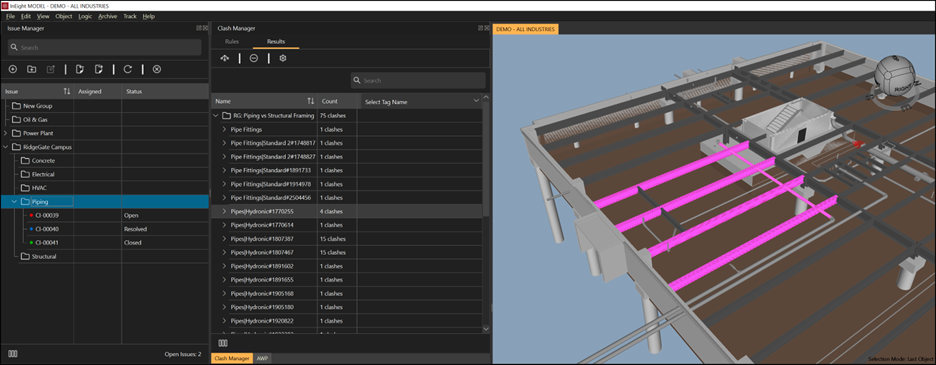
Select a clash result, and then in the viewer, zoom into the result.
Right-click the clash result, and then select New Issue from selected result or Add selected results to current Issue. The Details tab shows.
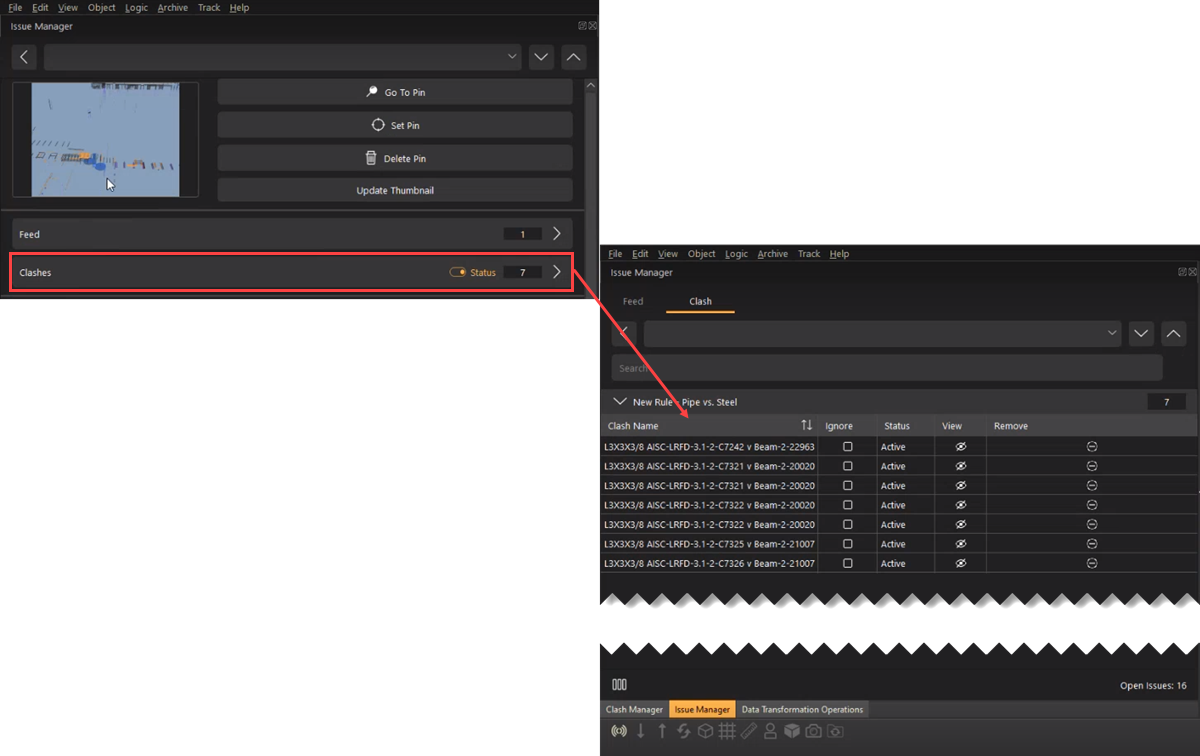
In the Details tab you can view and manage thumbnails, clashes, status, summary, views, attachments, and markups. For more information about the Details panel, see Details panel overview.

To view the all tabs side-by-side in Issue Manager, click the Expand icon at the bottom left.
When you create an issue offline, the issue ID number shows as a GUID. An issue ID number is assigned the next time you are online.
In the Details panel, under Attachments and Markups, click the Add button. A New Markup tab opens in the viewer window.

Markup the view using the markup tools.
You can edit the size of the text by highlighting the text and then using the Thickness bar.
To save the markup, click Save to..., and then you can select Issue... or File....When saving to Issue, it saves the markup to the issue. When saving to File, it saves the markup to a PDF file.

Click the Back to Model button to go back to the viewer.
To close the markup view, click the Close icon at the far right.
Select an issue, and then click the Edit issue icon. The issue opens in the Details panel.
You can view and edit thumbnails, pins, clashes, status, assignee, priority, due date, summary, views, attachments, and markups.
Select Clashes to view all clashes in the issue. You can edit active clashes and change to Ignore or Resolved. When all the clashes are set to Ignored or Resolved, the issue status automatically shows as Resolved.
When an issue is in Resolved status, the coordinator responsible should visually inspect the issue to ensure it has been resolved in a satisfactory manner. The coordinator can then change the issue status to Closed.
The status for a clash or clashes is automatically set to invalid when one or both intersecting objects are deleted in the design application, the model is published to InEight Model, and the Update Issue function is executed.
An invalid status indicates that InEight Model can no longer detect the clash since it cannot detect the source object or objects. Invalid clashes are treated as resolved.
In the Issues panel, select the Import icon.
Select your BCF file, and then select Open. Your files are imported to an Imported Issues folder.
In the Issues panel, select one or more issues or select a group folder that contains issues.
Click the Export icon, and then select BCF 2.1 or BCF 3.0.
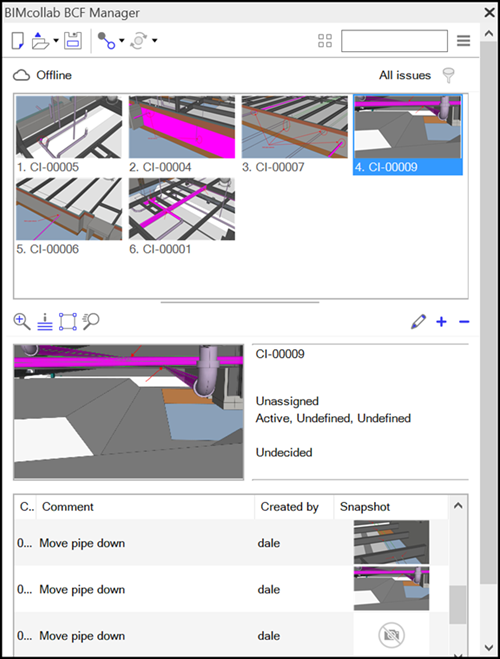
You can then name and save the file. The file is saved in a .bcfzip file format which can be opened in other applications as shown in the image below:
Publish a new model revision.
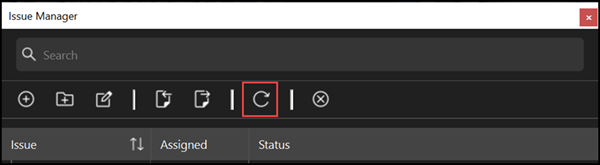
Click the Update Issues icon.
The resolved clashes automatically change the clashes in the issues to a Resolved status. If all clashes are resolved, the status for the Issue also shows as Resolved.
Select a coordination issue, and then click the Delete icon.
Additional Information
9977 N 90th Street, Suite 250 Scottsdale, AZ 85258 | 1-800-637-7496
© 2024 InEight, Inc. All Rights Reserved | Privacy Statement | Terms of Service | Cookie Policy | Do not sell/share my information