Create and Apply Sectioning

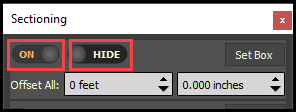
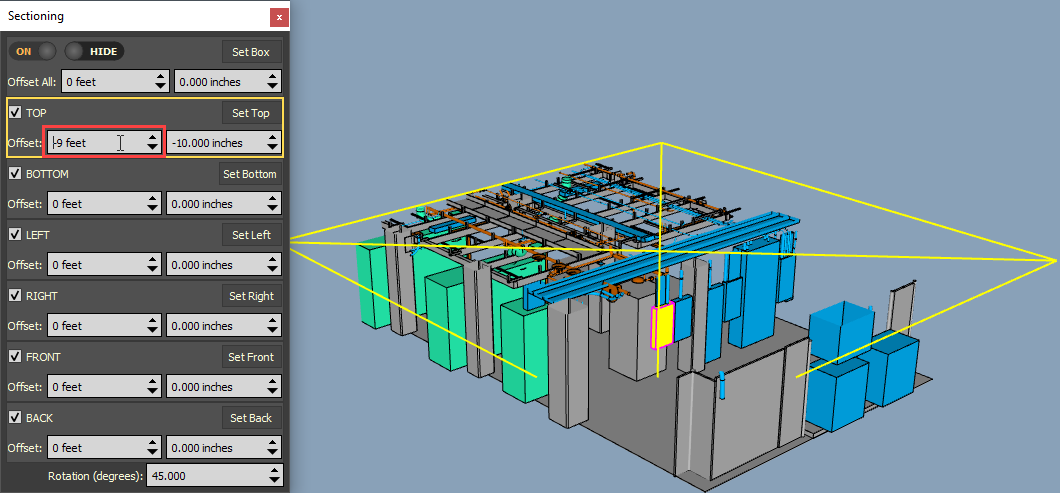
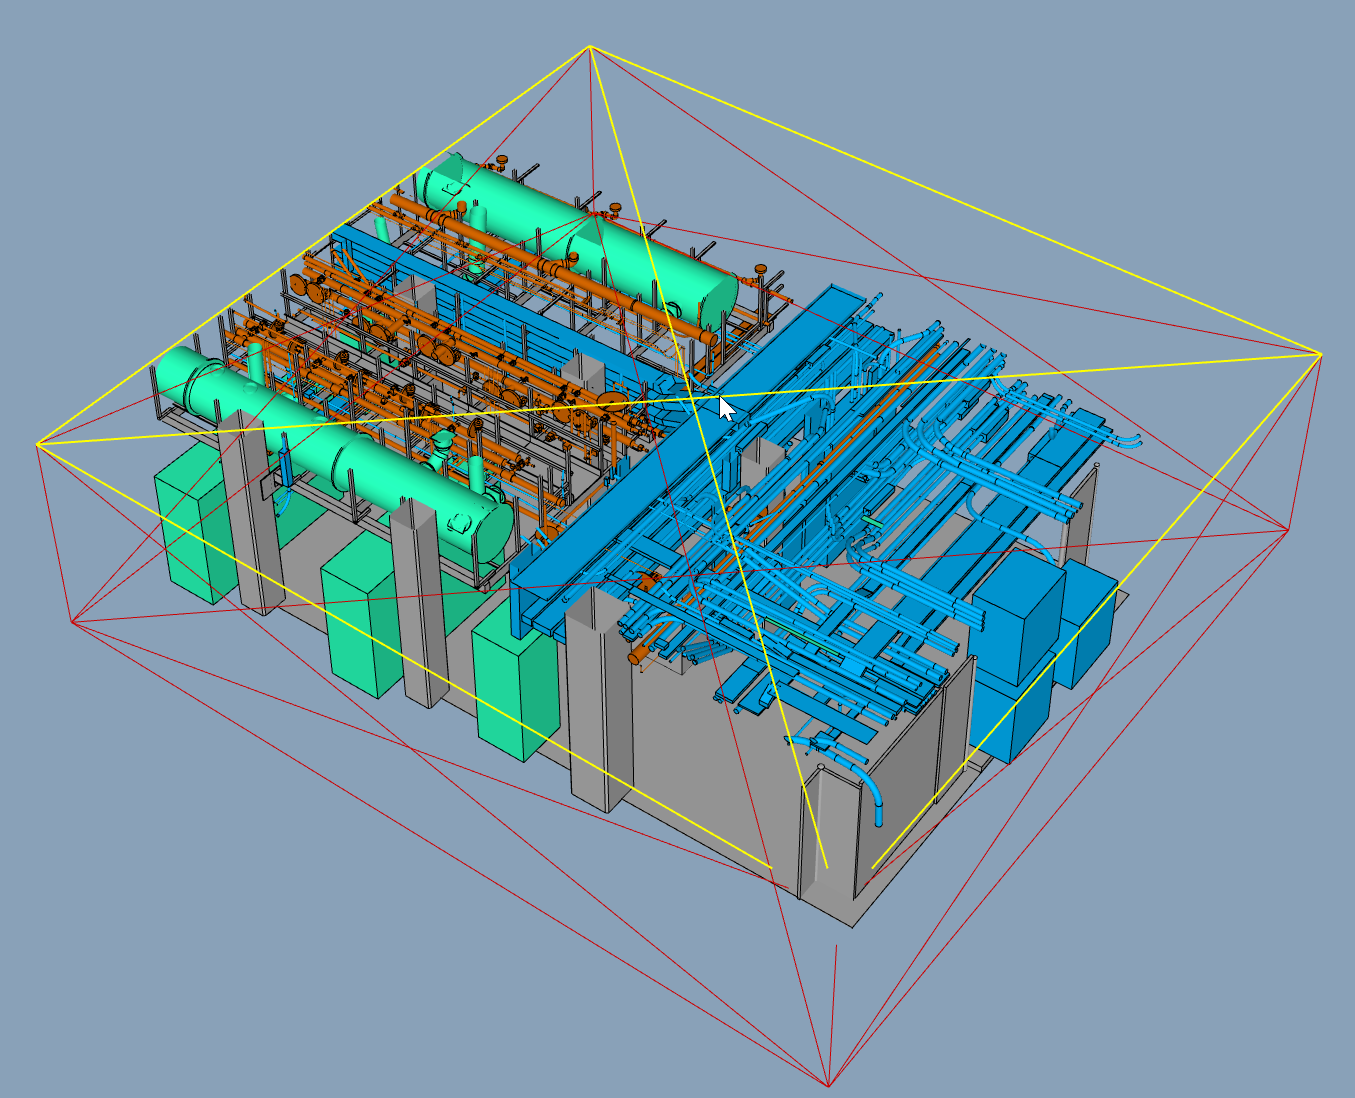
Sectioning can be applied in different ways to yield desirable results.

Step by Step — Apply Sectioning Using the Set Box

  1. Switch Sectioning ON.
  2. To see the sectioning box in the 3D viewer, toggle SHOW.
  3. Select a model object or a tag.
  4. Click the Set Box icon.
    • The Sectioning box has been set to the model objects boundaries

Step by Step — Apply Sectioning by Dragging and Dropping a Tag

  1. Switch Sectioning ON.
  2. From the Tags and Objects Panel, select a tag.
  3. Drag and drop the tag onto a section part in the Sectioning Panel.

Step by Step — Apply Sectioning by the Offset

  1. Switch Sectioning ON.
  2. With the mouse over an Offset field, scroll the mouse wheel to set a numeric offset
  3. Or type in the preferred numeric offset.

Step by Step — Move Sectioning Panes with Grips

  1. Switch Sectioning ON.
  2. Switch Section Box ON.
  3. Hold the CTRL key and hover over the sectioning panes to see them highlight.
  4. Hold CTRL + LMC (left mouse) to move a sectioning pane.

Step by Step — Reset the Sectioning Box to Model Boundary

  1. Switch Sectioning ON.
  2. Ensure no model object is selected.
  3. Click the Set Box icon.
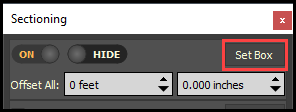
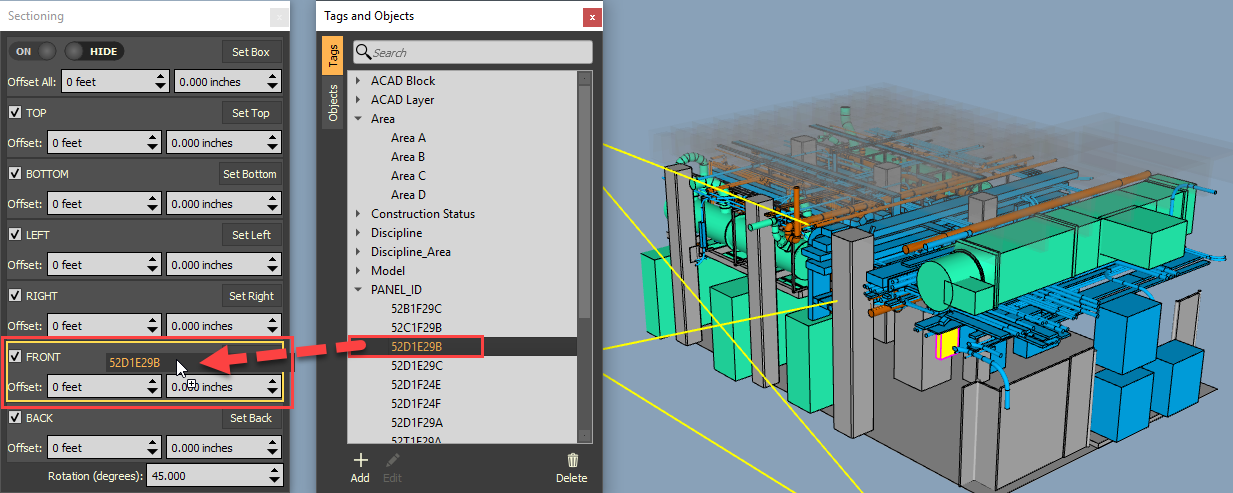
  4. Any of the Section Parts can be reset individually by ensuring that no model objects are selected, then select the specific Section part Set icon (that is, Set Top).

Step by Step — Use Sectioning with Master Presets

  1. Switch Sectioning ON.
  2. Adjust the Sectioning as desired.
  3. In the Master Preset Editor, click Sectioning.