Products
Solutions
Resources
9977 N 90th Street, Suite 250 Scottsdale, AZ 85258 | 1-800-637-7496
© 2024 InEight, Inc. All Rights Reserved | Privacy Statement | Terms of Service | Cookie Policy | Do not sell/share my information

Enter the Measurement Mode to start measuring the model.
1. Select the Ruler icon in the notification tray to toggle the Measure Mode on and off.
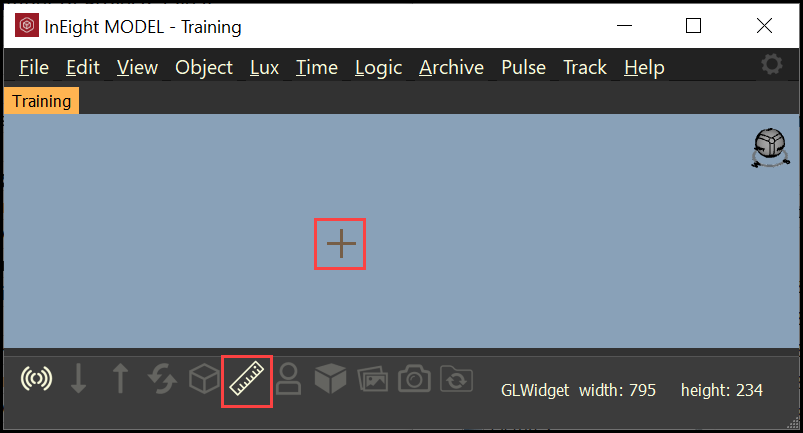
While in Measure Mode the cursor will become a cross hair and the Ruler icon will appear white.
Right-click on the Ruler icon to Start/Stop Measurement or to open the Measurement panel.
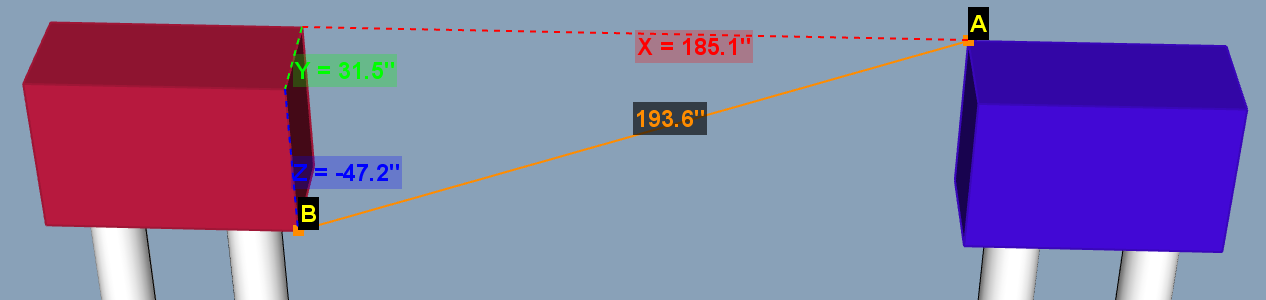
This lettering series will continue in order for measurement types consisting of more than two points.
While Measure Mode is active, hold control to restore navigation to move without having to exit Measure Mode.
While Measure Mode is active, hold control to restore navigation to move without having to exit Measure Mode.

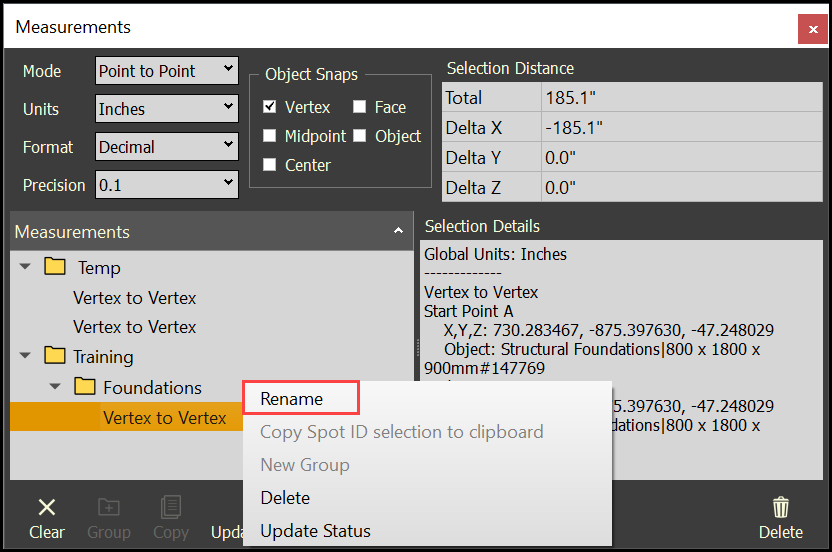
Another option is to right-click on the measurement, then select Delete.
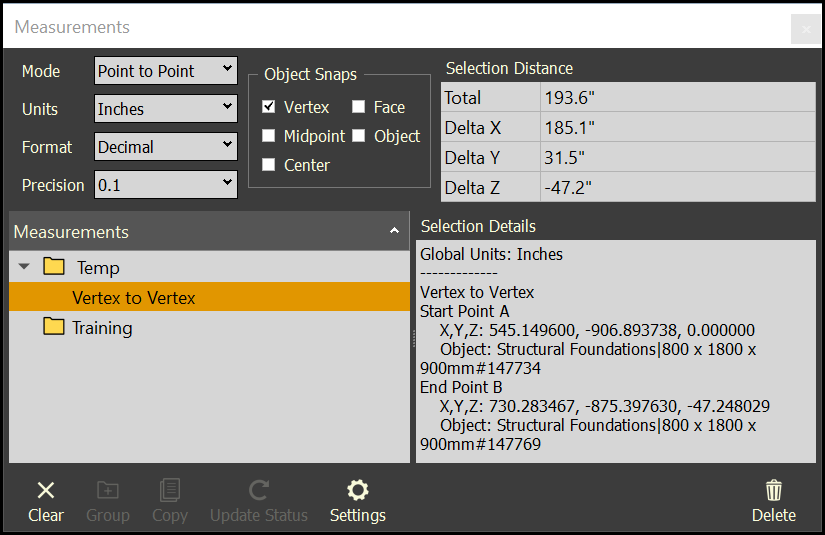
Clear allows the user to clear any measurements selected, which also clears the 3D view of displaying measurements.
![]()
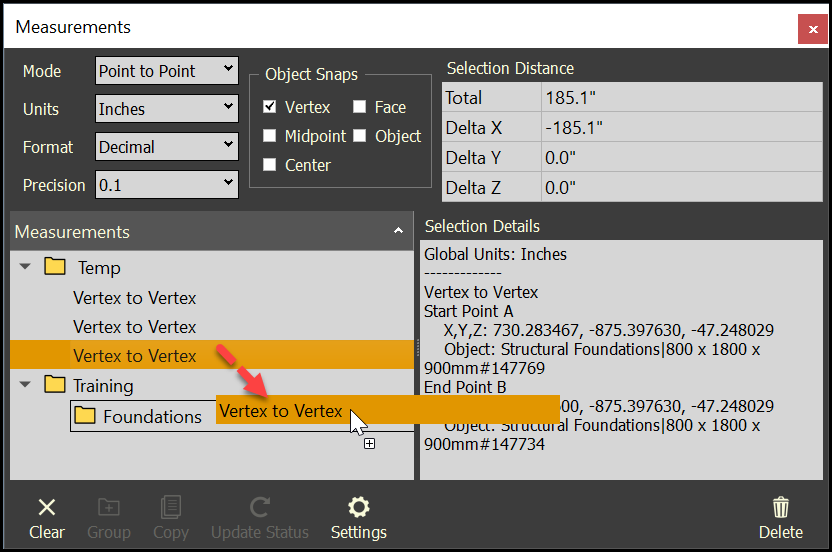
Create groups under the project named folder to move measurements into.
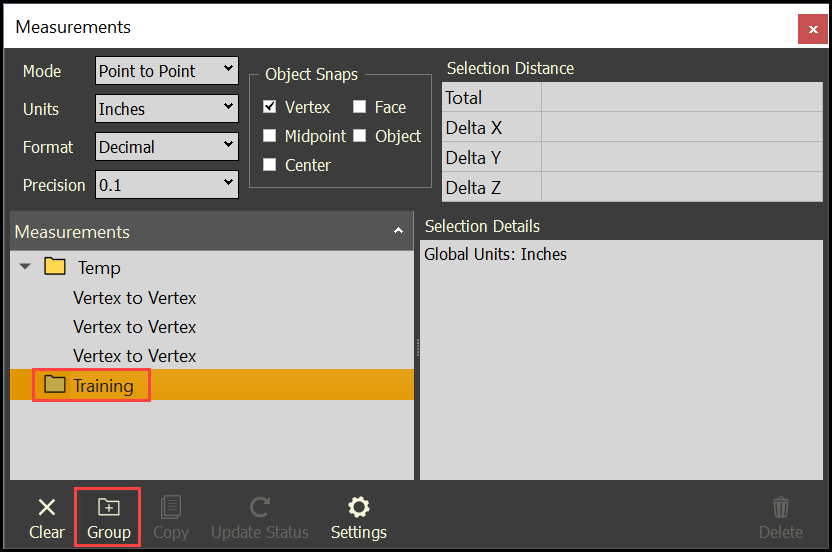
Another option is to right-click on the folder, then select New Group.

Additional Information
9977 N 90th Street, Suite 250 Scottsdale, AZ 85258 | 1-800-637-7496
© 2024 InEight, Inc. All Rights Reserved | Privacy Statement | Terms of Service | Cookie Policy | Do not sell/share my information