
Products
Solutions
Resources
9977 N 90th Street, Suite 250 Scottsdale, AZ 85258 | 1-800-637-7496
© 2024 InEight, Inc. All Rights Reserved | Privacy Statement | Terms of Service | Cookie Policy | Do not sell/share my information

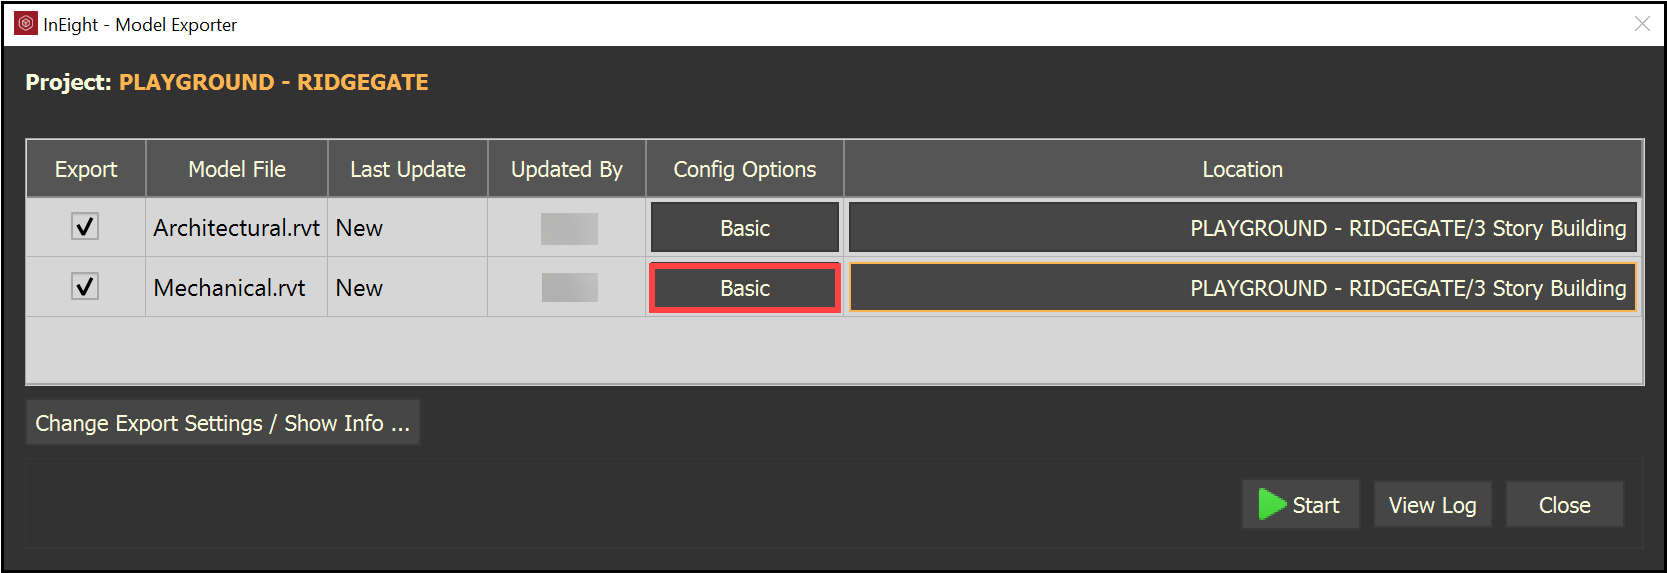
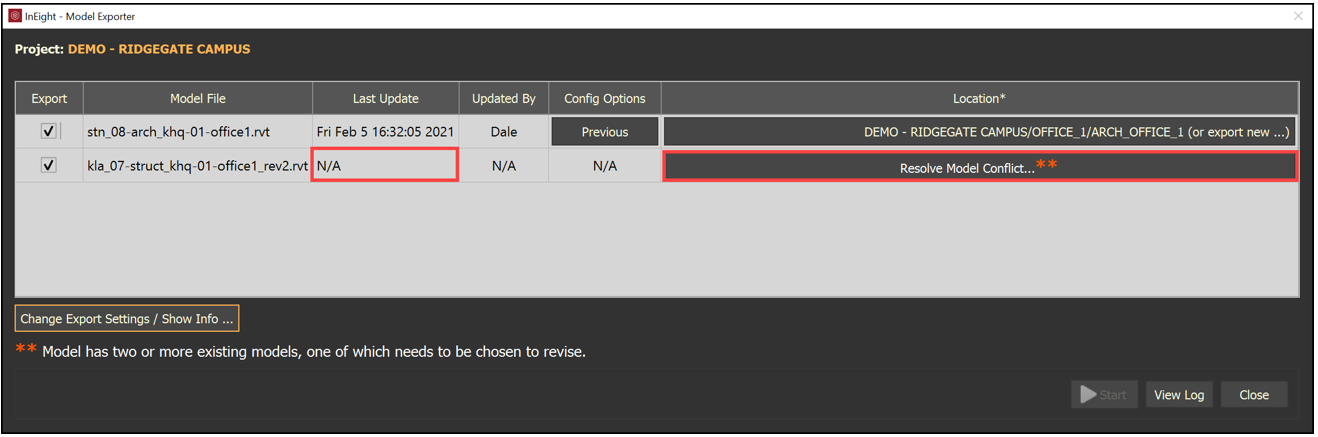
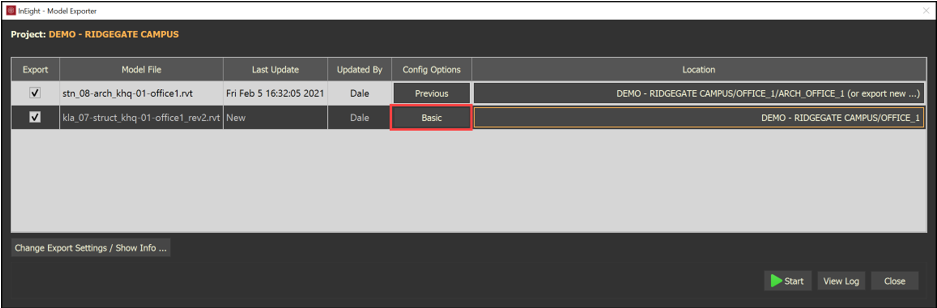
Config Options gives you the ability to define the parameters, or metadata, that will export along with the geometry, as well as providing some advanced options for applying various transformations.
The Config Options column in the Model Exporter will report three different states.
Config Options can be configured in bulk by multi-selecting the listed Model Files in the Model Exporter window then clicking within any of the Config Options field that corresponds with your selection.
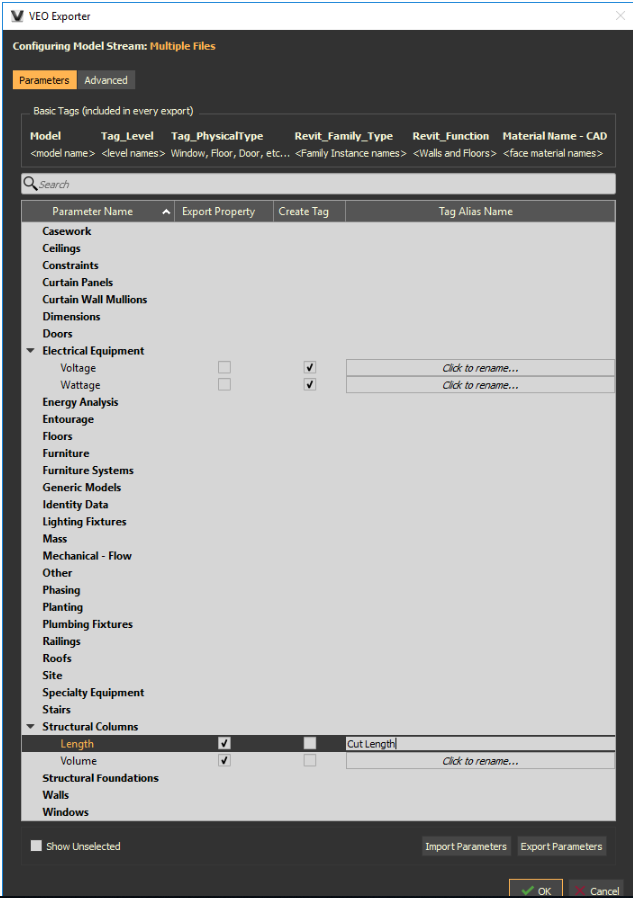
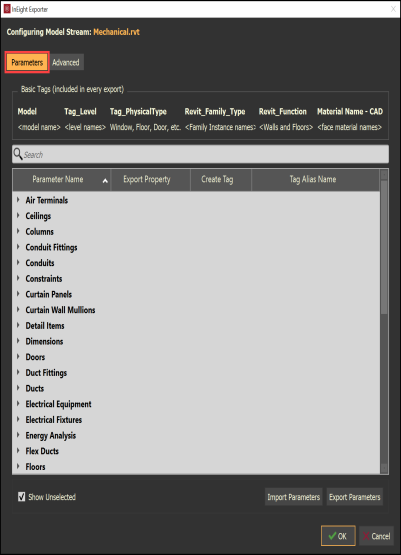
The Parameters tab in the Config Options window allows the user to define what metadata will be exported along with the geometry. The Basic Tags are also displayed along the top of the search bar. Basic Tags will be included in every export regardless of configuration.

Choose your desired tags and/or properties by expanding a category and checking the box next to a value. In the image below, we see that the Voltage and Wattage for the Electrical Equipment will be exported as a tag and that the Length and Volume for Structural Columns will be exported as properties. Additionally, clicking in the Click to rename... field in the Tag Alias Name column, the Length of the Structural Columns has been renamed to Cut Length. Renaming these values is a quick and easy way to achieve consistency when pulling geometry and metadata from files authored by various different organizations that may be using different values to represent the same data.
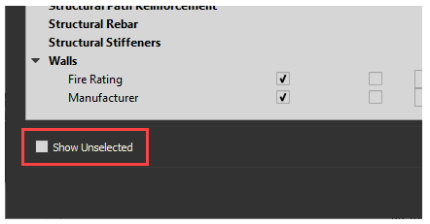
With the Show Unselected box checked (in the bottom left corner), all available parameters will be displayed. With the Show Unselected box un-checked, only the selected parameters will be displayed, this allows the user to easily view the current configuration.

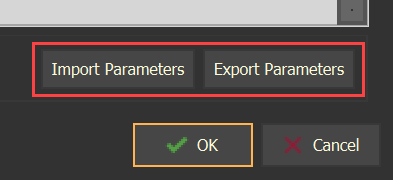
Use the Import Parameters and Exporter Parameters buttons to save your configuration to a local file or to import a previously saved configuration.
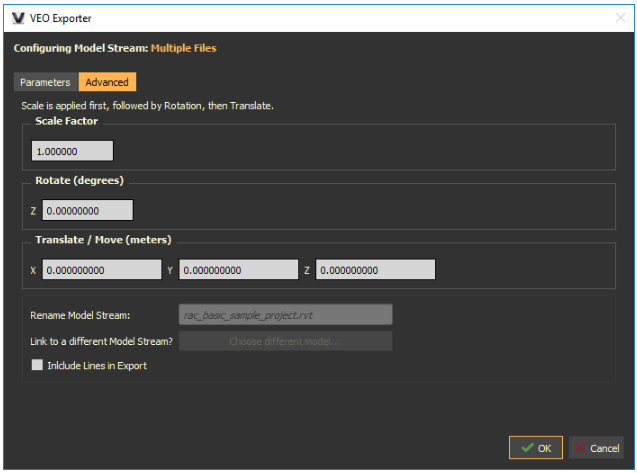
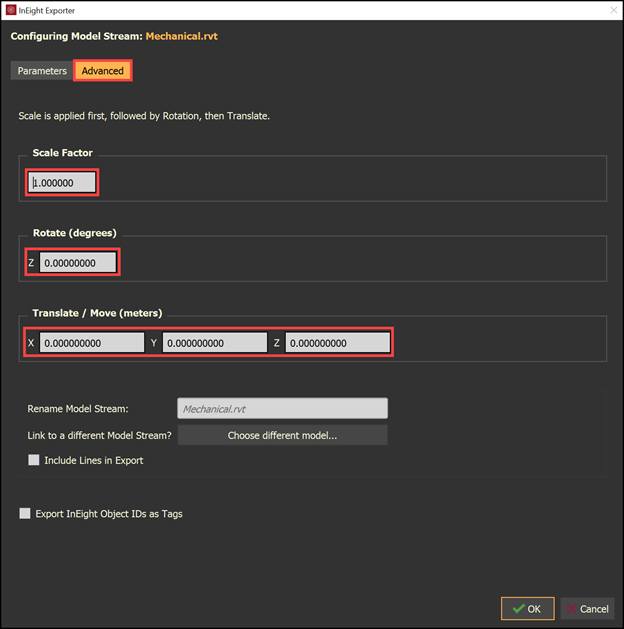
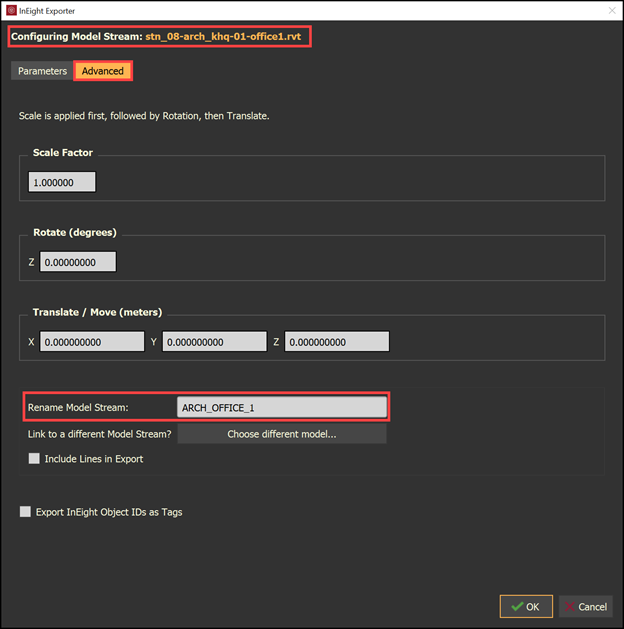
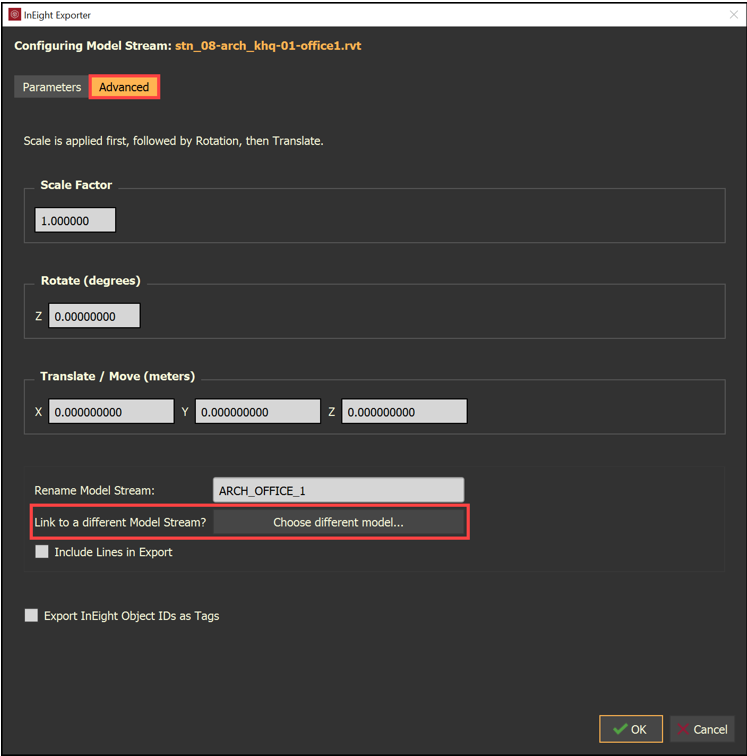
The Advanced tab allows Scale, Rotate, and Translate (move) options upon export. Settings configured in the Advanced Options are retained in future model updates.
To change the name of the Model Stream simply click in the Rename Model Stream field and enter the desired name.
If desired, check the Include Lines in Export box to include 2D and 3D line work.
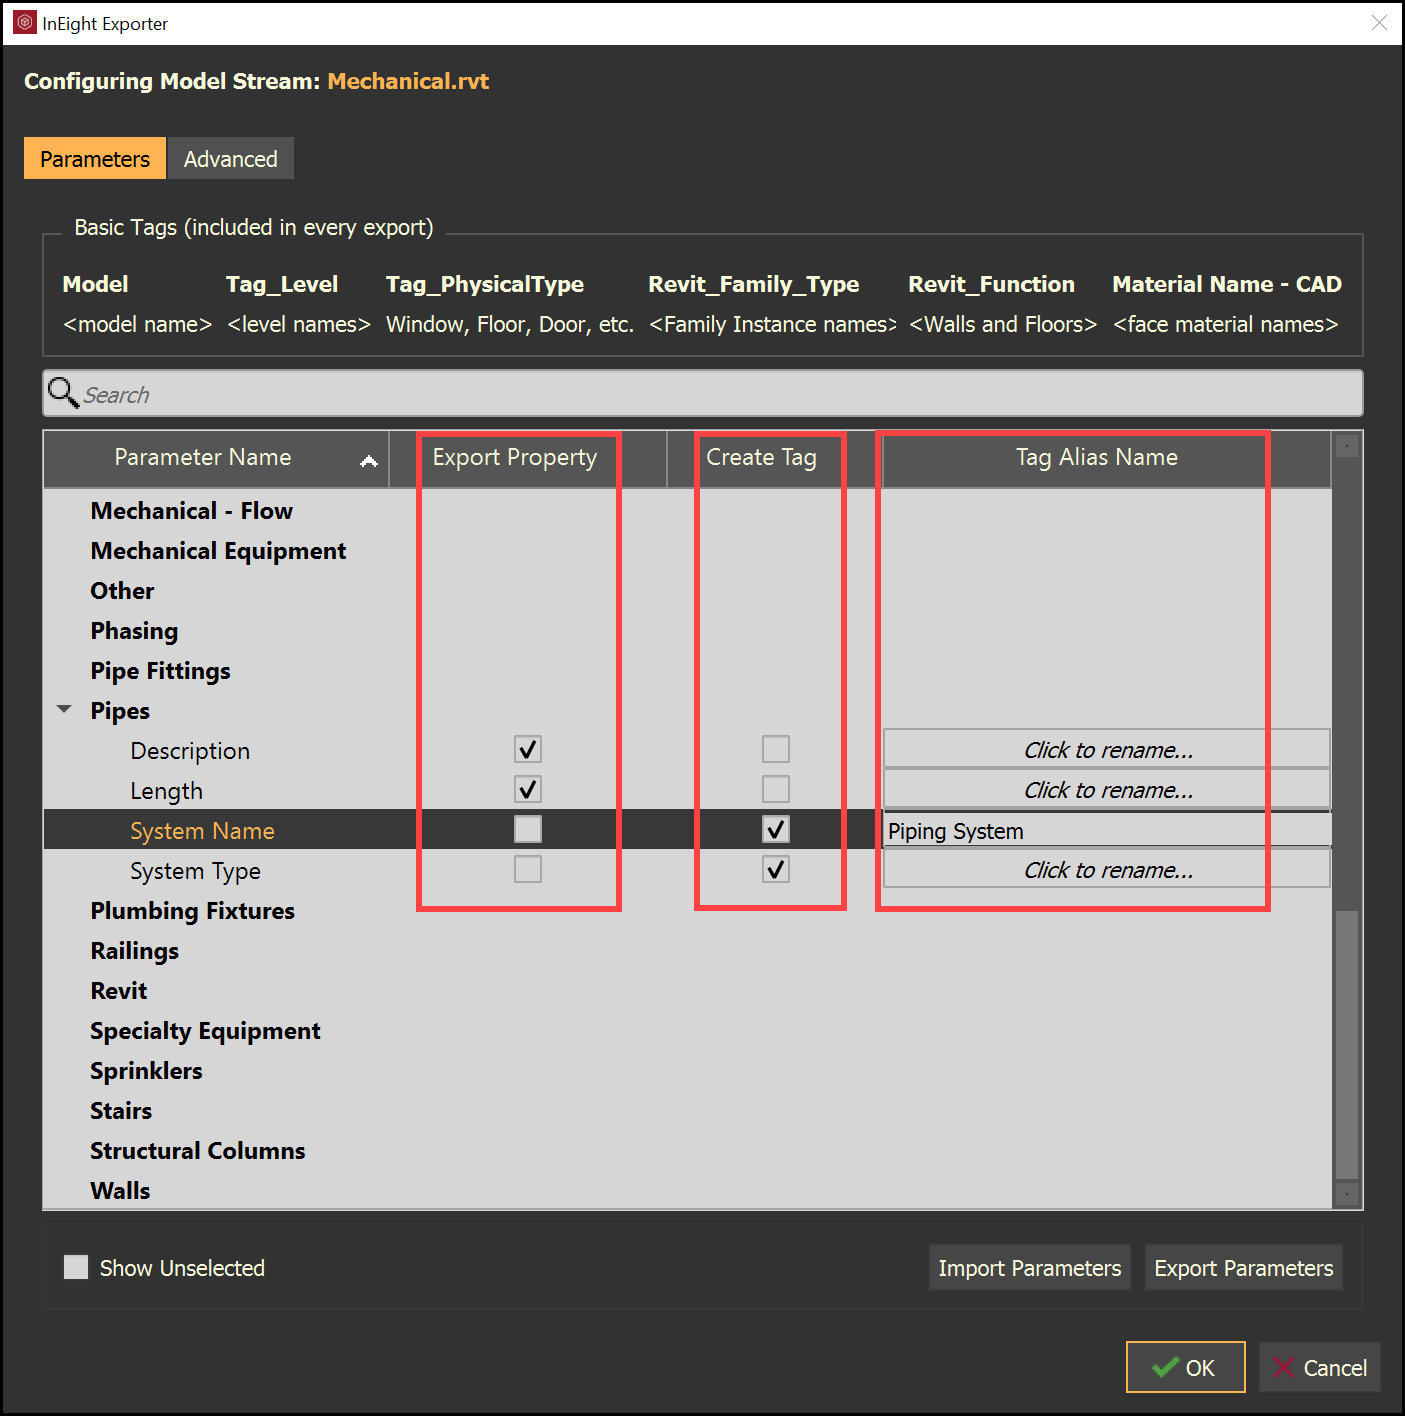
| Item | Description | |
|---|---|---|
| 1 | Parameter Name | Displays the Property Set Name and the Property Name of the metadata. |
| 2 | Export Property | Will export the Property Name with the existing value for each model object. |
| 3 | Create Tag | Will utilize the Property Name to create a Tag name with the existing value for each model object. |
| 4 | Tag Alias Name | Provides the capability to control what the Tag name is during the export of the model. |
| 5 | Export Parameters | Once the desired “Export Property”, “Create Tag,” and “Tag Alias Name” columns have been selected and filled out, then select Export Parameters to save these settings to use on similar models. |
| 6 | Import Parameters | If previous parameters have been exported, then select Import Parameters to populate Parameters. |
The Parameters tab in the Config Options window allows the user to define what metadata will be exported along with the geometry.
The Basic Tags are also displayed along the top of the search bar. Basic Tags will be included in every export regardless of configuration.

Select Import Parameters or Export Parameters.

 .
.
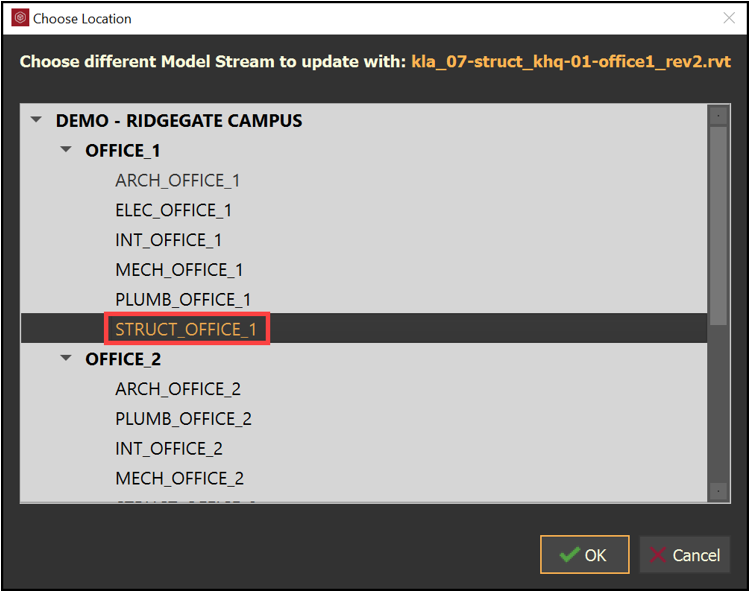
Click Choose different model…
Click OK when done with Config Options.
Additional Information
9977 N 90th Street, Suite 250 Scottsdale, AZ 85258 | 1-800-637-7496
© 2024 InEight, Inc. All Rights Reserved | Privacy Statement | Terms of Service | Cookie Policy | Do not sell/share my information