Columns
Customize columns according to your preferences. Changes you make to the placement of your columns will be retained the next time you access any page you have customized.
Move Columns
Drag and drop to move a column from one place to another to customize your view.
Move Columns
-
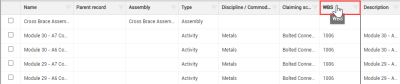
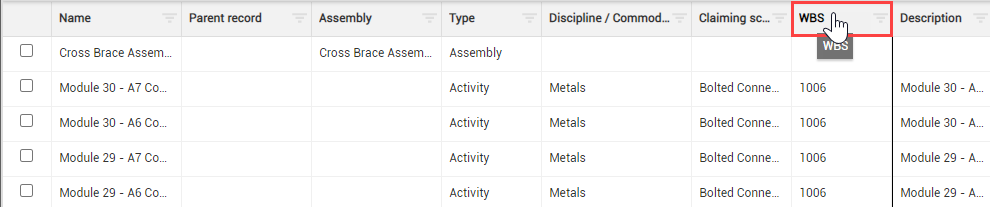
In the Standard Grid view of the Quantity Tracking module, click on and hold a column header.
-
Drag and drop the column in a new location.


Add and Remove Columns
Add or remove columns to customize your view and work more efficiently when in the Standard Grid view.
Add Additional Columns
-
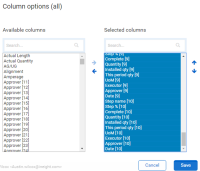
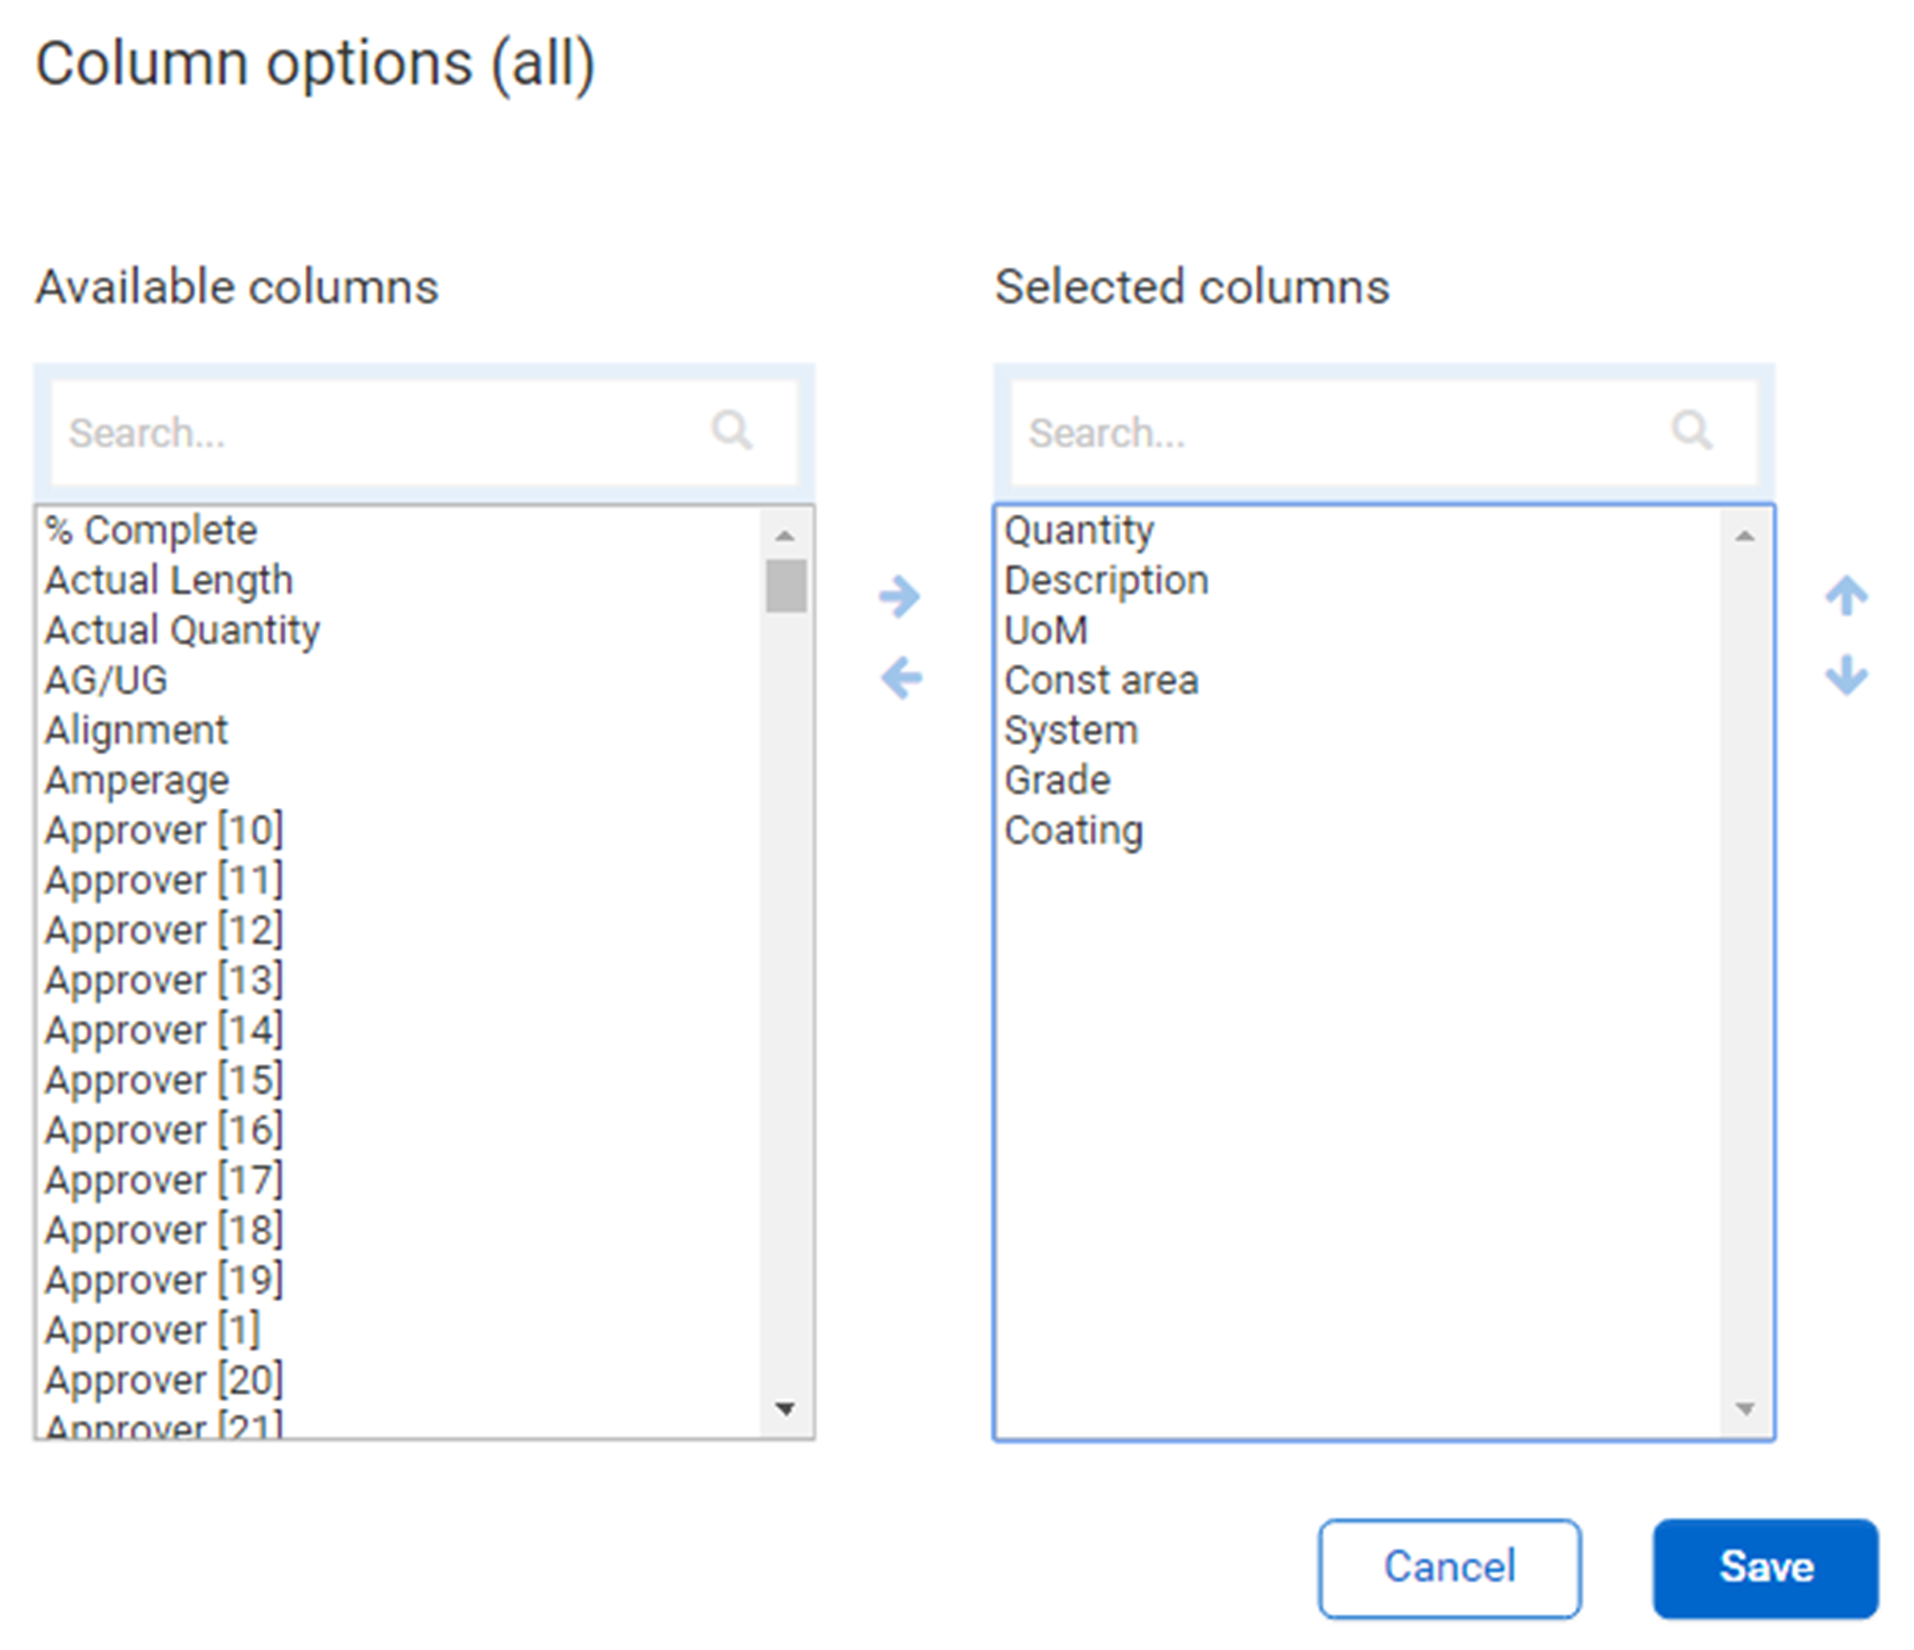
From the Standard Grid view, select the Column Chooser icon to open a pop-up window where you can search for and select columns.

-
In the selected columns list on the right, highlight all columns. To do this, select the first item in the list, press and hold the Shift key, scroll down the list, and select the last item in the list. Then, select the left pointing arrow.
-
In the Available columns list on the left, type a column name in the search bar or use the scroll bar to find a column by name. Select a column from the Available columns list.
 A yellow caution icon shows when a column is unavailable.
 -
Select the right facing arrow.
-
Repeat steps three and four as needed for your project.

-
Click Save.


Sort Columns
Sort in ascending or descending (both for alpha and numeric fields) order on any column by clicking one time on the column header.
Sort Columns
-
In the Standard Grid view of the Components page, click on any column header to sort the column in ascending order.
-
Notice the yellow up arrow designating you are sorting in ascending order

-
-
Click on a column header again (a second time) and the column will filter in descending order.
- Notice the yellow arrow is now pointing down

- Click the same column header a third time to remove the applied sorting feature.


Filter Columns
Filter columns as a way to see relevant information pertaining to your specific needs.
Filter Columns
-
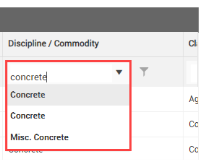
In standard or data block view, type your filtering criteria in the text box of any column header.
A drop-down list shows matching criteria.
-
Select a value from the drop-down list or press Enter.
-
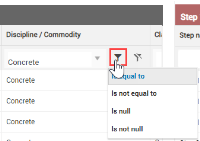
Optionally, click the Filter icon to select a different operator.
-
Click the Clear icon to remove the filter.


You can apply filters to multiple columns at the same time.
To clear all column filters at the same time, click the Clear applied filters icon on the left of the Quantity tracking page.
![]()
If you hover over the icon, a word bubble shows the current applied column filters.
Saved Filters
Save a specific filter to save time later and share with your team.
Create a Saved Filter
-
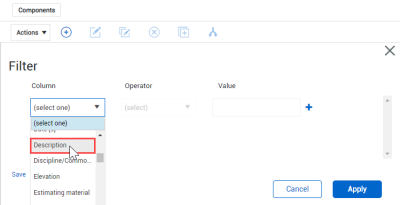
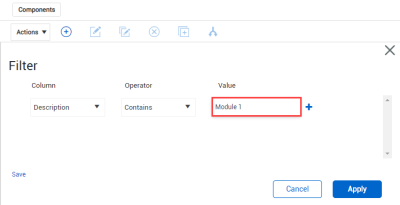
On the Components page, select the Filter icon.

-
On the resulting left slide out panel, select a column from the drop-down list in the column field.
-
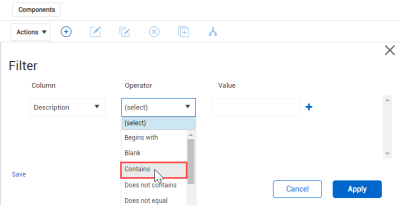
From the operator field, select an option from the drop-down list.
-
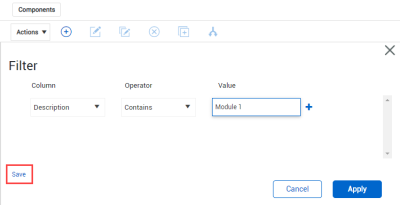
Enter a value in the Value field.
-
Click Save in the bottom left of the box.
-
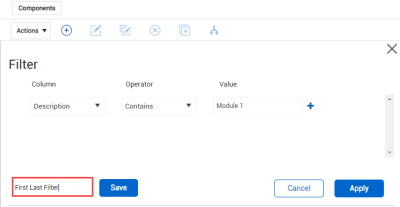
Change the filter name.
-
Click Save. You now have a saved filter.
-
Click Apply to apply your filter.
You can also share pre-defined filters with your team.


