Products
Solutions
Resources
9977 N 90th Street, Suite 250 Scottsdale, AZ 85258 | 1-800-637-7496
© 2024 InEight, Inc. All Rights Reserved | Privacy Statement | Terms of Service | Cookie Policy | Do not sell/share my information

In this topic, you will learn how to upload multiple components at once via the Import Template.
Imagine you are the structural steel field engineer responsible for tracking all steel erection for your module. You receive a bill of materials from your steel fabricator that matches the erection drawings. The bill of materials has all the information you need to input for components - piecemarks, weight, grade, coating, etc. You need to add all the piecemarks as components, so you can track them as they are installed.
You often receive lists of components from an outside source.
Can you think of other examples?
Electrical cable or termination schedules
Pipe spool fabricator bill of materials
Mechanical equipment list
Take off sheets from estimators
In these situations, it saves time to import multiple items at once. This can be done using the export and import feature in Plan.
The Import Template is a Microsoft Excel spreadsheet used to upload multiple components into Plan at once. The import template is generated first by setting up your view to show the columns of information you want to import, in addition to any required columns. Then you export the import template to Excel. You can export with or without data (by choosing Data Export), as well as, Excel equations. This means you can export just the column headers or all the information in the cells below as well. After export, you can fill in your information in the spreadsheet, save it, and import it. You have the option to import only new items or overwrite information on existing items (based on unique component IDs).
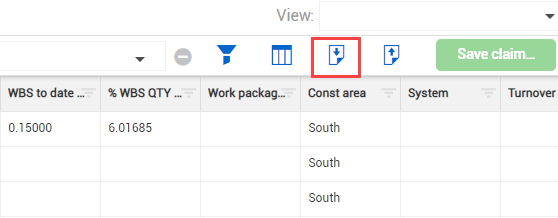
Component IDs are distinct from component names. You can have components with the same name, but they must have unique IDs. To change a component name, you must first know the component ID. This ID is used as the key reference point for all components. To find the component ID, from Quantity tracking in standard grid view, click the Export icon, and then select Data export. The Microsoft Excel file shows the component IDs in column A.
After import, Plan checks the file for any errors. Errors might include:
Validated fields that don’t exist
WBS codes that are not available
Non-unique component IDs
A report is generated to help you find and correct any errors before continuing the import.
The following step by step walks you through how to export the Import Template, populate it, and upload it back into Plan.
Component IDs must be unique within the same type of component (activity, material, or assembly). You cannot have two components of the same type with the exact same ID, but you can have an activity component with the same ID as a material component. If you want to duplicate an existing component (such as, the component created manually in the previous section), you must either delete it, or change the ID of either the existing or imported component.
Required columns are exported even if you hide them.
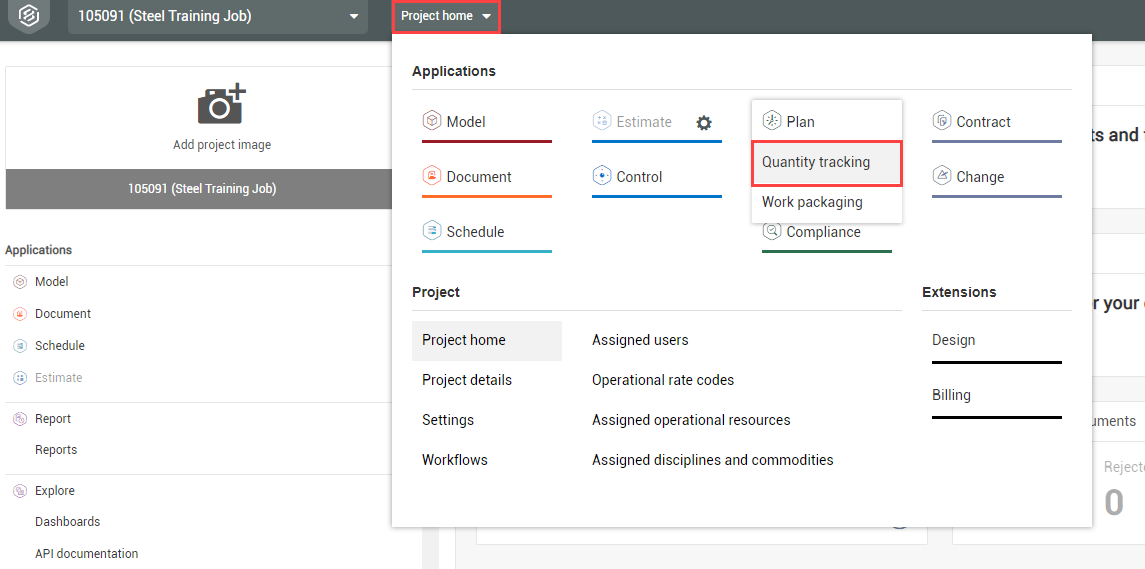
From an open project, go to the Quantity Tracking module.
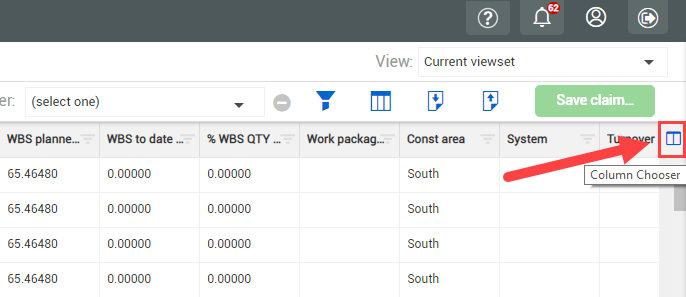
In Standard View, select the Column Chooser on the far right of the column header row.
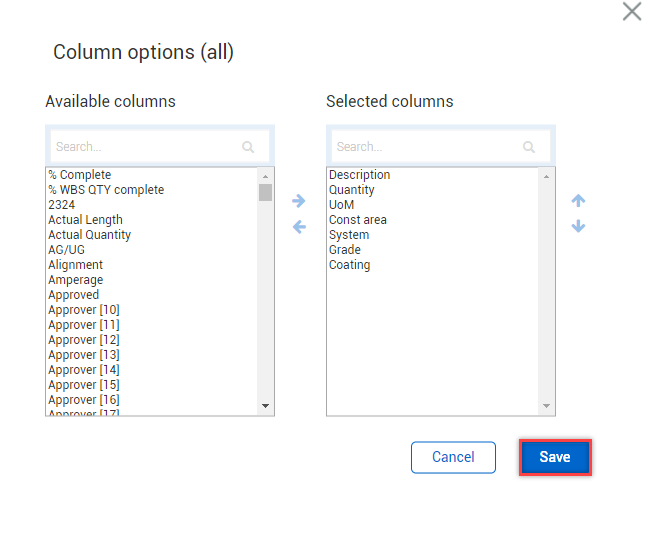
From the Column Chooser dialog box, select columns from the Available columns list, and then use the right arrow to move them into the Selected columns list. Save your columns.
Click the Export icon on the toolbar.
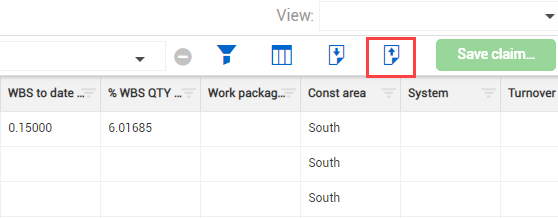
Select Template.
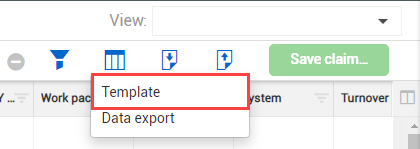
A Microsoft Excel spreadsheet automatically opens or is shown at the bottom of your screen to download
Click the drop-down arrow for the file, and then select Open.
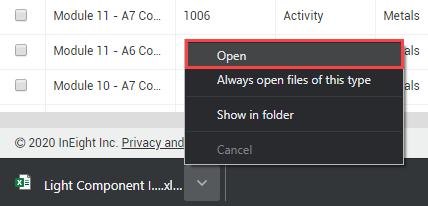
The resulting spreadsheet is now your Import Template and contains all required columns and only the optional columns that were shown in Plan at the time of exporting

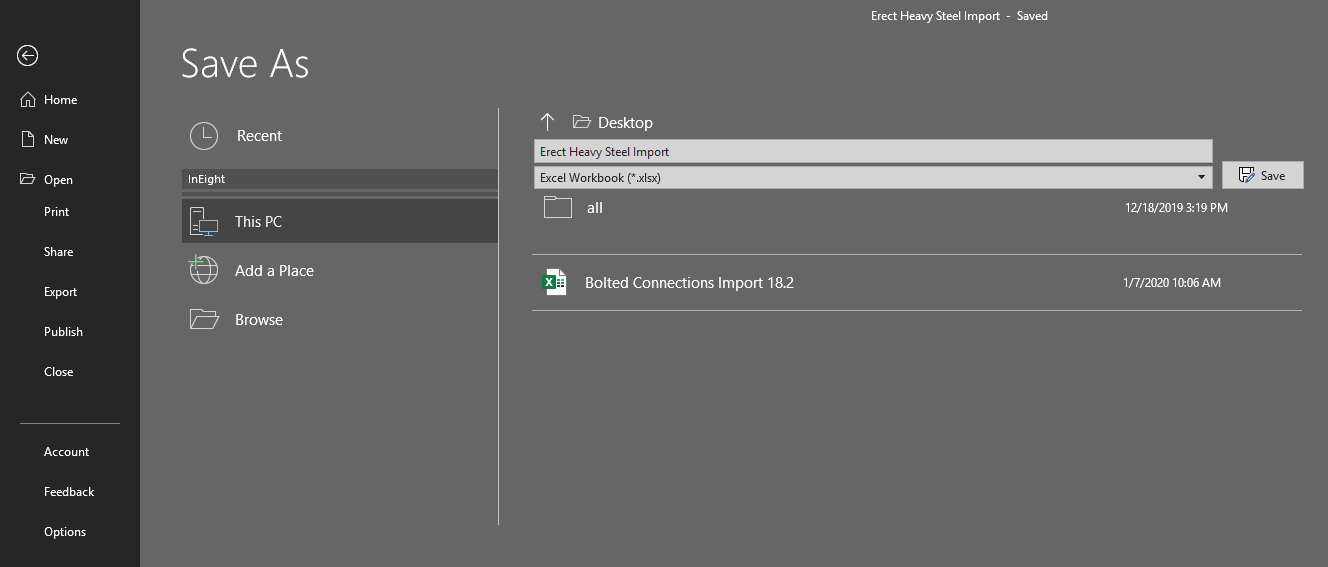
In the Name column, enter your component name.
Enter the component Name data.

Save the file to your desktop, so you can easily find it.
Return to Plan, and then click the Import button on the right toolbar.
An Import data dialog box is shown
Select Browse.
From the resulting Open window, locate and select your file, and then select Open.
Select Add new items only.
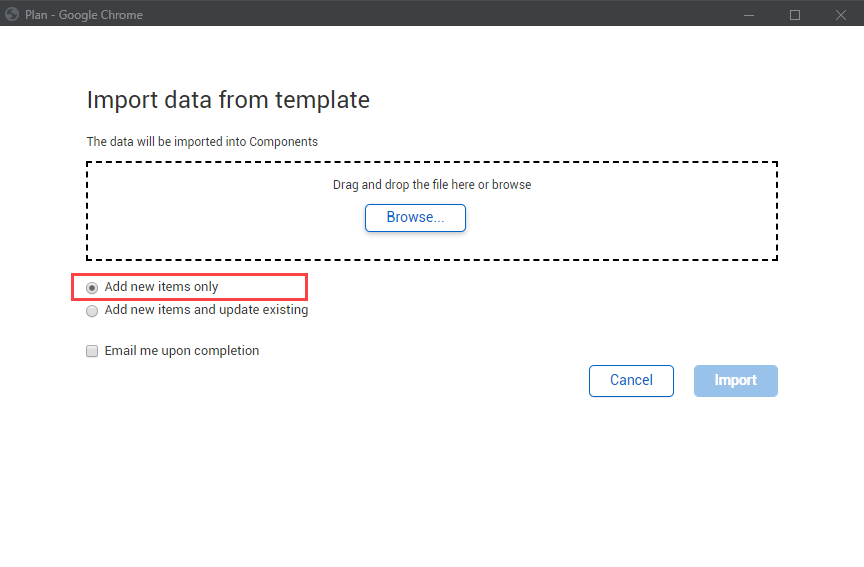
By selecting Add new items only, the system will flag an error if you’ve accidentally created a component with the same ID as a previously created component. If you select Add new items and update existing, instead of flagging an error for a component ID that already exists, the system overwrites the data for that component.
Click the check box for Email me upon completion.
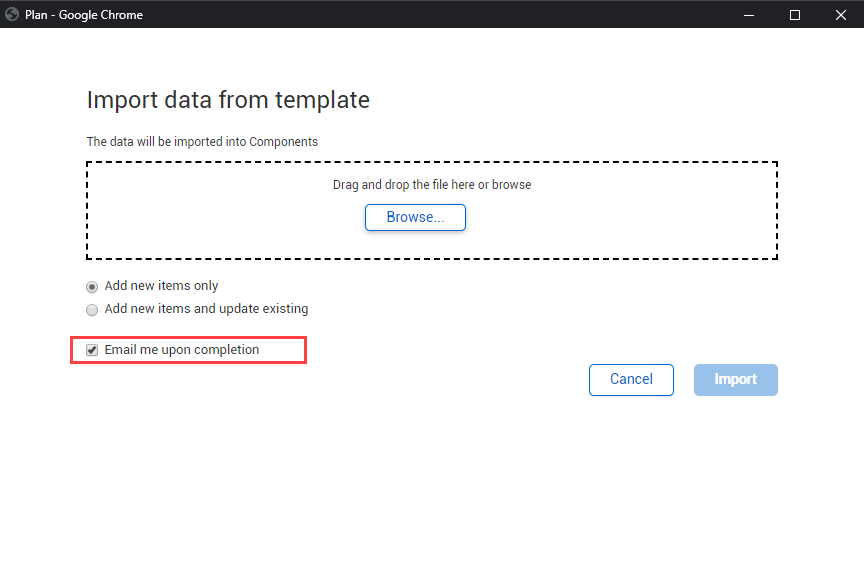
This alerts you to the completion of the upload
Click Import.
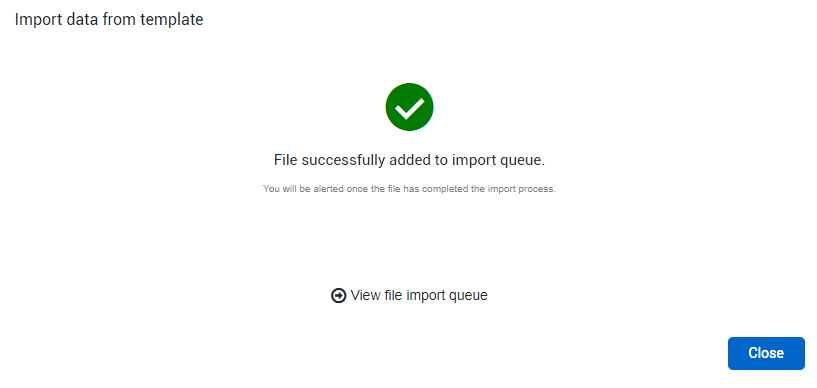
The import file is added to the import queue
To see all your import files and their statuses, click View file import queue
You can continue working in the application while your imports are processed. A notification tells you if your file is imported successfully or not.
If you have an error, check that the ID of your component is not the same as an existing component.
Click Close.
Now you can see how easy it is to upload multiple components. Picture a project with thousands of components from multiple sources that can be combined on an import template and easily loaded in quickly.
Additional Information
9977 N 90th Street, Suite 250 Scottsdale, AZ 85258 | 1-800-637-7496
© 2024 InEight, Inc. All Rights Reserved | Privacy Statement | Terms of Service | Cookie Policy | Do not sell/share my information