Products
Solutions
Resources
9977 N 90th Street, Suite 250 Scottsdale, AZ 85258 | 1-800-637-7496
© 2024 InEight, Inc. All Rights Reserved | Privacy Statement | Terms of Service | Cookie Policy | Do not sell/share my information

To create a new project in the InEight cloud platform, your estimate in InEight Estimate must be complete, and ready to bring into the system. The project must have a status of New to import from InEight Estimate.
|
Status |
Purpose |
|---|---|
|
New |
Projects must have the status of New to import from Estimate. This also hides the project from project roles. |
|
Active |
Projects must have Active status for project personnel to access this project. |
|
Closed |
Closing the project limits who can access the project. |
From the Main menu, click All projects & organizations. The page opens to the Projects tab.
Click the Add project icon.
Click the Add project icon. The Project details page opens.
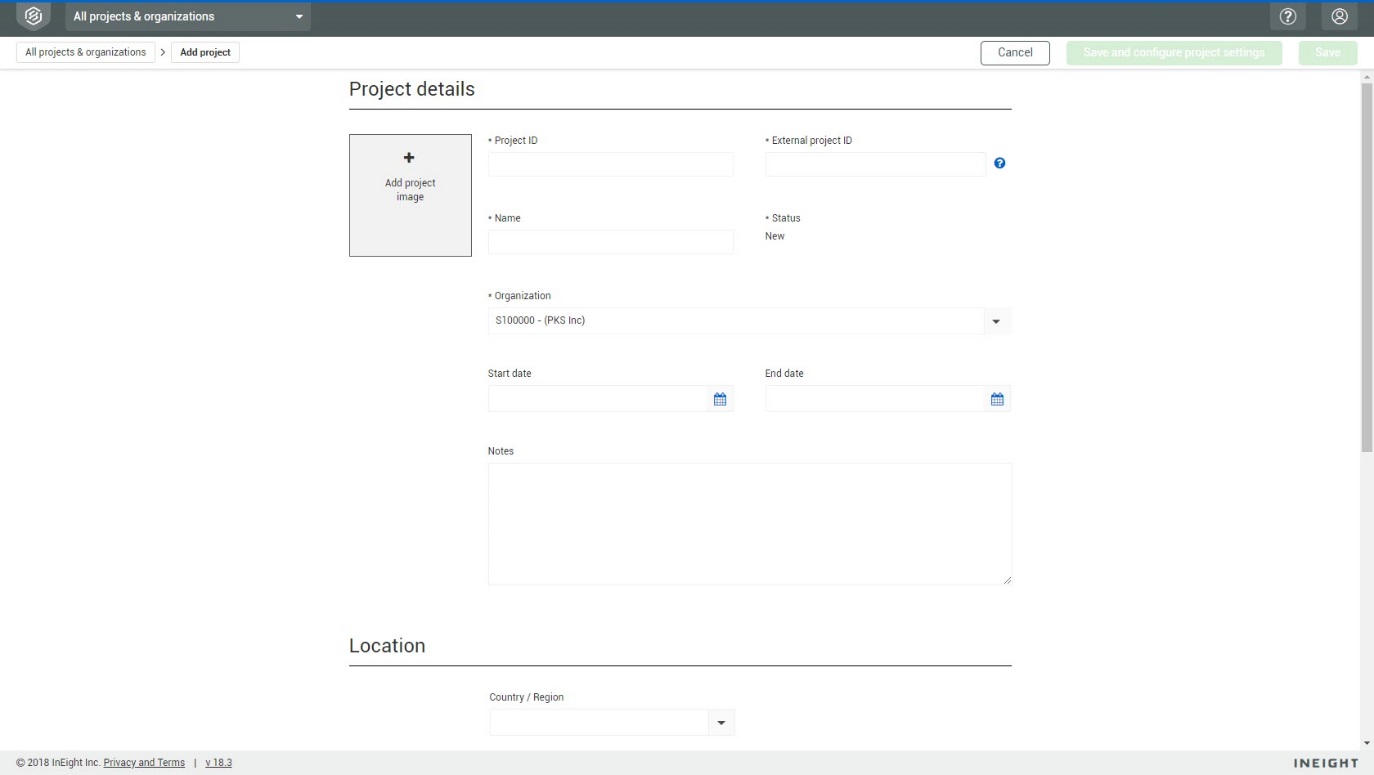
It is best practice to fill out as much project information as possible. This makes organizing and finding projects in the future much easier.
If you need to make changes to an existing project, you can edit the basic project information at any time.
The Project ID must match the Job Code in InEight Estimate.
The External project ID populates automatically from your ERP system.
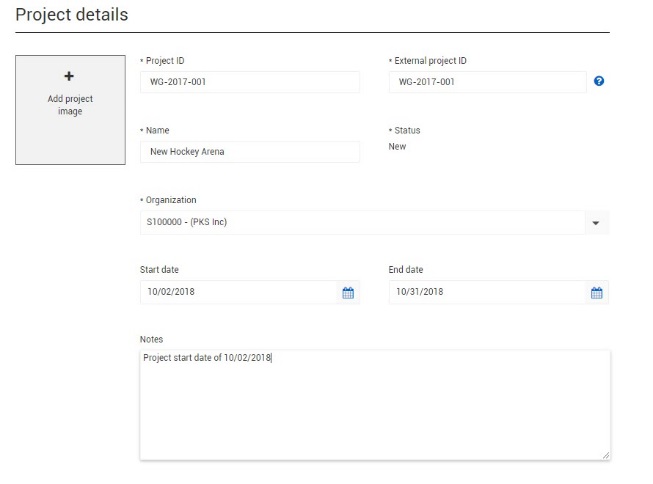
Enter a Project ID of [your initials]-2017-001.
Enter an External Project ID of 12345.
The Project ID will most likely come from your ERP system (e.g., SAP) and can be entered for reference
Give your project a Project Name of New Hockey Arena.
The Status of the project will default to New
This always defaults to New until you save the project
Select the Organization where the project is stored.
Start Date: [select today’s date]
End Date: [select a date in the future]
In the Notes field, type: Project start date of [the date you entered].
You can add a project image, but it cannot be any larger than 250 KB.
You can enter Location information manually, or nearly all this information can be imported.
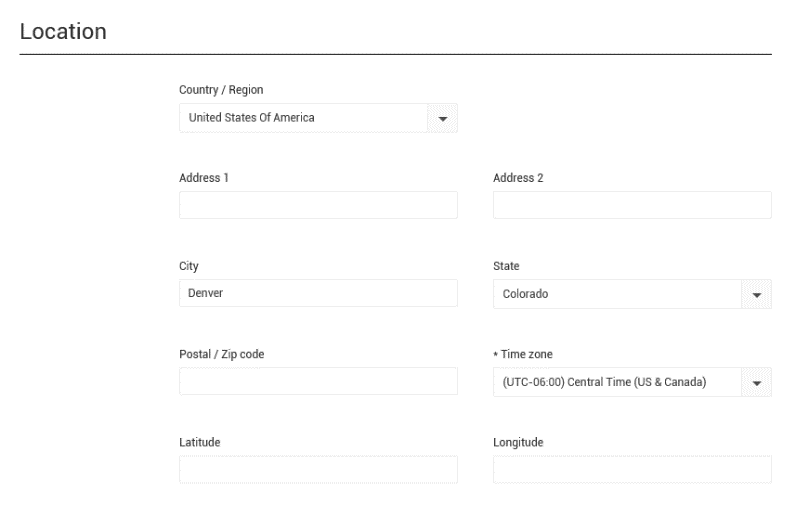
Once again, it is best practice to make sure as much information is filled out as possible.
Make sure Currency is selected, but this information can also import with your estimate from InEight Estimate. You can also add additional currencies into your project from this screen by selecting Add another currency.
From the Projects tab, find the project you just created.
Highlight the project and select the Edit icon.
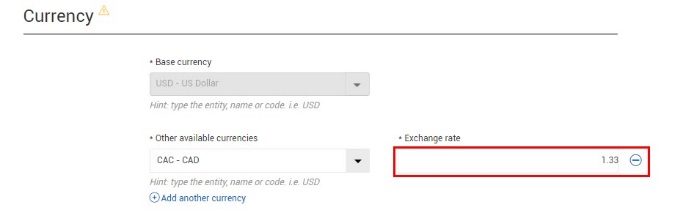
Scroll to the bottom of the screen to the Currency section.

Notice that there is a base currency. This currency was established at the Organization level and cannot be removed.
Any other currencies listed can be deleted using the Remove icon.
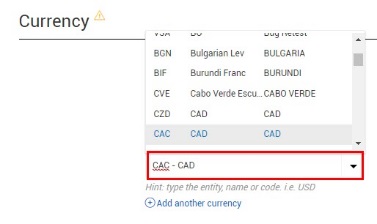
Select the Other available currencies drop-down list to view all currencies available.
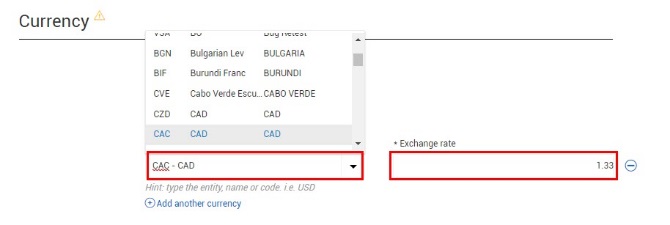
Select the currency you want to use.
Enter the Exchange rate (required).
Click Save.
You can add another currency by clicking the Add another currency.
Additional Information
9977 N 90th Street, Suite 250 Scottsdale, AZ 85258 | 1-800-637-7496
© 2024 InEight, Inc. All Rights Reserved | Privacy Statement | Terms of Service | Cookie Policy | Do not sell/share my information