Products
Solutions
Resources
9977 N 90th Street, Suite 250 Scottsdale, AZ 85258 | 1-800-637-7496
© 2024 InEight, Inc. All Rights Reserved | Privacy Statement | Terms of Service | Cookie Policy | Do not sell/share my information

You are a project administrator and you want to grant your project engineer access to edit the project. You also have ten field engineers that you want to view the project and claim quantities. After your team members have been added to the project, you will want to make it active.
There are key terms to know for managing users and resources for a project.
|
Classification |
Description |
|---|---|
|
User |
Person that has an account to use the InEight cloud platform. |
|
Member |
Users that are assigned specific roles on a project. Members are also referred to as assigned users in some areas of the application. Examples of specific project roles include: Superintendent, Engineer, Foreman. NOTE: Being assigned a member with specific roles is necessary for access in other InEight applications, such as InEight Progress. |
|
Operational Resource |
The specific employee, equipment, and material used to build the work on the project and tracked in Plan and Progress. NOTE: Currently, you can only add employee and equipment operational resources to the project but not materials. |
|
Employee |
Employees are operational resources that are assigned to specific projects for cost tracking. For example:
|
|
Equipment |
Equipment are operational resources that are assigned to specific projects for cost tracking. For example:
|
You must be assigned as a member with the role of Superintendent, Engineer, or Foreman to use the Progress application.
From the Main menu, select a project from your favorites list, and then click Project home. The Project home page opens.
On the Assigned users tile, click the Add user icon. The Add members to project dialog box opens.
For Project role, select Engineer from the list.
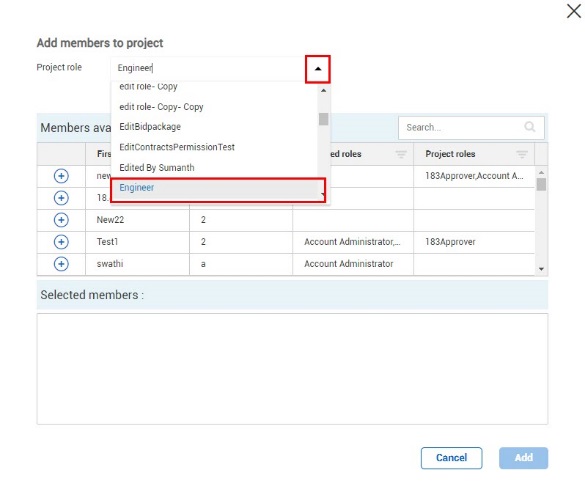
Click the Add icon next to your name.
Click Add.
Notice the total in the users block now is 1
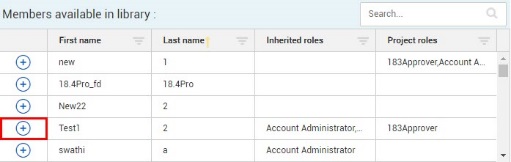
On the Project home page Assigned users tile, click Manage users.
The Assigned users page opens
Sort the Assigned Roles column in descending order.
All the members that are assigned to the project will be at the top of the screen
Note the Inherited Roles column. These are the people that are assigned to the organizational level, that have inherited roles on this project. They can access the project per their permission level, but they are not counted as members
A User is assigned the same permissions as a member. The difference is that they are an outside source to the main organization. For example, a Designer is hired as a contractor and not as a full-time employee. To perform the task effectively, the contractor needs the same permissions as a regular employee.
Along with members, you can add employees and equipment to the project, so they can be used by the InEight applications (e.g., Plan, Progress, Control).
On the Project home landing page, click the Add icon on the Assigned employees tile.
Click the Add icon next to the following names to add them to the project (use the search bar to find the names if necessary):
John Luke
Joe Farley
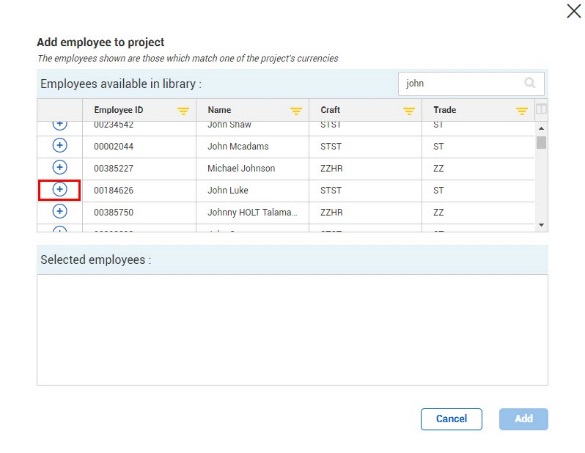
Click Add.
Notice the number total in the Assigned employees tile increased by two.
From the Project home landing page, click the Add icon in the Assigned equipment tile.
Click the Add icon next to the Grove-RT880E (ID# 110002) crane to add it to the project (use the search bar to find it if necessary):
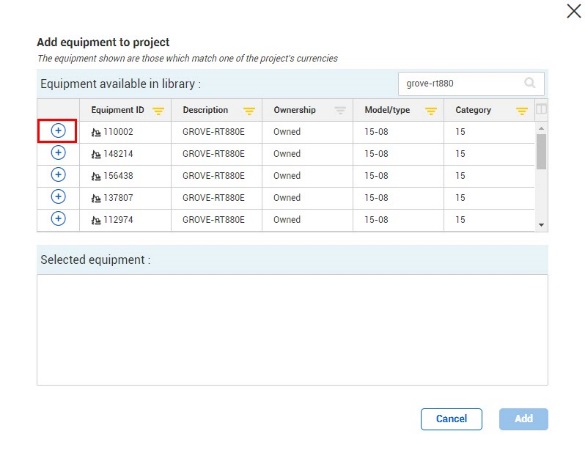
Click Add.
You will notice the total number in the Assigned equipment tile increased by one.
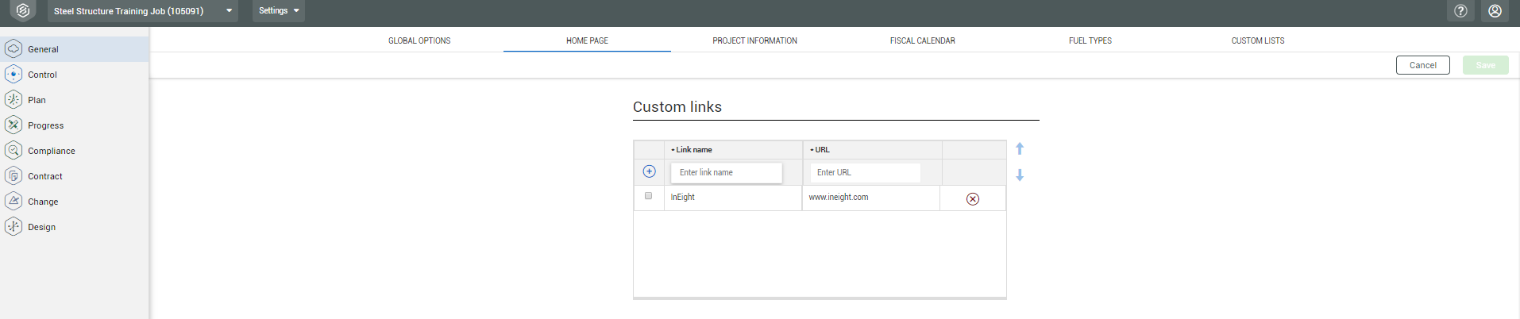
With the required permissions, you can add custom links to the Project home page Links tile for easy access to associated or needed content.
To add a custom link to the project, click the Add icon. This opens the Project settings Home Page tab, where links can be added or edited.
Documents are not stored centrally but instead they are stored at the project level. On the Project home page Supporting Documents tile, click the View icon to open Contracts page where you can see all the pertinent documents that have been linked to your project.

You can also access project documents from the left navigation menu and go to Contract > Contracts > Supporting Documents.
Along with entering a Title for your document, you can specify what document type you are uploading, for example:
Change Order
Contract Document
Design Document
Diagram
Other
Permit
Photo
Request for Information
Submittal Document
Transmittal Document
After you have configured the project and received approval from the administrator, the project will be placed into Active status.
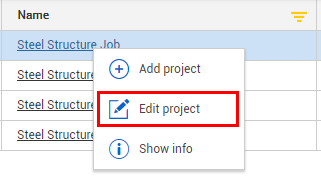
On the Projects tab, find your project and click anywhere in the row to highlight it.

Right-click on the row and a window appears.
Select Edit project.
Click the drop-down menu in the Status box and select Active.
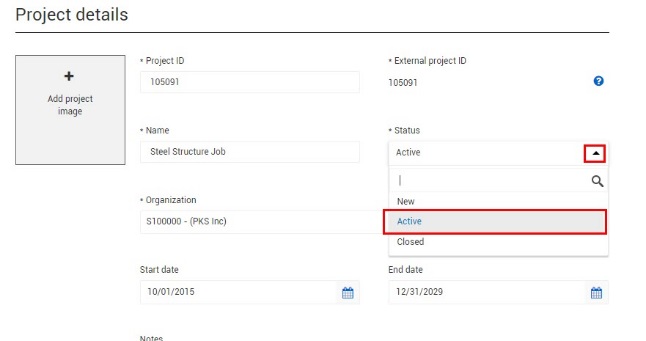
Click Save.
The steel structure was just completed and is ready for opening ceremonies in October. Steve has closed out the contract with the client and is now ready to close the project for archiving.
After the project is complete and all information is finalized, the project can be closed and archived.
On the Projects tab, find your project and click anywhere in the row to highlight it.
Right-click on the project row and a menu shows.
Select Edit project.
Click the drop-down menu in the Status box, and then select Closed.
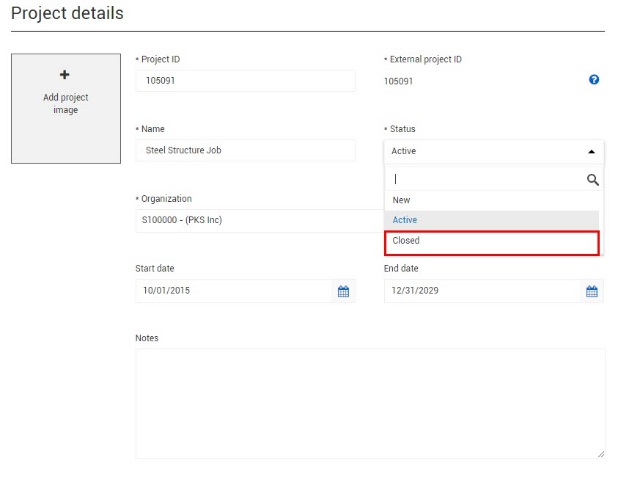
Click Save.
Additional Information
9977 N 90th Street, Suite 250 Scottsdale, AZ 85258 | 1-800-637-7496
© 2024 InEight, Inc. All Rights Reserved | Privacy Statement | Terms of Service | Cookie Policy | Do not sell/share my information