Products
Solutions
Resources
9977 N 90th Street, Suite 250 Scottsdale, AZ 85258 | 1-800-637-7496
© 2024 InEight, Inc. All Rights Reserved | Privacy Statement | Terms of Service | Cookie Policy | Do not sell/share my information

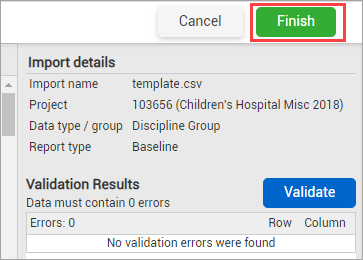
The Scheduling Import tool in Report lets you integrate schedule data with other InEight application data. The following reports will consume schedule data:
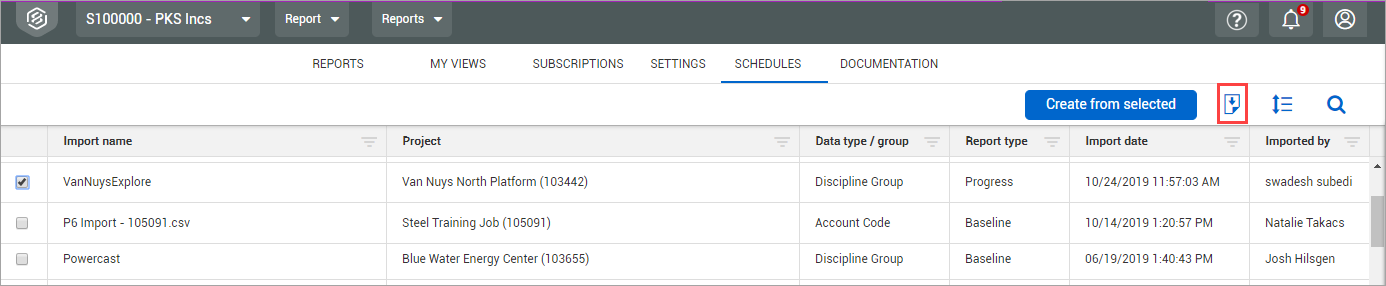
The Schedules tab contains a log of all schedules you have access to see.
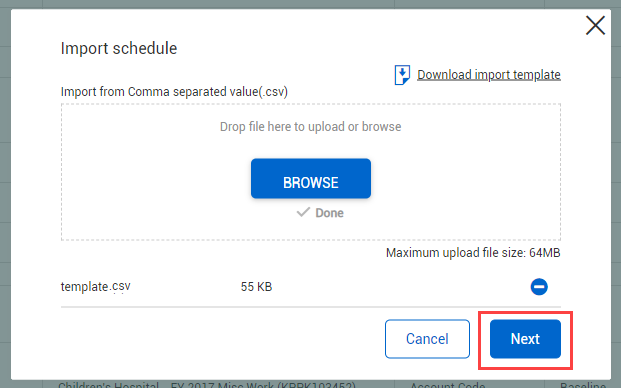
You can also select Download import template if you want to use a .csv file and fill in the information yourself.
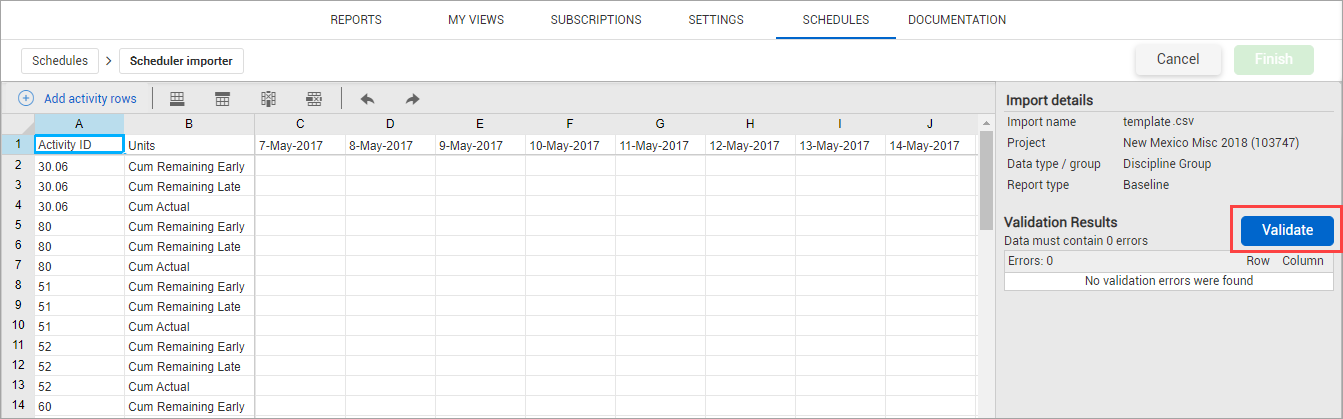
If there is an error in your file, the cell with the error will show highlighted in red.

After a schedule has been imported, it can also be updated in the application without having to make changes locally in the .csv file then re-uploading. This process will create a new record in the import log.
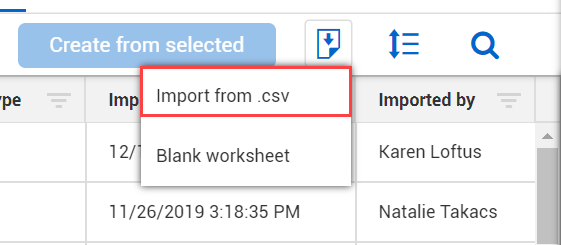
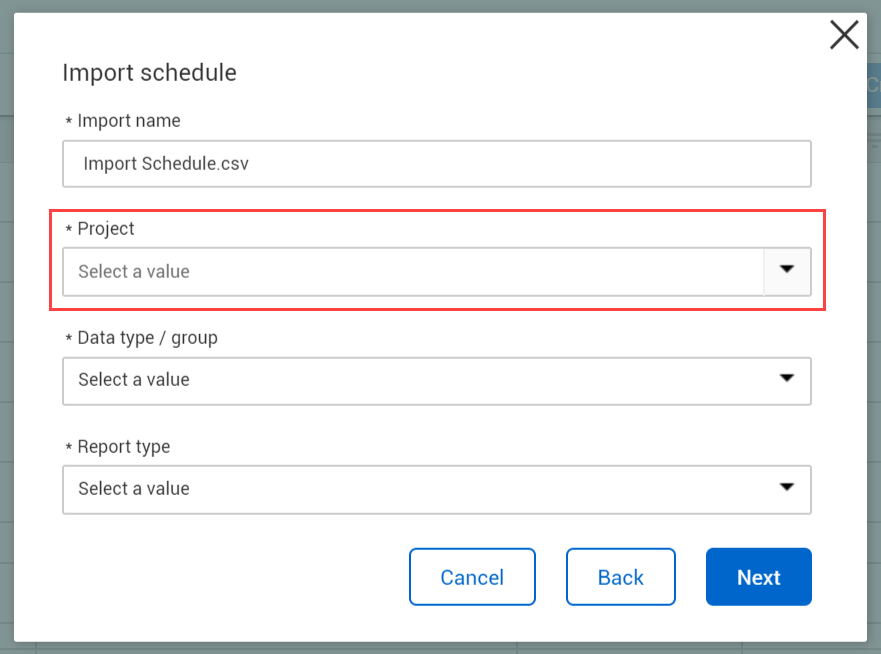
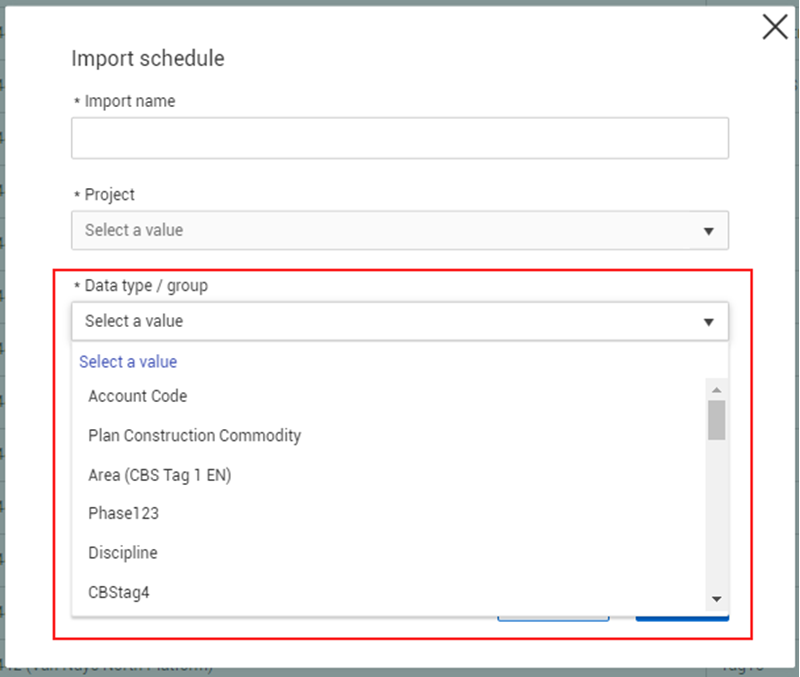
Clicking Import > Blank Worksheet brings up an empty Import Schedule.
![]()
On the Schedules tab, select the schedule you want to update by clicking on the corresponding check box.
Click the Create from selected button.

A pop-up box asks you if you want to create a new schedule item from the selected record. Select Continue.
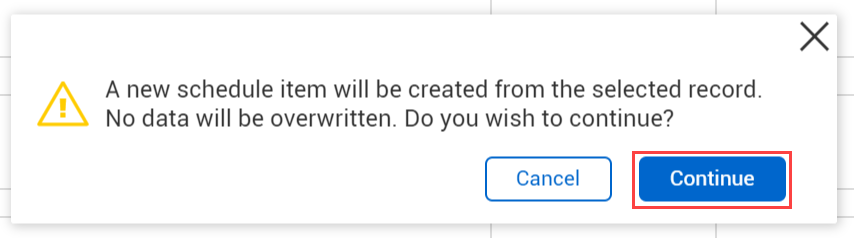
You will then be directed to the metadata and data entry/validation screens as outlined in the previous section of this document.
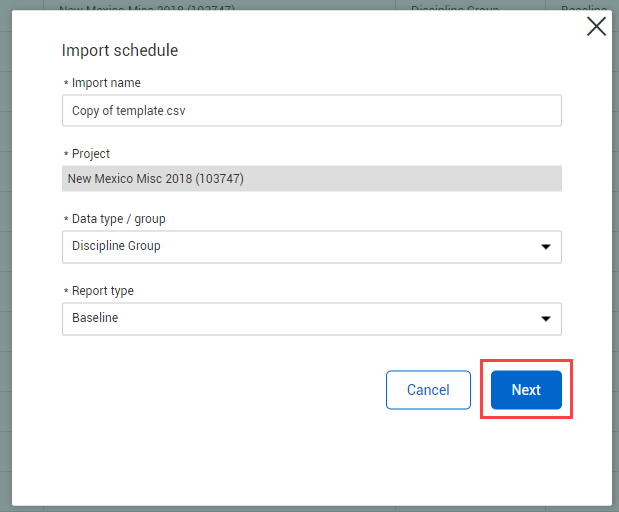
You may edit a previous schedule and it will automatically save as the latest version, with previous data saved in the database.
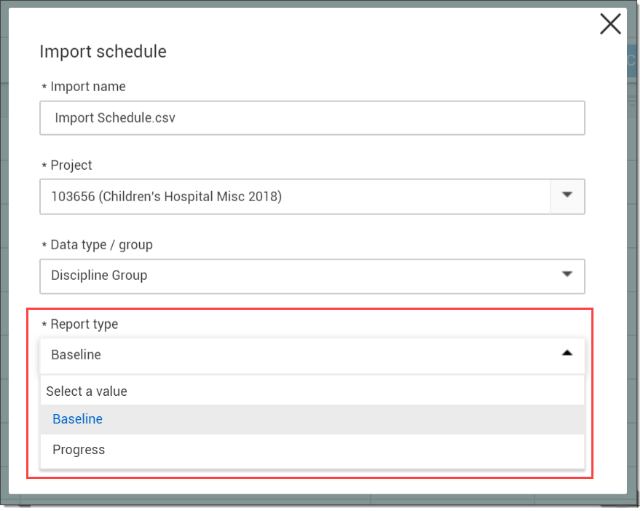
Reports will only reflect the most recent import for each import type [Baseline/Progress, and Account Code/Commodity/Discipline Group].
Additional Information
9977 N 90th Street, Suite 250 Scottsdale, AZ 85258 | 1-800-637-7496
© 2024 InEight, Inc. All Rights Reserved | Privacy Statement | Terms of Service | Cookie Policy | Do not sell/share my information