Products
Solutions
Resources
9977 N 90th Street, Suite 250 Scottsdale, AZ 85258 | 1-800-637-7496
© 2024 InEight, Inc. All Rights Reserved | Privacy Statement | Terms of Service | Cookie Policy | Do not sell/share my information

To access the Knowledge Base, click the Knowledge Base icon.
In the Knowledge Base, you can establish the base pool of resources for the organization. Schedule is built on top of augmented intelligence, or machine based learning. The Knowledge Base is used to enhance machine based learning and load with past schedule-related data that an organization would want to include in future schedules. Hence, this data that gets loaded should be as accurate as possible. After set up, schedulers can pull these into projects for use with the resource management functionality and analytics.
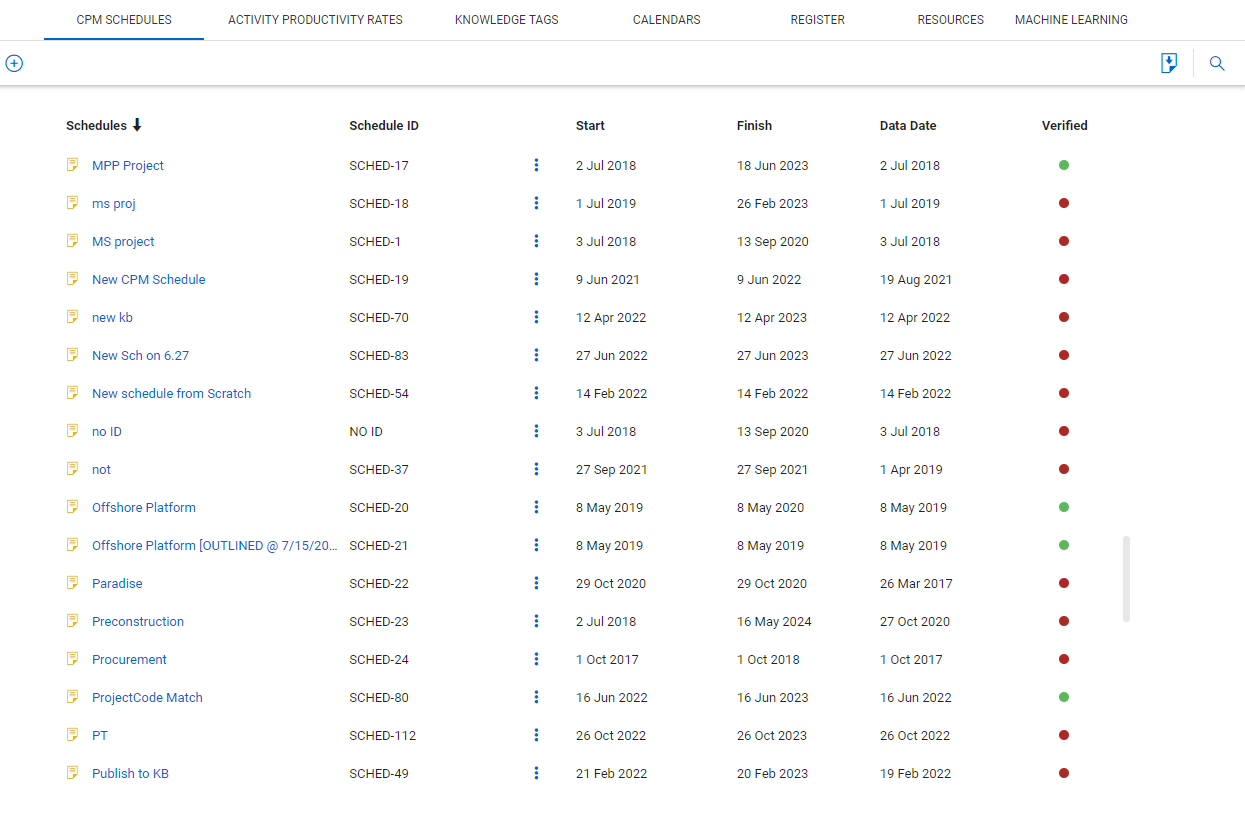
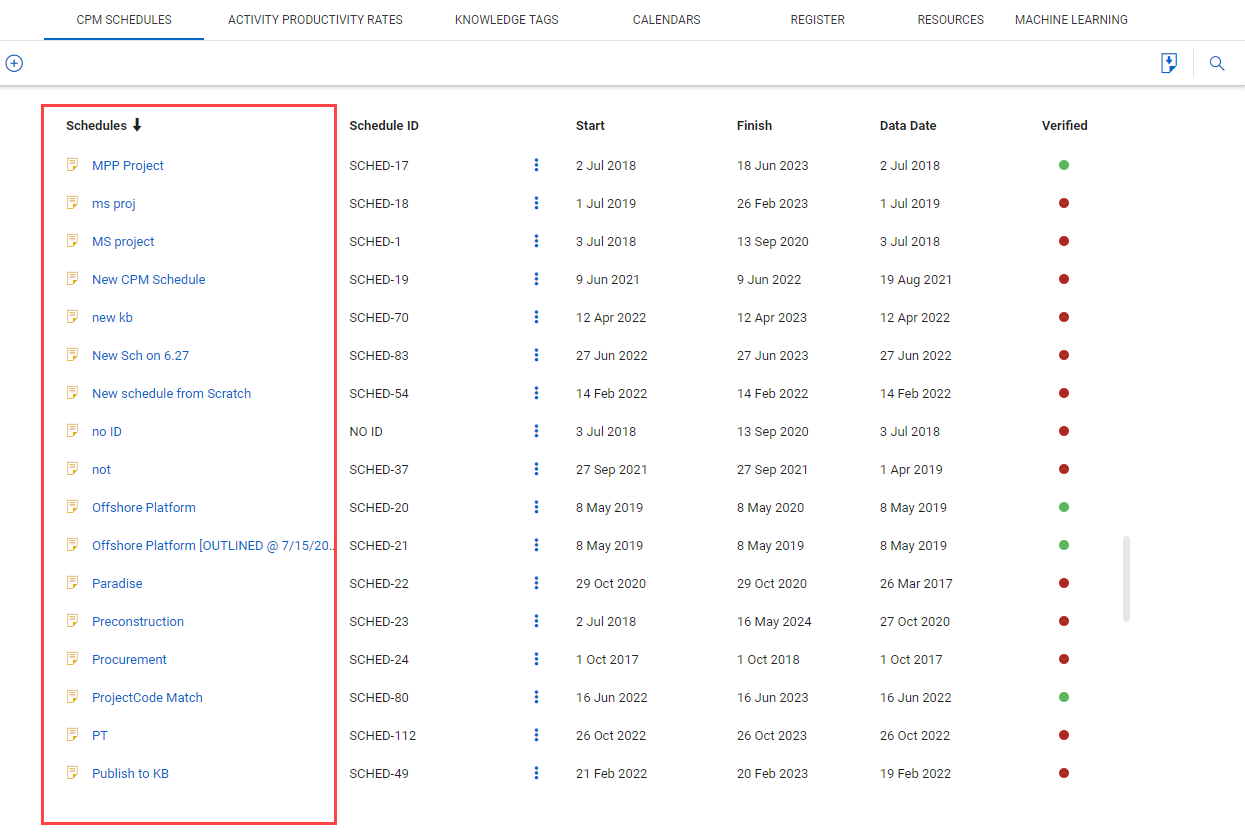
CPM schedules in the Knowledge Base contain the same information as project schedules. CPM schedules are past or current schedules where relevant schedule data can be used in future schedules. For example: if you are working on a new schedule for bridgework, you can store past bridgework schedules in the knowledge library to use later for machine learning for new projects.
The Verified column on the far right is controlled by an administrator, and represents schedules that have been certified as schedules that contain accurate data. Schedules that show a green dot are verified, and red dots are unverified schedules.
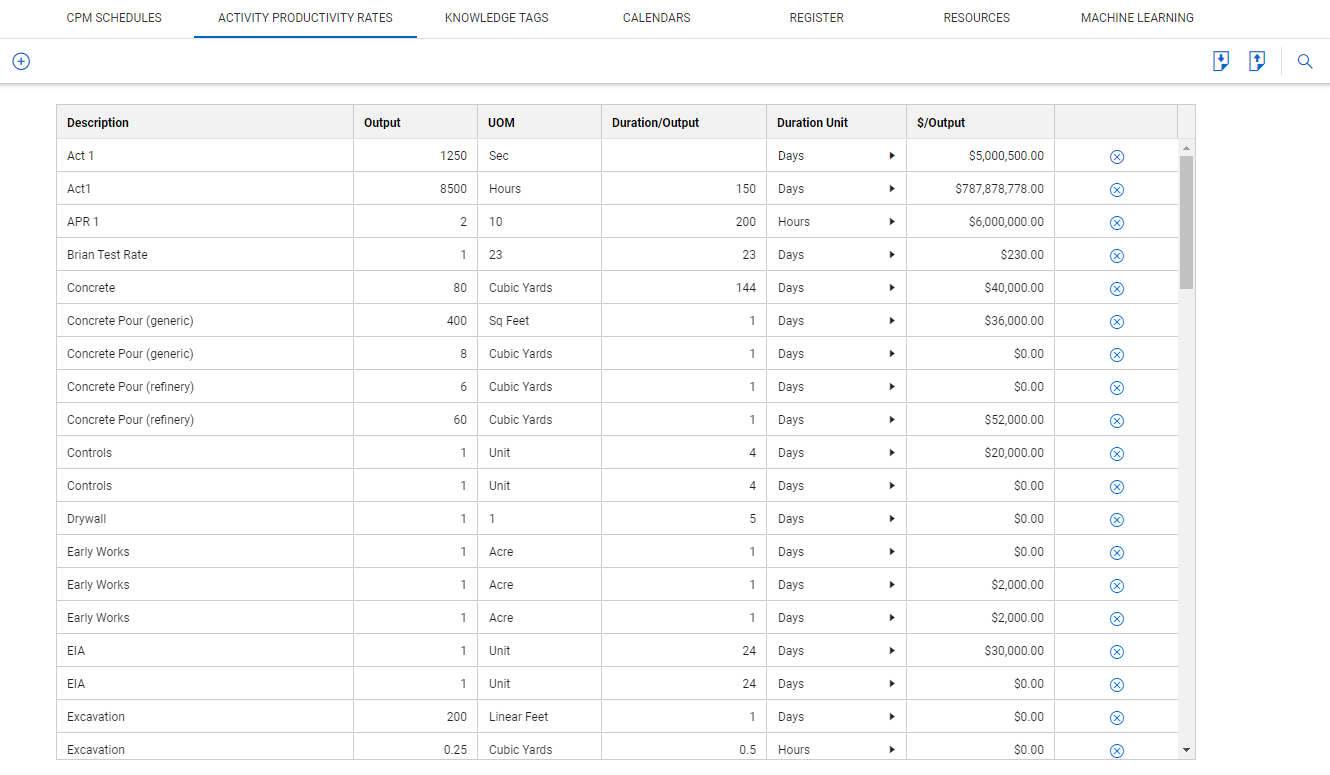
Organizations can use Activity Productivity Rates deemed as being the most productive, which can be used to give you durations.
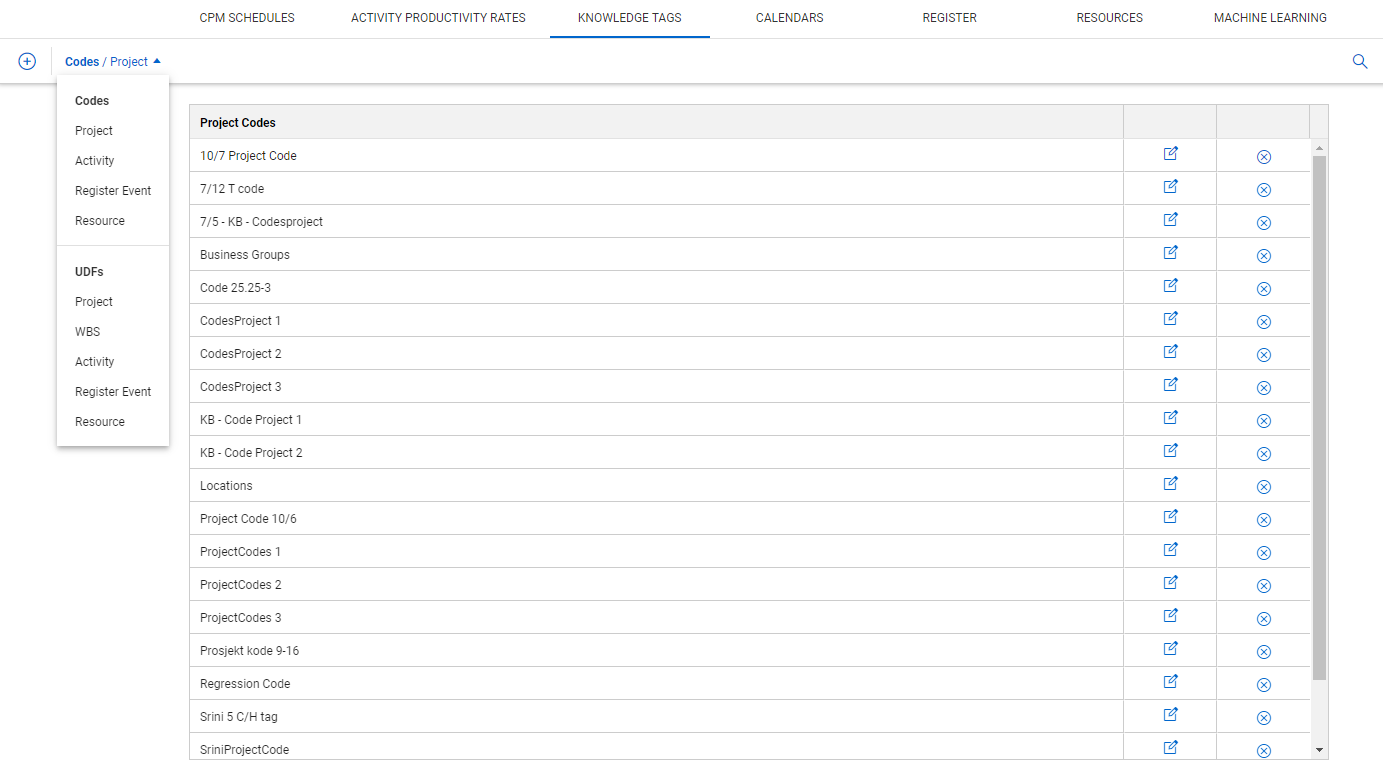
On the Knowledge Tags tab, you can review tags defined at the organization level and exclude them as necessary from consideration by the Schedule inference engine. When a new project is created, you have the option to import these knowledge tags into the new project.
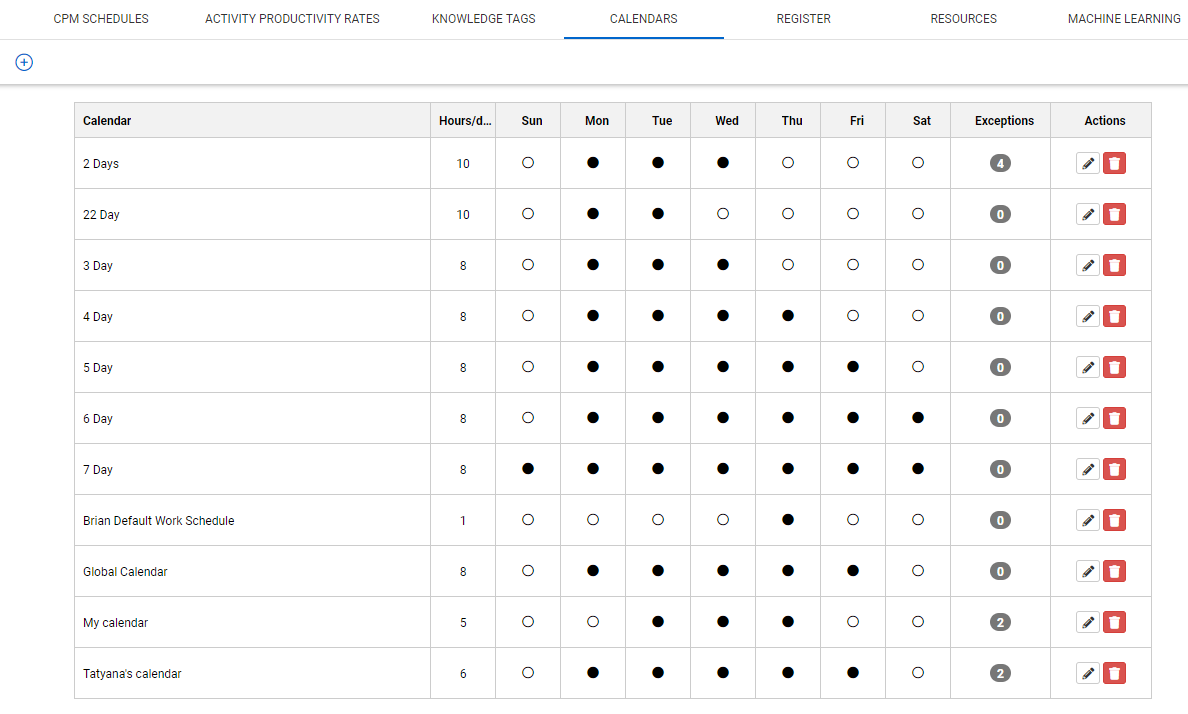
On the Calendars tab, additional calendars can be created, working days can be edited, and a default calendar can be defined. This is also where holidays are defined.
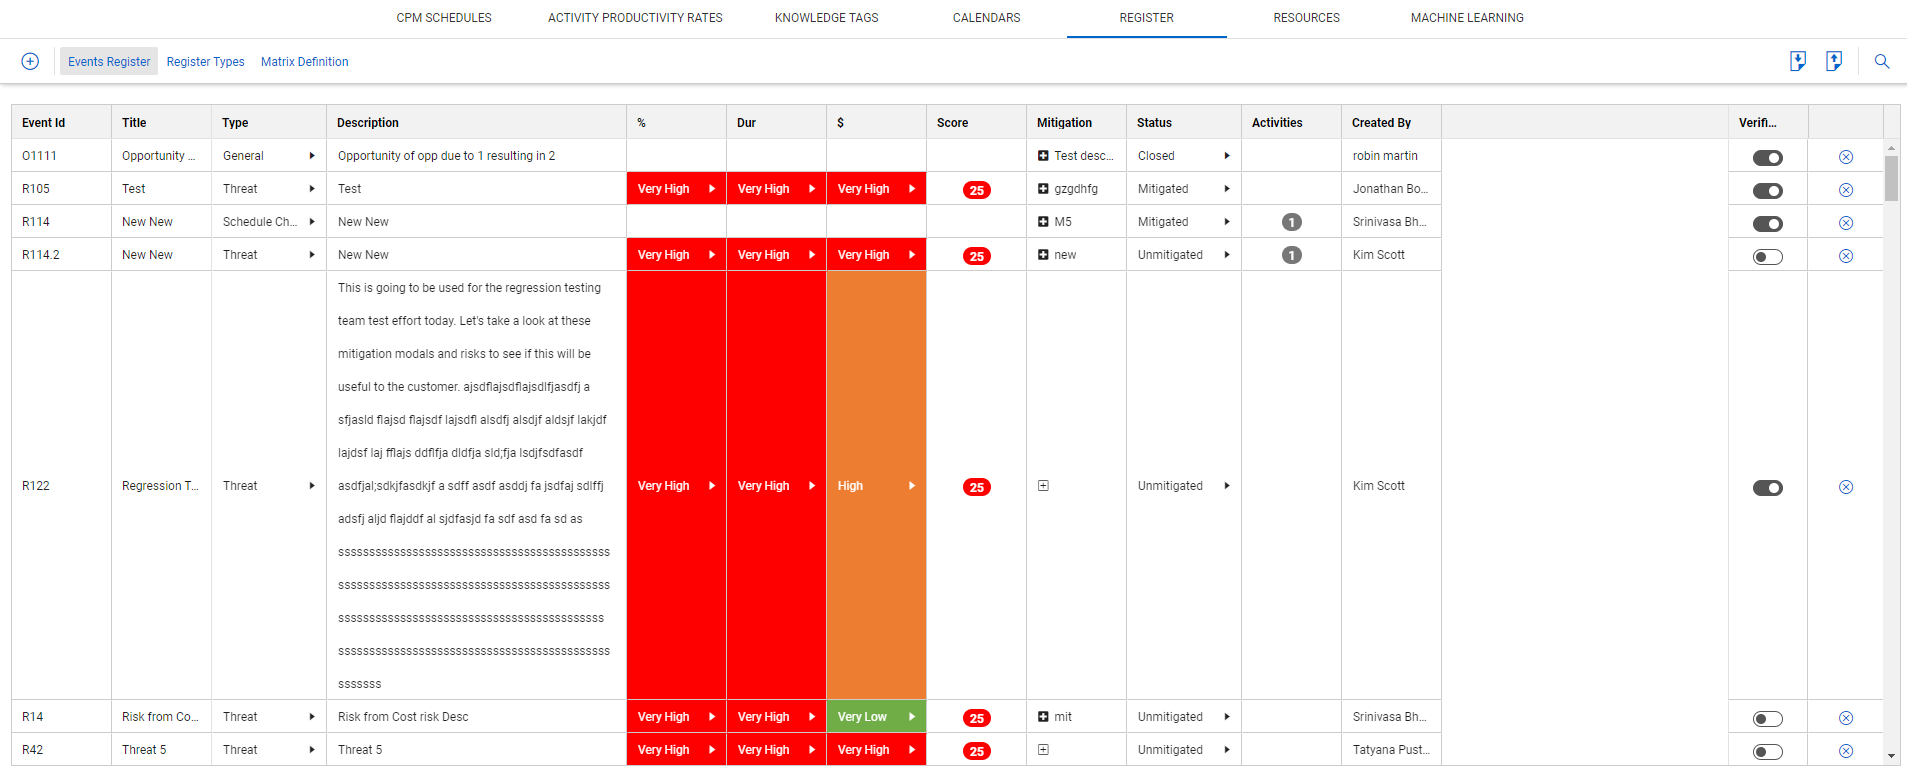
The Events register is where you store persistent risks that occur on projects. The Events register is useful for pulling stored risks into new schedules and use them for risk workshops. The following fields can be quickly edited from the register.
| Tab | Function/Description |
|---|---|
| Title | Title of the event. |
| Type | This describes the type of register item, for example, Risk, Opportunity, or Action Item. |
| Description | Items descriptions can be edited at any time. |
| % | The Probability an event will occur in a risk simulation. |
| Dur | Impact range event would have on a simulation when it occurs. |
| $ | Impact range event would have on a simulation when it occurs |
| Score |
A score is automatically generated based on the probability and impact of items. |
| Mitigation |
Mitigation strategies can be captured here. |
| Status |
Indicates the status of an event in the register |
| Activities |
The number of times the register item appears schedules. Specific Project and WBS element appearances can be reviewed by clicking on the number. You can select the All drop down to filter the list by project. |
| Created By |
Indicates the user that created the Event. |
| Verified |
Items can be either created directly in the Knolwedge Library, or pushed from individual projects. Items pushed from projects will appear here as unverified, and will not show up as Smart Suggestion options in other projects until verified. |
| Delete |
Deletes the Event from the register and from any assigned instances in schedules. |
Additional Register Types can be defined by selecting the register type tab.
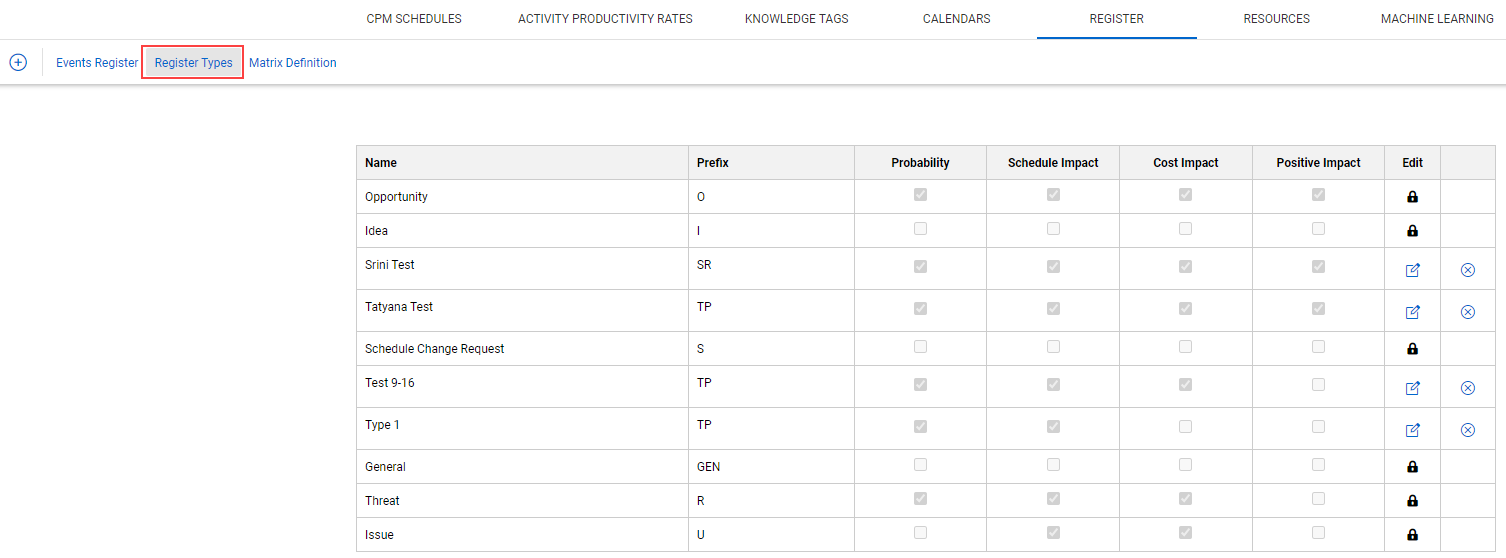
The tenant level definition of the likelihood and range of impact for both duration and cost a register event has in the cost risk, and schedule review views on risk simulations. These can be adjusted to be project or schedule specific

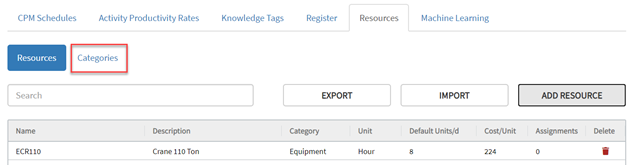
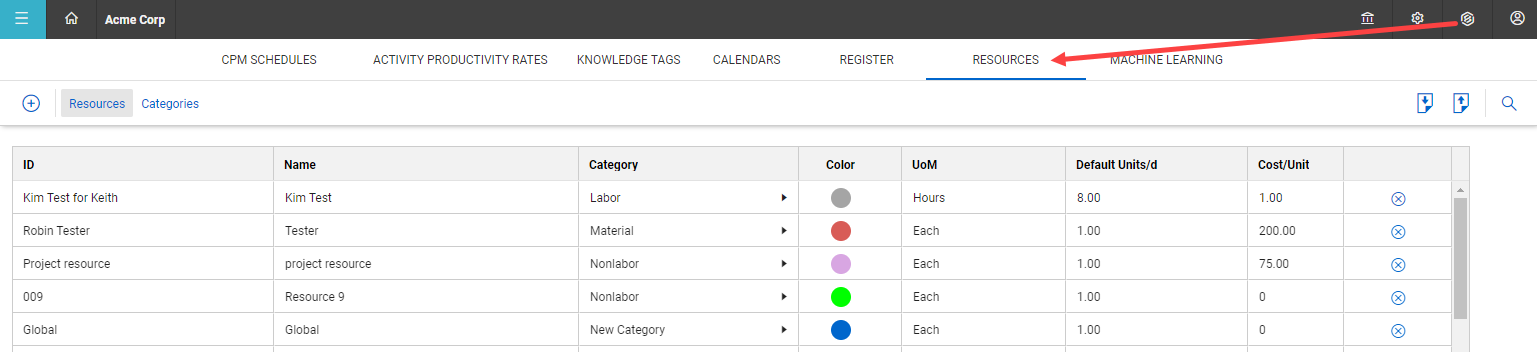
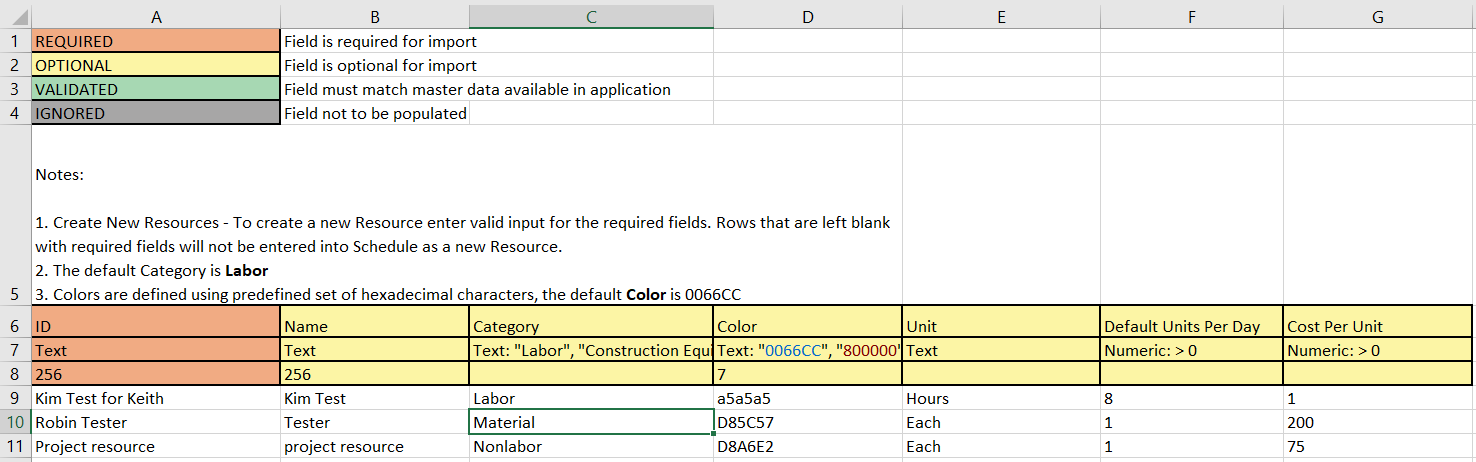
Resource details such as ID, Name, Category, Default Units, and Costs can be edited in the register. The indent arrows located on the far right of the screen are used to create child resources or to move the resource to a different part of the grid.
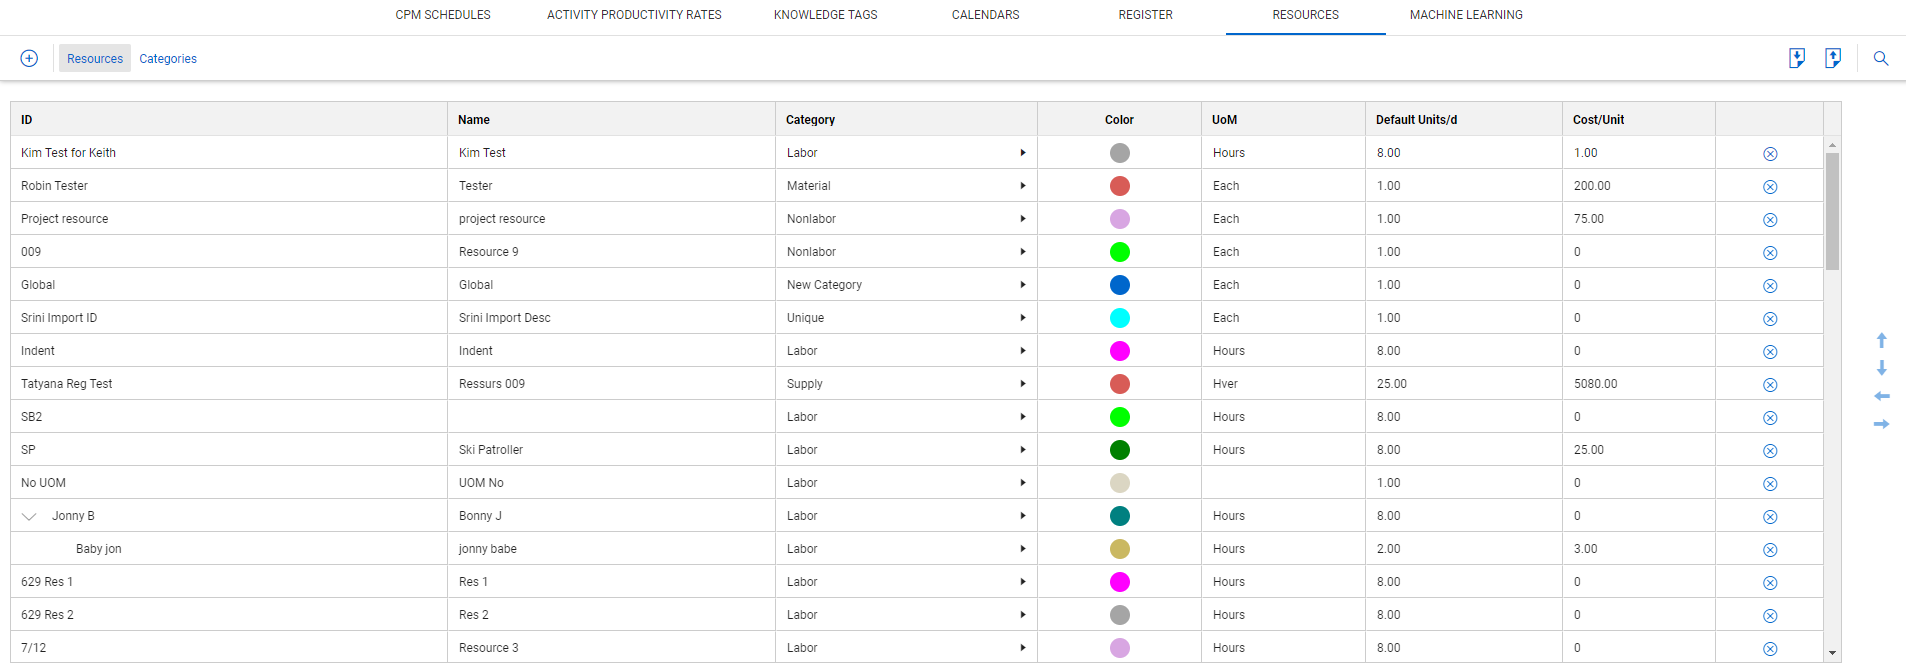
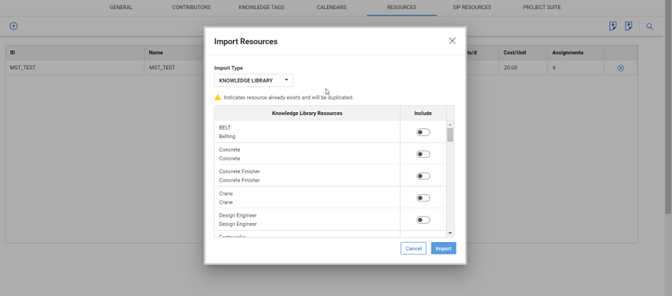
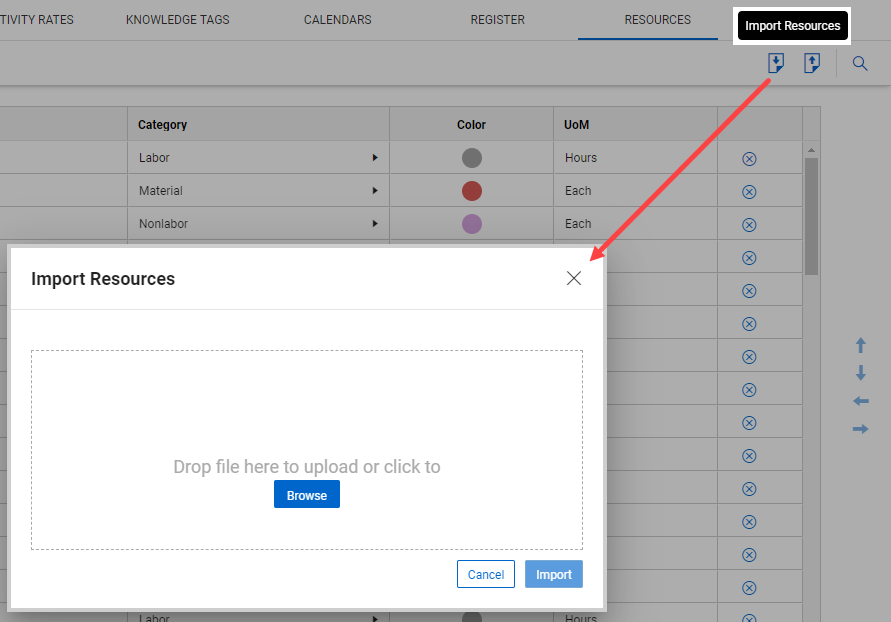
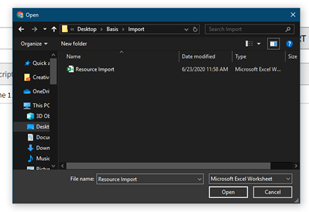
Resources can be imported from a Microsoft Excel file and also exported, which can then be edited and imported back into the Resources tab.
Schedule validates the Categories column in the Resources register after it is updated.
Only System Administrators can add, edit, or delete Category types.
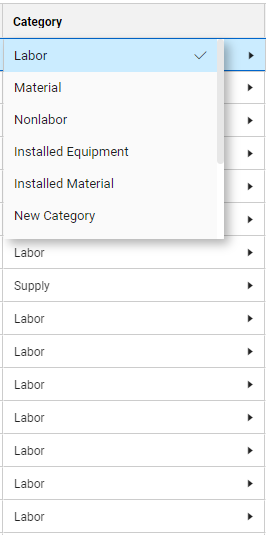
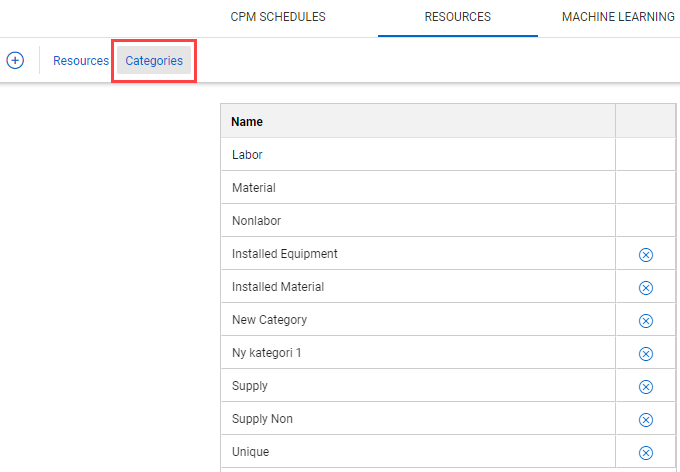
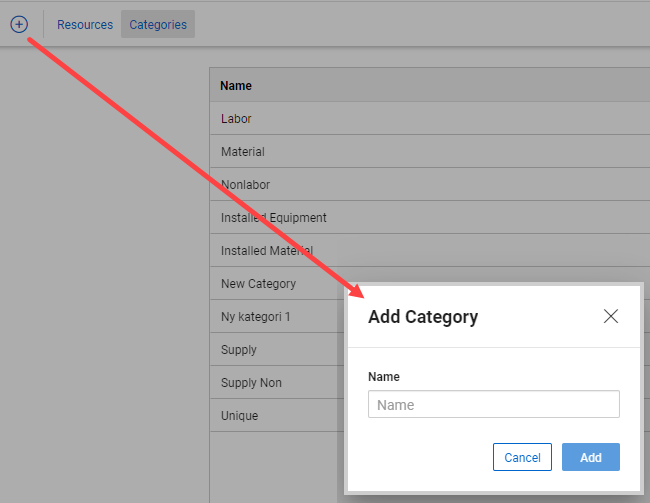
To modify the categories available, click on the Categories section of the Knowledge Library Resource register.
To add a category, click the Add Category button.
Type in a new category name. Click Add to complete the action.
To edit a category name, click directly into the name field of the category to be modified.
If a category needs to be deleted, select the icon in the delete column.
If you are using Estimate or Control, these categories also match the default categories.
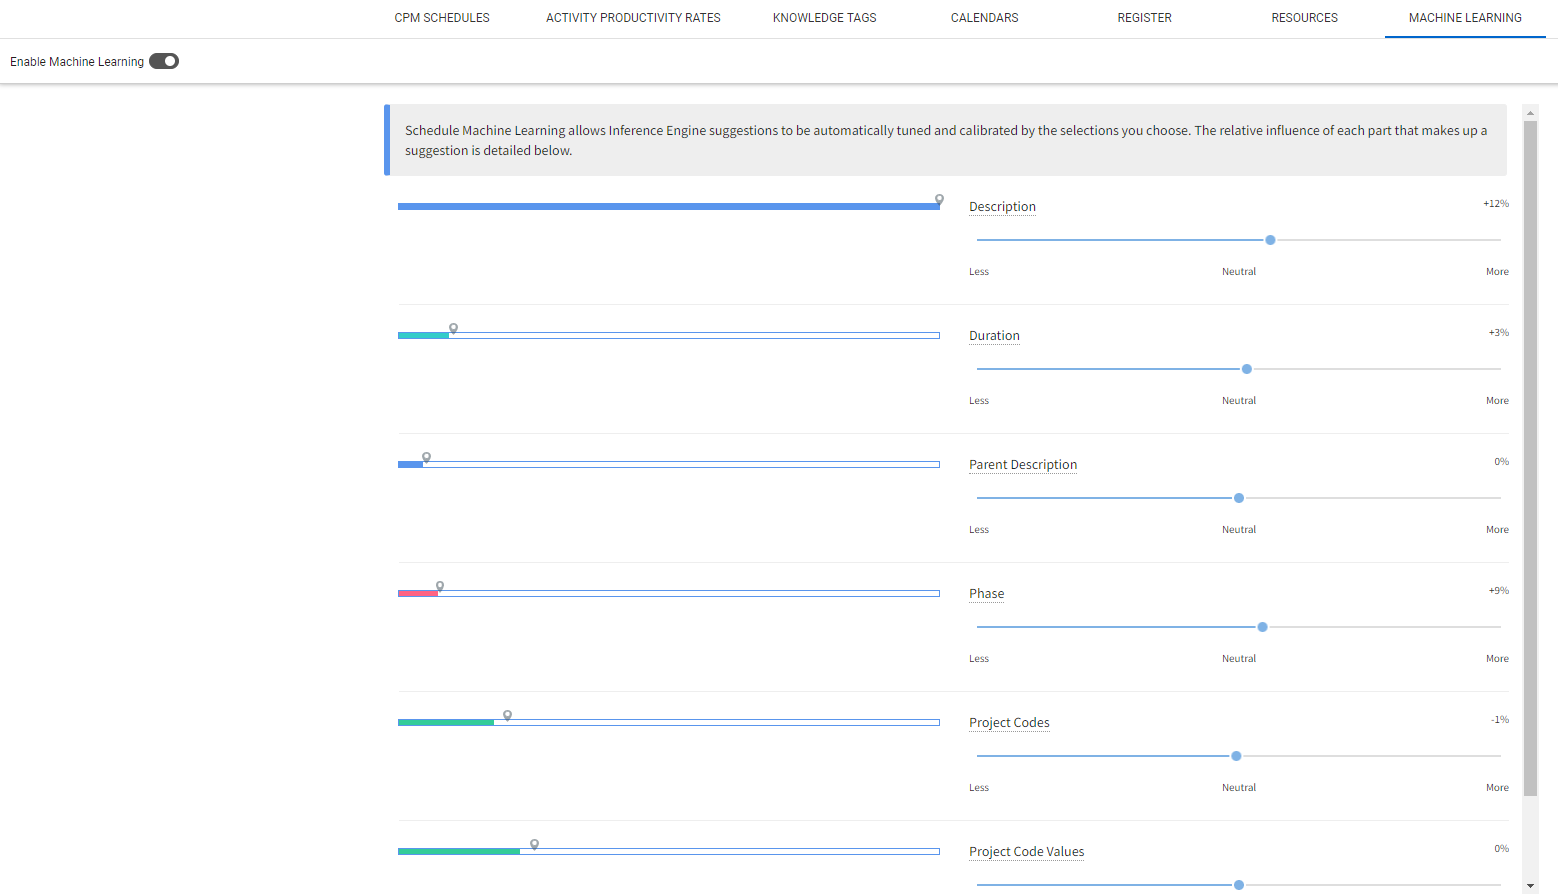
Machine learning lets inference engine suggestions be automatically tuned and calibrated by the chosen selection.

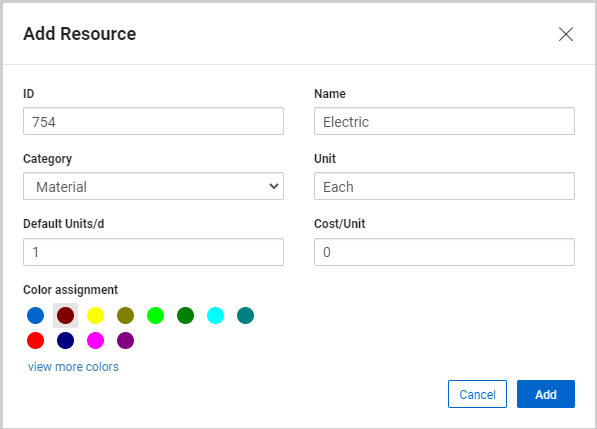
A dialog box opens.
|
Field |
Definition |
|---|---|
|
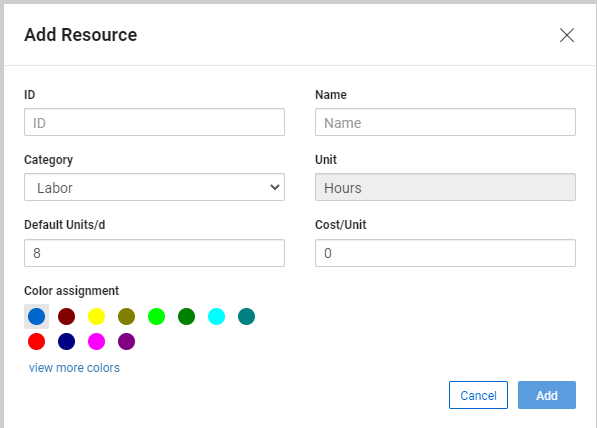
Name |
Recognizable resource name or abbreviation schedulers reference when selecting resources from the register |
|
Description |
Extended description or full title of the resource |
|
Category |
Resource type classification such as Labor, equipment, and material. |
| Unit |
The resource’s unit of measure |
|
Default Units/d |
Daily unit production/completion rate |
|
Cost/Unit |
Cost per unit |

To edit a resource, click directly into the specific field of that resource in the register.
To delete a resource, click the icon in the Delete column.
In addition to using the Resources register to set up individual resources, you can also import and export resources in bulk.

Additional Information
9977 N 90th Street, Suite 250 Scottsdale, AZ 85258 | 1-800-637-7496
© 2024 InEight, Inc. All Rights Reserved | Privacy Statement | Terms of Service | Cookie Policy | Do not sell/share my information