Products
Solutions
Resources
9977 N 90th Street, Suite 250 Scottsdale, AZ 85258 | 1-800-637-7496
© 2024 InEight, Inc. All Rights Reserved | Privacy Statement | Terms of Service | Cookie Policy | Do not sell/share my information

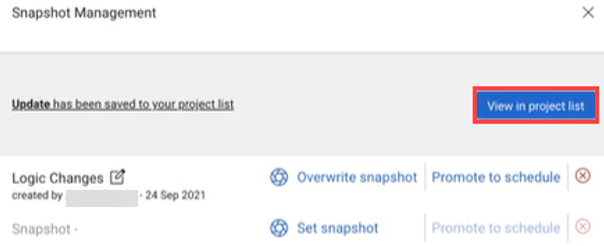
When you choose to promote a snapshot to schedule or to save a snapshot as a new schedule, the snapshot selected is then saved to the project list.
Promote to Schedule saves a snapshot to the project list. If you select Save as a new schedule, this option saves the current project as a copy onto the project list view as a new schedule.
The following step-by-step walks you through how to save a snapshot to the project list.
In the Snapshot Management menu, click the Promote to Schedule button.

If preferred, enter a new name for the snapshot in the New snapshot schedule name field.
Click Create new schedule. The new schedule has been saved to the project list.
Click View in Project List to view the new schedule.
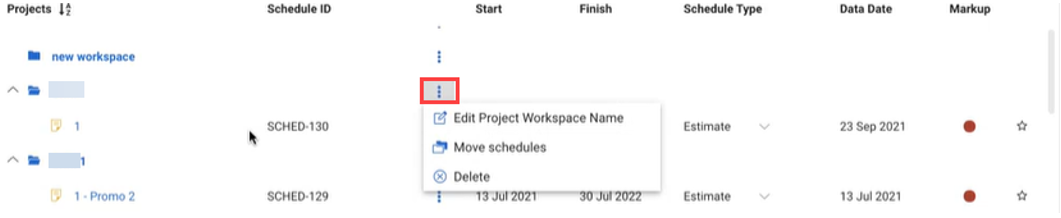
You can organize your schedules in project folders. Project folders can be created in the project list to better organize schedules into a project hierarchy. You can list as many schedules as needed under each project workspace.
The projects can be organized alphabetically using the column header sort function. Use the options from the Action menu on folders to perfom the following:
Edit Project Workspace Name
Move schedules
Delete
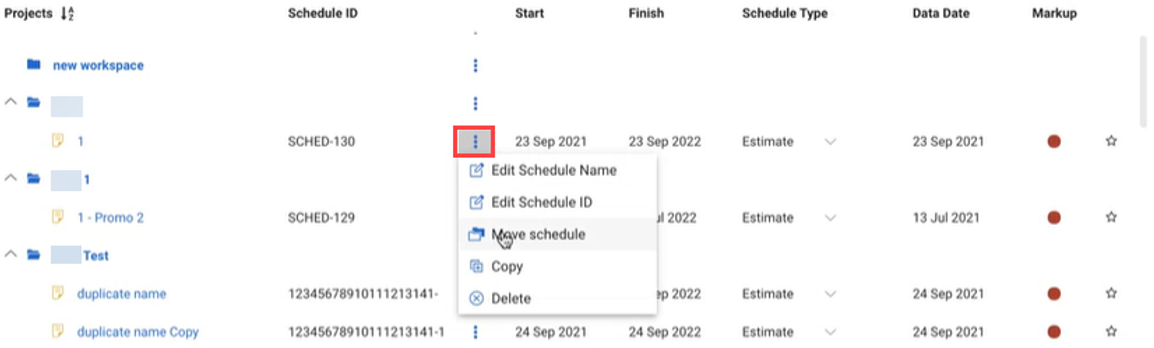
Use the options from the Action menu on individual schedules to perform the following:
Edit Schedule Name
Edit Schedule ID
Move schedule
Copy
Delete
You can also edit the Schedule Type for each schedule. By default, the Schedule Type field is set to Estimate.
If you do not organize your schedules into specific project folders, then the schedule is placed under the None folder by default.
If you import a project file into Schedule, you must include the Schedule ID, Schedule Name, and a Project Workspace.
Additional Information
9977 N 90th Street, Suite 250 Scottsdale, AZ 85258 | 1-800-637-7496
© 2024 InEight, Inc. All Rights Reserved | Privacy Statement | Terms of Service | Cookie Policy | Do not sell/share my information