Products
Solutions
Resources
9977 N 90th Street, Suite 250 Scottsdale, AZ 85258 | 1-800-637-7496
© 2024 InEight, Inc. All Rights Reserved | Privacy Statement | Terms of Service | Cookie Policy | Do not sell/share my information

Easily upload multiple documents using the bulk upload feature. You can choose the standard bulk upload or the enhanced bulk upload, where you can use tools such as copy and paste or dragging values to quickly enter document data.
Both upload interfaces include time-saving features. If you select a document in the Documents register before selecting Bulk upload, the details of that document automatically show in a row. You can then edit the details as needed.
If you are uploading revised documents, select the documents in the register before selecting Bulk upload. You can edit the revision and attach new files.
If you are uploading to an existing document number and want Document to carry forward the same file when the status is changed, select the Carry forward view files from the previous status check box on the standard dialog box, or select Yes in the Carry forward view files column in the enhanced dialog box. Existing files are not carried over if a new file has been attached to the document.
Select the Superseded revision check box if you want to upload previous revisions of the files.
Summary: Choose the standard bulk upload tool to upload documents in bulk in the interface.
Considerations: If you are using standard folders, you can select a folder before starting these steps, and the documents are automatically added to that folder.
From the Documents register, click the Add icon, and then select Bulk items.
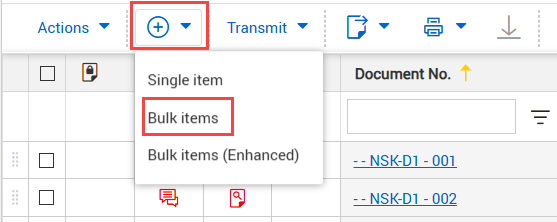
The Bulk upload dialog box opens.
In the Bulk upload dialog box, click the Add files icon in the Files column. The Upload file dialog box opens.
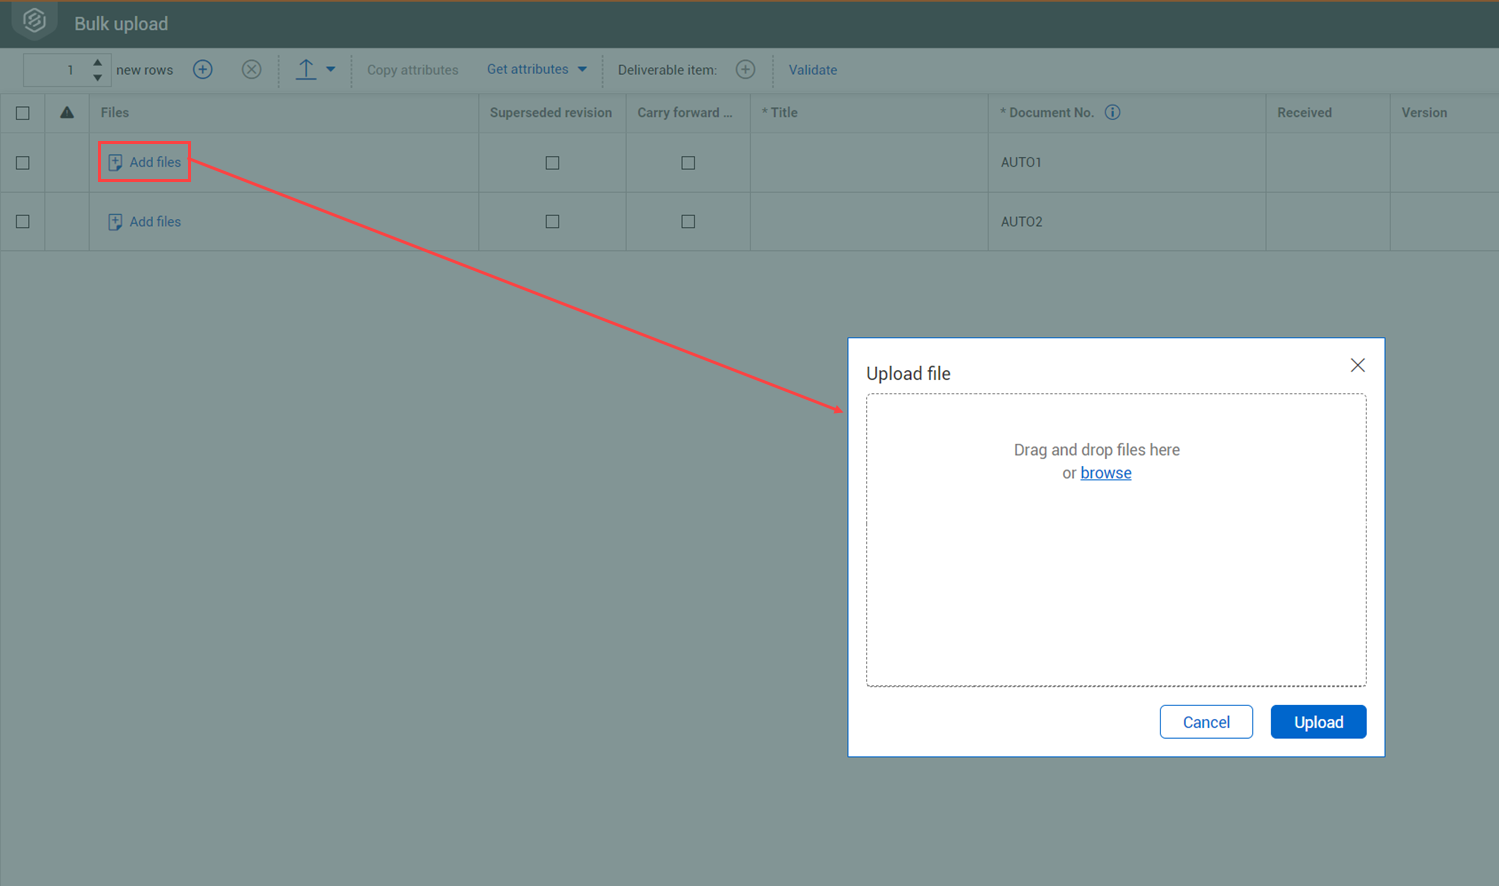
Drag and drop files for the document entry into the Upload file dialog box. You can upload multiple files for each document if they are of different file formats. After all files are added, click Upload.
Complete the required fields and the applicable optional fields.
Repeat steps 2-4 as needed. If you need additional grid lines, click the Add rows icon.

To delete a row, select the document, and then click the Delete rows icon.
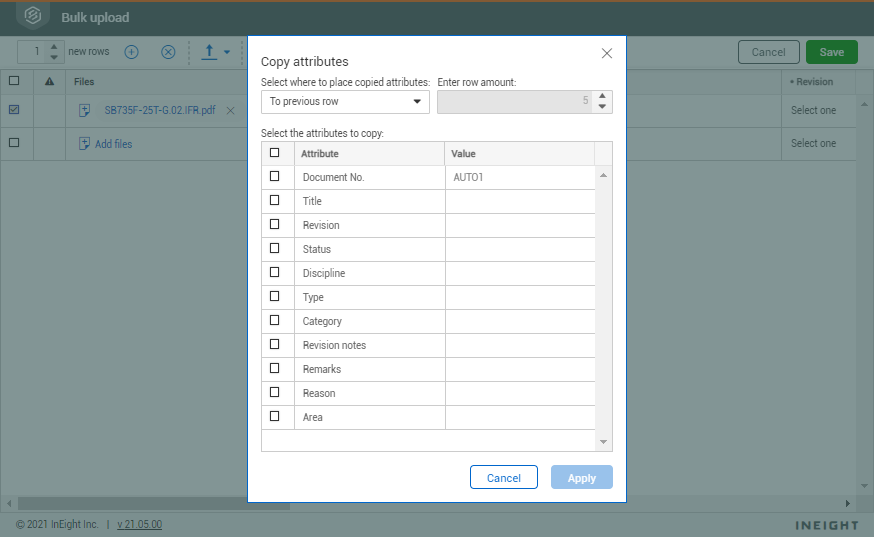
If the documents being uploaded have similar details as other documents in the dialog box, you can select the previous document, click the Copy attributes, and then select which details you want to copy to each row.
You can click Get Attributes to retrieve document details from existing revisions with the same document number already uploaded to the Documents register.
Click Validate to check that all fields have been completed and details are correct. When there are errors, the incorrect fields show in red, so you can edit them as required.

Click Save. A confirmation box opens.
Click Yes to create a transmittal for the saved documents.
Click No to return to the Documents Register.
Summary: Choose the enhanced bulk upload tool to upload when you want the convenience of spreadsheet-style tools to enter metadata quickly.
Considerations: If you are using standard folders, you can select a folder before starting these steps, and the documents are automatically added to that folder. If you want to leave the page before you are ready to upload your documents, you can click Save as draft and return to the page later.
From the Documents register, click the Add icon, and then select Bulk items (Enhanced).
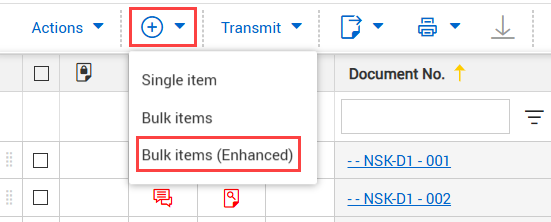
The Bulk upload (Enhanced) dialog box opens.
Click the first available cell in the Files column. The Upload file dialog box opens. Alternatively, you can click the Upload files button.
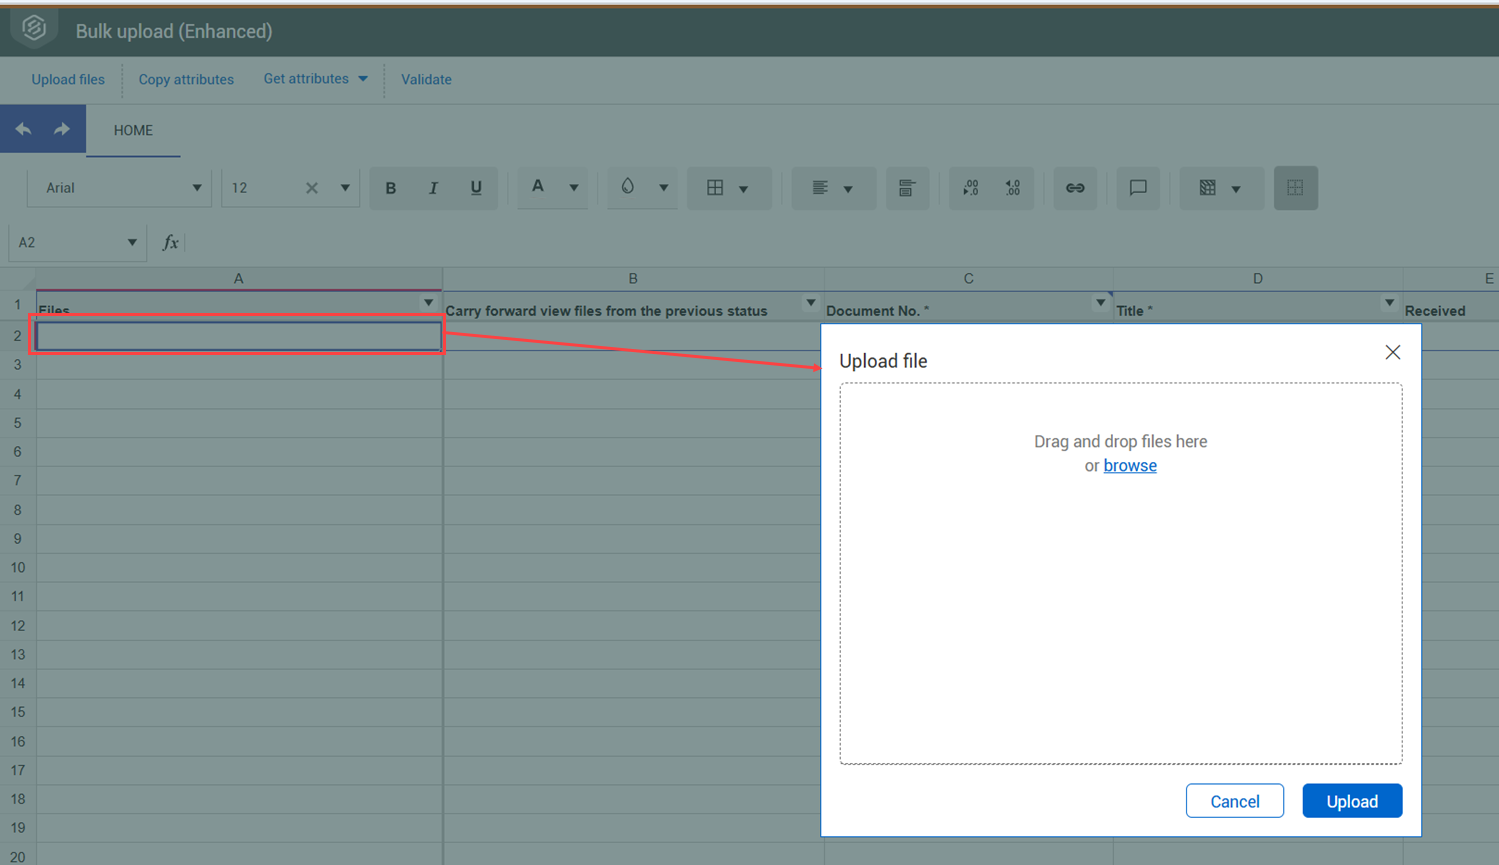
Drag and drop or browse for files for entry into the Upload file dialog box. You can upload multiple files for each document if they are of different file formats. After all files are added, click Upload.
Complete the required fields and the applicable optional fields. You can use features similar to those on a spreadsheet to quickly complete document fields.
You can copy and paste values from a spreadsheet or another source.
You can drag a value across rows by selecting a cell and then hovering over the lower right corner to show the fill handle. You can then hold down the mouse and drag your mouse down the column.
If the documents being uploaded have similar details as other documents in the dialog box, you can select the previous document, click Copy attributes, and then select which details you want to copy to each row.
Click Validate to check that all fields have been completed and details are correct. If there are errors, the incorrect fields show in red, so you can edit them as required.
Click Save. A confirmation box opens.
Click Yes to create a transmittal for the saved documents.
Click No to return to the Documents Register.
What's next: You can click Clear Sheet to clear items from the Bulk upload page. A confirmation message shows, warning that all files and data will be removed.
Additional Information
9977 N 90th Street, Suite 250 Scottsdale, AZ 85258 | 1-800-637-7496
© 2024 InEight, Inc. All Rights Reserved | Privacy Statement | Terms of Service | Cookie Policy | Do not sell/share my information