Bid Wizard
InEight Estimate’s Bid Wizard is a powerful tool that can help automate the process of setting up estimates by copying information that already exists in other InEight Estimate job folders. The Bid Wizard can be used to create new projects, create a new job from an existing template, or to add to projects that are already underway.
Rather than copying every part of an existing job, the Bid Wizard gives you more flexibility and control over which parts of a job you want to duplicate, e.g., pay items or cost items or both.
In most cases you will be copying cost items, but if you have a project with pay items that are commonly used, you can copy them into a new project. If you select pay items, you will be able to select cost items as well.
The following Step by Step walks you through how you can use the Bid Wizard to create a new job by importing pay items and their associated costs from an existing job.
Step by Step — Use the Bid Wizard
-
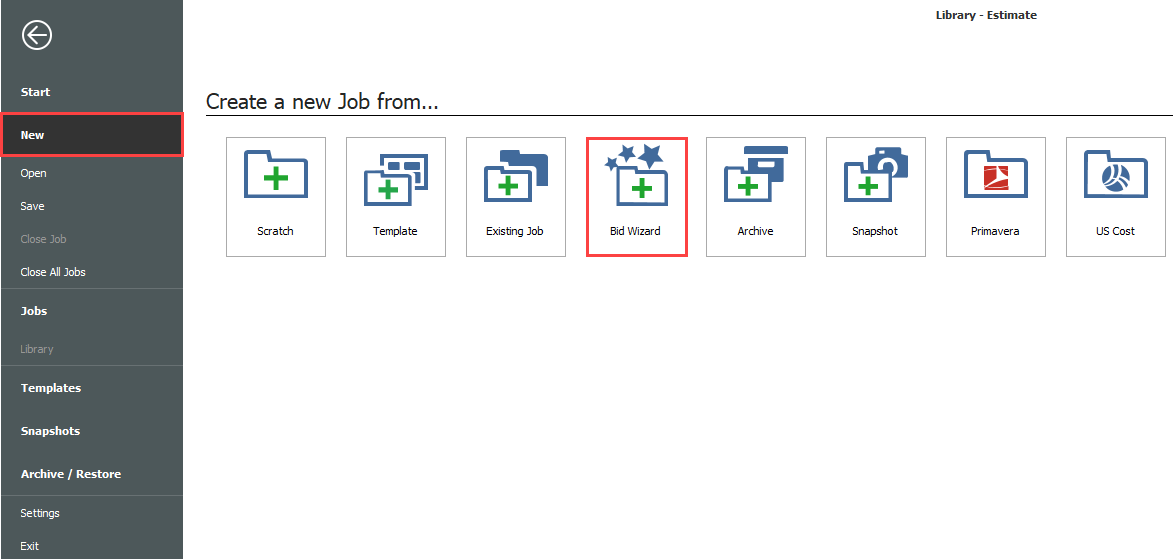
To open the Bid Wizard, click the File tab on the Estimate landing page.

-
From the left side panel, select New, then select Bid Wizard.

-
The Bid Wizard – Step 1 dialog displays

Notice that you can either create a new project or add to an existing project.
-
-
Type E101 Bid Wizard (with your initials) in the New Code field.
-
Type Bid Wizard Example in the Description field.
-
Click the Next button.
-
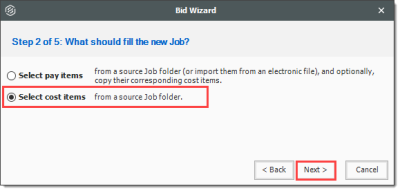
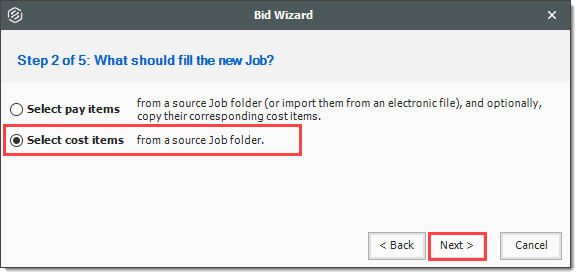
The Bid Wizard – Step 2 dialog displays
-
-
Choose Select cost items and click Next.
-
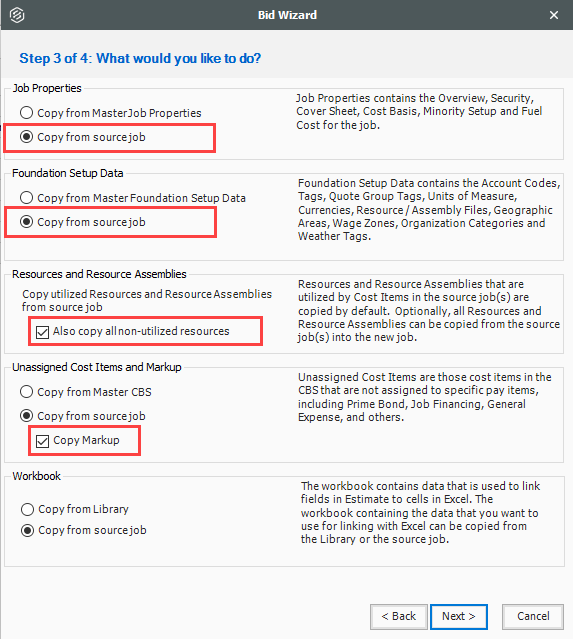
The Bid Wizard – Step 3 of 4 dialog displays
-
You use this step to indicate which source you want to pull your setup data from (the library or your source job)
-
-
For all selections, select Copy from source job.
-
Check the Also copy all non-utilized resources checkbox.
-
Select Copy from source job under Unassigned Cost Items and Markup, and the Copy Markup box is automatically selected.

-
Click Next.
-
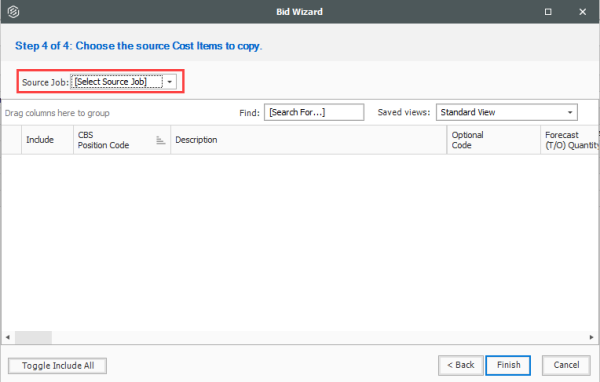
The Bid Wizard – Step 4 of 4 dialog displays
-
-
Click the Source Job drop-down arrow.
-
The Job Register opens
-
-
Find and select Training Job.
-
Click OK.
-
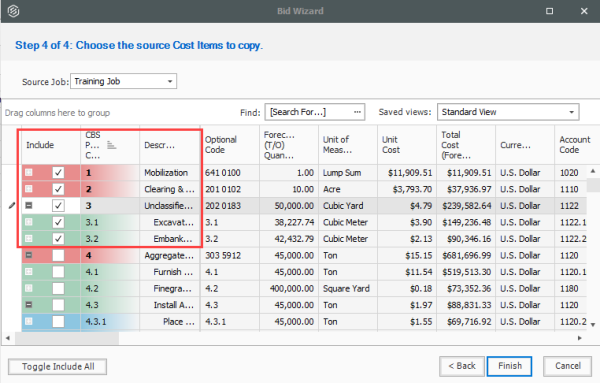
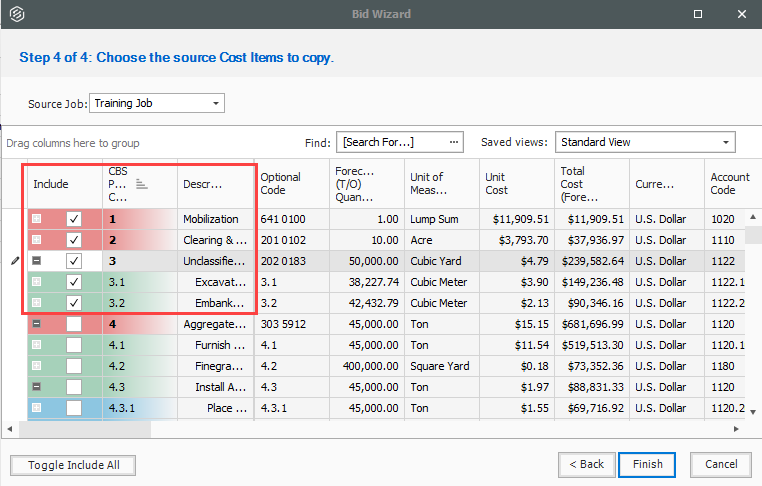
This screen displays the cost items of the source job (Training Job). All items are automatically selected
-
-
Use the Toggle Include All button to exclude all selections.

-
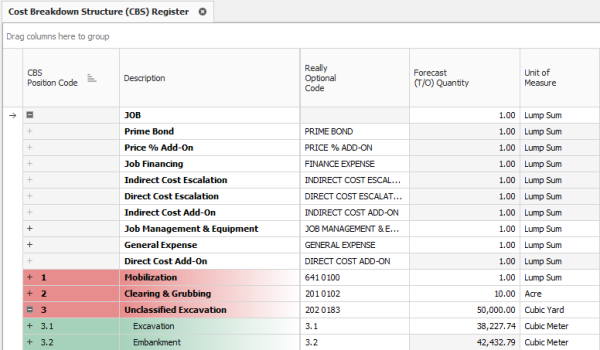
Select the checkboxes to include Mobilization, Clearing & Grubbing, and Unclassified Excavation.
-
Notice that when selecting Unclassified Excavation, that cost item’s subordinates are automatically selected
-
Click Finish to add the new job.
-
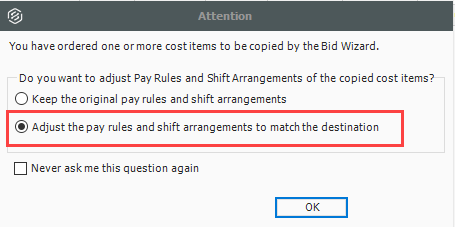
An Attention prompt appears asking, “Do you want to adjust Pay Rules and Shift Arrangements of the copied cost items?”
-
Typically, you will want to use the shifts and payment rules of your new destination job.
-
-
Select Adjust the pay rules and shift arrangements to match the destination.

-
Click OK.
-
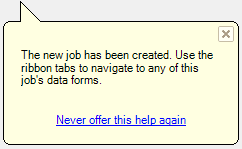
A help bubble appears letting you know the job has been created, and that you can use the ribbon tabs on the Estimate landing page to open any form
-
-
Close the help bubble by selecting the X in the upper right corner.

-
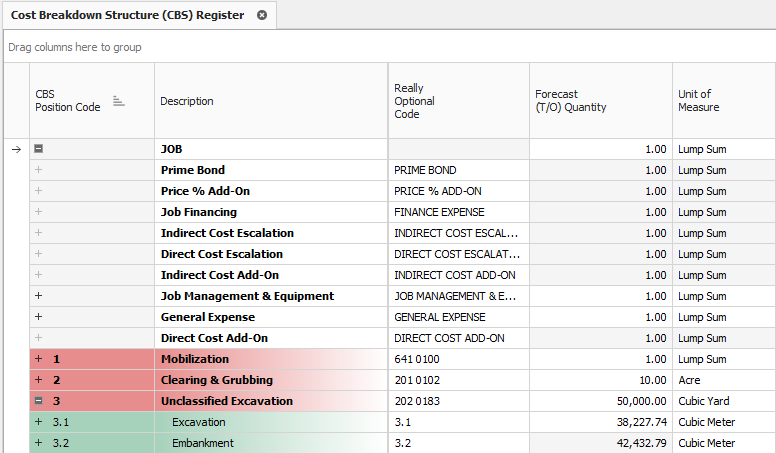
Open the Estimate > CBS to see the three cost items that were brought in.


Bid Wizard Updates
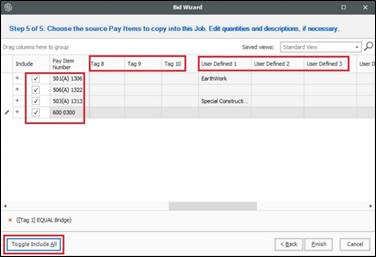
While using the Bid Wizard, the Include option is left unchecked by default. A filter is applied to bring in pay items when using the Bid Wizard. The Toggle Include All button only selects the filtered list of items instead of all items.
When the filter criteria is modified, the selected items remain checked even if some of the items might not be visible in the view. When the view is changed, the selected items remain checked.
Tags and UDF fields are included in the Bid Wizard Selection register for the cost items and Pay Item & Proposal selection registers. This lets you filter the list of cost items based on a tag or UDF.
When you select the Toggle Select All button, only filtered items are included which allow you to include scopes of work relevant to your estimate without having to manually select all items needed.