Products
Solutions
Resources
9977 N 90th Street, Suite 250 Scottsdale, AZ 85258 | 1-800-637-7496
© 2024 InEight, Inc. All Rights Reserved | Privacy Statement | Terms of Service | Cookie Policy | Do not sell/share my information


The team has worked through several iterations of project design and is entering the execution phase of the project. In preparation, the project scheduler details out the baseline schedule for executing the work.
This topic covers how to detail out activities, add milestones, set up calendars and load resources to build out a detailed CPM schedule.

As the Scheduler building out a detailed CPM schedule, you will likely be looking for quick ways to add WBS items and activities. The Detail Out option allows you to add multiple planning packages and activities at once.
Let’s look at an example.
For this scenario, let’s assume you are scheduling out the construction phase of a project for Piping work.
You want to add three separate activities for pipe spools at once.
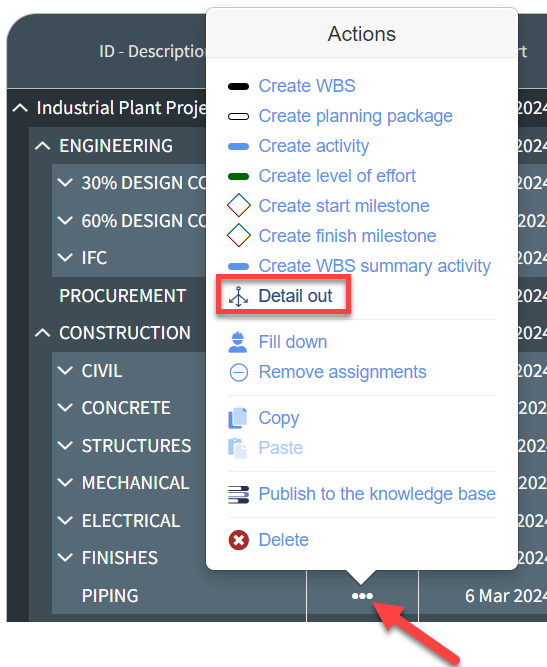
You select Actions > Detail out for the Piping item.
On the resulting window, you select settings to have 3 activities in succession, each with a duration of 20 days, then click Build.
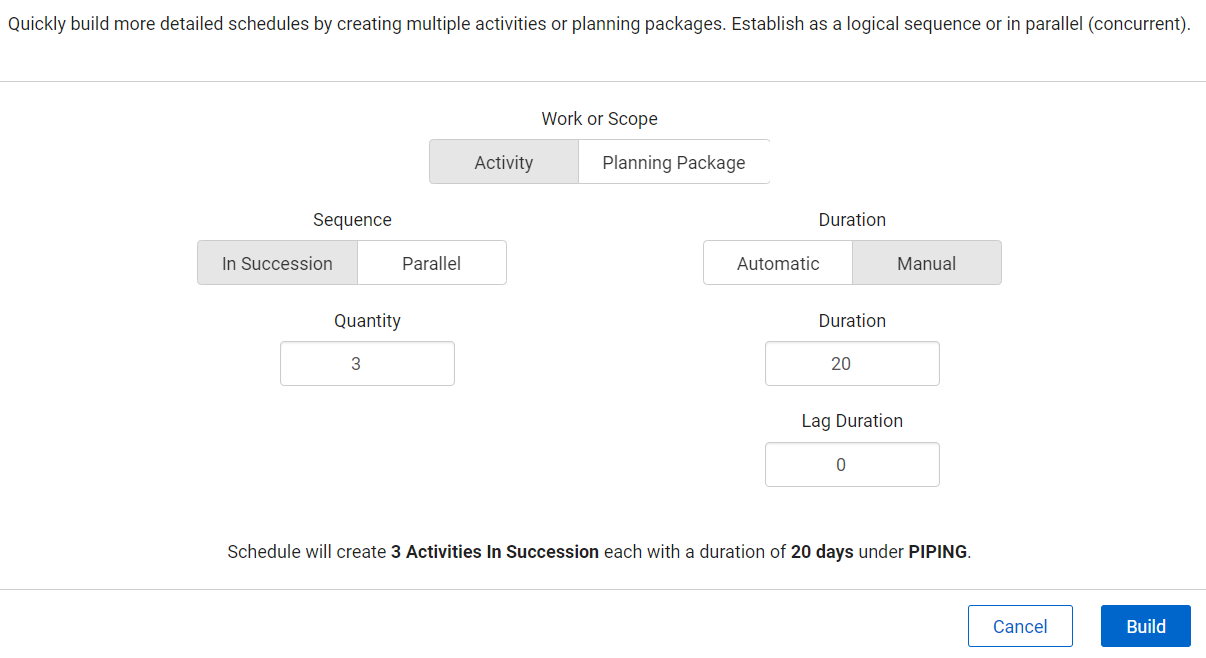
The three activities are added to the schedule.
You double click in each ID – Description field to update the activity descriptions.

Access the following links to learn more about how to detail out schedule activities, including adding knowledge tags, relationship logic, and productivity:
As you detail out your schedule, you may want to include important milestones for coordination and tracking of significant phases or events of the project. In InEight Schedule, you can add both start milestones and end milestones to your project.
These milestones can also be visible on the look ahead (short interval planning) schedules for work planners to be aware of in the field.
Start milestones establish the starting points for various sequences of activities. They clearly identify when certain critical tasks or phases should commence and help in coordinating different teams, resources, and activities.
Start milestones also serve as reference points for tracking progress. They help project managers monitor whether tasks are starting as scheduled and identify any delays at the outset.
Examples might include groundbreaking, foundation laying, or mobilization of resources.
End milestones mark the completion points of critical tasks, phases, or the entire project. They are essential for verifying that work has been finished satisfactorily. They serve as checkpoints for transitioning between project phases or handing over completed work to clients or stakeholders.
Examples include completion of building structures or final project handover to the client.
Let’s take a look at adding a milestone in InEight Schedule.
Let’s assume you have an important milestone you need to add to indicate when a critical task should begin.
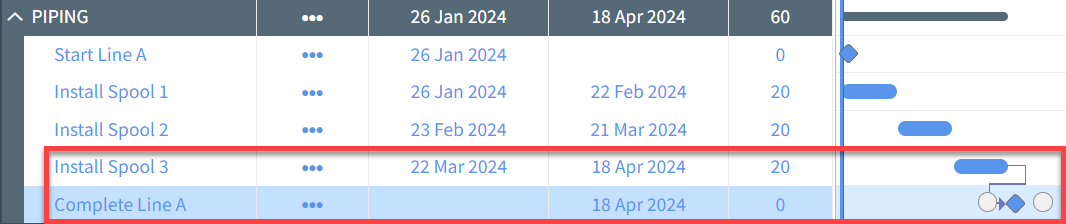
In this case, the milestone you need to create is related to your “Install Spool” activities. You need the milestone to start with the installation of Spool 1 and end with the completion of Spool 3.
To create the milestone, click on the Actions ellipses and select Create start milestone.
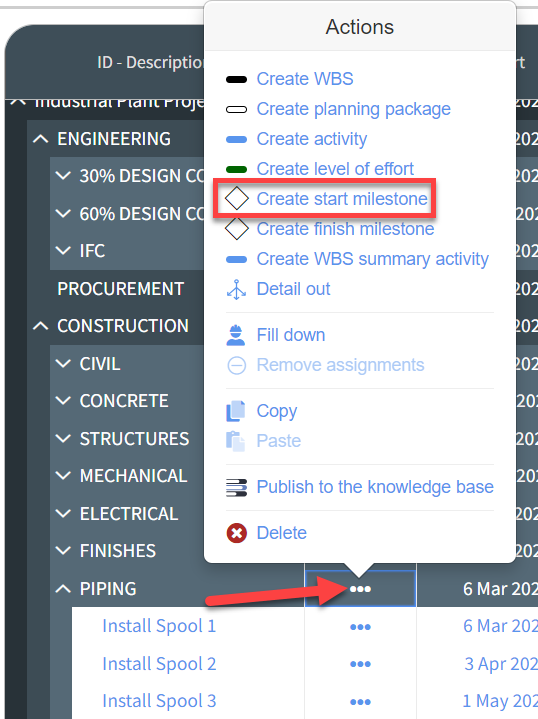
This creates a new start milestone under Piping. You double click in the ID – Description field to change the name of the milestone.
You then drag and drop the milestone to the appropriate place in your schedule (in this case before “Install Spool 1”).

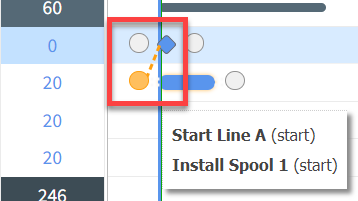
Let’s assume this milestone should start when the “Install Spool 1” activity starts, so you need to create a start-to-start relationship for the milestone.
Drag and drop to establish a start-to-start relationship between the Start Line A milestone and the Install Spool 1 activity.
In this case, you also need to add a finish milestone for when all three pipe spools are finished being installed.
Follow the same steps to add a Finish milestone after the “Install Spool 3” activity.
As you detail out the schedule, you can set up and use different calendars on activities to meet the unique characteristics and constraints of the project. For example, you might use different calendars to address seasonal constraints, explore employing different shifts or overtime, or to comply with regulations for certain areas of work.
You can create and manage additional calendars through the Schedule Configuration view in InEight Schedule, including indicating which calendar should be the default. These calendars will then be available to assign to your activities.
Let’s take a look at an example.
In this scenario, let’s say your schedule is using an 8 hours per day, 5 days per week calendar. For the piping work on the project, however, your project manager negotiated with the pipefitters union to have 10 hour shifts, excluding key holidays, to increase efficiency and shorten the schedule timeline.
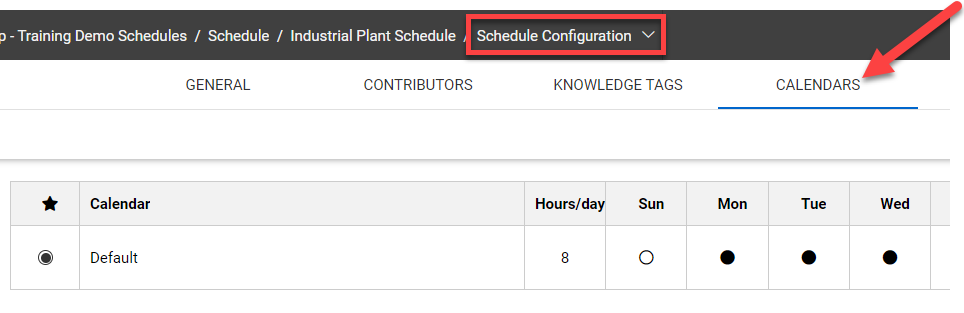
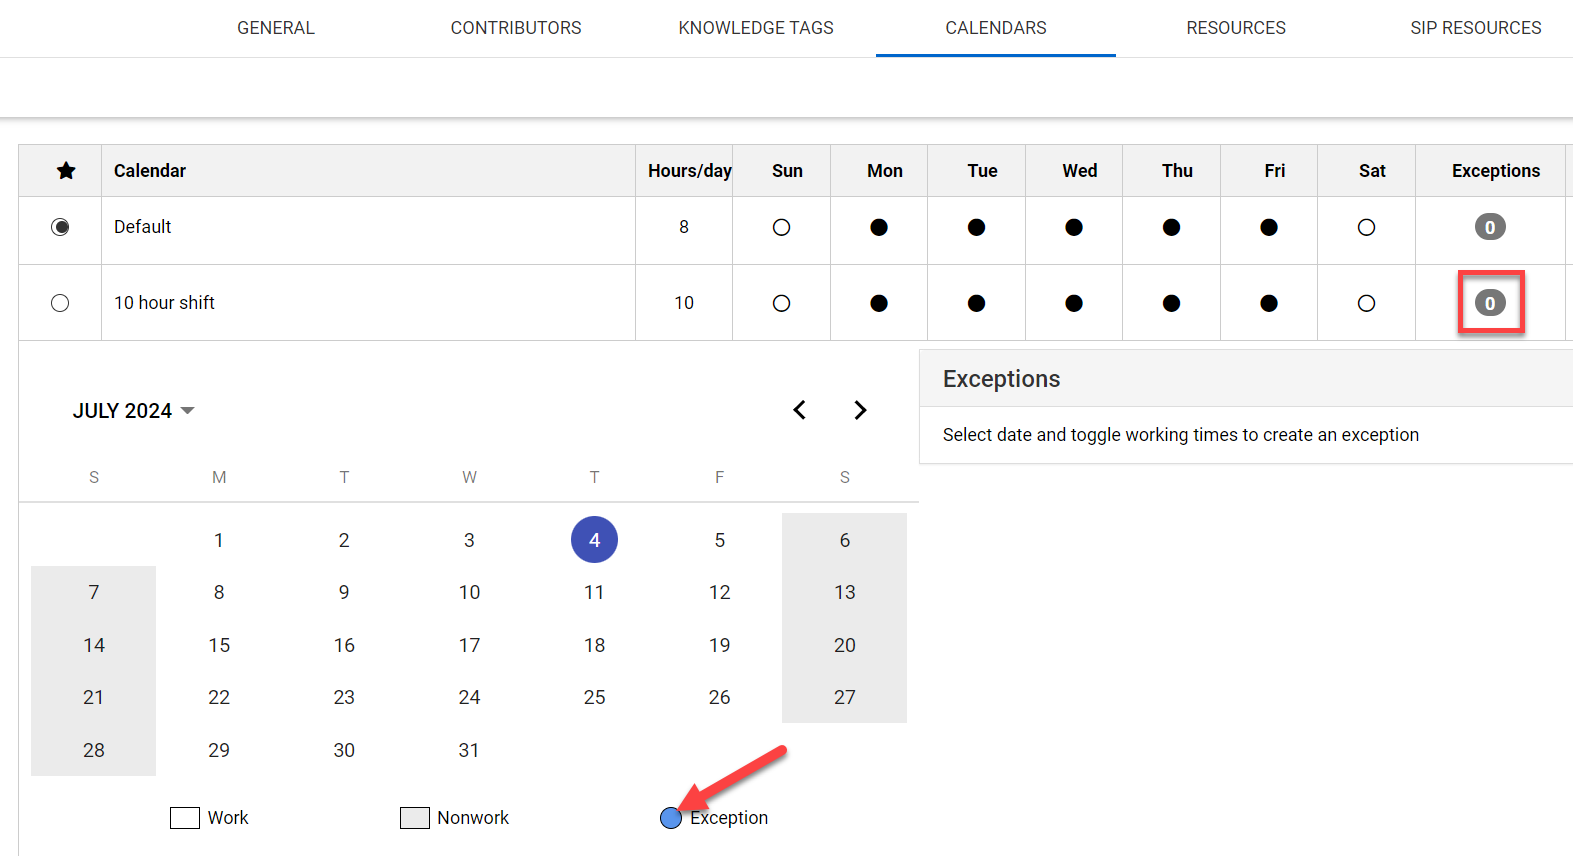
To add the 10-hour calendar, select Schedule Configuration from the Schedule Views drop-down menu and go to the Calendars tab.
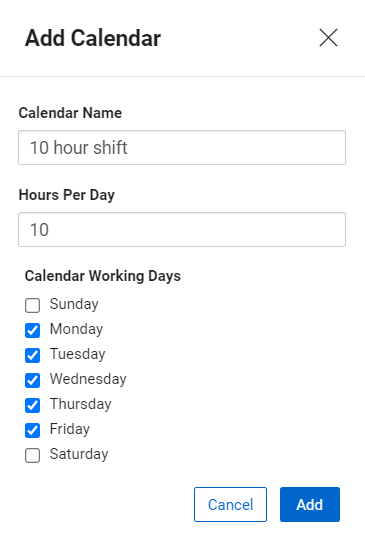
Click the Add icon to add a new calendar.
Give it a name and indicate hours per day and calendar working days, then click Add.
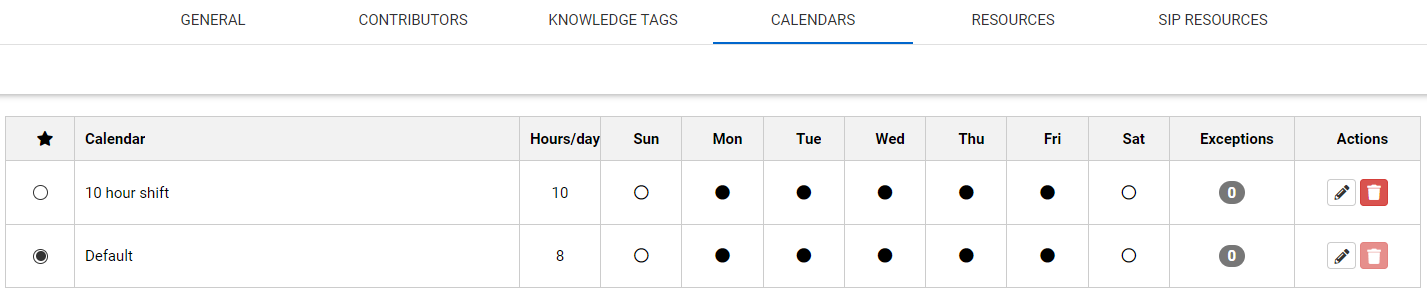
The new calendar adds to the register.
Notice you can indicate the default schedule calendar in the far-left column.
Under the Actions column, you can edit or delete calendars.
To exclude calendar dates, click the Exceptions field, then select the date and toggle the Exception button.
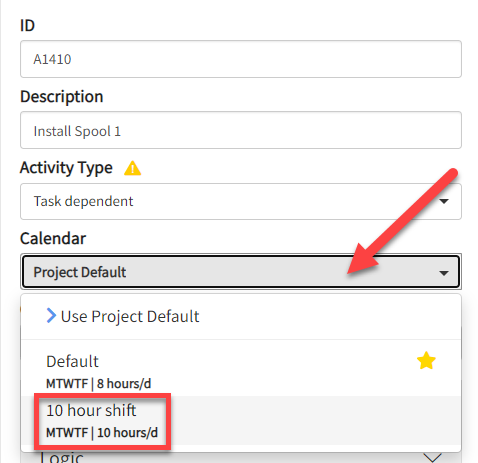
Back on the Plan view, you change the calendar for an activity through the Iris panel.
Calendars can also be stored in the Knowledge Base so they can be available to import into any schedule.
You can load resources into your schedule to account for and optimize the usage of your labor, equipment, and materials, identify constraints or potential conflicts, and more accurately estimate costs.
In InEight Schedule, you can add resources at one of three levels:
Resources stored here are at the organization level, where they are available for schedulers to import into project schedules as needed. It is a good place to store resources that will be used from project to project.
You can manage Knowledge Base resources by selecting the Knowledge Base icon and going to the Resources tab.
At the project level, schedulers can manually add resources for use specific to that project. They can also import resources in from the Knowledge Base or from an Excel file.
You manage project level resources from the Schedule Configuration view of your project, on the Resources tab.
You can also add resources on the fly at the activity level when detailing out your schedule in the Plan view.
You can add resources as individuals (e.g., Pipefitter) or as a group of resources (e.g., Piping Crew).
Let’s walk through an example of adding a resource to an activity.
Let’s assume you need to add a resource to an activity.
In this example, we’ll say you need to add a Piping Crew to one of your “Install Spool” activities.
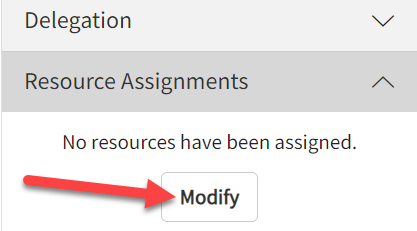
To add a resource, select the activity and on the Iris side panel, under Resource Assignments, click Modify.
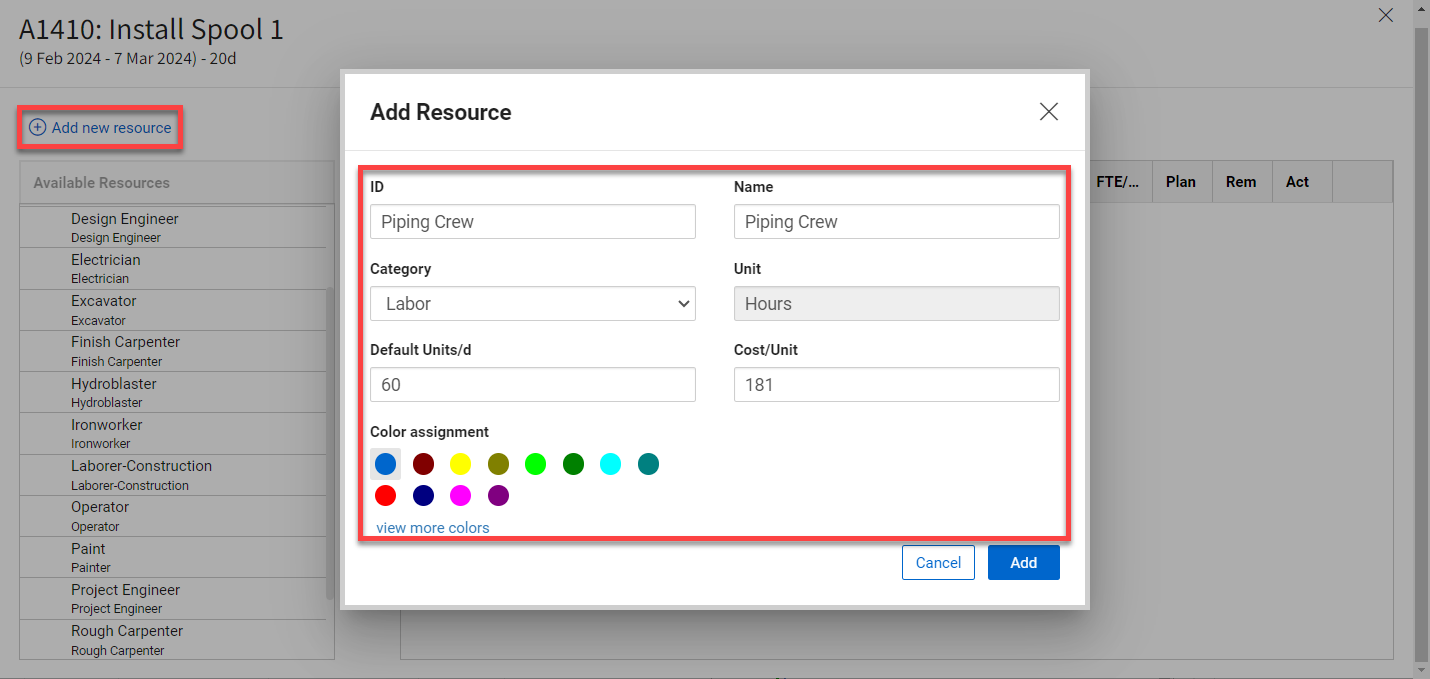
From the Modify Resources window, you can select the list of available project resources, or add one on the fly.
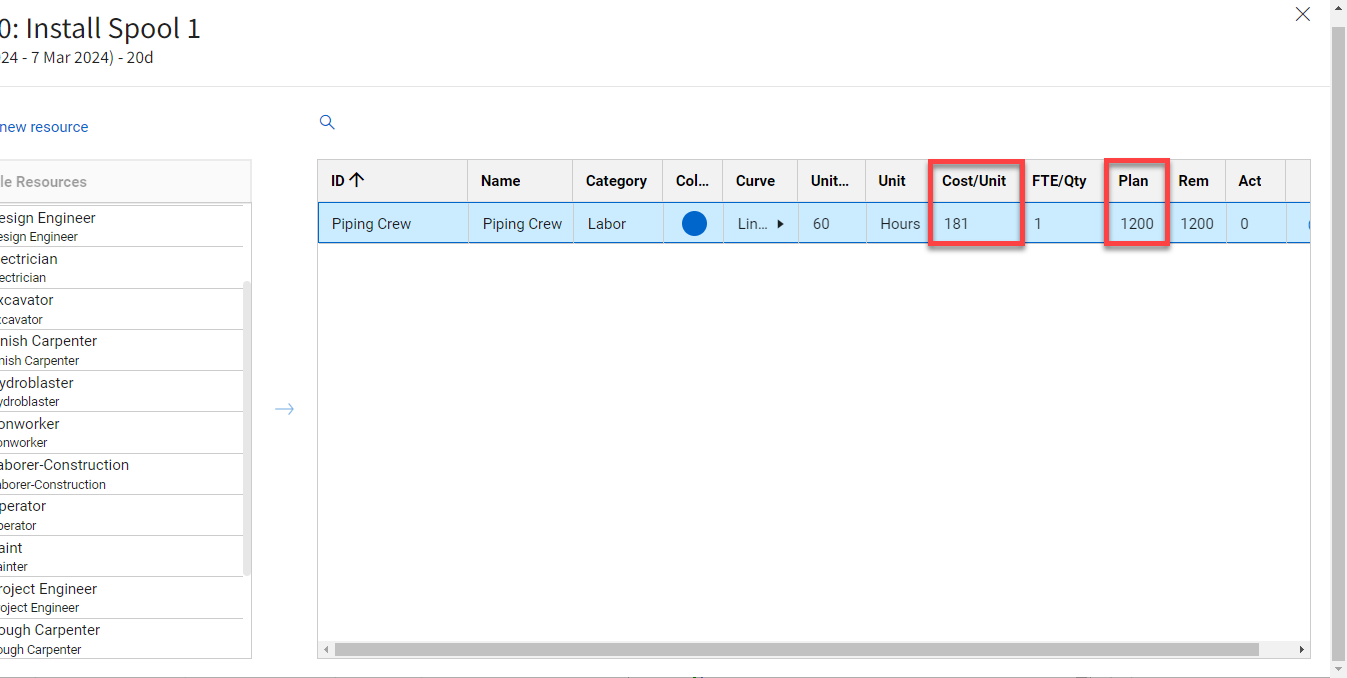
Let’s assume you need to add a resource for your Piping Crew. Click Add new resource and fill in the details.
Then, click Add.
With the resource added, the system can calculate units of work (e.g., hours) and cost, based on the duration already defined for that activity.
Ideas on Site
If you plan to load resources with estimate hours and costs into your schedule, a good best practice may be to consult with the Estimating team to leverage what hours and cost information they already have estimated for the project.
Depending on what estimating tool they are using (e.g., InEight Estimate), the Estimating team can export this information for the Scheduling team to consider when loading resources into the schedule.
Access the following links to learn more about managing resources in InEight Schedule:
Additional Information
9977 N 90th Street, Suite 250 Scottsdale, AZ 85258 | 1-800-637-7496
© 2024 InEight, Inc. All Rights Reserved | Privacy Statement | Terms of Service | Cookie Policy | Do not sell/share my information