Products
Solutions
Resources
9977 N 90th Street, Suite 250 Scottsdale, AZ 85258 | 1-800-637-7496
© 2024 InEight, Inc. All Rights Reserved | Privacy Statement | Terms of Service | Cookie Policy | Do not sell/share my information

In the module summary you can view or change the module name, description, activate or deactivate the module, and configure automatic user assignments.
When you enable or disable the Activate module toggle, you enable or disable the module for the entire InEight product portfolio, organization, or project. Each module is self-contained and does not share information with the other modules. The changes made to a module will be shown throughout the product portfolio, module page, tabs, landing page and mobile device.
You must be an administrator to access the module summary.
The following step-by-step walks you through navigating the module summary page.
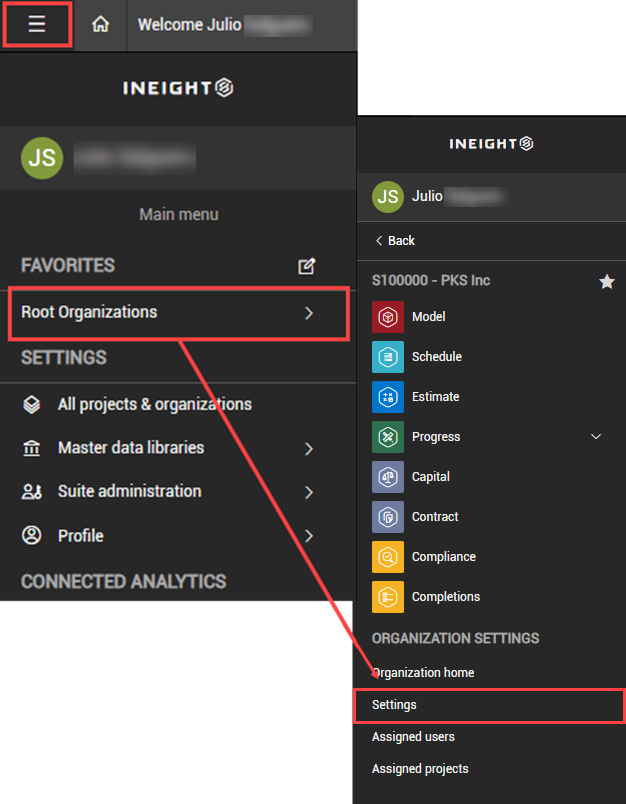
Select Main menu -> Your Organization -> Settings.
The Organization home page opens.
Select Completions on the left navigation panel.
The Completions settings page opens
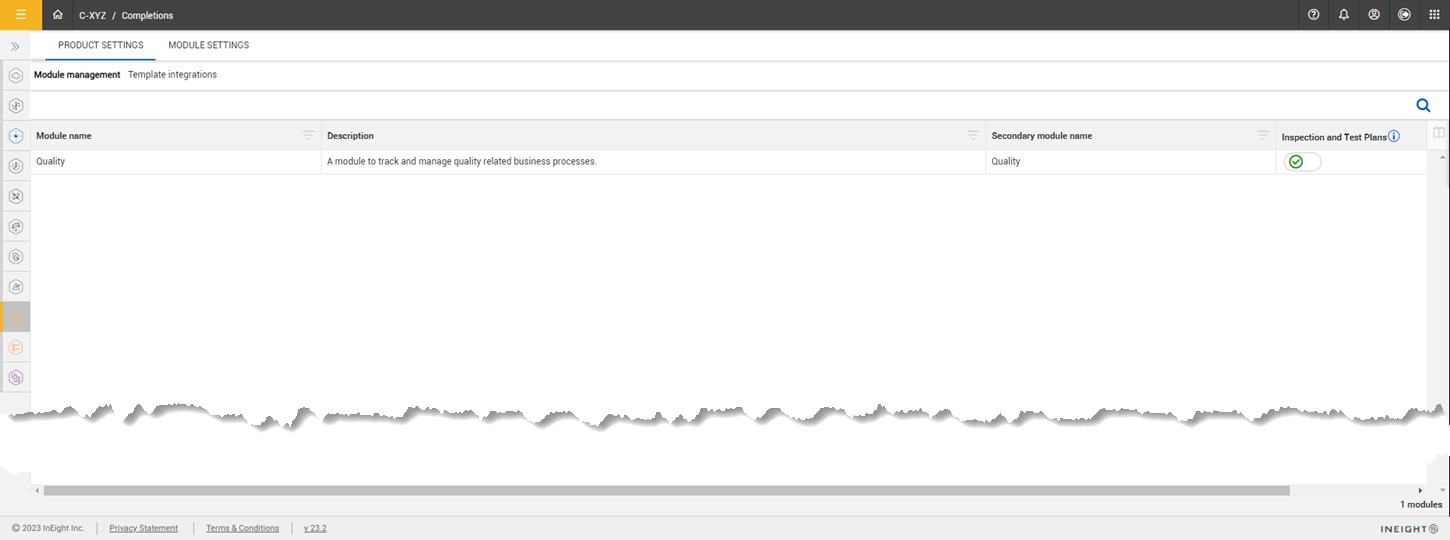
Select the Module Settings tab, and then click the Quality tile.
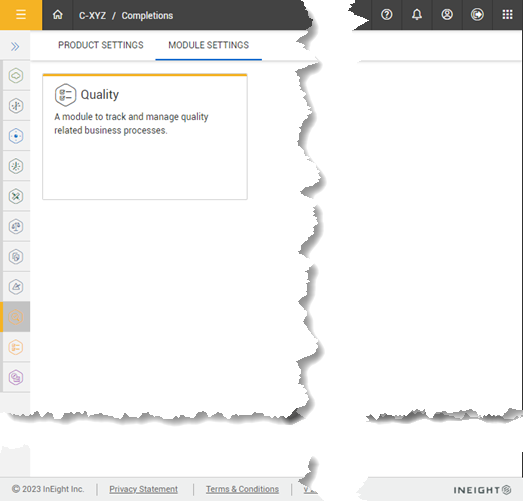
The Completions settings page opens to the module summary tab. .
Select a module.
The Module summary tab opens
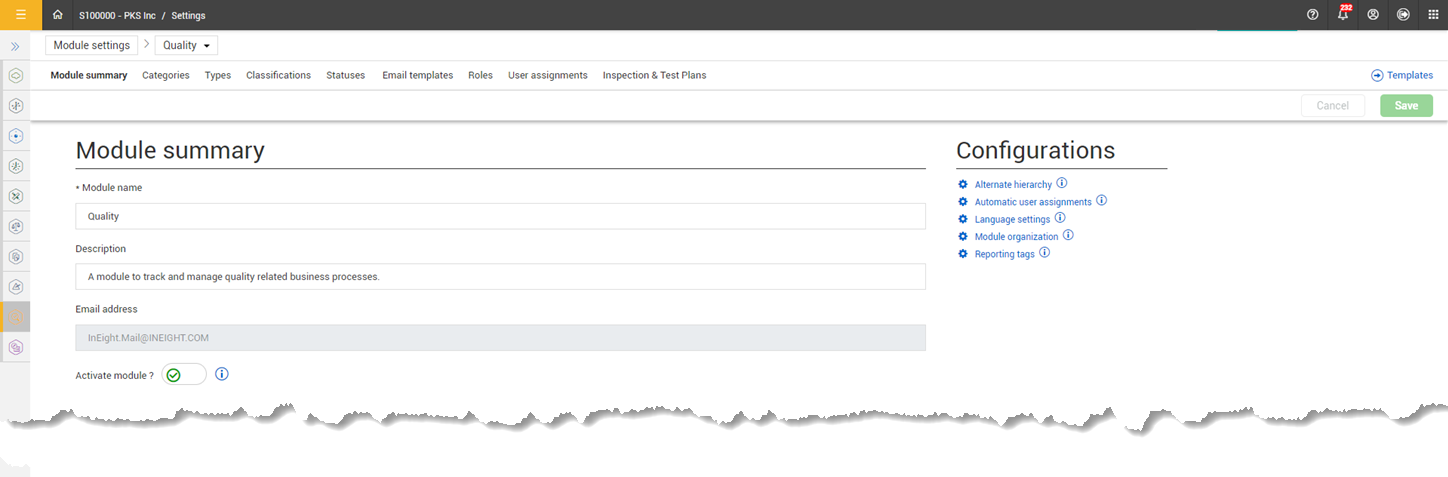
To configure additional settings, you can click the links under the Configurations menu. Each link shows an information dialog box.
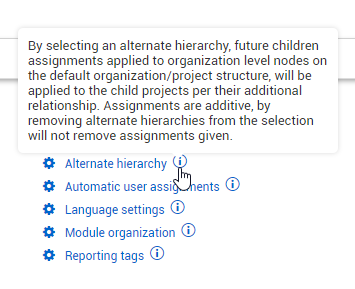
An alternate hierarchy is separate from the default organization and project hierarchy in the InEight cloud platform. You can set up an alternate hierarchy if you need to share templates and user permissions across projects that do not follow the default hierarchy. For example, if your default hierarchy is organized into legal entities for financial reporting purposes, you can create an alternate hierarchy based on project locations. A project in the infrastructure division might need to share templates and user permissions with a project in the Energy division because both are in the Western region.
To set up an alternate hierarchy, you must perform the following three steps:
The following step by step walks you through defining hierarchy attributes at the organization level.
Select Main menu > Your organization > Settings.
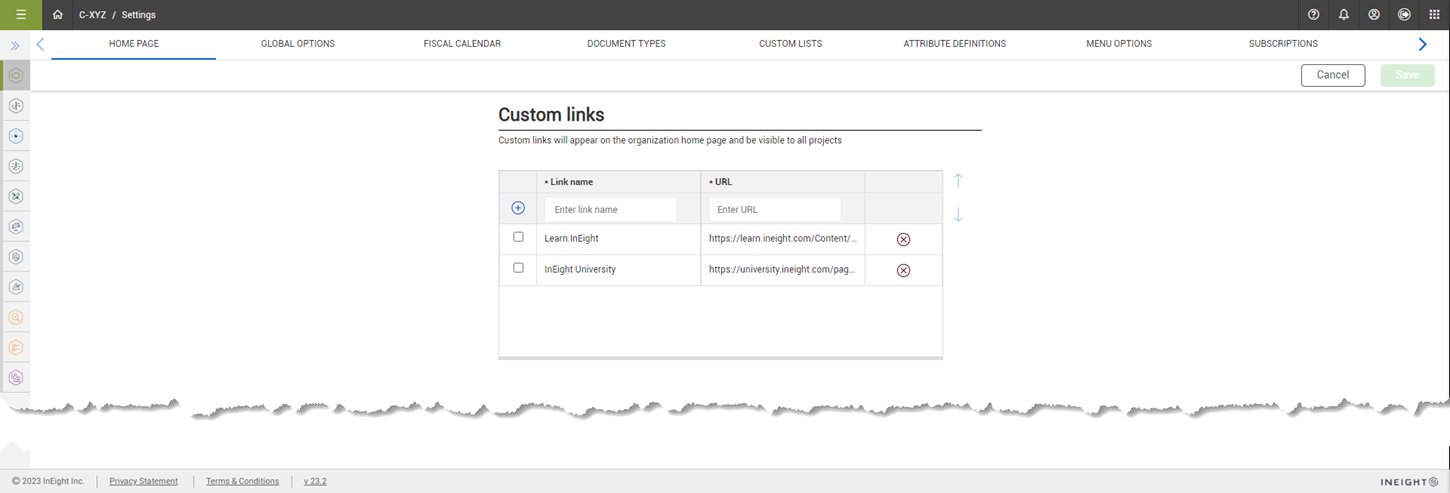
Select General on the left menu, and then the Attribute Definitions tab.
Click the Add icon.
The Add attribute side panel opens.
Enter the required fields.
Enter the required fields.
For hierarchy purposes, the Data type field is most often set to text or data. When the type is set to Data, you must select a data source of either Organization or Project.
In the example of a location-based hierarchy, an attribute might be named Region, Data type set to Data, Data source set to Organization, and Category set to Location, which lets you associate organizations with regions.
The following step by step walks you through how to associate hierarchy attributes at the project level.
Select the Attributes tab.
The Attributes tab opens with each defined attribute organized by category.
For each attribute that you want to associate, select an organization from its drop-down list or enter a project ID in its field, depending on the attribute’s data source.
In the example of a location-based hierarchy, you might associate an attribute named Region with an organization that represents the Western region. If you set this association in a project in the Infrastructure division of your default hierarchy, you are saying that project is also part of the Western region in an alternate location-based hierarchy.
The following step by step shows you how to extend templates and user permissions between future child projects or organizations via alternate hierarchy.
To view or edit Alternate hierarchy settings, you must have a level 3 access role.
Select the Main menu > Your organization > Completions.
Click Settings on the left navigation menu.
The Product Settings tab opens in the Settings page.
Select the Module Settings tab, and then click the Quality tile.
Click Alternate hierarchy in the Configurations links.
The Alternate hierarchy dialog box shows.
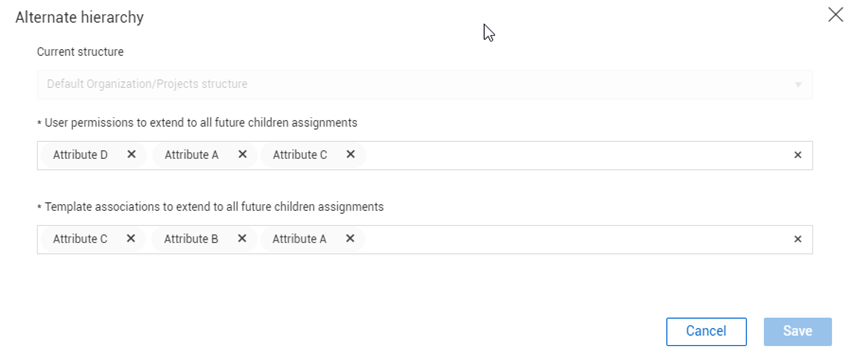
Select attributes from the drop-down lists for template associations and user permissions.
Template associations and user permissions are applied to all future child organizations or projects of the attributes you select. If you remove the attributes, the associations themselves are not removed.
In the example of a location-based hierarchy, if you add the Region attribute to these fields, for projects that are both associated with the Western region, templates and user permissions will be automatically assigned to users in future children of the Western region organization.
You must have a Level 3 access role in InEight Platform to view and change Automatic user assignments.
The Automatic user assignments configuration lets you save administrative setup time and automatically assign a Completions role and categories to all users from InEight Platform.
To automatically assign a role, select a role from the drop-down menu.
To automatically assign categories, begin typing a category name in the field or click inside the field and select one from the drop-down list.
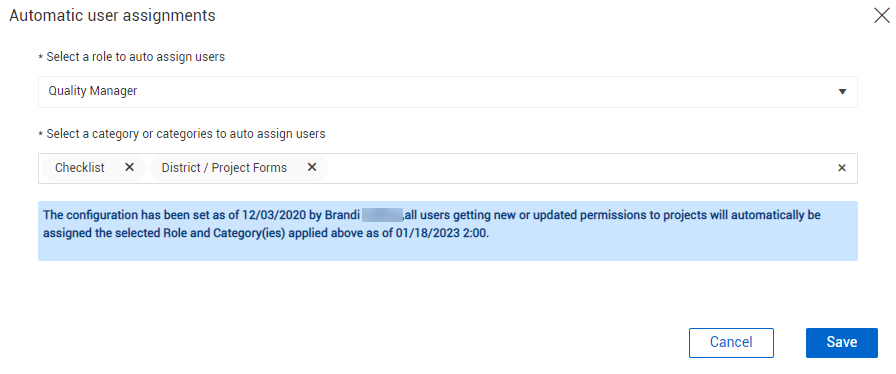
Click Save when you are done assigning roles and categories.
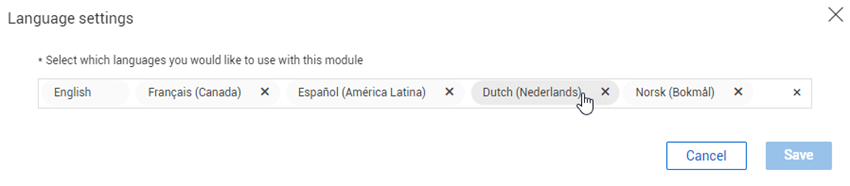
To show translations of a module's user-configurable fields in different languages, select a language from the drop-down list.
To apply translations to a template, use the import function in a template's Properties tab. See Template Translation for more information.
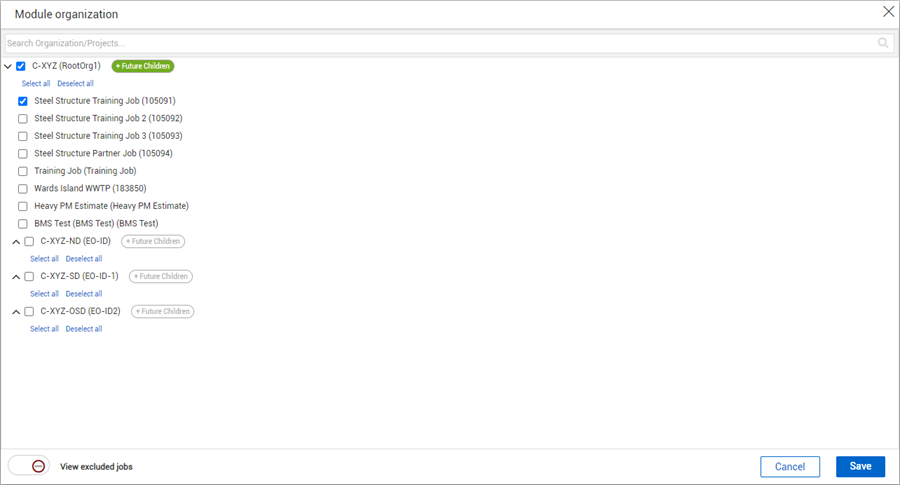
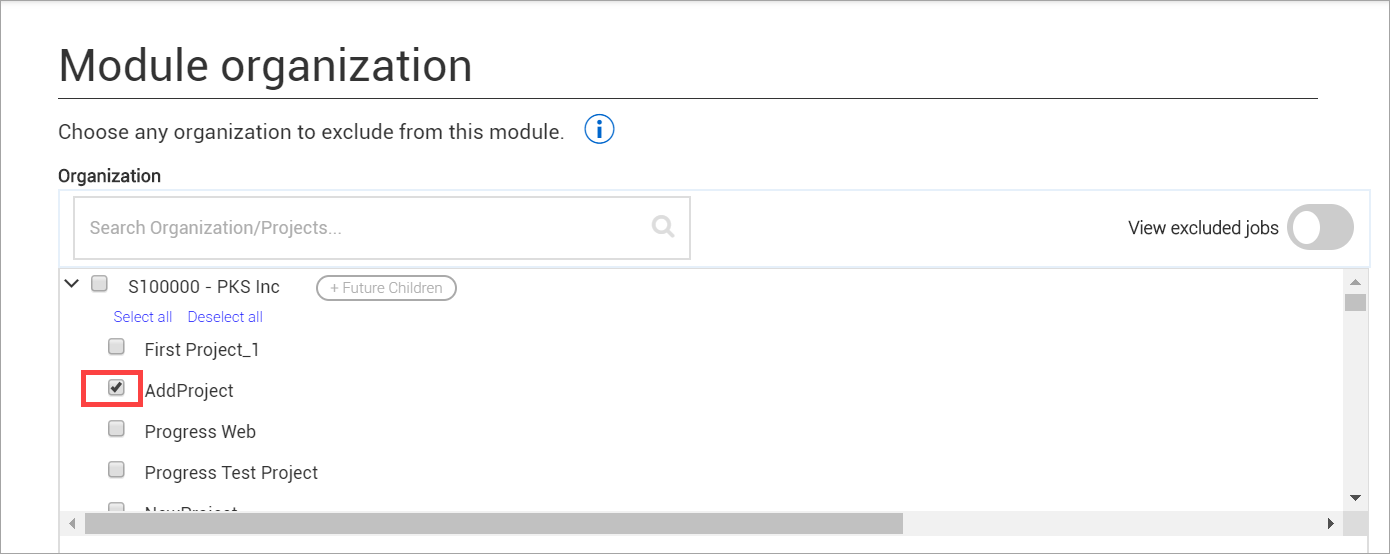
The Module organization lets you exclude any project or organization from modules; therefore, you will not see the project or organization in the module. If you exclude a project, the project cannot be used in user assignments or templates.
For example, if you are working on a JV project and they are using a different software to keep track of quality processes, you would want to exclude them from the list of projects.
The following step-by-step walks you through excluding projects or organizations from modules.
Select Module organization from the Configurations menu.
The Module organization dialog box opens.
Click Save.
A saved successfully message briefly shows.
Now the selected organization or projects are excluded from the module.
You can view all excluded organizations or projects by enabling the View excluded jobs toggle on the bottom left of the window.
You can use reporting tags to secure information when you use reports. Reporting tags drive permissions when running reports. If a question is assigned a reporting tag and you are not assigned that reporting tag in Completions, you cannot see the response to the question in a report. Reporting tags are defined per module. After you add reporting tags in this section, you can assign reporting tags to users and template questions to define who can see reporting data on those questions.

Additional Information
9977 N 90th Street, Suite 250 Scottsdale, AZ 85258 | 1-800-637-7496
© 2024 InEight, Inc. All Rights Reserved | Privacy Statement | Terms of Service | Cookie Policy | Do not sell/share my information