Products
Solutions
Resources
9977 N 90th Street, Suite 250 Scottsdale, AZ 85258 | 1-800-637-7496
© 2024 InEight, Inc. All Rights Reserved | Privacy Statement | Terms of Service | Cookie Policy | Do not sell/share my information

User assignments contain all the users from InEight Platform. Completions also pulls the user’s email and status of active/inactive from the user profiles.
In the user assignments tab, you can assign, edit, and add new users to specific Completions modules. You can also transfer assignments between users and add reporting tags to users.

When you click the Add icon, you can choose to Add user assignments or Add reporting tags.
![]()
You can also configure automatic user assignments on the Module summary tab. See Module Summary and Organization for more information.
In the Add user assignment wizard, a user consists of an organization, project, category, and role.
The following step by step walks you through adding a user assignment.
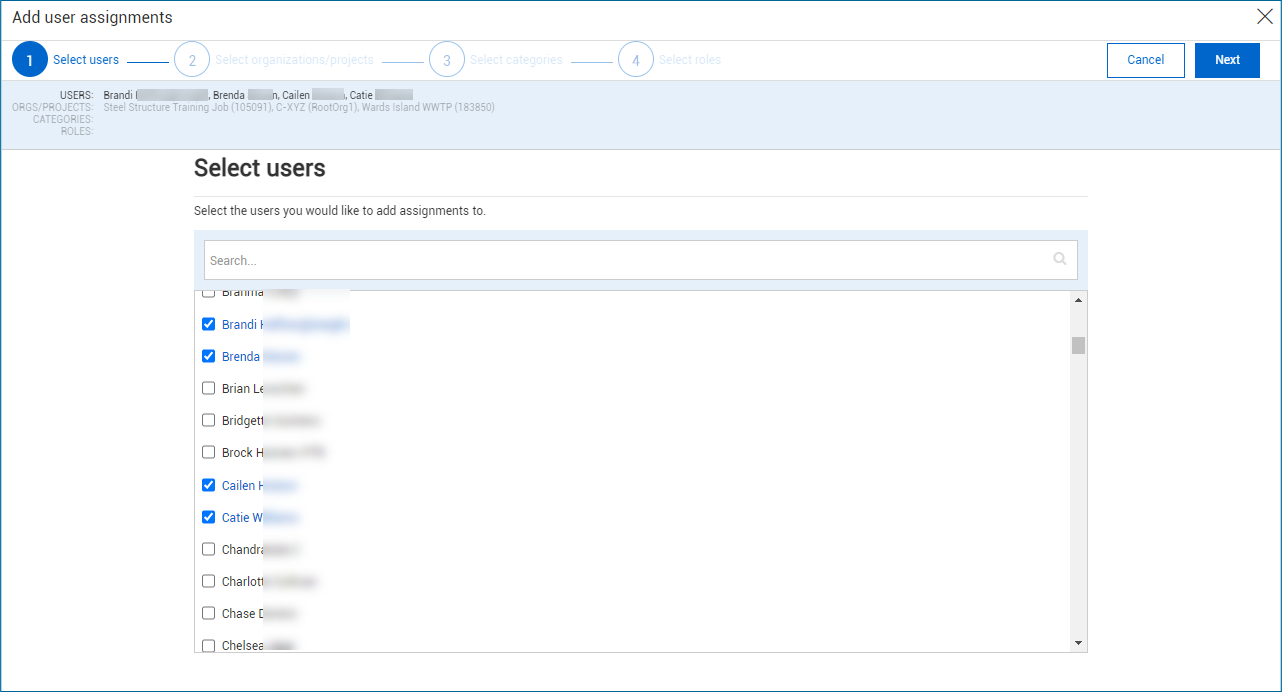
In the User assignments tab, click the Add icon, and then select Add user assignments from the drop-down list.
![]()
Select from the available users to add assignments to from the list, and then click Next.
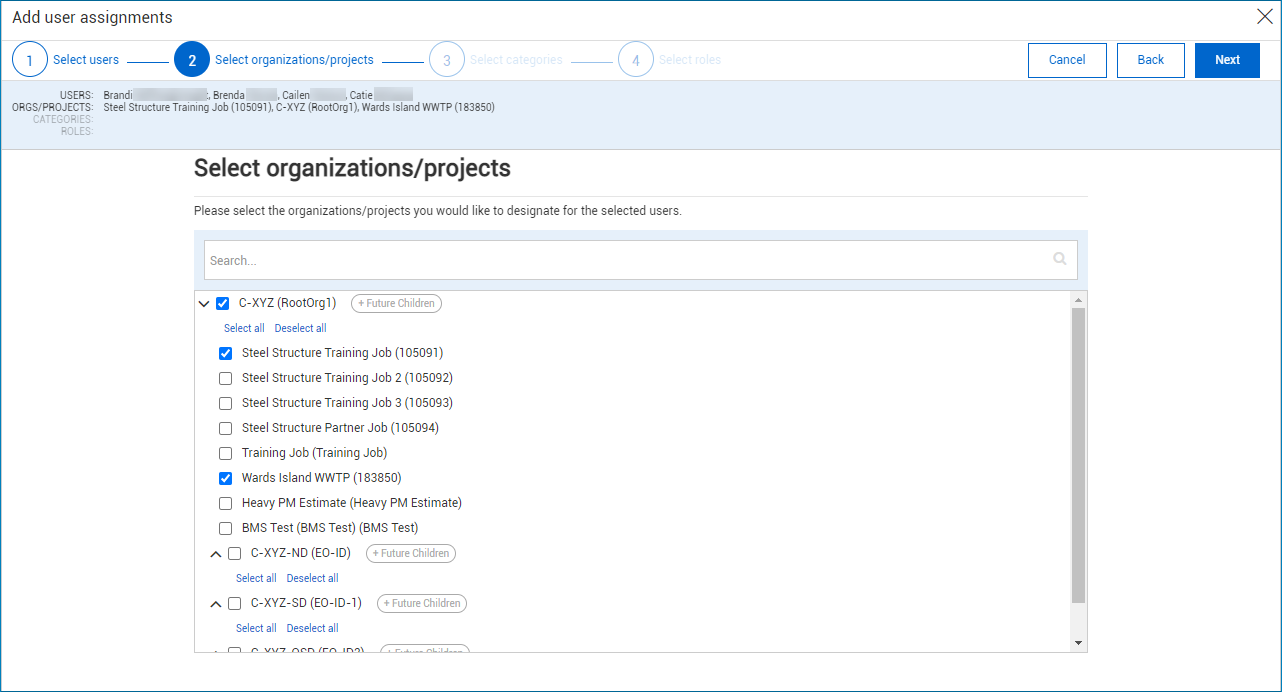
Select from the organizations or projects lists, and then click Next.
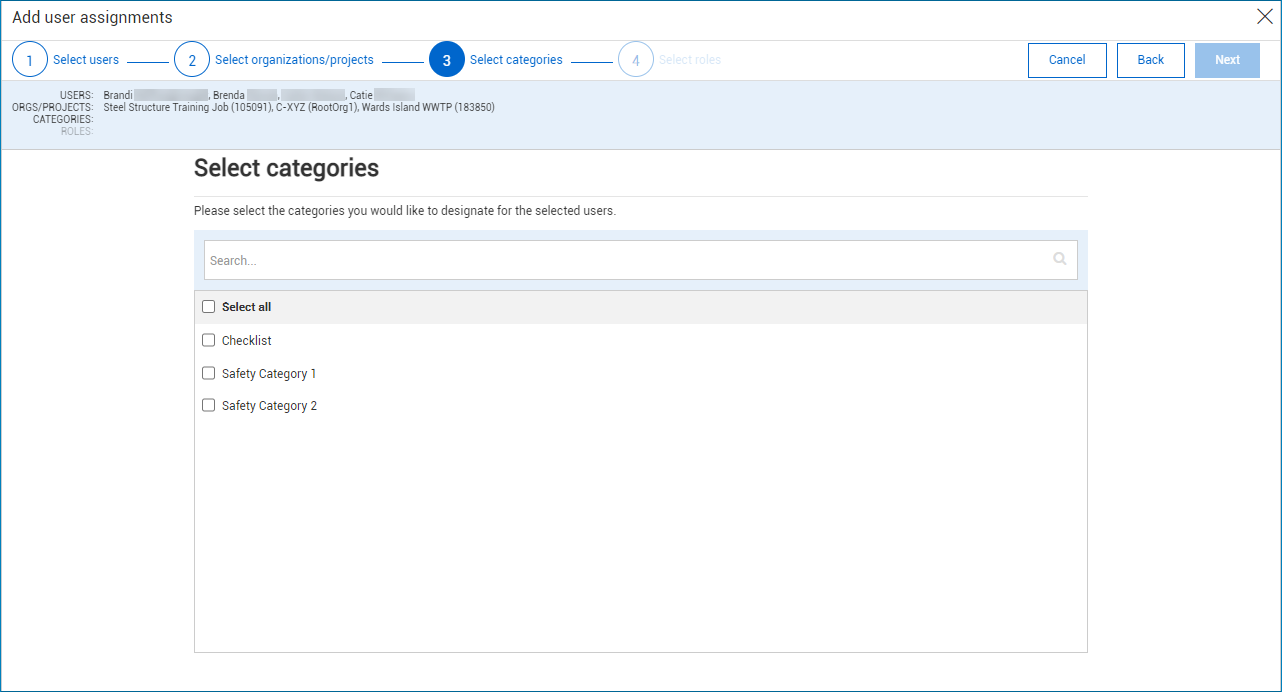
Select from the categories to designate for the selected users, and then click Next.
Select the roles to designate for the selected users and then click Done.
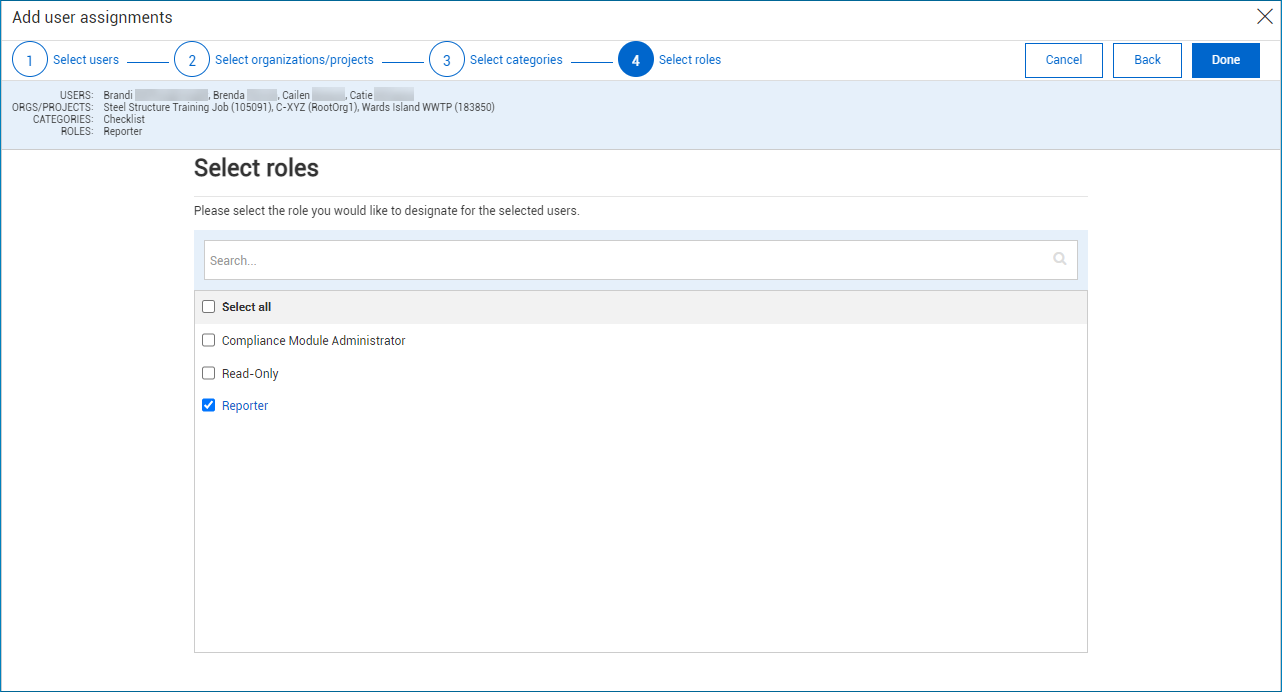
Your new user assignment is created and shown in the list of User
assignments.

When you select multiple users in the Select users step, the assignments are listed individually for each user.
You can reassign forms, tasks, and workflow between users by transferring user assignments. The following Step by Step walks you through transferring a user's assignments.
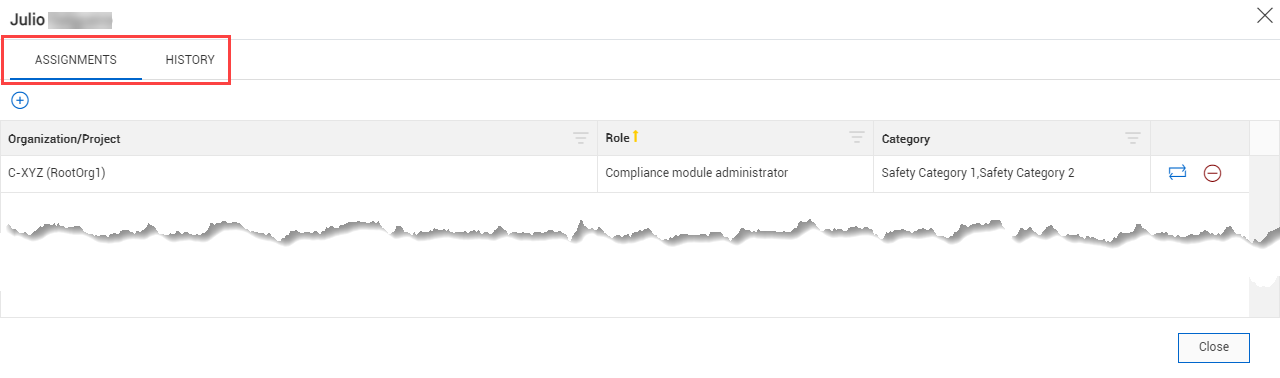
In the Name column, click a username in the User assignments tab to open user's assignment window.
Click the Transfer assignment icon next to the role you want to transfer.
You can only transfer one role's assignments at a time.
![]()
In the Transfer user assignments wizard, select the user you would like to transfer the assignment to, and then click Next.
Select the categories whose assignments you want to transfer, and then click Next.
Select the organization or project whose assignments you want to transfer, and then click Next.
Select the Transfer button, and then click on Transfer and select next user or Transfer and close.
![]()
An email is sent to the target user when assignments are transferred.
You can have many assignments. All assignments do not affect the Core roles in the product portfolio at any time.
In the Assignments tab you can view the user assignment roles.
Reporting tags define who can see reporting data on template questions with the same tags as the users.
Reporting tags are configured on the Module summary tab. See Open Module Summary and Organization topic for more information.
The following step by step walks you through how to add reporting tags.
Click the Add icon, and then select Add reporting tags from the drop-down list.
![]()
The Add reporting tags dialog box opens
Select the users you would like to add reporting tags to, and then click Next.
You can search for users or turn on View selected Users to limit your view to only users you select.
Select the reporting tags you would like to designate for the selected users, and then click Save.
You can search for reporting tags or turn on View selected reporting tags to limit your view to only tags you select.
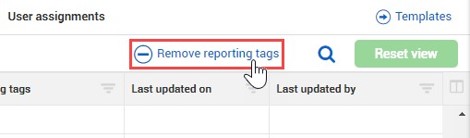
To remove reporting tags from users, select the check box next to a user’s name, and then click Remove reporting tags at the top right of the page.
If you remove reporting tags from a user, that user is no longer able to see any reporting associated with the removed tags.
Additional Information
9977 N 90th Street, Suite 250 Scottsdale, AZ 85258 | 1-800-637-7496
© 2024 InEight, Inc. All Rights Reserved | Privacy Statement | Terms of Service | Cookie Policy | Do not sell/share my information