Products
Solutions
Resources
9977 N 90th Street, Suite 250 Scottsdale, AZ 85258 | 1-800-637-7496
© 2024 InEight, Inc. All Rights Reserved | Privacy Statement | Terms of Service | Cookie Policy | Do not sell/share my information

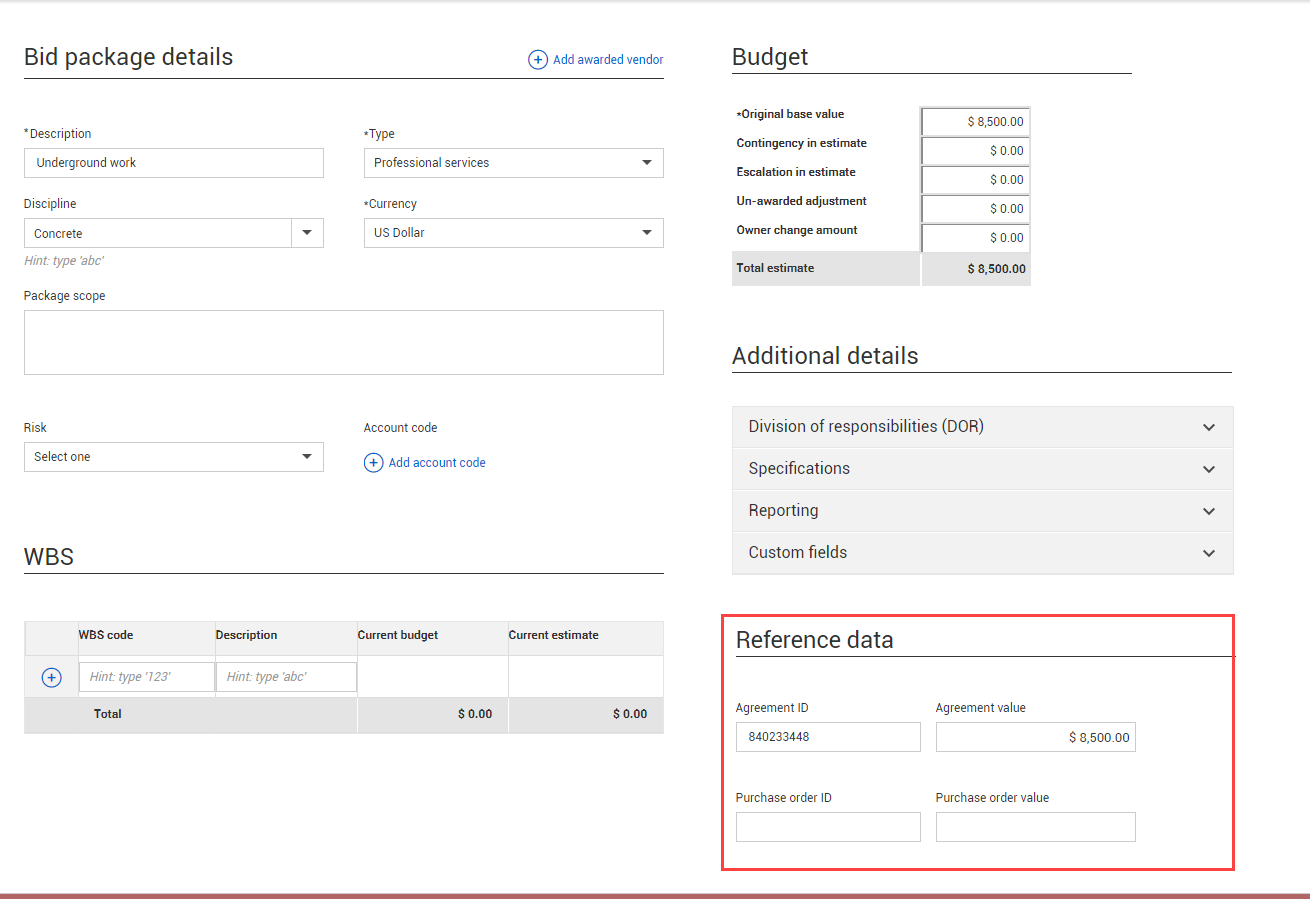
Bid packages default to the Overview tab (indicated by a blue underline). There are seven information groups. Values within the Bid package detail and Budget information groups are auto populated from information you entered during bid package creation.
| Information Group | Description |
|---|---|
|
Bid package details |
Specific attributes that describe and uniquely identify your bid package. |
|
Budget |
Total estimated cost of the scope of work you intend to put under contract. |
| Additional details | A section that includes drop-down subsections for division of responsibilities, specifications, reporting, and custom fields. |
|
WBS |
Work Breakdown Structure is a specific element of the scope of work to be completed. If the project is reimported from inEight Estimate after creation, this field is blank, and you must manually update it with a new WBS code. |
|
Reference data |
Agreement ID and value fields are retained in the Reference data sections of the contract after converting a bid package to a contract. If the Agreement ID or value is updated, similar to the DOR, it will not go back to the Bid Package and update it there. It only happens when you are converting from a Bid Package to a Contract. |
| eSign | Lists of eSign recipients, Project contacts, and Division of responsibility names that default as signees for an eSignature. |
When you convert a bid package to a contract, the Agreement ID, Agreement value, Purchase order ID, and Purchase order value fields in the External purchase agreement section are retained in the Reference data section of the contract.
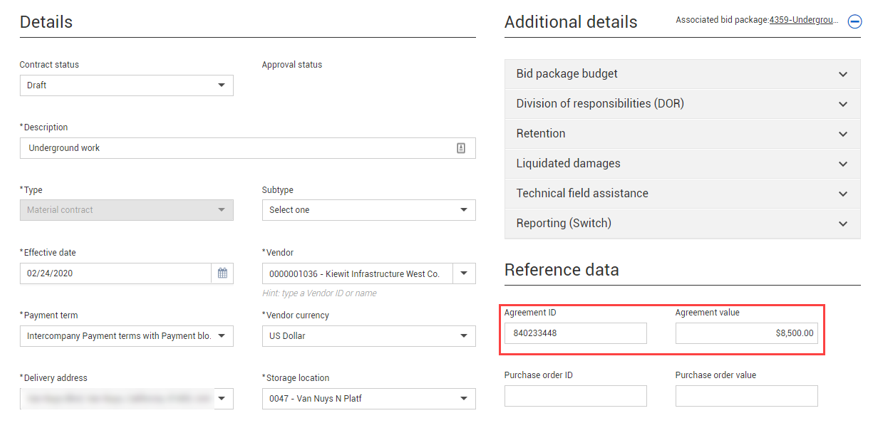
This connection is not maintained beyond conversion. If you manually change these fields after conversion in either the bid package or contract, the changes are not reflected in both locations.
If a project is associated with Document, you can create a form or mail item from a bid package. Document saves the form or mail and creates a link in the Supporting documents tab.
Single-sign on is available for Contract-to-Document features, such as creating mail or a form. When you use one of these features, the Document sign-on page opens, and you can enter your credentials. This creates a sign-on token that lets you remain signed in until the session ends. The first time you sign in to Document, a black secondary window and the Document home window also open. You can close these windows. Single sign-on is activated, and they are not shown again.
Creating forms or mail is initiated from the Actions menu. If Actions > Create document > Form or Mail is inactive, you can select the Settings (cogwheel) icon in the Actions menu to set up integration with Document.
You can create a Client RFI or Request For Information form in Document and add it to the Supporting documents for the bid package in a single procedure.
From the Details page go to Actions > Create document, and then select Form.
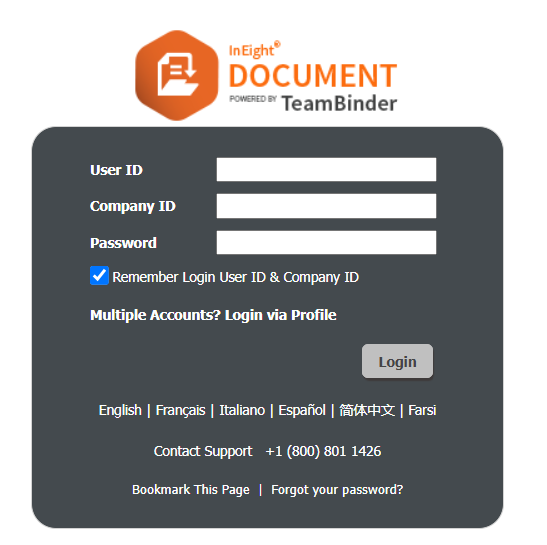
If you are not already signed into Document, use your credentials to sign into InEight Document.
A sign-in token is created that lets you remain signed in to Document until the session ends. If this is the first time you are signing in to Document from Contract, a black secondary window and the Document Home window are shown. After you close these windows, single sign-on (SSO) to Document is activated, and they are not shown again.
The Create new form dialog box opens. Select the form type, and then click Next. The Request for information window opens in Document.
Complete the form, and then select the users for distribution of your form. A success message is shown and a link to the form is added to the Add supporting documents dialog box.
Click Add to add the form as a supporting document.
You can create a mail item in Document and add it to the Supporting documents for the bid package in a single procedure.
From the Details page go to Actions > Create document > Mail.
If you are not already signed into Document, use your credentials to sign into InEight Document.
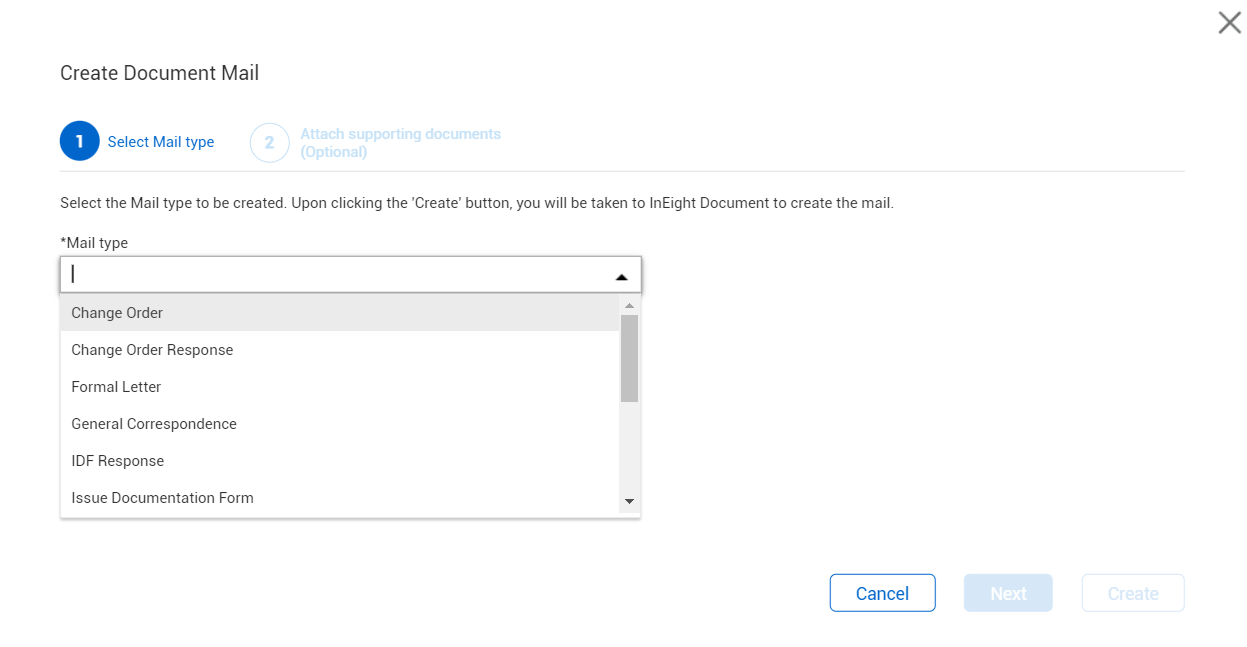
The Create Document Mail dialog box opens. Select the mail type from the list defined in Document that are specific to the project's mail type, and then click Next.
Optionally add an attachment. If you selected documents on the Supporting documents page before you started the action, they are automatically included.
To add an attachment from the Supporting documents tab, click Next. The Select documents dialog box opens. You can choose documents from the Supporting documents tab with the Document source My computer. After you attach the documents, click Create. The Mail module opens in Document with your attachments included.
To add an attachment in Document, click Create. The Mail module opens in Document. Click Attach files > Attach Documents, where you can search for the document. After you select a document, click Save.
To send mail without an attachment, click Create. The Mail module in Document opens.
Enter information in the To and Subject fields. The other fields on the page are optional. Enter or update the fields as needed for the mail message, and then click Send. A summary page opens.
Edit links and notes, if needed. The mail is added in Document.
Close the Document window. You are then prompted to add the mail as a supporting document in Contract. The document type defaults to Correspondence but can be changed.
Click Save to save the mail to the Supporting documents page.
The eSign section lets you view or add recipients to be used as default eSign signees. This section has subsections for eSign, Project contacts, and division of responsibility. All signees must be added to at least one section.
Names in the eSign section are populated from the project eSign setup tab (Project settings > Contract > Configurations >eSign setup). You can also manually enter the names of the signees.
Names in the Project contacts section are populated with contact information from Project contacts added in Project details. This section is for reference only. If you want to add or change recipients, you must edit the Project Contacts.
Names in the Division of responsibility section are populated with user information defined in the Division of responsibilities section of the contract details. The company is populated from the Company legal name in Project details. The title field is always blank. This section is for reference only. If you want to add or change recipients, you must edit them in the Division of responsibility section of the Additional details.
Additional Information
9977 N 90th Street, Suite 250 Scottsdale, AZ 85258 | 1-800-637-7496
© 2024 InEight, Inc. All Rights Reserved | Privacy Statement | Terms of Service | Cookie Policy | Do not sell/share my information