Products
Solutions
Resources
9977 N 90th Street, Suite 250 Scottsdale, AZ 85258 | 1-800-637-7496
© 2024 InEight, Inc. All Rights Reserved | Privacy Statement | Terms of Service | Cookie Policy | Do not sell/share my information

A job snapshot is a copy of an estimate that you can create and provides read-only access to the job’s data as it existed at a specific point in time.
You can use a job snapshot to do the following:
Create an instance of your estimate at different instances for audit purposes, such as after take-off is complete, after bid review is complete, or after final subcontractor/supplier prices have been entered.
Provide users access to the job's data without giving them the ability to modify the data.
Allow users to access a job, while eliminating the concern that someone may inadvertently change live data.
Copy data from a snapshot of a job and paste it into the current job or any other project.
Create a new job from a snapshot of a job.
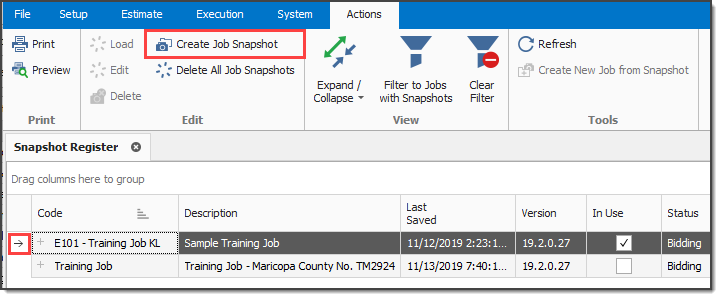
In addition to the Code, Description, Last Saved, and Version column, the Snapshot register contains all fields that are in the Jobs register that provides you with an easier way to group, sort, filter, and find the jobs you need.
The job snapshot is also saved and maintained as an archive. When a snapshot is loaded, the archive is restored similar to a local copy. A snapshot can be modified, but changes cannot be saved.
Snapshots are managed in the Snapshot Register. You can manage snapshots by:
Viewing individual snapshots for specific jobs.
Filtering the Snapshot register to jobs containing snapshots.
Creating job snapshots from existing jobs.
Loading existing job snapshots. When you load a snapshot, it loads into Estimate similar to other Estimate jobs.
Editing and deleting job snapshots.
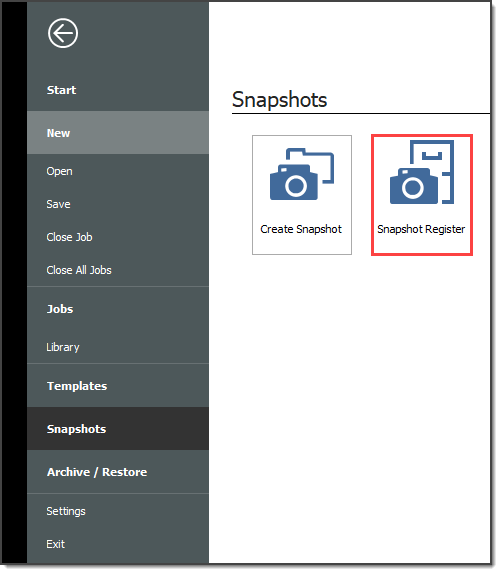
Click theFile tab to open the backstage view, and then select Snapshots.
From the Snapshots form, select the Snapshot Register icon. The Snapshot Register opens.
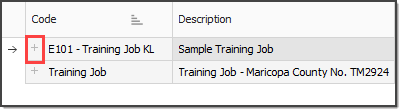
To view individual snapshots for specific jobs, click the Expand icon next to the job to show the list of snapshots.
From the Snapshots form, select the Create Snapshot button.
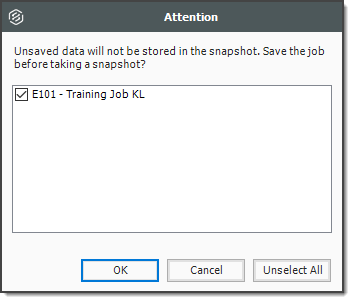
The job must be saved before creating a snapshot. If the job you are creating a snapshot from has unsaved data, an Attention dialog box shows that alerts you of the unsaved data. Click OK to save the job.
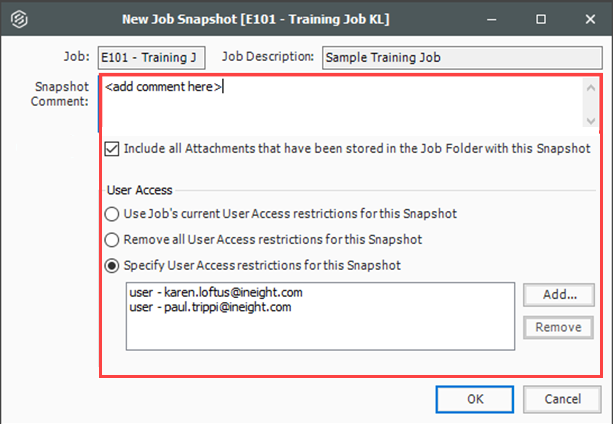
The New Job Snapshot [job code] dialog box opens. You can do the following:
Add a comment in the Snapshot Comment field.
Select the check box to include existing attachments.
Configure user access. Select one of the following options:
Select Use Job's current User Access restrictions… to use the job’s current access restrictions.
Select Remove User Access restrictions… to allow read-only access to all users.
Select Specify User Access restrictions… to specify new user restrictions. This option is selected by default. You can then use the Add and Remove buttons to specify access using Active Directory. Users with current access to the job are automatically added to the list.
Click OK to create the snapshot. A Success message shows to indicate that the snapshot has been created.
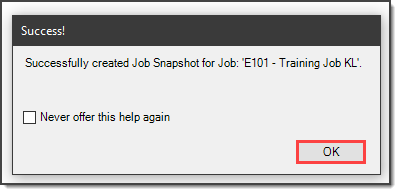
Click OK.
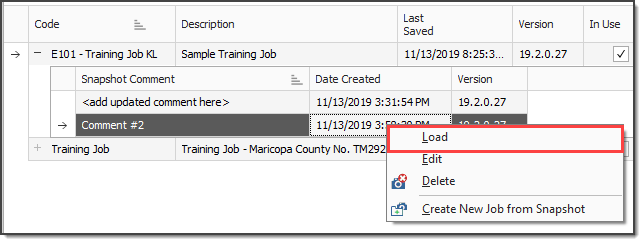
From the Snapshot Register, click the Expand icon next to the job to show the list of snapshots.
Right-click the individual snapshot you want to load, and then select Load.
On the Snapshot Register, click the Expand icon next to the desired job to display the list of snapshots.
Right-click on the individual snapshot you want to load and select Load.
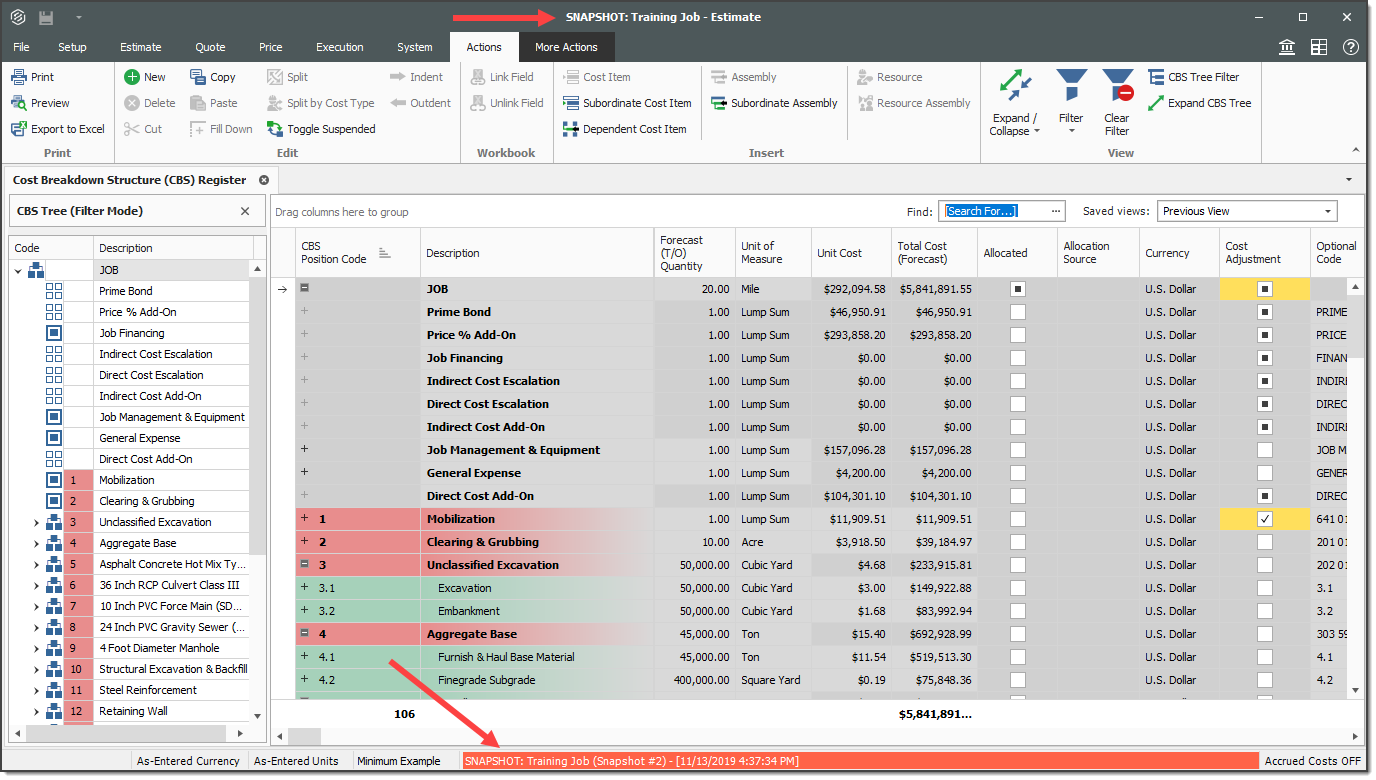
To identify a snapshot in Estimate as a read-only snapshot:
The job name is preceded by the label SNAPSHOT centered on the top of the toolbar.
A red banner shows the snapshot information at the bottom of the page.
A snapshot can be modified, but it cannot be saved because it is read-only.
In the Snapshot Register, click the Expand icon next to the job to show the snapshots.
Right-click the individual snapshot you want to edit, and then select Edit.
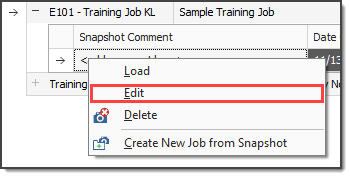
The Edit Job Snapshot dialog box opens. You can do the following:
Add a comment in the Snapshot Comment field.
Select the check box to include existing attachments.
Configure user access. Select one of the following options:
Select Use Job's current User Access restrictions… to use the job’s current access restrictions.
Select Remove User Access restrictions… to allow read-only access to all users.
Select Specify User Access restrictions… to specify new user restrictions. This option is selected by default. You can then use the Add and Remove buttons to specify access using Active Directory. Users with current access to the job are automatically added to the list.
Click OK to update the snapshot.
From the Snapshot Register, click the Expand icon next to the job to show the snapshots.
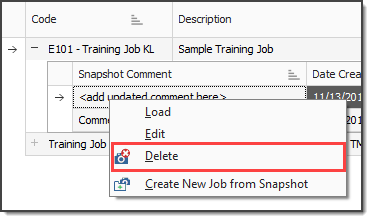
In the Delete Job Snapshot dialog box, click OK.
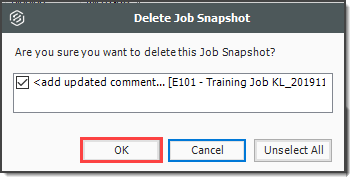
You can also click Delete All Job Snapshots in the Actions tab to remove all snapshots.

Additional Information
9977 N 90th Street, Suite 250 Scottsdale, AZ 85258 | 1-800-637-7496
© 2024 InEight, Inc. All Rights Reserved | Privacy Statement | Terms of Service | Cookie Policy | Do not sell/share my information