Products
Solutions
Resources
9977 N 90th Street, Suite 250 Scottsdale, AZ 85258 | 1-800-637-7496
© 2024 InEight, Inc. All Rights Reserved | Privacy Statement | Terms of Service | Cookie Policy | Do not sell/share my information

From the Windows desktop, locate the InEight Estimate shortcut icon.

Double click on the icon, or right click and select Open.
If you cannot find the InEight Estimate shortcut icon, you can also launch InEight Estimate from the Windows Start menu.
Click File to open the Backstage View.
Select Archive / Restore.
Several options appear for archiving and restoring your jobs and library
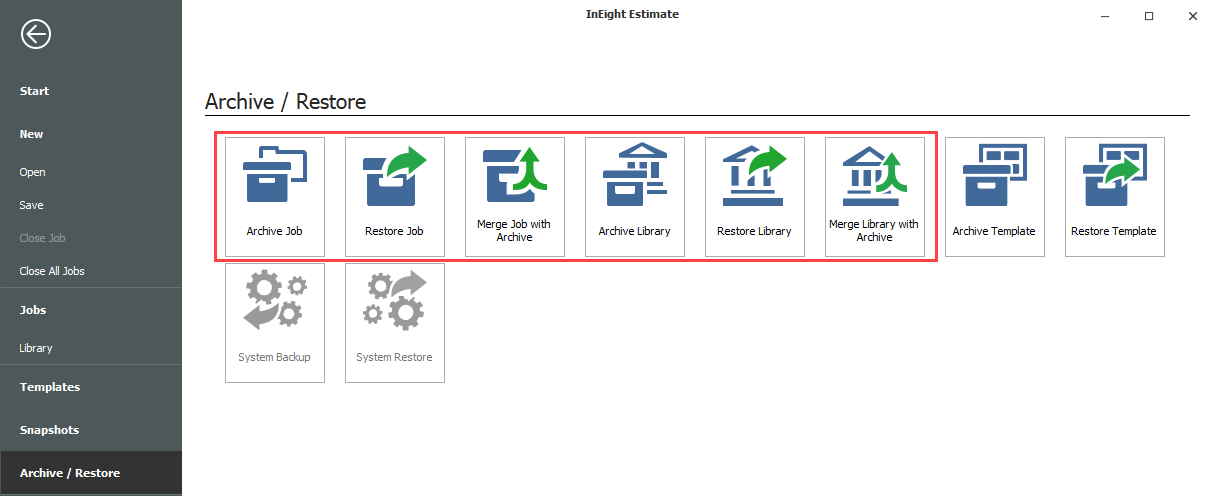
Select Archive Job.
The Job Register appears
Select the Training Job, then click OK.
When prompted to include attachments, click Yes.
The Save As window appears
Browse to where you want to save the job, then click Save.
To restore the job, select Restore Job Archive from the Archive / Restore page of the Backstage View.
Browse to the archived job and select it.
Click Open.
If the job already exists, a prompt will appear asking if you want to overwrite it
To overwrite it, select Yes
If you select No, you will be prompted to save it under a new Job Code
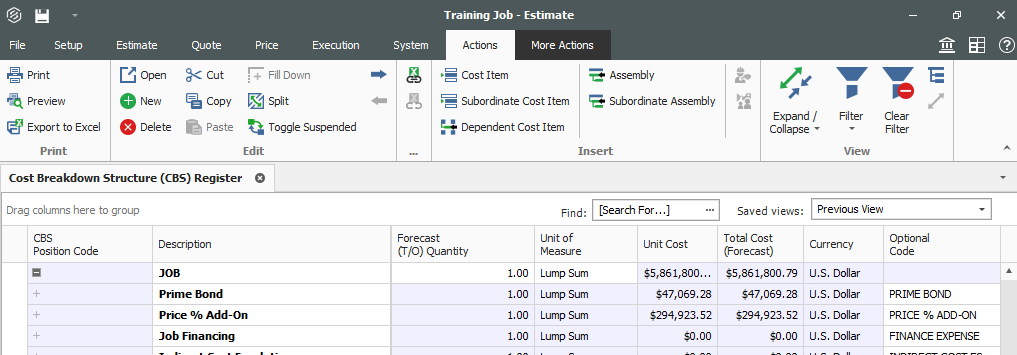
From the Backstage view, under the Open a recent Job section, double click on your job.
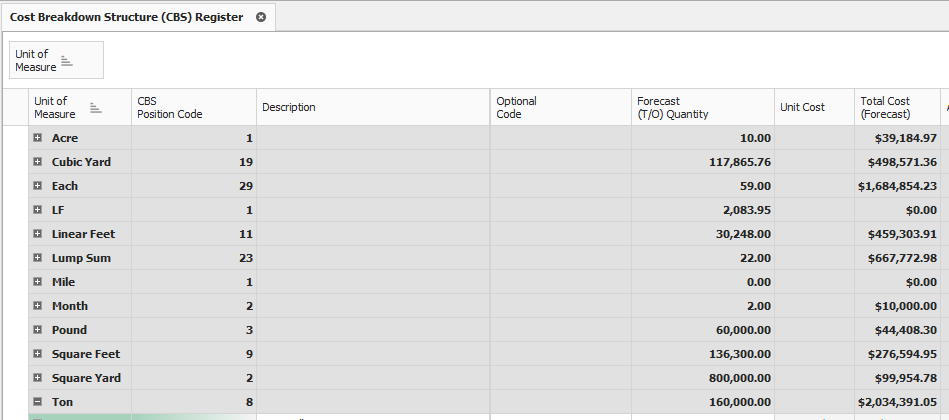
The job folder opens by default to the Cost Breakdown Structure Register.
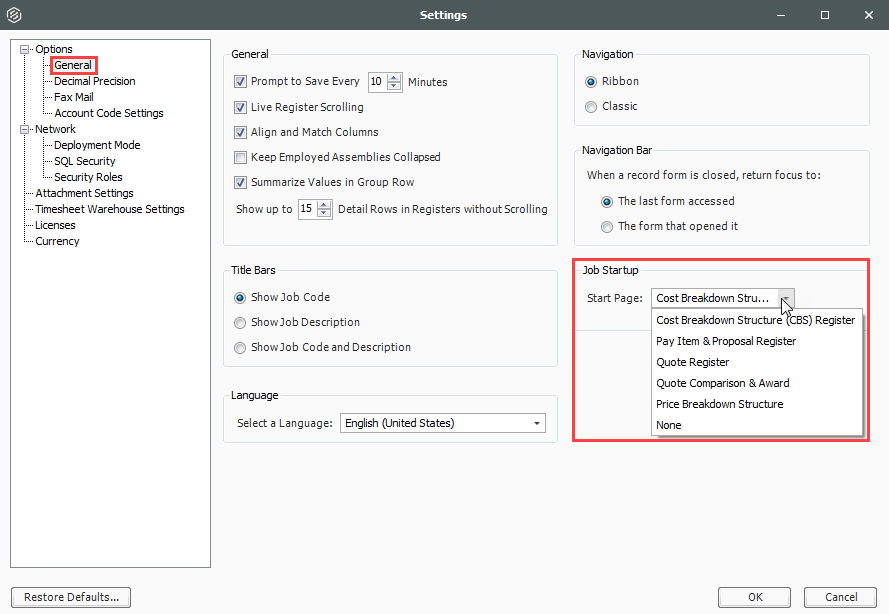
You can change the default form that opens when you start up a job. From the Backstage view, click on Settings to change the Job Startup > Start Page settings.
Click on the Setup tab.
In the Initialize section of the Setup tab, click on the drop-down menu for Job Properties.

Notice that each form opens in its own tab within the active job folder

You can tab between these forms as you are working in InEight Estimate
Once you are in a register, the Actions and More Actions tabs are available to you. The options available are contextual to that register


In the CBS, click on the Currency column header and drag the column to the left, dropping it to the right of the Description column.
Hide the Optional Code column by dragging the Optional Code column header down until a black X appears, then let go.
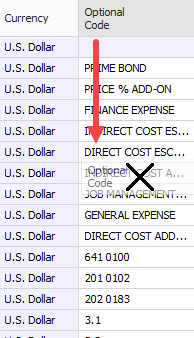
The Optional Code is now hidden from view
To unhide a column, right click on any column header and select Column Chooser; a Customization window appears, which contains all the hidden columns in that register
Find the column you want to unhide and drag-and-drop it to the location where you want it to go.

You can also unhide a column using the Go To Column feature
Right click on a column header and select Go To Column.
Click on the drop-down menu and select the column you want to unhide.
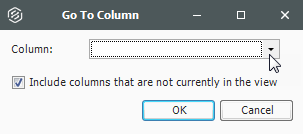
Click OK.
You can sort on any column by clicking once on the column header.
In the CBS Register, click on the Total Cost (Forecast) column to sort the column in ascending order (e.g., 1 to 10, A to Z).
Click the Total Cost (Forecast) column a second time to sort in descending order (e.g.,10 to 1, Z to A).
Use Ctrl-click to unsort a column and reset it to its original state.
In the CBS, hover over the Unit of Measure column header for the filter icon to appear.
Click on the filter icon in the Unit of Measure column to select a filter value.
From the filter list, you can select any of the values defined for that column or you can use one of the predefined values (Custom, Blanks, Non blanks).
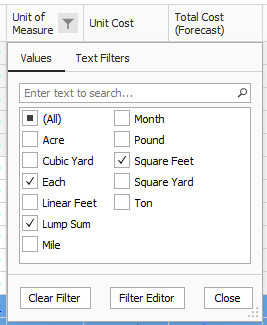
Make your selection, then click Close.
To clear the filter, click on the red X at the bottom of the form or click on the filter icon on the header of the column you filtered and select (All), then click OK.
In the CBS, hover over the Unit of Measure column header for the filter icon to appear.
Click the Filter icon in the Unit of Measure column to select a filter value; select the desired UoM.
Select the Filter Editor button, and the Filter Editor data box appears.
Select your preferred operator and enter in your preferred value.
To add additional And/Or statements, select the word And in the top left corner. A drop-down appears.
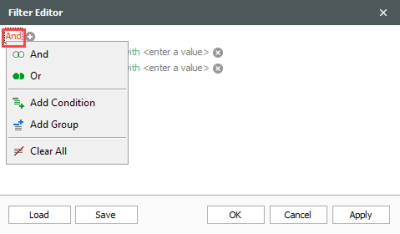
Click OK.
From the CBS register, group the Unit of Measure column by dragging it into the grouping area (where it says “Drag columns here to group”).
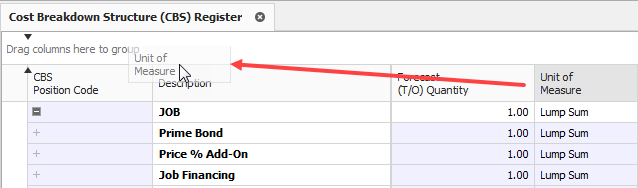
Notice that the cost items in the register are now grouped together by their units of measure, and each group of cost items is subtotalled by costs, hours, quantities, etc.
To ungroup, right click in the grouping area and select Clear Grouping
The column returns to its original location
You can group by more than one column to have multiple grouping levels.
In the CBS register, click on the Saved Views drop-down menu and the Save disc icon appears.
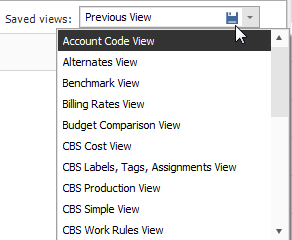
Click on the Save disc icon.
The Save Current View window appears
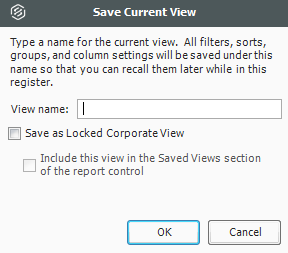
Enter the View Name, then select OK.
The new view displays in the drop-down menu
Saved views are user-specific; you will only see your own saved views when you are logged in.
Additional Information
9977 N 90th Street, Suite 250 Scottsdale, AZ 85258 | 1-800-637-7496
© 2024 InEight, Inc. All Rights Reserved | Privacy Statement | Terms of Service | Cookie Policy | Do not sell/share my information