Products
Solutions
Resources
9977 N 90th Street, Suite 250 Scottsdale, AZ 85258 | 1-800-637-7496
© 2024 InEight, Inc. All Rights Reserved | Privacy Statement | Terms of Service | Cookie Policy | Do not sell/share my information

Use Case: The client requests several changes to the topsoil installation, including an upgrade to premium topsoil and an additional area to be included in the installation. The project team works together to document the issue and progress it through a formal change order process.
This section covers how to update the budget through the change order process.
[Show workflow with appropriate step highlighted.]
The InEight Suite offers a variety of tools for documenting project issues. For example, a foreman can log an issue in a daily plan from InEight Progress, or a QA inspector can note an issue on a form using InEight Compliance. Once an issue has been created, it’s added to the New Issue register in InEight Change and is then detailed out and tracked as part of the change order process.
The following steps show an example of how to create an issue directly in InEight Change.
[Begin Step by Step]
STEP 1
The client informs the project manager that they want premium topsoil installed rather than generic topsoil, and that they want an additional area to be covered. This request wasn’t communicated at the time of the Original Budget, so a change order needs to be initiated. Also, this request comes directly from the client, rather than from a development in the field, so the issue can be created directly in InEight Change.
STEP 2
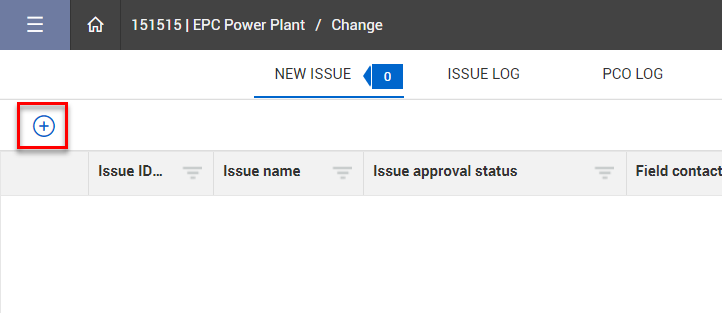
From the New Issue register in Change, the project manager clicks the Add button.
STEP 3
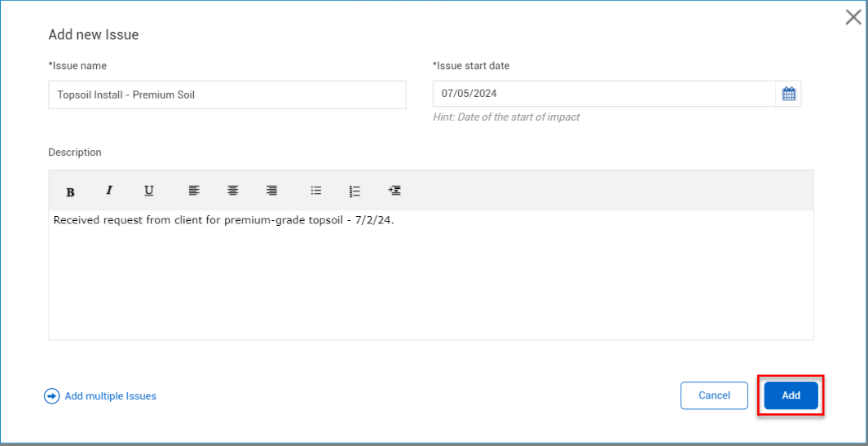
He adds high-level issue details. When he’s finished, he clicks Add.
STEP 4
The new issue is now created. It can be accessed from the New Issue register or from the Issue Log.

[End of Step by Step]
Issues can be shared with internal and external stakeholders for feedback and approval.
Note: The approval process will vary depending on the organization. Visit Set Up Issue Approval to learn more about configuring an issue approval workflow.

Access the following links to learn more:
TOPIC | Issue Creation and Setup
VIDEO | Issue Creation
Once a new issue has been created, the next step is to add pricing details.
Follow the steps below to see an example of pricing an issue based on an existing cost item.
[Begin Step by Step]
STEP 1
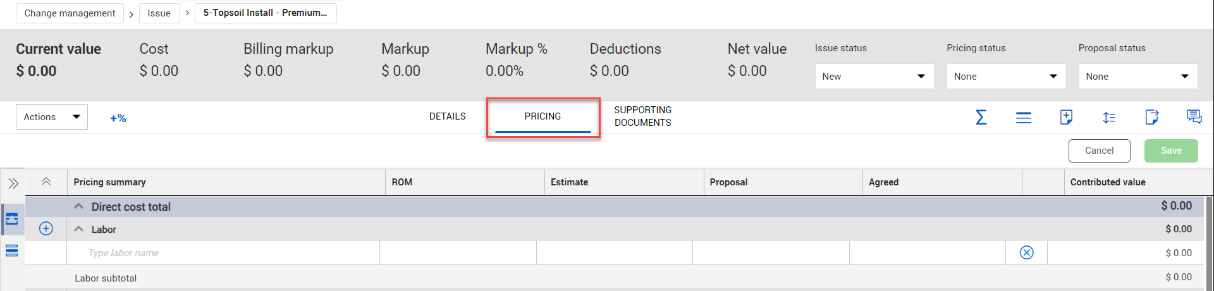
An issue based on a client request has been created. From the issue record, the project engineer opens the Pricing tab.
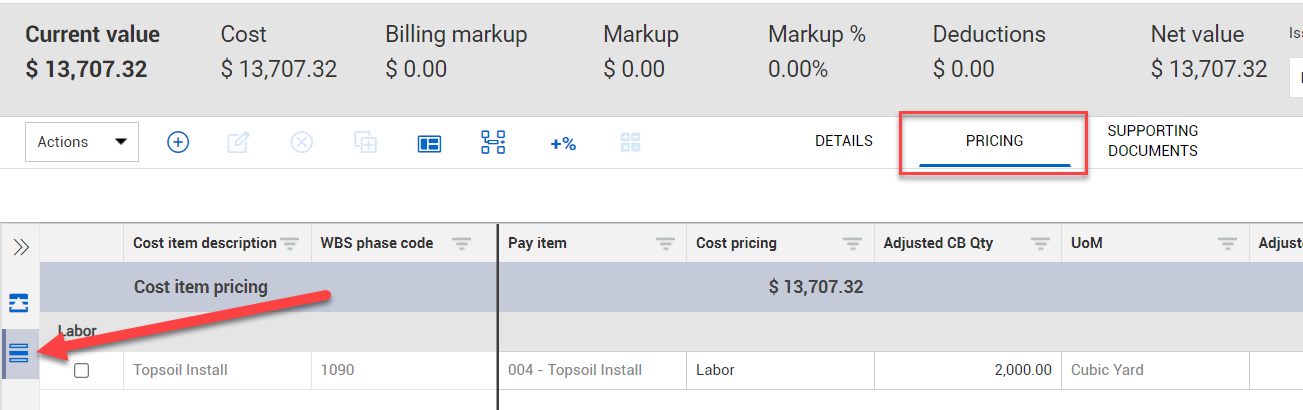
STEP 2
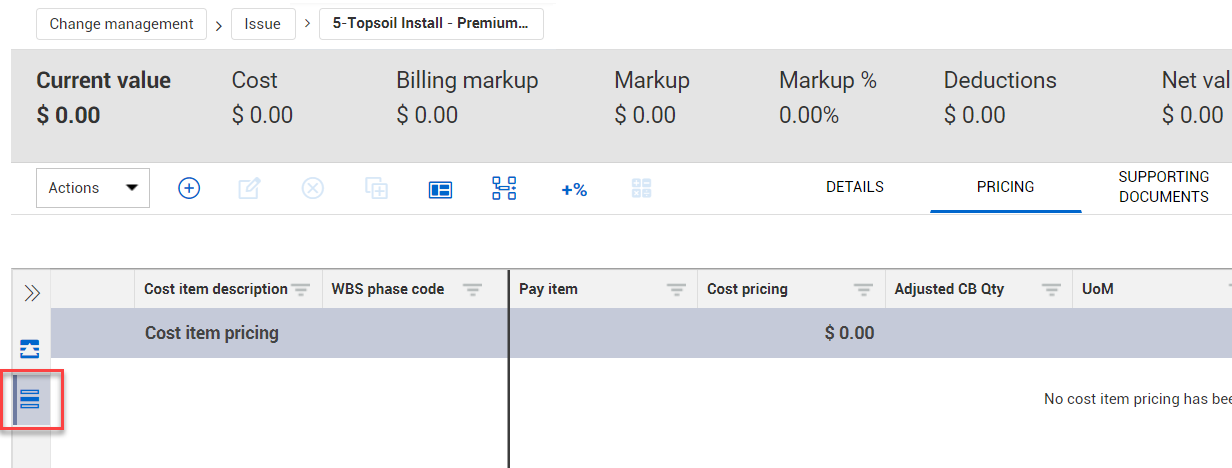
He opens Cost Item Pricing.
STEP 3
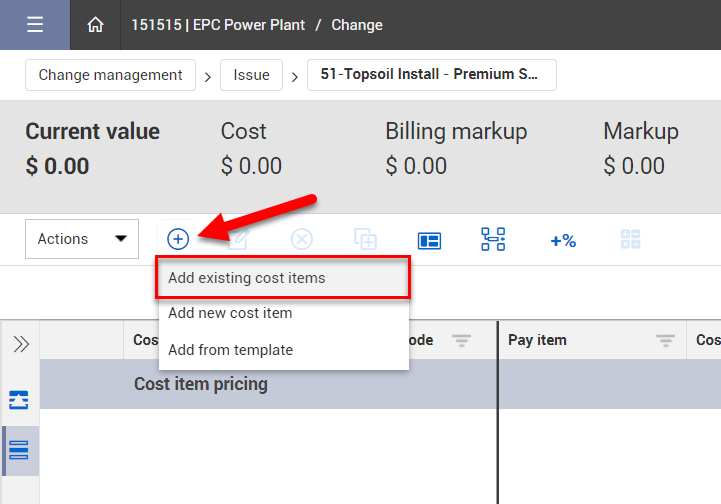
The client requested that an additional area be included in the topsoil installation, so the project engineer needs to modify the existing cost item “Topsoil Install.” He selects Add > Add existing cost items.
STEP 4
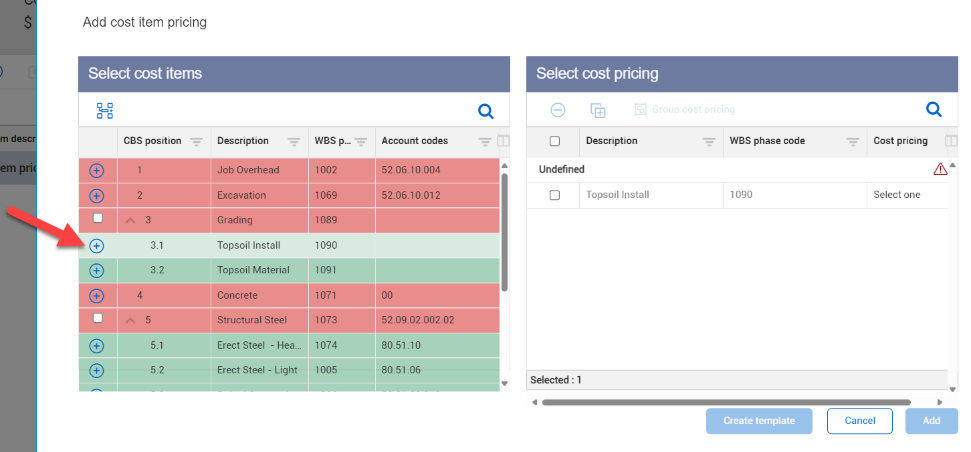
He clicks the Add icon to select the cost item “Topsoil Install”.
STEP 5
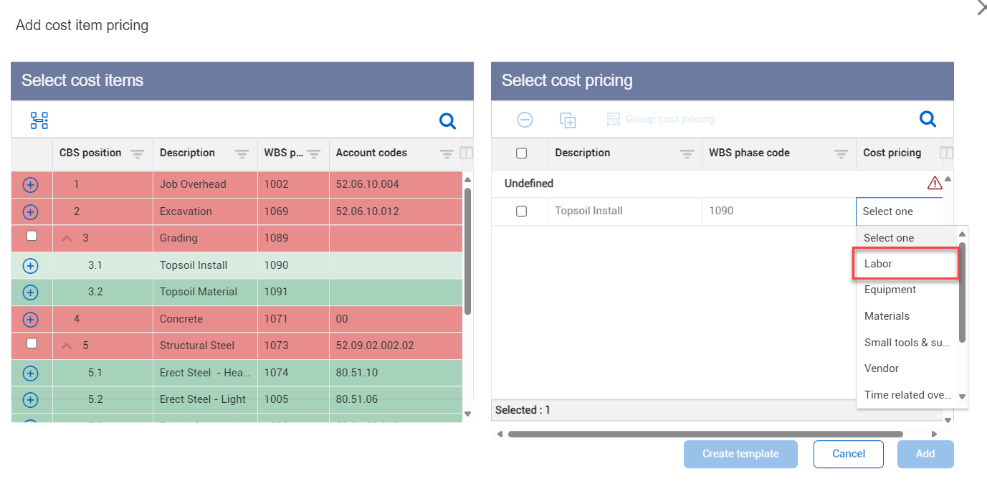
He selects the "Labor” from the Cost pricing drop-down menu. Then he clicks Add.
STEP 6
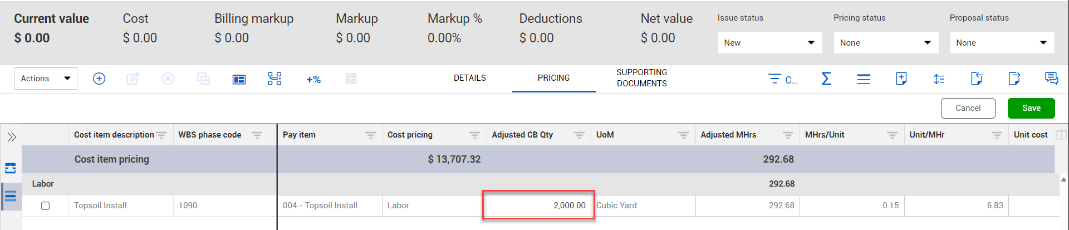
Now the cost item is added to Cost Item Pricing. He enters the adjusted quantity in the Adjusted CB Qty field.
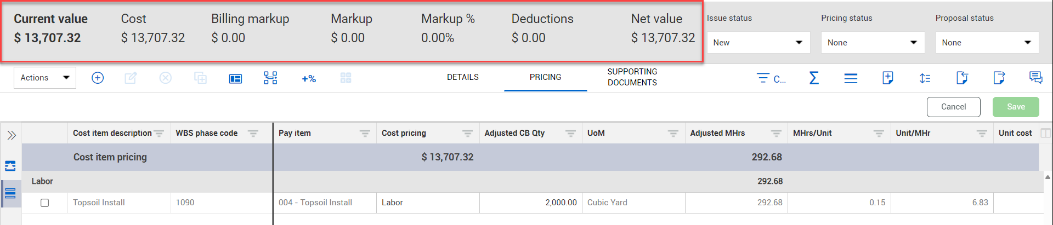
STEP 7
Note that the pricing values have changed, but the header has not been updated. He clicks Save to save the changes and update the issue header.
[End of Step by Step]
Follow the steps below to see an example of pricing an issue based on a new cost item.
[Begin Step by Step]
STEP 1
The project engineer is pricing an issue based on a client request. From the issue record, he opens Pricing > Cost item pricing.
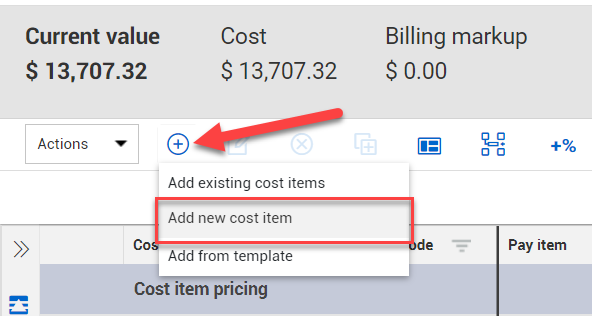
STEP 2
The client requested that premium topsoil be used, so the project engineer needs to create a new cost item. He selects Add > Add new cost item.
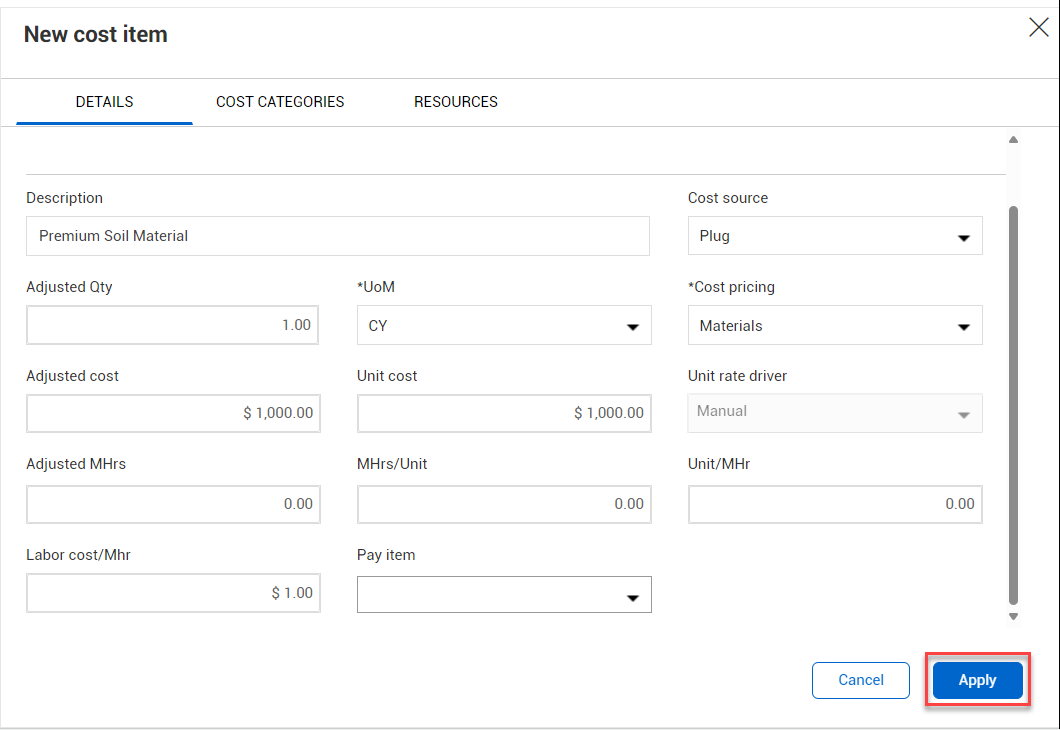
STEP 3
He inputs the details for the new cost item. He then clicks Apply.
STEP 4
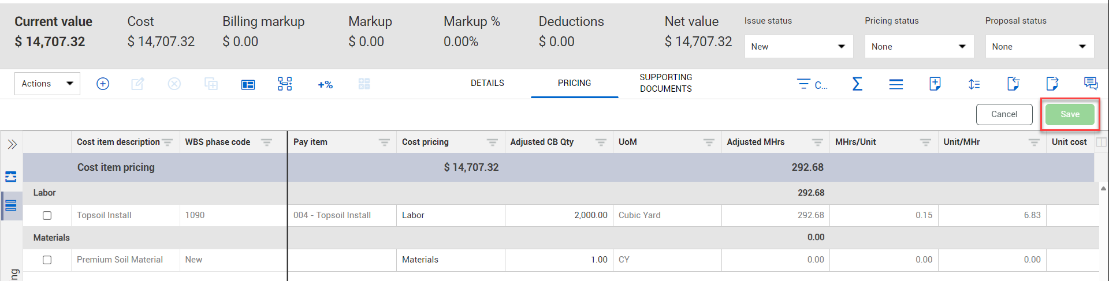
Now the cost item is added to Cost Item Pricing. Note that the pricing values have changed, but the header has not been updated.
He clicks Save to save the changes and update the issue header.
[End of Step by Step]
In addition to adding details at the cost-item level, issue pricing can also be adjusted for markup values.
To add markup values, click the Add markups icon and select the type of markup you want to add.
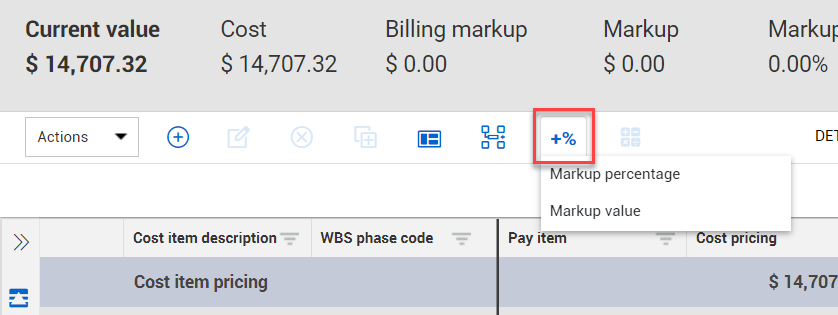
You can select from available markups configured in Project Settings or add a manual markup.
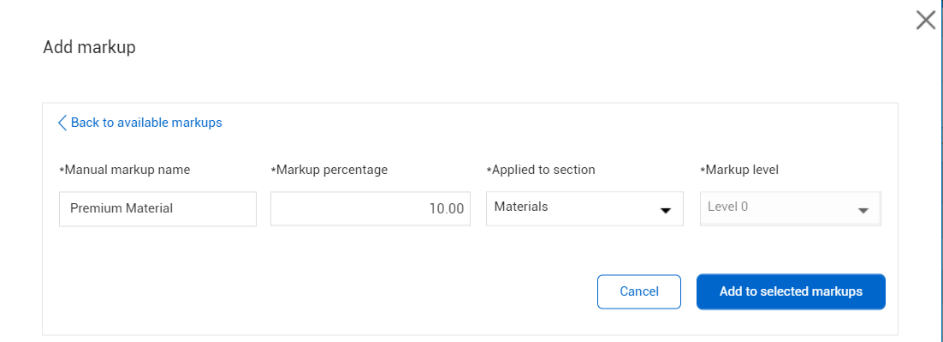
Once added, markup values will be displayed in the header and can be managed from the Pricing tab.

Access the following links to learn more about pricing an issue:
VIDEO | Pricing Tab
VIDEO | Cost Item Pricing
TOPIC | Cost Item Pricing Tab
TOPIC | Markups
After an issue is approved, either through an approval workflow or by default, the next step is to associate it to a change order. The issue may be associated to a potential change order (PCO), or it may be moved directly to a client change order (CCO).
The following example shows associating an issue directly to a CCO. For more details on working with PCOs, please consult Potential Change Order (PCO).
[Begin Step by Step]
STEP 1
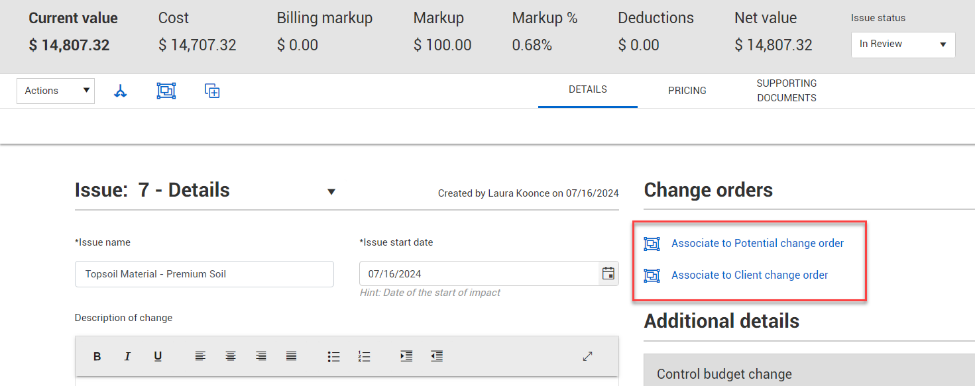
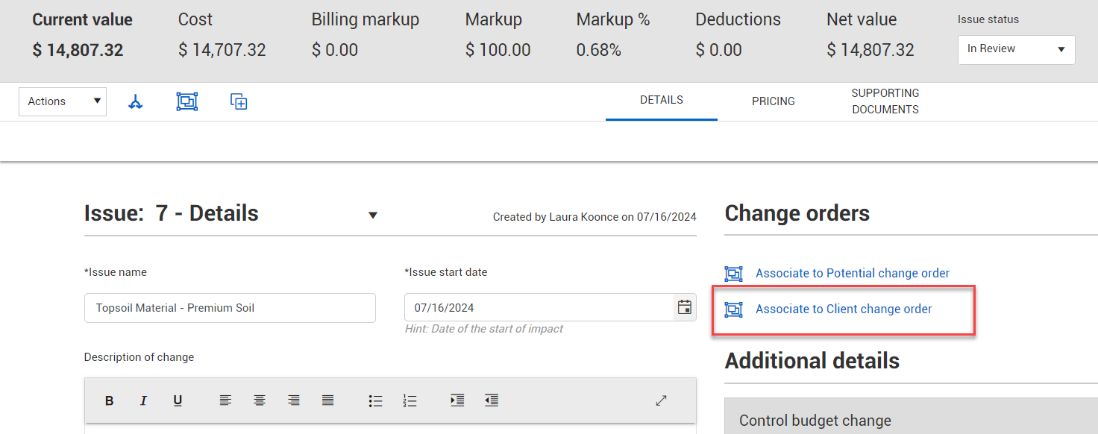
The project engineer has priced out the issue using input from the field team. Now he’s ready to create a client change order so that the project manager can finalize the change with the client. From the Details tab of the issue record, he selects Associate to Client change order.
STEP 2
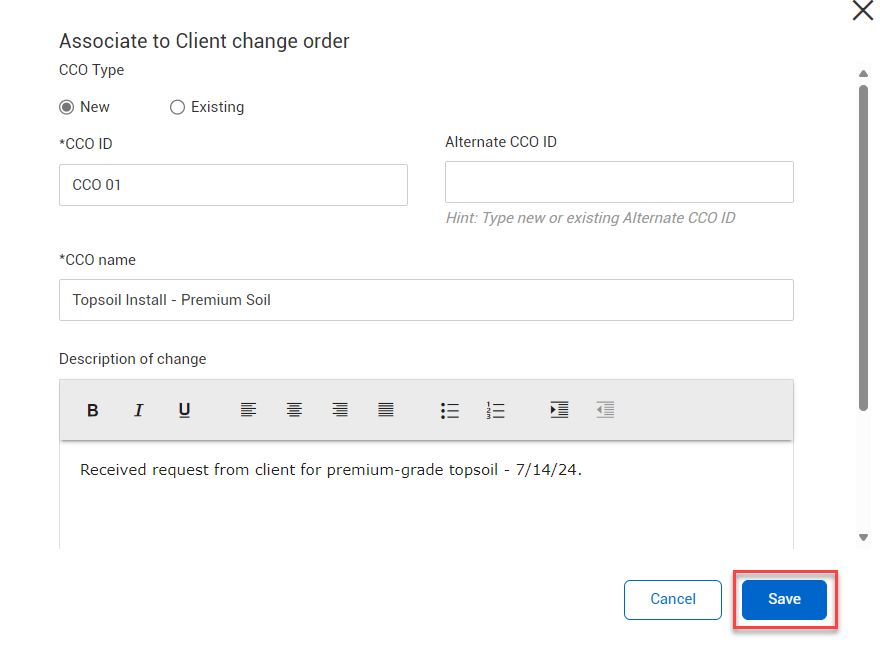
He inputs the details of the CCO and then clicks Save.
STEP 3
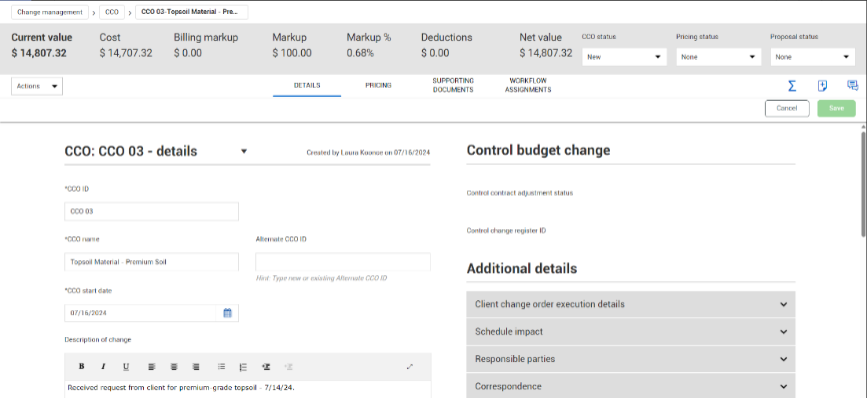
The CCO has been created, and the new CCO record opens to the Details tab.
[End of Step by Step]
Like an issue or PCO, the details of the CCO can be adjusted based on internal input or negotiations with the client.
If pricing details need to be modified, this can be done at the issue level and then pushed to the associated change order.

Once a final agreement is reached, the CCO status can be changed to “Executed.”
Follow the steps below to see an example of executing a CCO.
[Begin Step by Step]
STEP 1
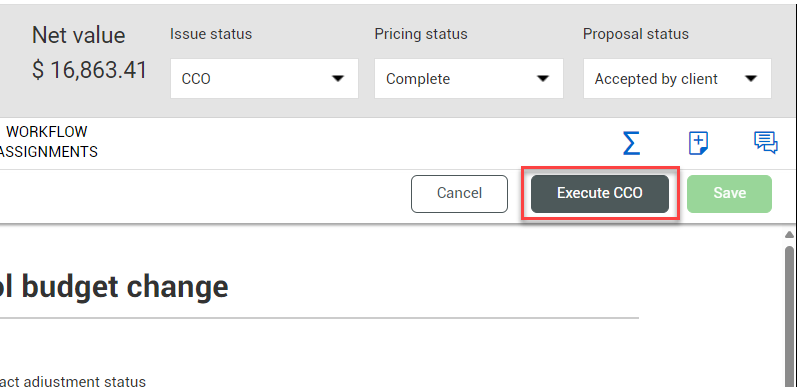
After reaching an agreement with the client, the project manager inputs an agreed amount on the Pricing tab and sends out the formal agreement via DocuSign.
Once he receives the signed agreement, he opens the CCO record and changes the CCO status to Executed.
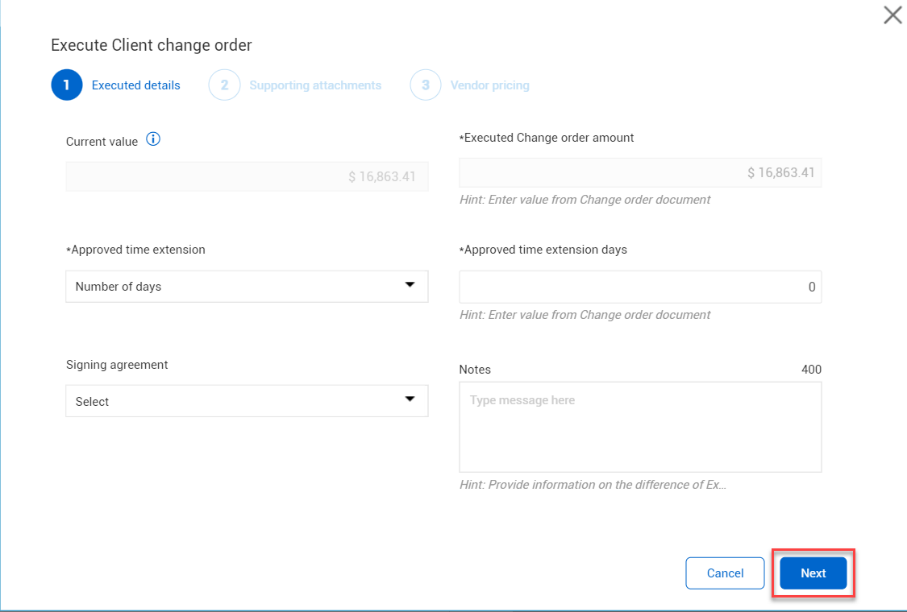
STEP 2
He inputs the required details of the change order and clicks Next.
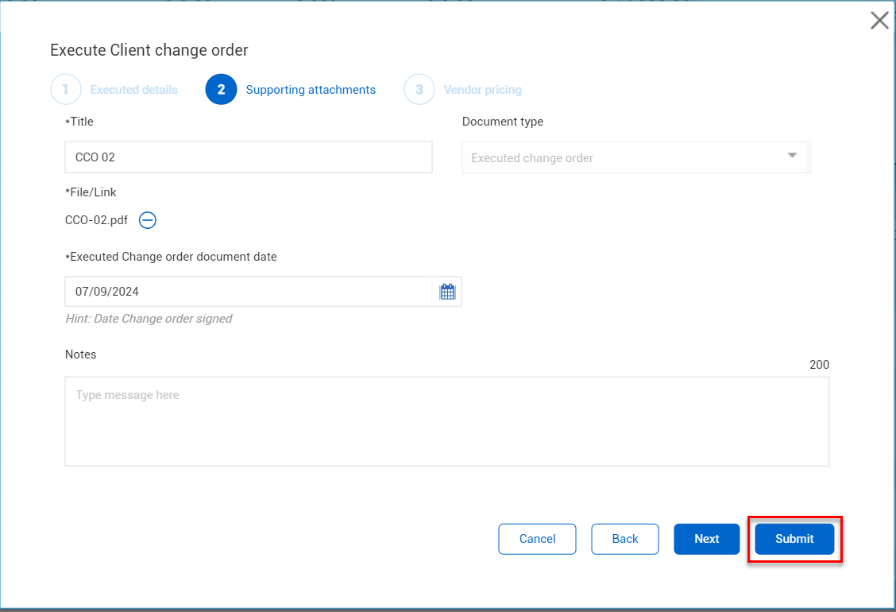
STEP 3
He attaches the signed executed change order. This change order is not associated with a vendor, so he doesn’t need to input details under Vendor pricing.
He clicks Submit.
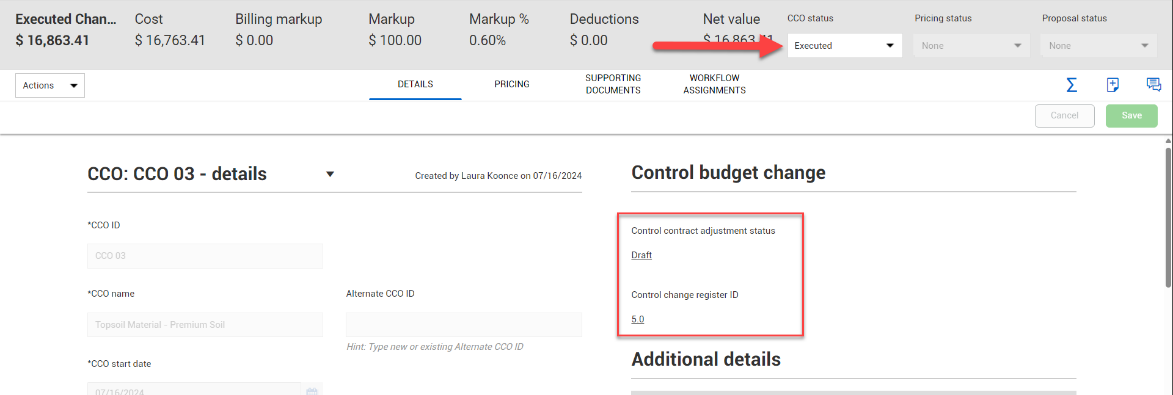
STEP 4
With the status changed to Executed, the Control contract adjustment status and Control change register ID can now be accessed from the CCO record.
[End of Step by Step]
Note: The internal CCO approval process will vary by organization. Visit Workflow Assignments to learn more about setting up PCO and CCO approval steps.
Access the following links to learn more about finalizing and executing a change order:
VIDEO | Client Change Order (CCO)
VIDEO | Sending a Document in DocuSign
TOPIC | Finalize Client Approval
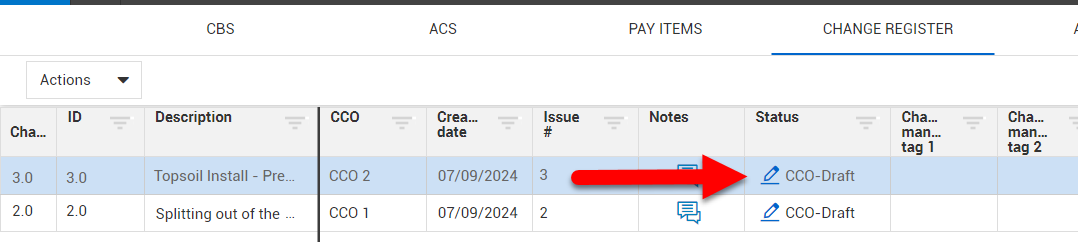
In InEight Control, executed CCOs appear on the Change Register tab. Executed CCOs start with a status of CCO-Draft and can be reviewed and submitted for final approval.

Follow the steps below for an example of how to review a contract adjustment.
[Begin Step by Step]
STEP 1
A client change order has been finalized and agreed to by all parties and can now be viewed from InEight Control. The project controller clicks the Edit icon and selects Revise.
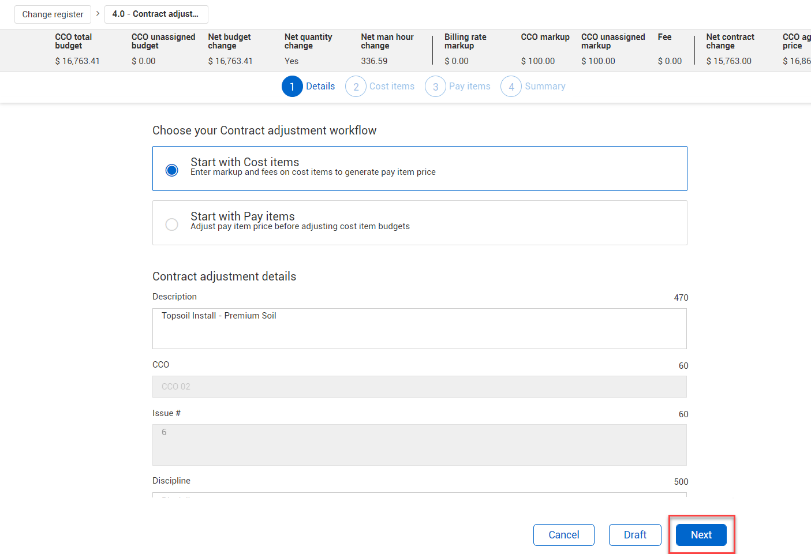
STEP 2
The contract adjustment record opens to the Details step. In this case, the workflow must start with cost items because this contract adjustment originated from InEight Change. She clicks Next.
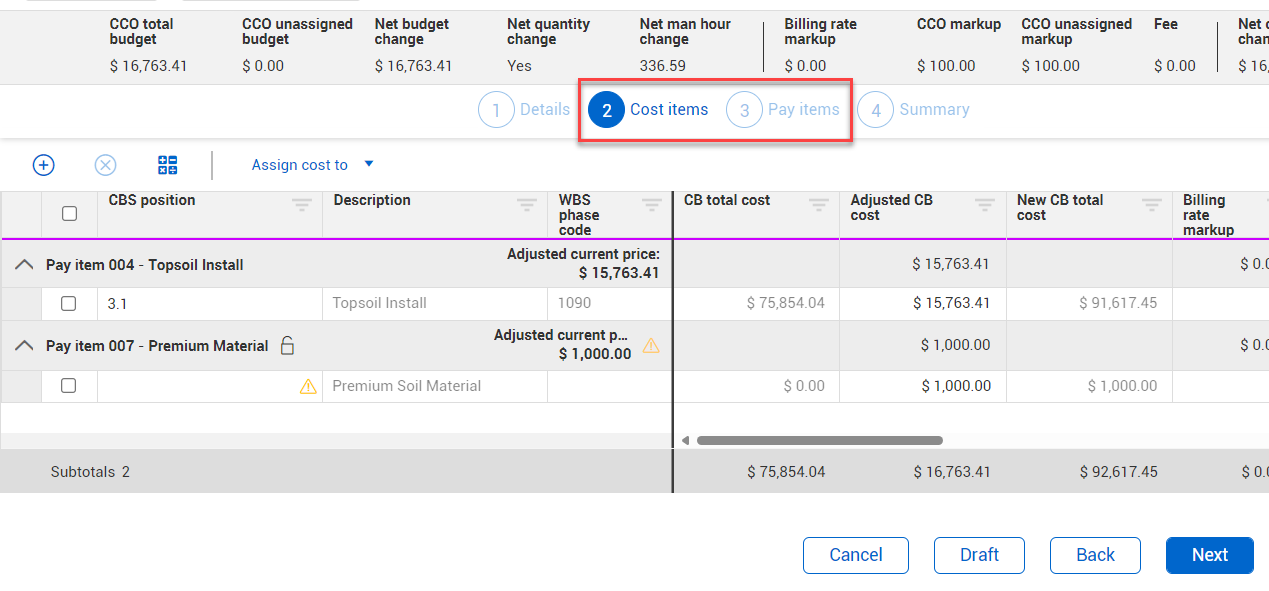
STEP 3
The project controller continues her review of the contract adjustment and adjusts the values for cost items and pay items as needed.
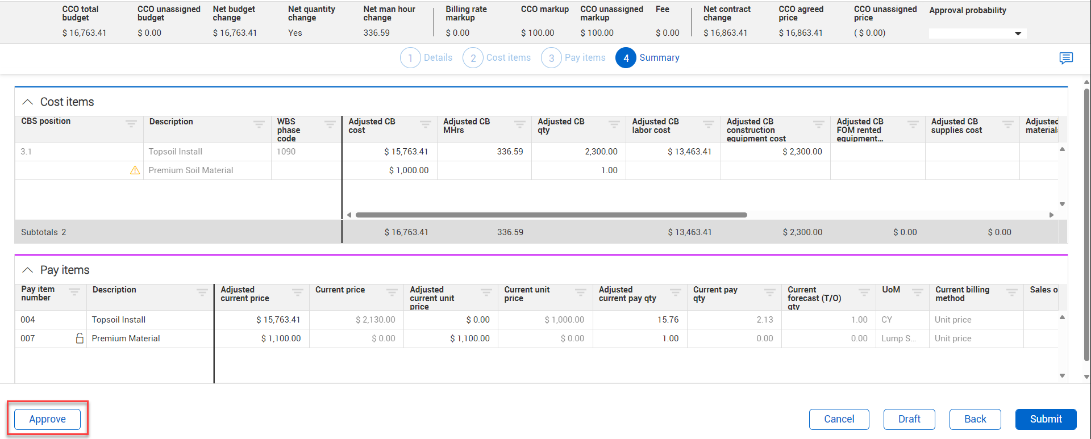
STEP 4
Once she’s confirmed the details of the adjusted values, she’s ready to approve the contract adjustment. Since she has final approval permission in this case, she clicks Approve.
STEP 5
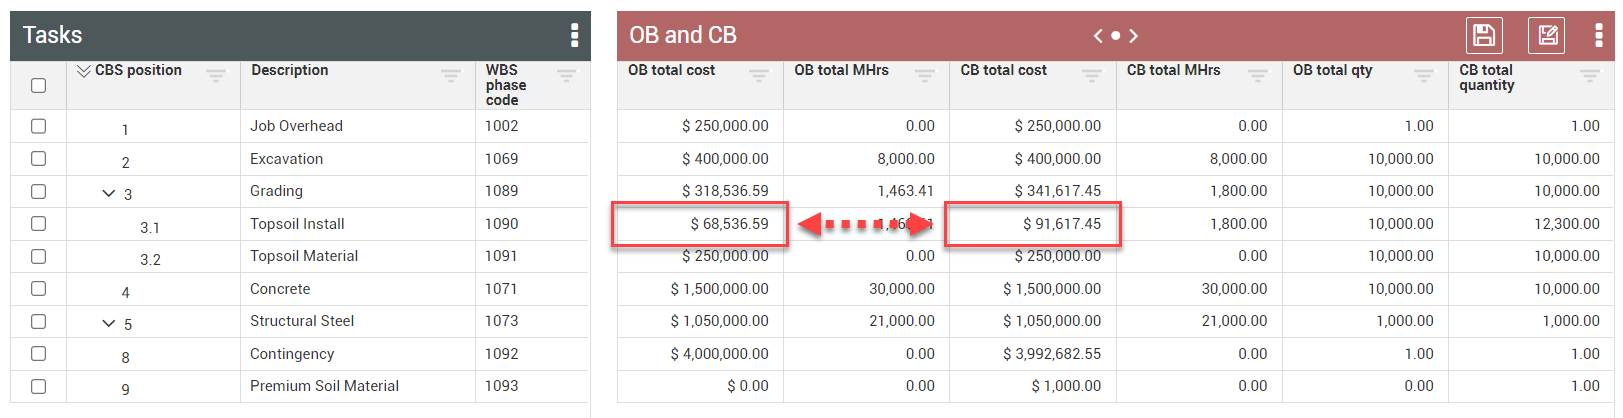
The CCO now has a status of Approved on the Change Register tab.

On the CBS tab, the project controller can see that the Current Budget values have updated.
[End of Step by Step]
Note: The adjusted CB values drive the changes in your budget once the contract adjustment is approved.
Access the following links for more detailed information on approving and updating contract adjustments:
TOPIC | Approve Contract Adjustment
TOPIC | Contract Adjustment
TOPIC | Change Approval Process
VIDEO | Managing Change Orders
VIDEO | Change Approval Process
Additional Information
9977 N 90th Street, Suite 250 Scottsdale, AZ 85258 | 1-800-637-7496
© 2024 InEight, Inc. All Rights Reserved | Privacy Statement | Terms of Service | Cookie Policy | Do not sell/share my information