Products
Solutions
Resources
9977 N 90th Street, Suite 250 Scottsdale, AZ 85258 | 1-800-637-7496
© 2024 InEight, Inc. All Rights Reserved | Privacy Statement | Terms of Service | Cookie Policy | Do not sell/share my information

While less commonly used, if you prefer to begin your calculation of a contract change by adjusting pay items and then the related cost items, you can select the Start with Pay items workflow.
Keep in mind that when using this workflow, you will need to know in advance the pending prices you plan to adjust to for your pay items, including markup and fees, since there is no step to define costs, markups and fees before pay item pricing.
Click Actions > Budget and contract adjustment > Contract adjustment. The Contract adjustment wizard opens to step 1, Details.
On Details, select the Start with Pay items workflow option, and then add contract adjustment details as needed.
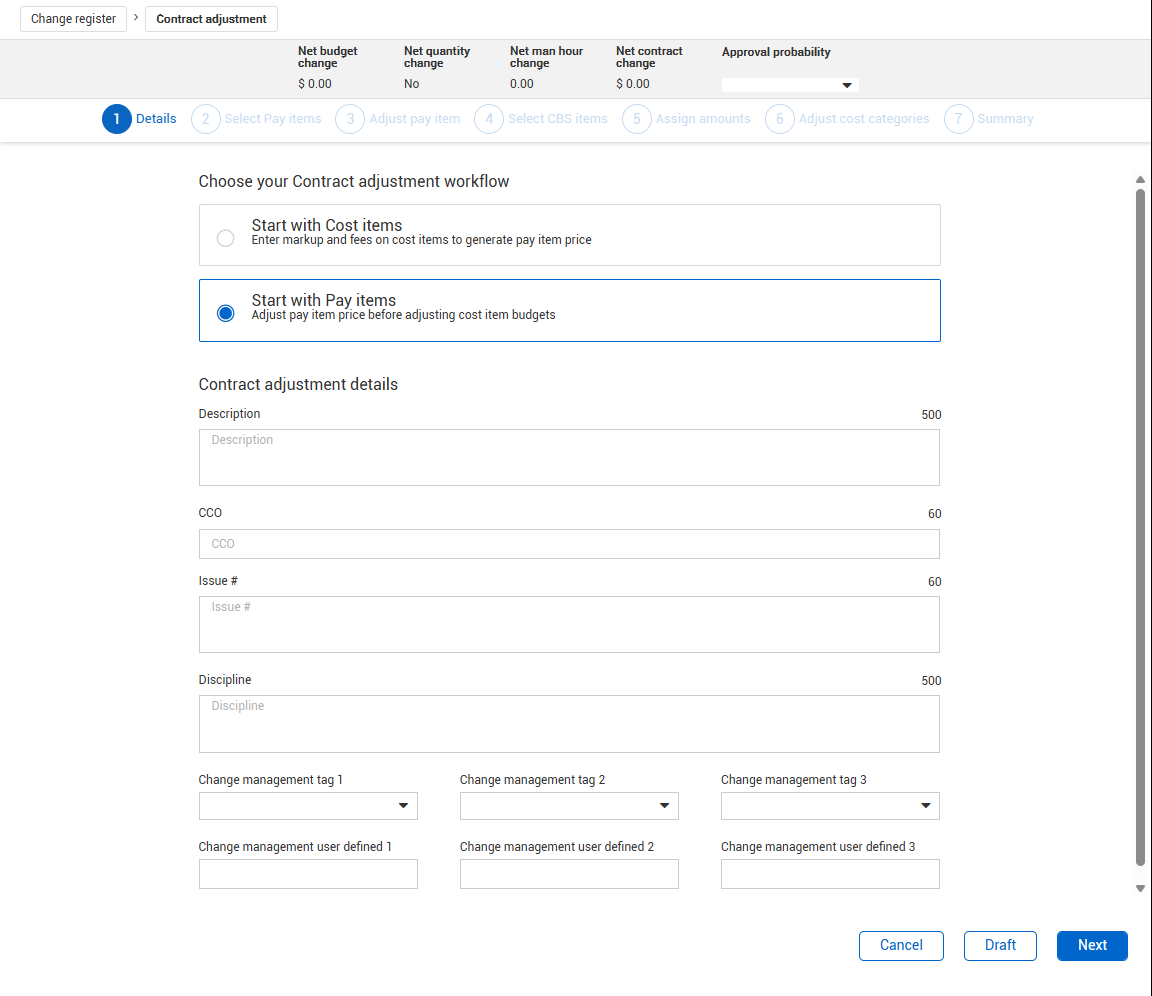
Click Next. The Contract adjustment wizard opens to step 2, Select Pay items. On this step, a list is provided of pay items already under the project’s contract.
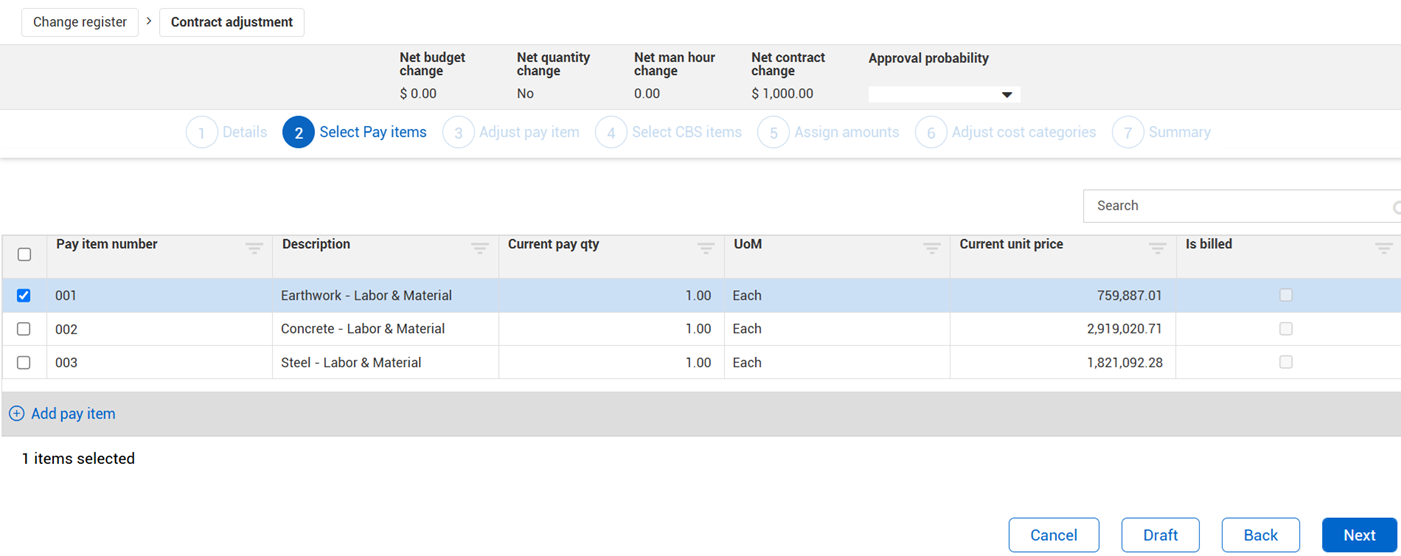
If you need to add a new pay item to the contract for the change order, select Add pay itemat the bottom left of the list of pay items.
You can select existing pay items from the list, and then click Next. to go to Step 3, Adjust pay item. If you need to add new pay items click Add pay item at the bottom left of the list of pay items. This open a new Add pay item workflow which becomes step 2, and the Select pay items step becomes step 3. In Add pay item, add the details of the new pay item.

In the Proposal details section, enter Current price and Current unit price. The Current pay qty is auto-calculated.
Click Next. The Contract adjustment wizard opens to step 3, Select Pay items. The new pay item shows in Select Pay items.
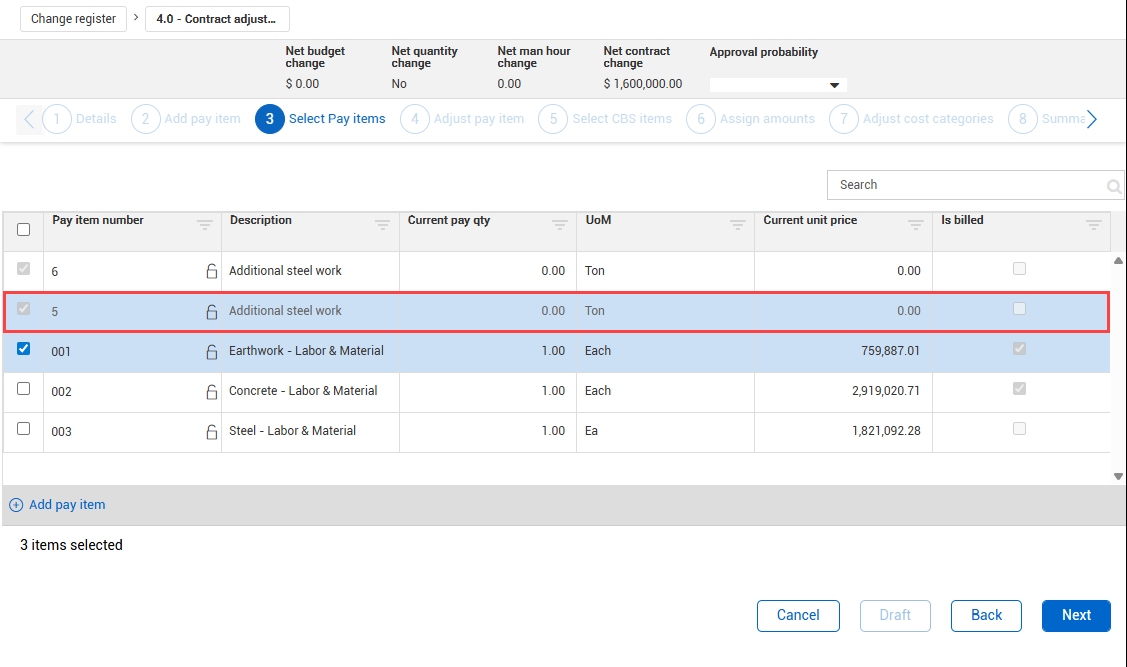
The pay item is unlocked, and the quantity and price are zero when the contract adjustment has not been approved. When the contract adjustment is approved, the pay item will lock and officially become part of the contract price.
After selecting or adding pay items in Select Pay items, click Next. The Contract adjustment wizard opens to step 4, Adjust pay item. On Adjust pay item, for each pay item, you can enter the adjustment amounts under Current price and Current pay qty fields in the Pending row.

You may need to change which field to lock in order to calculate your unit price and quantities correctly.
Click Next after defining pending prices of your pay items. The Contract adjustment wizard opens to step 5, Select CBS items. On Select CBS items, select the cost items that pertain to the contract adjustment from the list.
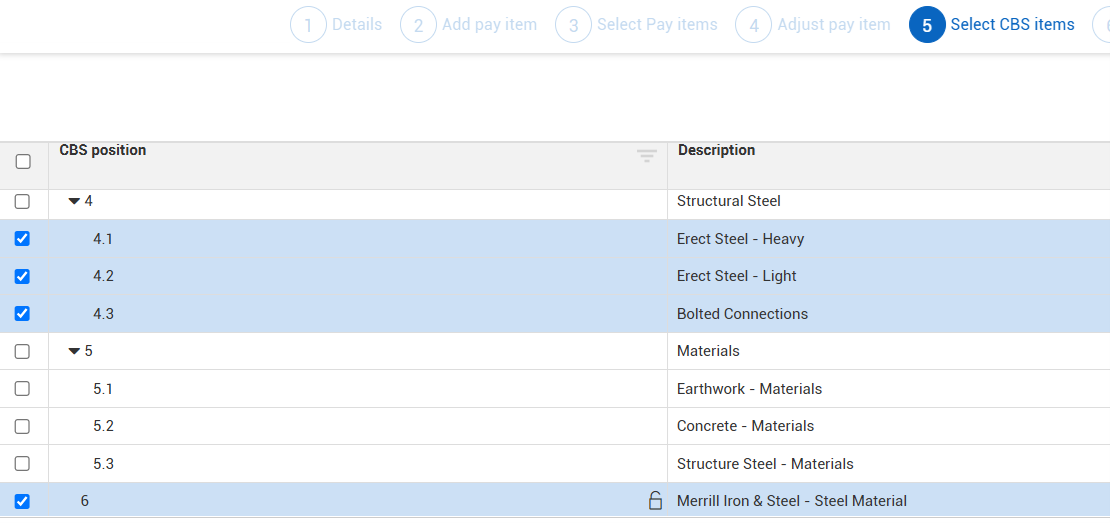
Similar to a contract adjustment that starts with cost items, if the contract adjustment requires a new cost item to be added to the budget, this must be added to the Cost Breakdown Structure on the Workspaces CBS tab before creating the contract adjustment.
In this example, a new cost item was added in the CBS for additional steel material (Merrill Iron & Steel – Steel Material) prior to creating the contract adjustment, so it is available to select.
Click Next after selecting CBS items. The Contract adjustment wizard opens to step 6, Assign amounts. On Assign amounts, add the adjustment amounts for current budget, man-hours and quantities in the applicable pending fields.
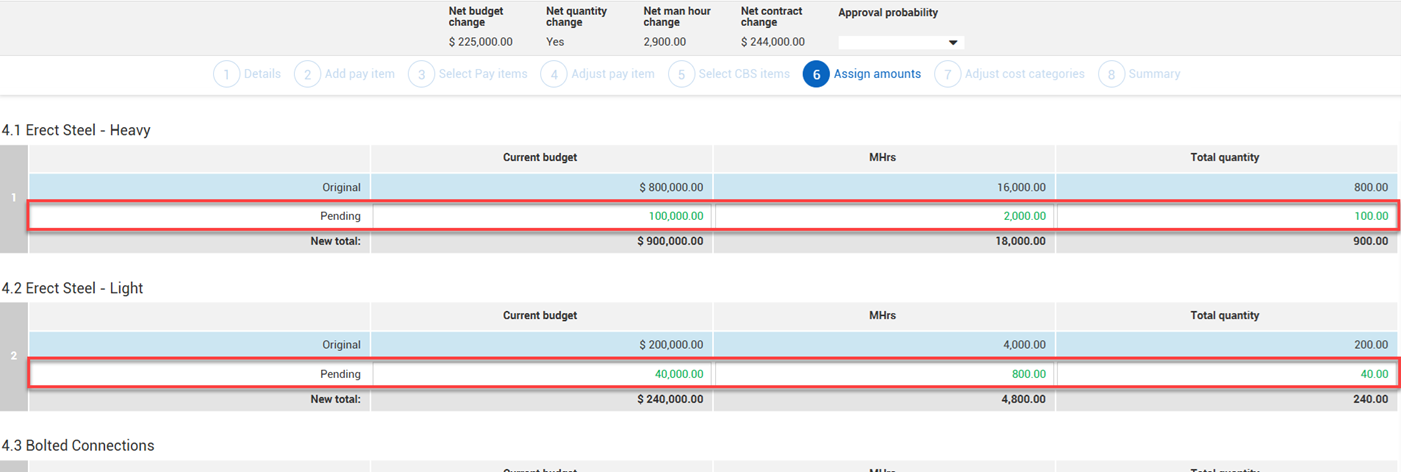
Click Next after making your adjustments. The Contract adjustment wizard opens to step 8, Summary. On Summary, you can do a final review the cost items and pay items involved in the contract adjustment with their adjusted values. Click Submit to send it to the Change Register for review and approval.
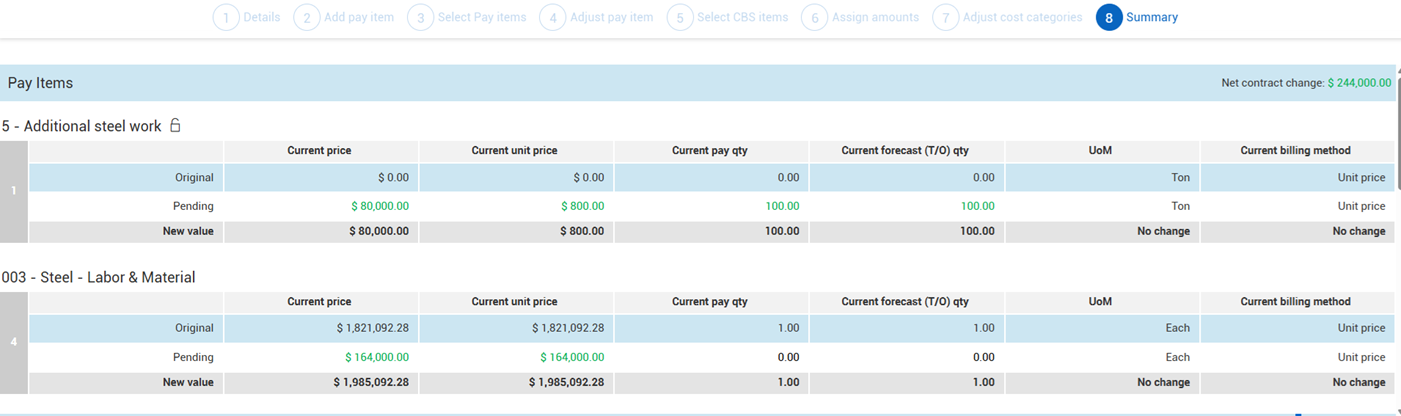
Unlike the Start with Cost items workflow, in the Start with Pay items workflow, the adjusted (pending) values defined for your cost items have no direct influence on your pay items’ pending values. In the Start with Cost items workflow, the system directly calculates the adjusted current price from the assigned cost items automatically. In the Start with Pay items workflow this is not the case. Instead, the pending current prices are manually determined, independent from the pending values you enter for the related cost items.
At any time during the development of the contract adjustment you can use any of the following buttons:
Back - Use this button to move back a step in the contract adjustment workflow.
Draft - If the contract adjustment is not yet complete or ready for review, select Draft to save it for later. This will save the adjustment as a draft in the Change Register. At any time, you can edit the adjustment by selecting the Edit icon for the record on the Change Register.
![]()
Cancel - Select to close the contract adjustment without saving any changes.
Additional Information
9977 N 90th Street, Suite 250 Scottsdale, AZ 85258 | 1-800-637-7496
© 2024 InEight, Inc. All Rights Reserved | Privacy Statement | Terms of Service | Cookie Policy | Do not sell/share my information