Products
Solutions
Resources
9977 N 90th Street, Suite 250 Scottsdale, AZ 85258 | 1-800-637-7496
© 2024 InEight, Inc. All Rights Reserved | Privacy Statement | Terms of Service | Cookie Policy | Do not sell/share my information

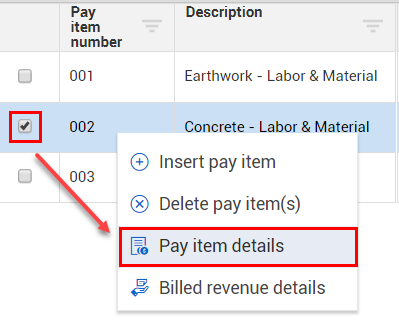
When you right click on a pay item, a context menu appears with four options for managing pay items. You can:
Insert a pay item
Delete a pay item
Access/maintain pay item details
Access/maintain billed revenue details.
Selecting Pay item details will open a Pay item Details slide out panel.
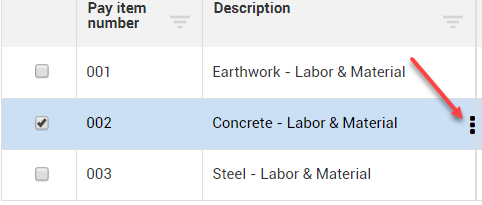
You can also access this context menu by hovering over to the right of the Description and clicking on the three black dots.
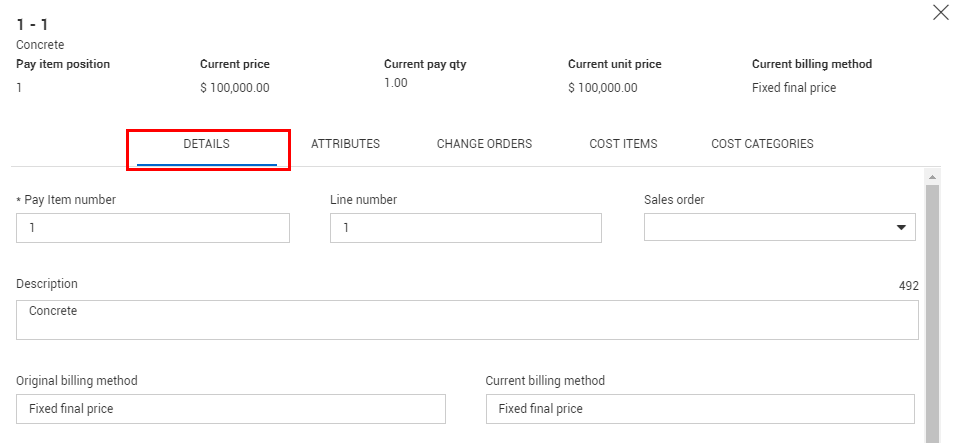
The first tab in Pay item details is called Details. This is where you can view the details for the pay item such as Total Price, Pay Quantity, and Unit Price. You can also make changes to fields such as Pay Item number, Line number, and Description.
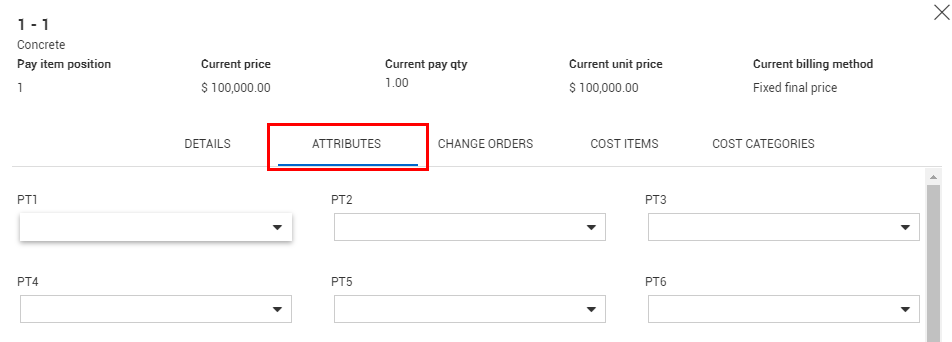
Next is the Attributes tab. This is where you can associate specific tags to your pay item, or to define field values.
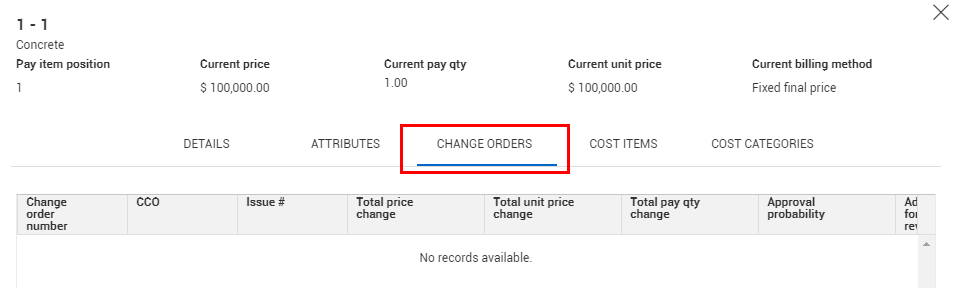
The Change Orders tab displays all change orders associated to the selected pay item.
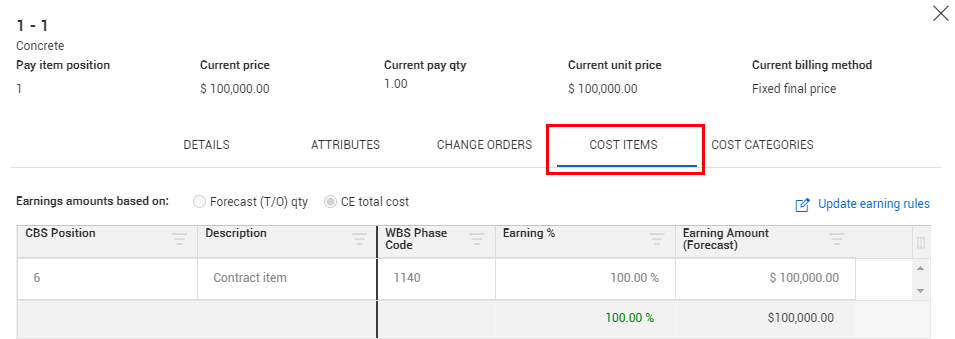
The Cost Items tab displays the cost items that are assigned to the selected pay item. In this example there are two cost items assigned to the 002 Concrete – Labor & Material pay item.
The Cost Categories tab shows a break at the cost category level for the cost items that are assigned to that pay item. This tab is a quick way to see where you have cost and revenue as well as where you have revenue at the pay item level for the pay item at the cost category level. The different fields represent the different billing methods that are available currently.

Forecast final revenue, Revenue earned, and Markup amount only show at the totals level of the cost categories.
Forecast final revenue and Revenue earned shows the information that is pulled from the pay item's register.
The Total cost to date column breaks down the information from the information from the cost items assigned to the pay based on where you claimed the cost for those items.
The Markup amount calculates the difference between your total price and your agreed upon current budget cost for those assigned cost items. The Markup amount uses the calculation Total price on the pay item - sum of the CB total cost on the assigned cost items
When setting up your project, you can manually create pay items or quickly import your pay items by uploading them from a Microsoft Excel spreadsheet.
1. In the Actions menu, select the upload icon to upload the Excel spreadsheet.
2. Drag and drop your Microsoft Excel spreadsheet or select browse to upload it.
3. Select the New import option.
4. After the spreadsheet is uploaded, choose the columns you want to see.
Because the project has not started, pricing is unlocked. This means you can:
• Add new pay items
• Enter price and quantity for each item.
When you are done adding details, your pay items show the current values that were entered.
After you are done with your list and ready to move forward, lock in your pricing. To lock pricing select Actions > Lock/unlock price > Lock price. This saves the changes as the original pricing for the project. If you are not ready to lock all items, you can also select the individual pay items and lock or unlock them from the Actions menu.
After the pricing is locked on a pay item, the pay item's price can only be edited through a contract adjustment.
Partial locking is available. When set, you can add pay items at any time during the project life cycle, and you can lock each pay item individually after you enter the price is entered for that pay item.
Additional Information
9977 N 90th Street, Suite 250 Scottsdale, AZ 85258 | 1-800-637-7496
© 2024 InEight, Inc. All Rights Reserved | Privacy Statement | Terms of Service | Cookie Policy | Do not sell/share my information