Scheduled Syncs
Scheduled syncs let you set a time and date for the type of information you want updated from either push or get data.
You can set up recurring syncs or a one-time sync to get up-to-date costs on man-hours. Scheduled syncs occur at the point and time you scheduled them for.
To start scheduling syncs, the tab Sync integrations has been added to the Control Project settings.
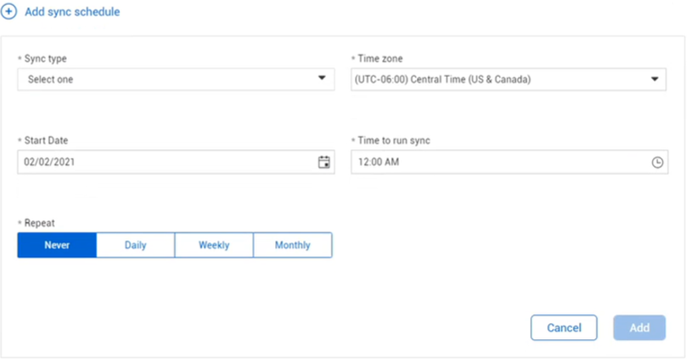
If no syncs are scheduled, you can add a sync by selecting the Add sync schedule button.

There are five required fields you must fill out in order to schedule a sync.
-
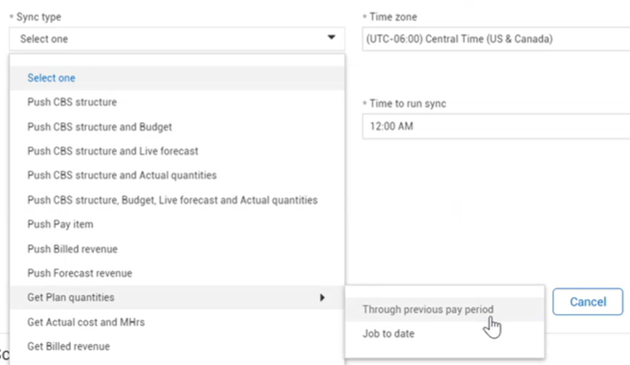
Sync type
-
Time zone
-
Start date
-
Time to run sync
-
Repeat
Sync types lists all available push and get syncs.
The Time zone is where you select which region's time zone you are in.
Start date functions similarly to selecting a start date for a project. You cannot select to start a sync from a day in the past. The scheduled sync starts at the current day by default unless you select otherwise.
You can only select start times in 30 minute increments.
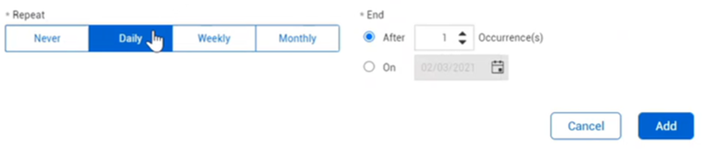
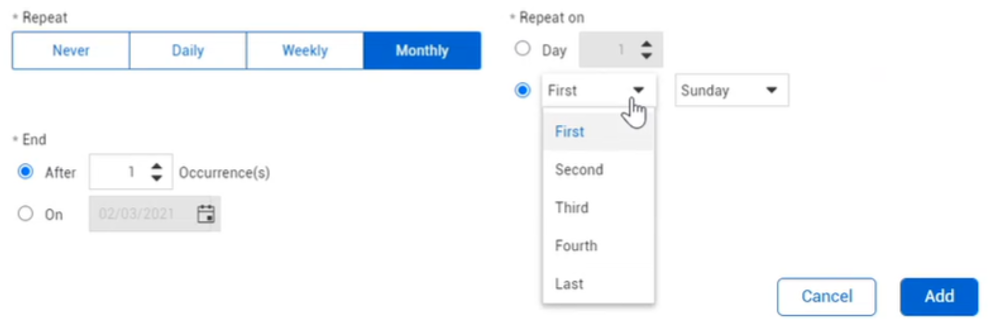
The Repeat section is where you select how often a scheduled sync repeats. You can choose to have the sync repeat daily, weekly, monthly, or never depending on your preference. You can end the schedule syncs on a certain date or end after a number of occurrences.
For daily syncs, select how often you want to repeat the sync or when you want the reoccurring syncs to end.
For weekly syncs, select which days the sync repeats on as well as when you want the sync to end.

For monthly syncs, select what day in the month the sync repeats and when you want the sync to end.
After you click Add, the sync appears in the synch integrations tab.
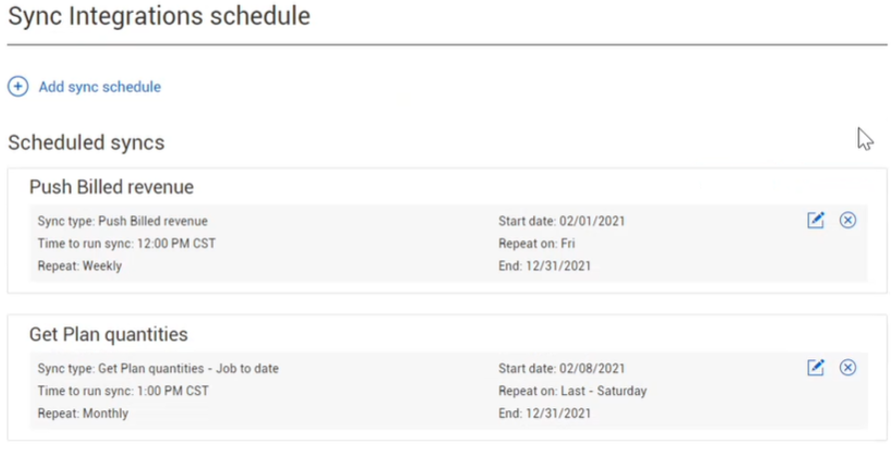
You can edit syncs or delete them using the edit and delete buttons on the far right of the sync data box.
You can schedule all your syncs for the project at one time. If you already have syncs configured for currently existing projects, you don’t need to reconfigure your setup for this feature.
For any new projects that do notyet have scheduled syncs set up, you need to go to the Application integrations section of Control. Follow the Step by Step to navigate to the Application integrations page.
Navigating to Application Integration
-
From the header bar, select the projects drop-down.
-
Hover over Suite administration. That is where you would set up all of your sync configurations.
-
Select Application integrations.