Products
Solutions
Resources
9977 N 90th Street, Suite 250 Scottsdale, AZ 85258 | 1-800-637-7496
© 2024 InEight, Inc. All Rights Reserved | Privacy Statement | Terms of Service | Cookie Policy | Do not sell/share my information


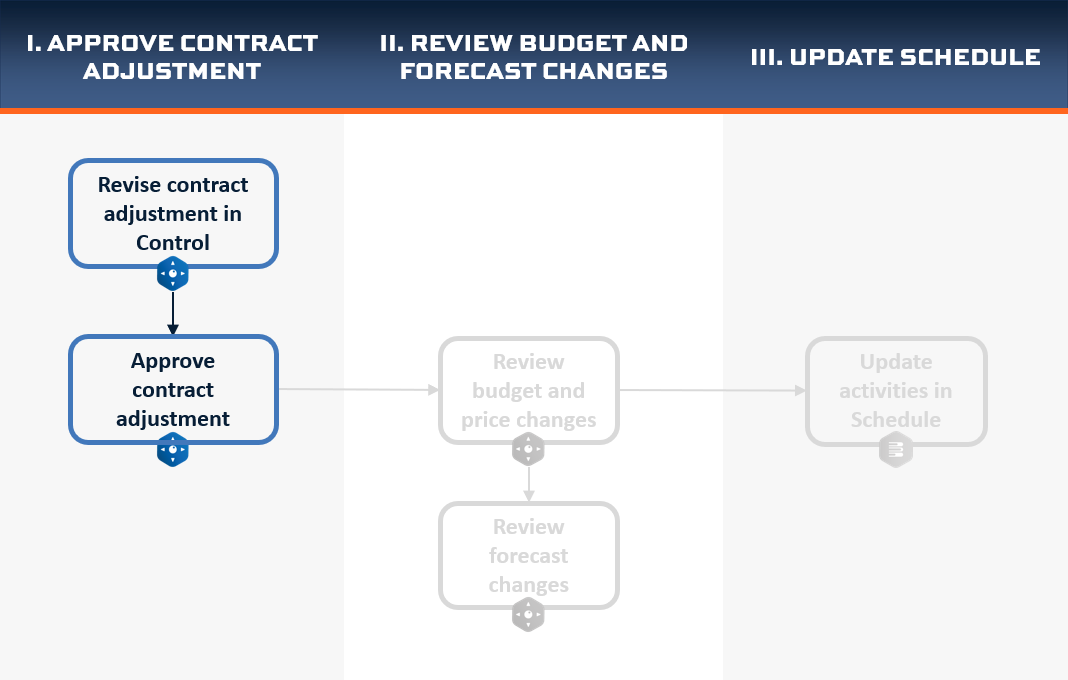
Within the budget, the project controls manager reviews the pending contract adjustment for the additional steel work. She reviews the final pricing, references it to a pay item, and submits it to the project manager for budget approval. The project manager checks the changes log the next day, reviews the pending adjustment, and approves it.
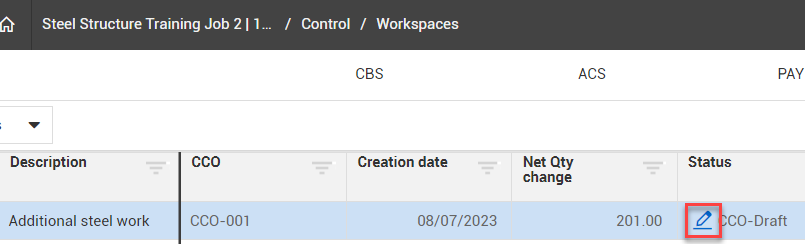
Within InEight Control, a new contract adjustment record appears in the Changes Register from the Executed CCO in InEight Change. It has the default status of CCO-Draft and can be reviewed and submitted for final approval.
From the Change Register, you can revise the new contract adjustment line item to confirm which cost items should be updated with additional budget, as well as define which pay items the negotiated price should be assigned to.

The following steps walk through revising a contract adjustment.
In the Change Register, select the Edit icon under Status and click Revise.
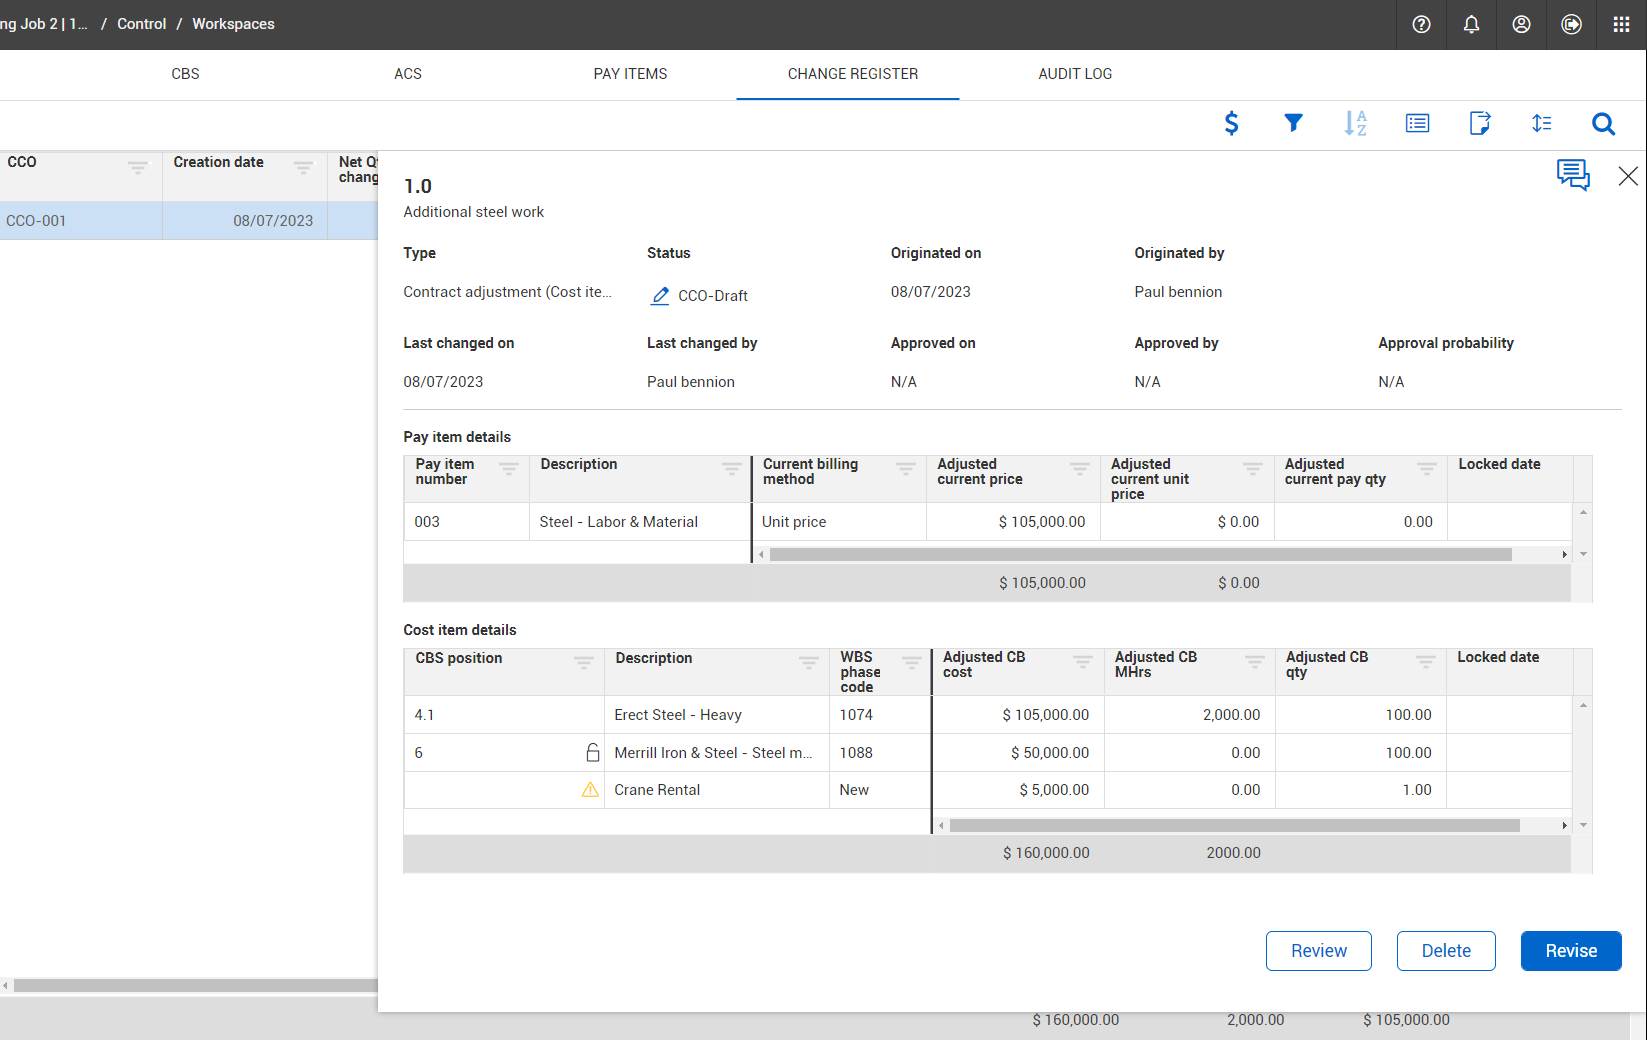
This opens a slide-out summary of the contract adjustment.
To do a final review and make necessary adjustments, click Revise.
This opens the contract adjustment record on the Details tab.
The contract adjustment does not allow you to select Start with Pay Items if you are using a CCO-draft that originated from Change.
Click Next.
This takes you to the Cost items step, where you can review the cost item pricing that came with the CCO from InEight Change.
From here you can:
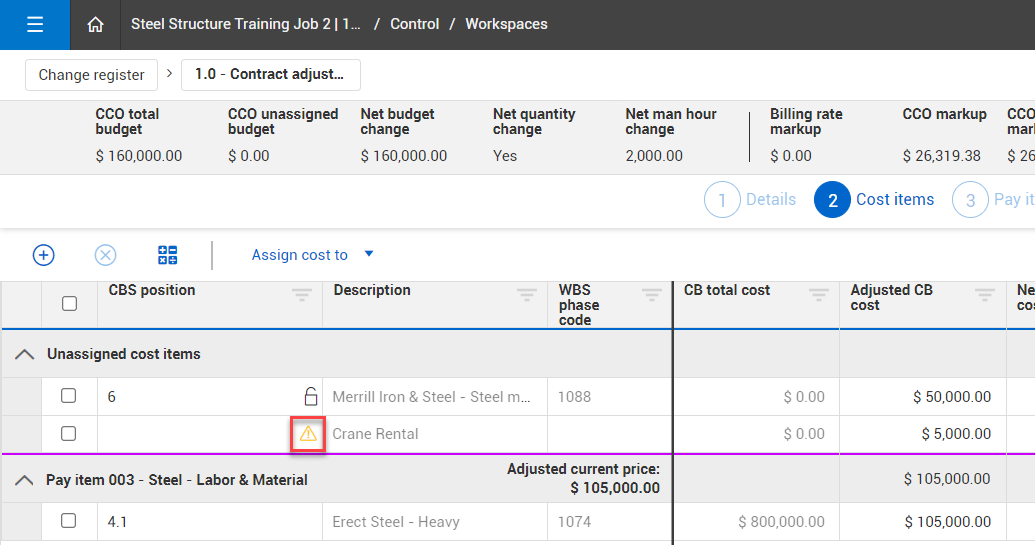
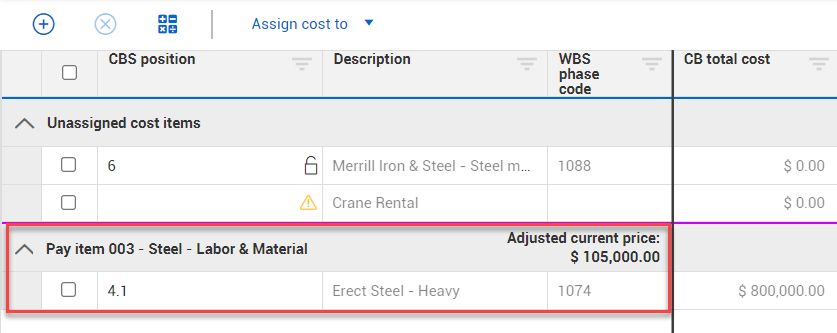
Remember that while the CCO’s costs are accounted for through your cost items, you need pay items to account for revenue.

This is done by selecting the cost items to assign, then clicking the Assign cost to drop-down and selecting Assign to new or existing pay item.

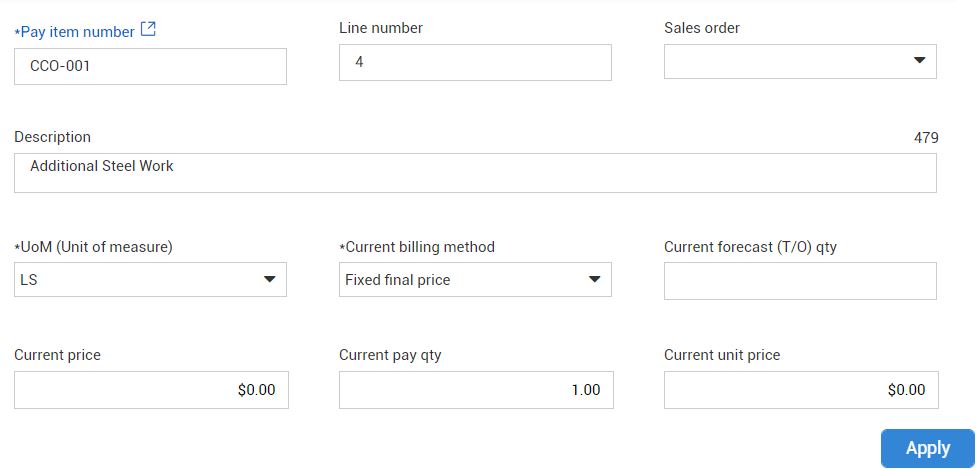
In this case, we’ve added a new Additional Steel Work pay item.
The steel material and crane cost items will be assigned to it when we click Apply.
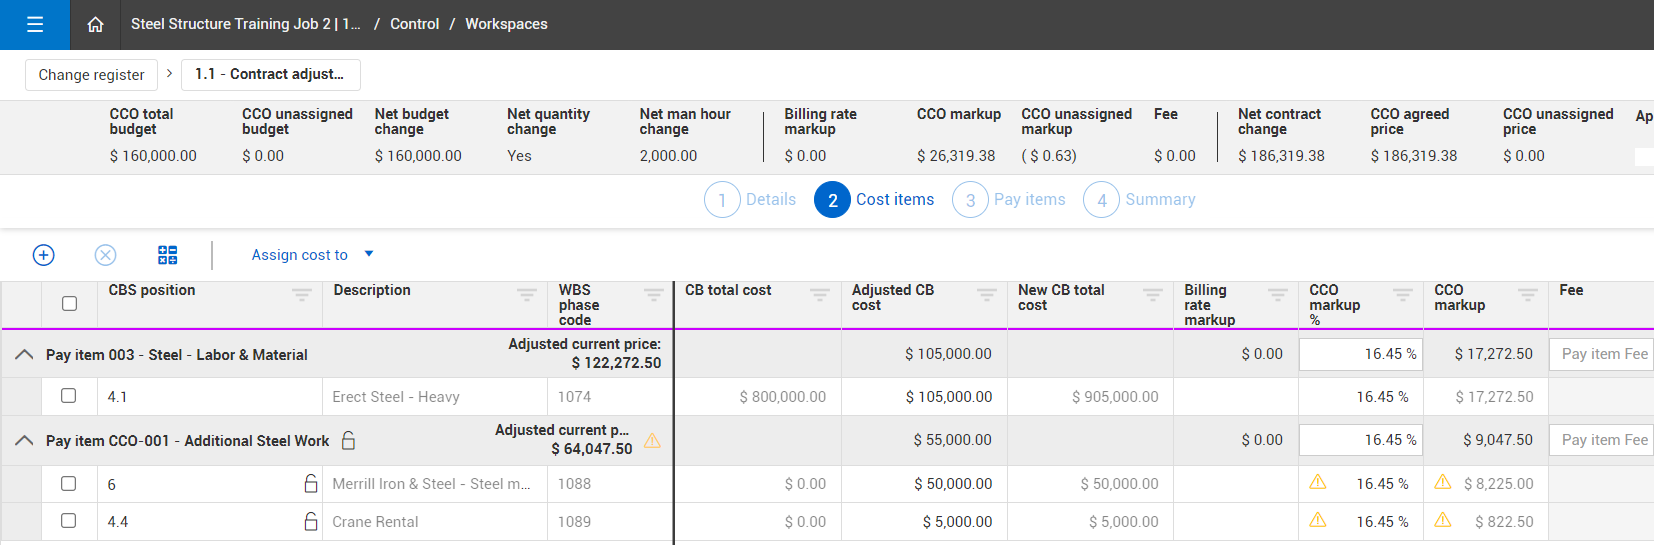
With cost items and pay items assigned, you can add markup and fees to determine your final price. The final pricing of the adjustment will be the total Adjusted CB cost + Billing markup and Fee.
You can review your costs by comparing them to the CCO total budgeted cost (and hours) shown in the header.
You can review price (with markup and fees) by comparing it to the CCO markup and fee in the header.
In this case, our costs already match what came from the CCO, and we add a markup percentage to match (as close as possible) the CCO markup and fee amount.


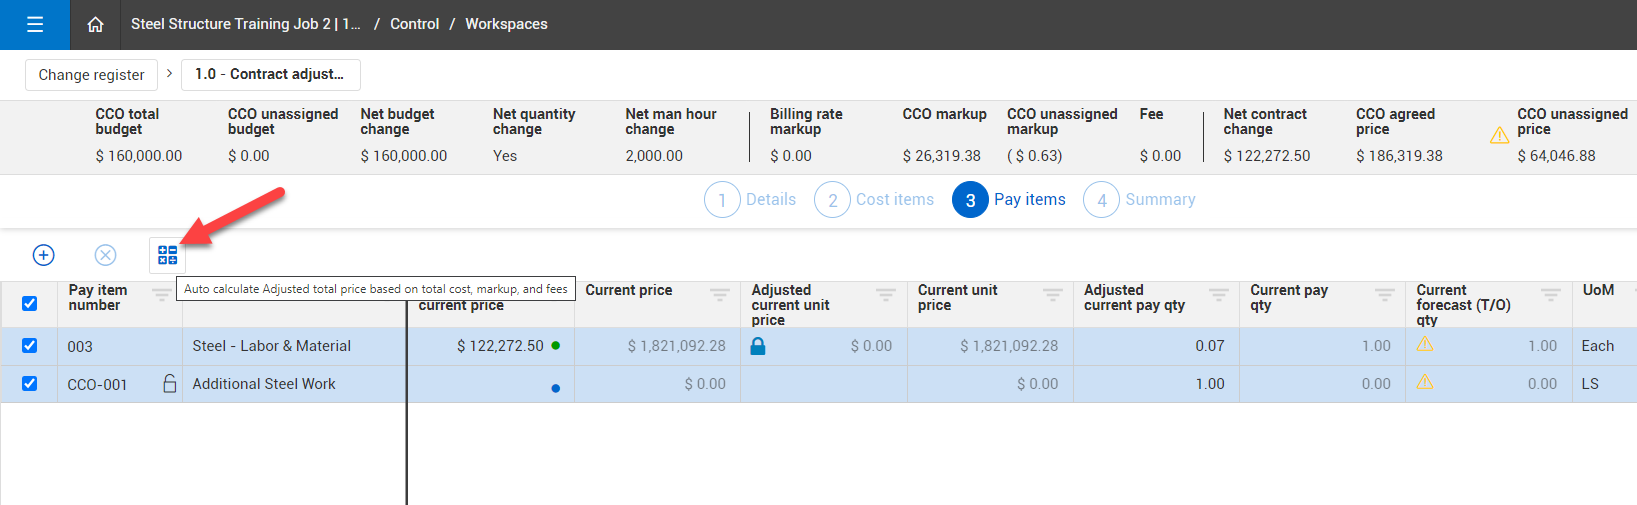
On the Pay items step, you can Auto calculate Adjusted total price based on total cost, markup, and fees. This updates your pay items with the values calculated on the Cost items step and assigns the currently unassigned CCO price.
Click Yes when prompted if you want to revert back to system-generated values.
Here we see the pay items with the auto-calculated pricing assigned.
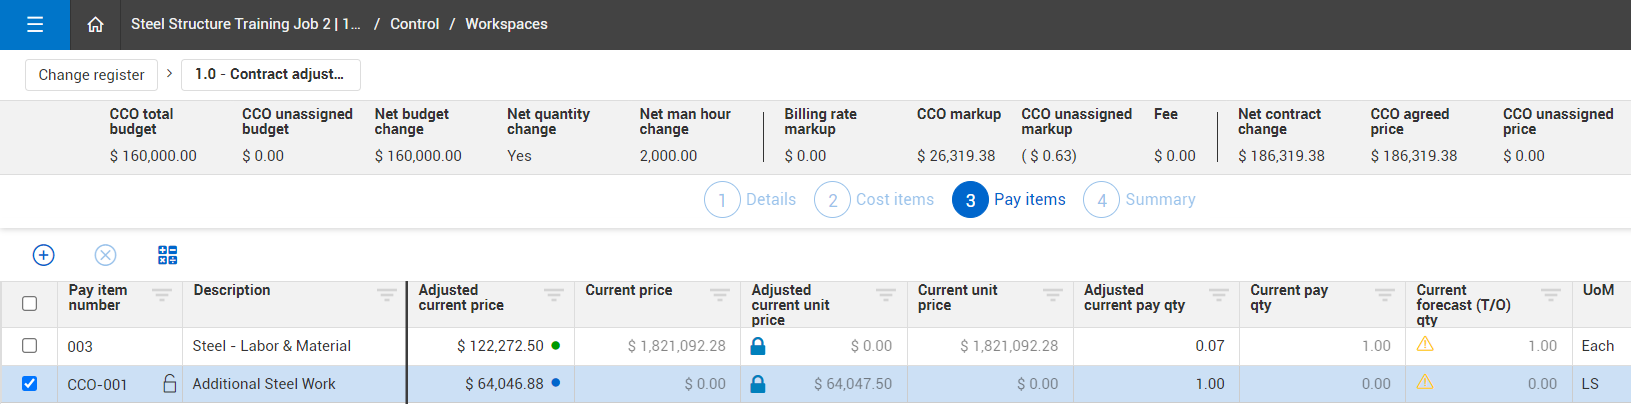
Click Next to go to the Summary step, where you can do a final review and Submit.

Once submitted, the Status of the contract adjustment changes from CCO-Draft to CCO-Pending. The appropriate approver (e.g., project manager) will check the Change Register on a regular basis to review and either approve or reject all pending items.
To approve the contract adjustment, click on the adjustment’s status. This opens a slide out summary from which you can either Review, Reject, Revise, or Approve.
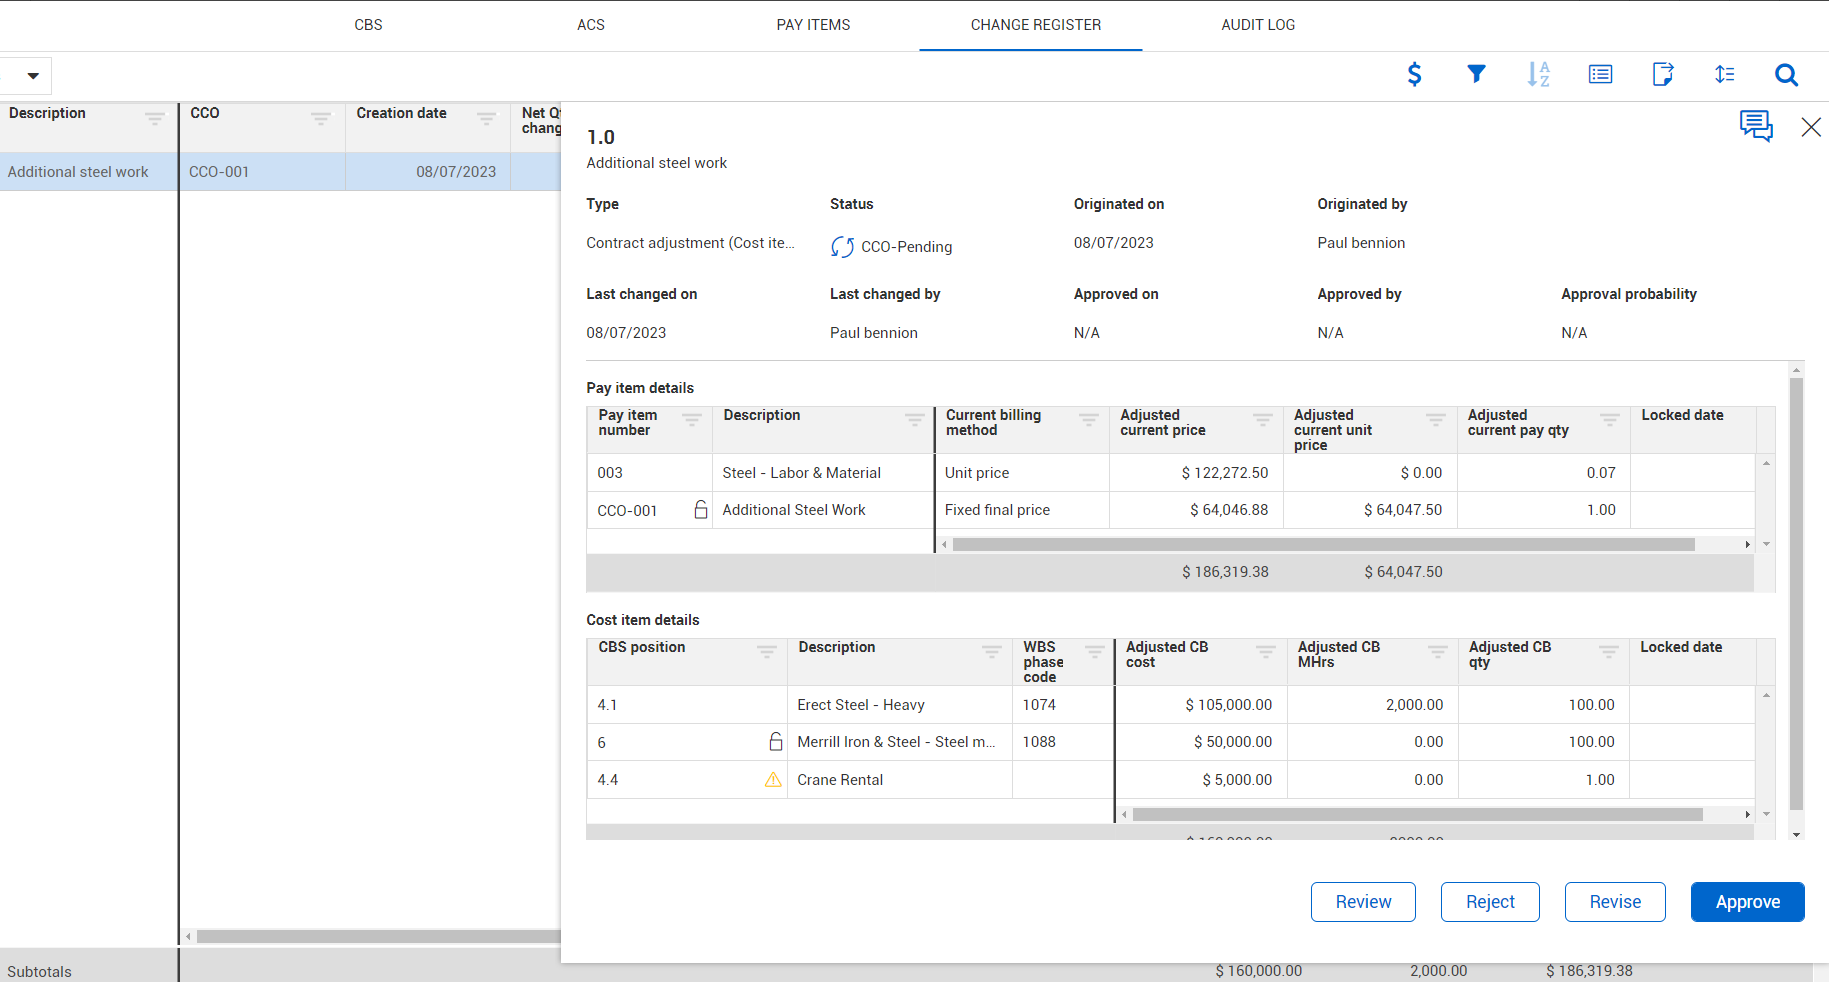
When clicking Approve, you will get a prompt indicating this action will lock your new cost items and set their Original Budget to zero.

Once approved, the contract adjustment status updates to CCO-Approved.

After the contract adjustment is approved, it initiates the updating or creating of cost items and pay items in the Current Budget/Current Price as designated in the adjustment.
Review the following for a summary of managing a change order, from Change to Control:
Additional Information
9977 N 90th Street, Suite 250 Scottsdale, AZ 85258 | 1-800-637-7496
© 2024 InEight, Inc. All Rights Reserved | Privacy Statement | Terms of Service | Cookie Policy | Do not sell/share my information