Products
Solutions
Resources
9977 N 90th Street, Suite 250 Scottsdale, AZ 85258 | 1-800-637-7496
© 2024 InEight, Inc. All Rights Reserved | Privacy Statement | Terms of Service | Cookie Policy | Do not sell/share my information


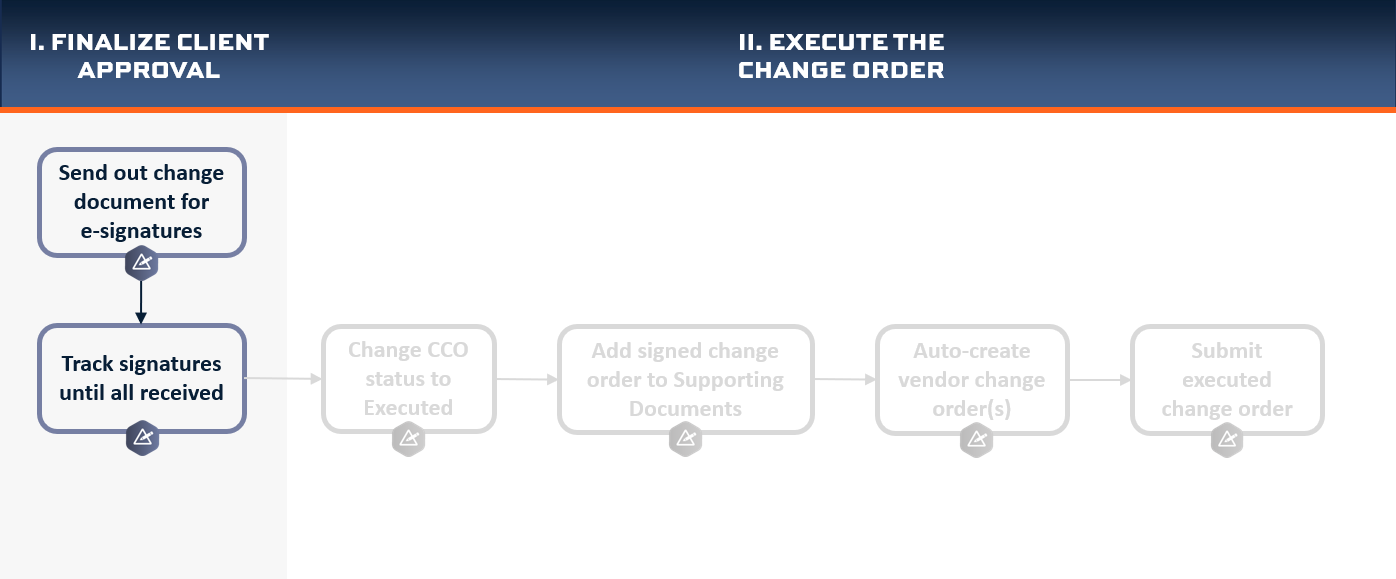
The project controls manager and project manager both approved the change order document. The project manager sends the finalized document out for both client and internal signatures.
From the CCO record in InEight Change, you can send the finalized document for official eSignatures via DocuSign. As the recipients sign, the status updates in InEight Change.
As you follow the steps below for sending documents for eSignature, make sure:
You have Edit change and Send for eSignature permissions to send documents.
The document you use is saved in Word, Excel or PDF format.
The browser’s pop-up blocker is disabled before you click to send.
Follow these steps to prepare and send out a document for e-signatures.
In the CCO record, verify the recipients for this document on the Details tab. Edit and change if necessary.
Click Save.

On the Supporting document tab, select the document you want to send for signatures. Click the Send for signature icon.

On the Send for signature dialog box, verify the names of the recipients. You can delete and add names by selecting the minus to remove and add from the unassigned list below. Click Next or Send for signature.

Complete the second panel with the subject line and message to recipients. Click Send.

A sample document will open for you to review and make changes to recipients.
Since there are two signatures required on this document, each name will have different colors.
Drag the items onto the screen under the correct color placement. Other items are provided which can be dragged onto the screen as well related to the person selected.
On the right side of the screen, there are a few formatting features you can apply to the select recipient on the form.

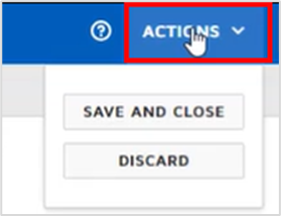
Before you complete, you have the options to save and close or discard.
Prior to sending, you can preview the document by selecting the recipient preview button. This preview will show all the signature lines as they're placed with titles.
Click Send when finished.

Follow these steps to monitor the progress of the signatures of your documents.
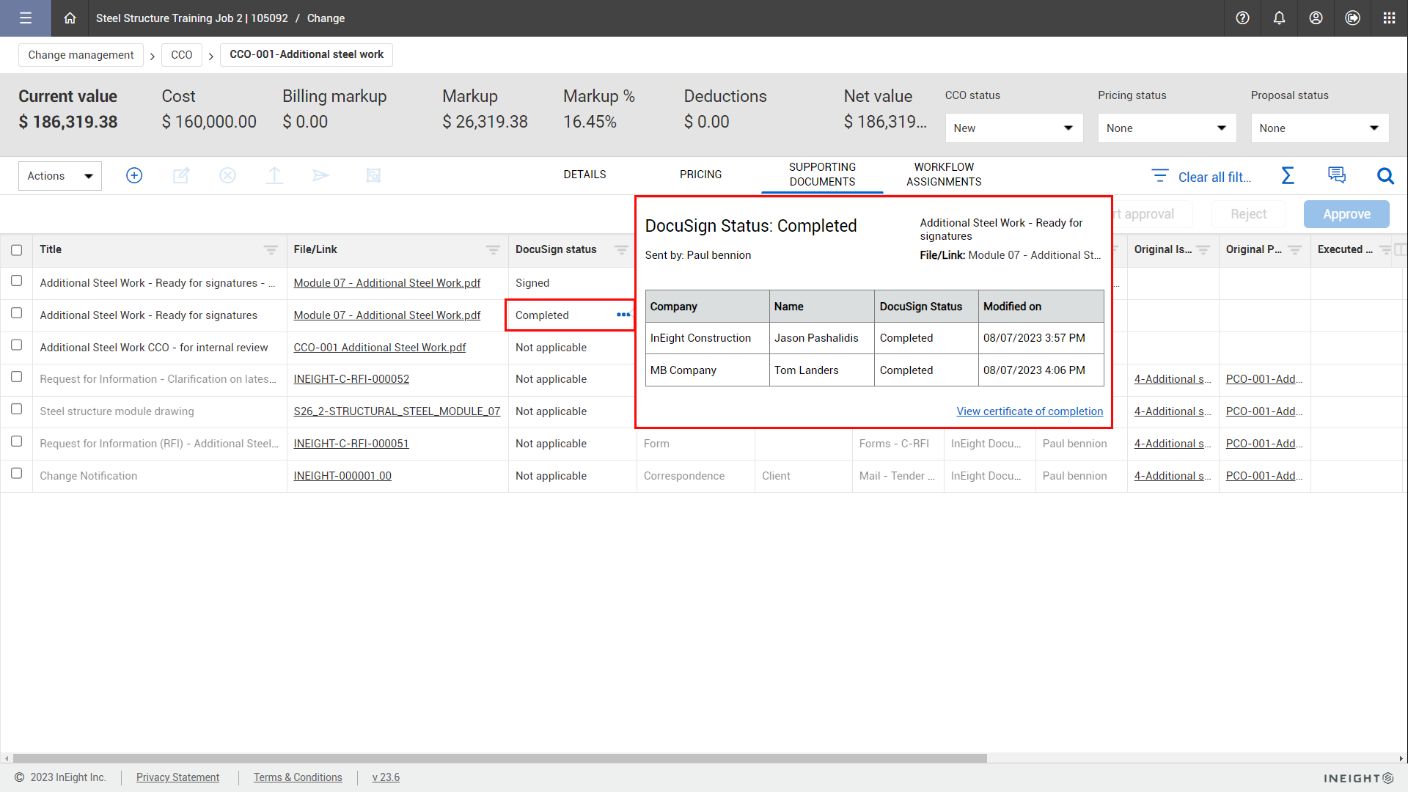
When sending is completed, an update will appear under the DocuSign status on the Supporting Documents tab.

When signatures have been completed from the client side, a completed notification will appear. Hover over the ellipsis to view the status. Click to view the certificate of completion.
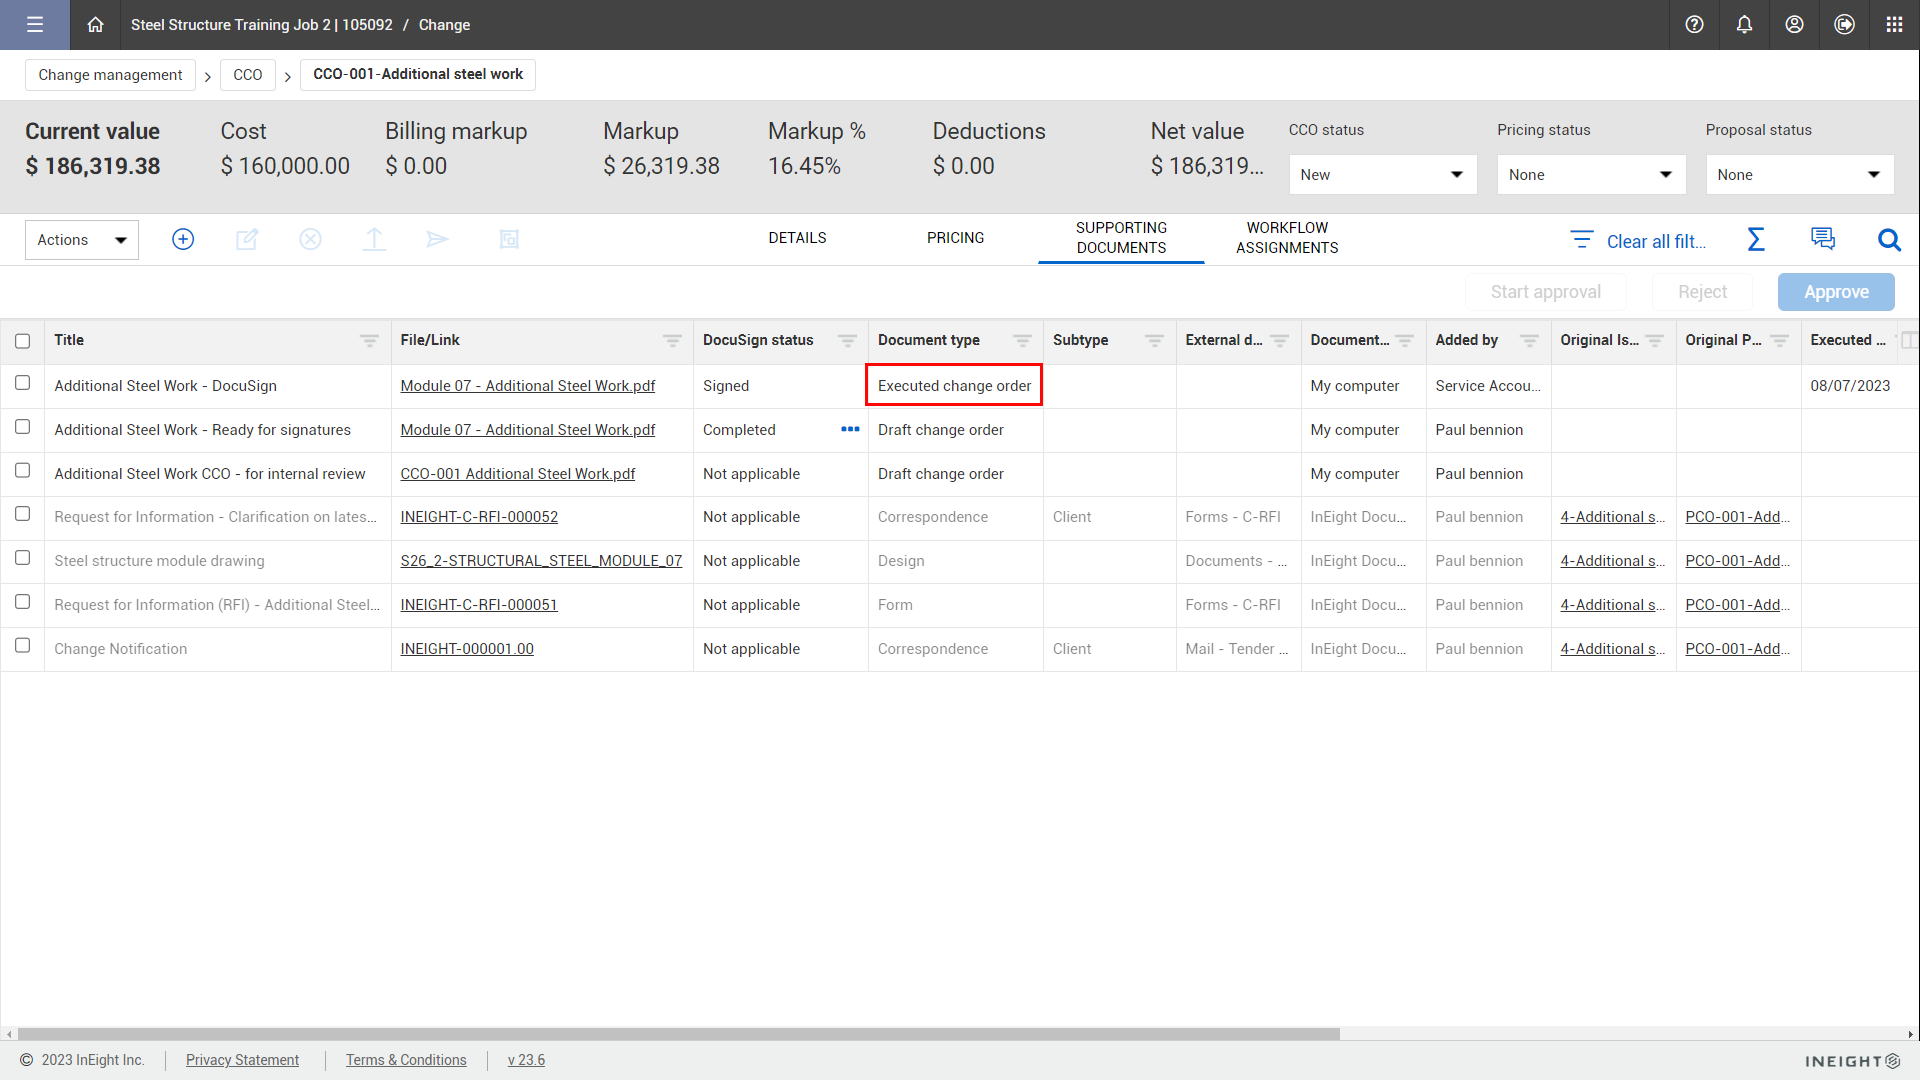
Once all signatures are completed, you can select the document line with Signed as the document status and click the Edit icon.
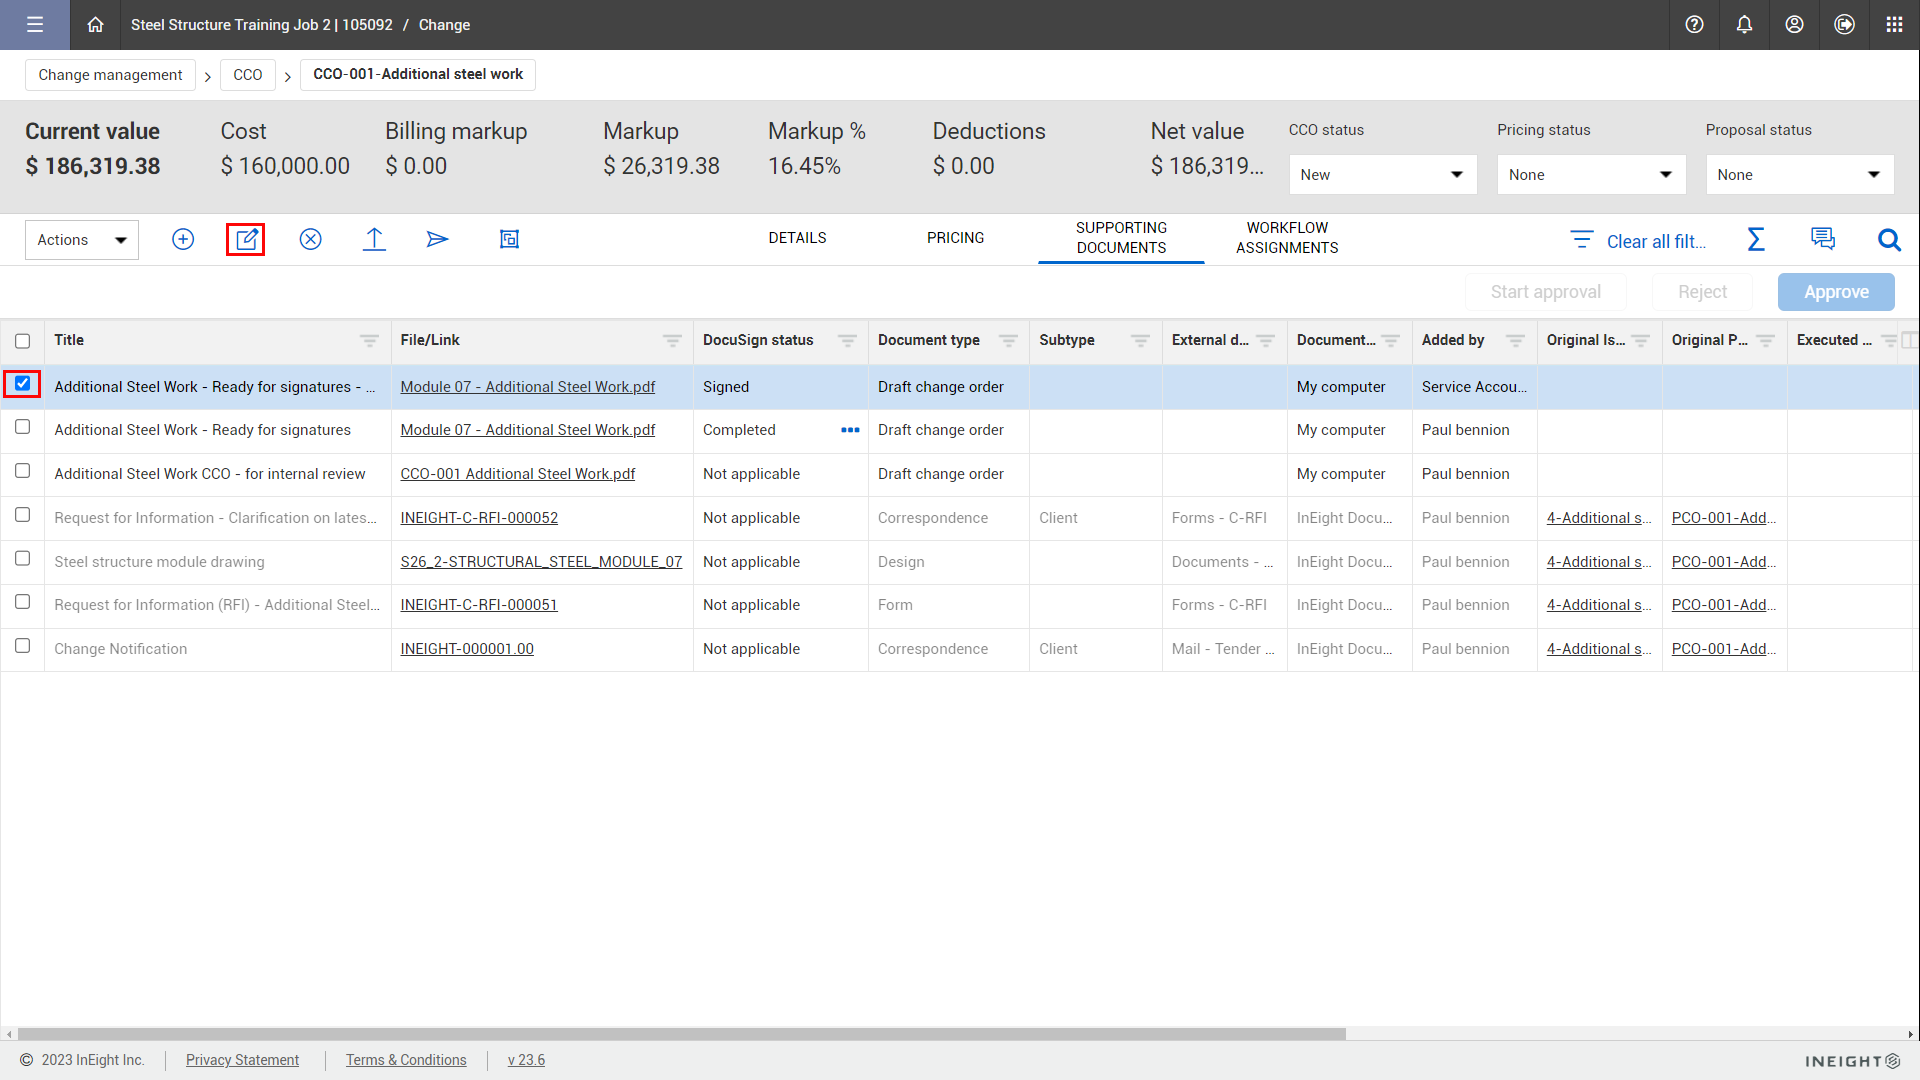
Update the title if needed.
Attach the signed change order document and change the Document type to Executed change order.
Select the appropriate Executed Change order document date.
Click Save.

The document type is now updated to Executed change order in the register.
Access the following content for more information:
Send change documents for eSignature via Docusign
Additional Information
9977 N 90th Street, Suite 250 Scottsdale, AZ 85258 | 1-800-637-7496
© 2024 InEight, Inc. All Rights Reserved | Privacy Statement | Terms of Service | Cookie Policy | Do not sell/share my information